先上官方文档
InteractionSource
InteractionSource represents a stream of Interactions corresponding to events emitted by a component. These Interactions can be used to change how components appear in different states, such as when a component is pressed or dragged.
翻译
InteractionSource表示与组件发出的事件相对应的交互流。这些交互可用于更改组件在不同状态下的显示方式,例如按下或拖动组件时。
也就是说它应该是用来记录不同的交互状态
官方示例简化
val interactionSource = remember { MutableInteractionSource() }

//拖拽
val draggable = Modifier.draggable(
    interactionSource = interactionSource,
    orientation = Orientation.Horizontal,
    state = rememberDraggableState { /* update some business state here */ }
)

//点击
val clickable = Modifier.clickable(
    interactionSource = interactionSource,
    indication = LocalIndication.current
) { /* update some business state here */ }

//状态值变化结果
val isDragged by interactionSource.collectIsDraggedAsState()
val isPressed by interactionSource.collectIsPressedAsState()

//定义变化后的 text 和 color  下方Box 中 border使用了color    Text 使用了text
val (text, color) = when {
    isDragged && isPressed -> "Dragged and pressed" to Color.Red
    isDragged -> "Dragged" to Color.Green
    isPressed -> "Pressed" to Color.Blue
    // Default / baseline state
    else -> "Drag me horizontally, or press me!" to Color.Black
}

Box(
    Modifier
        .fillMaxSize()
        .wrapContentSize()
        .size(width = 240.dp, height = 80.dp)
) {
    Box(
        Modifier
            .fillMaxSize()
            .then(clickable)
            .then(draggable)
            .border(BorderStroke(3.dp, color))
            .padding(3.dp)
    ) {
        Text(
            text, style = LocalTextStyle.current.copy(textAlign = TextAlign.Center),
            modifier = Modifier.fillMaxSize().wrapContentSize()
        )
    }
}
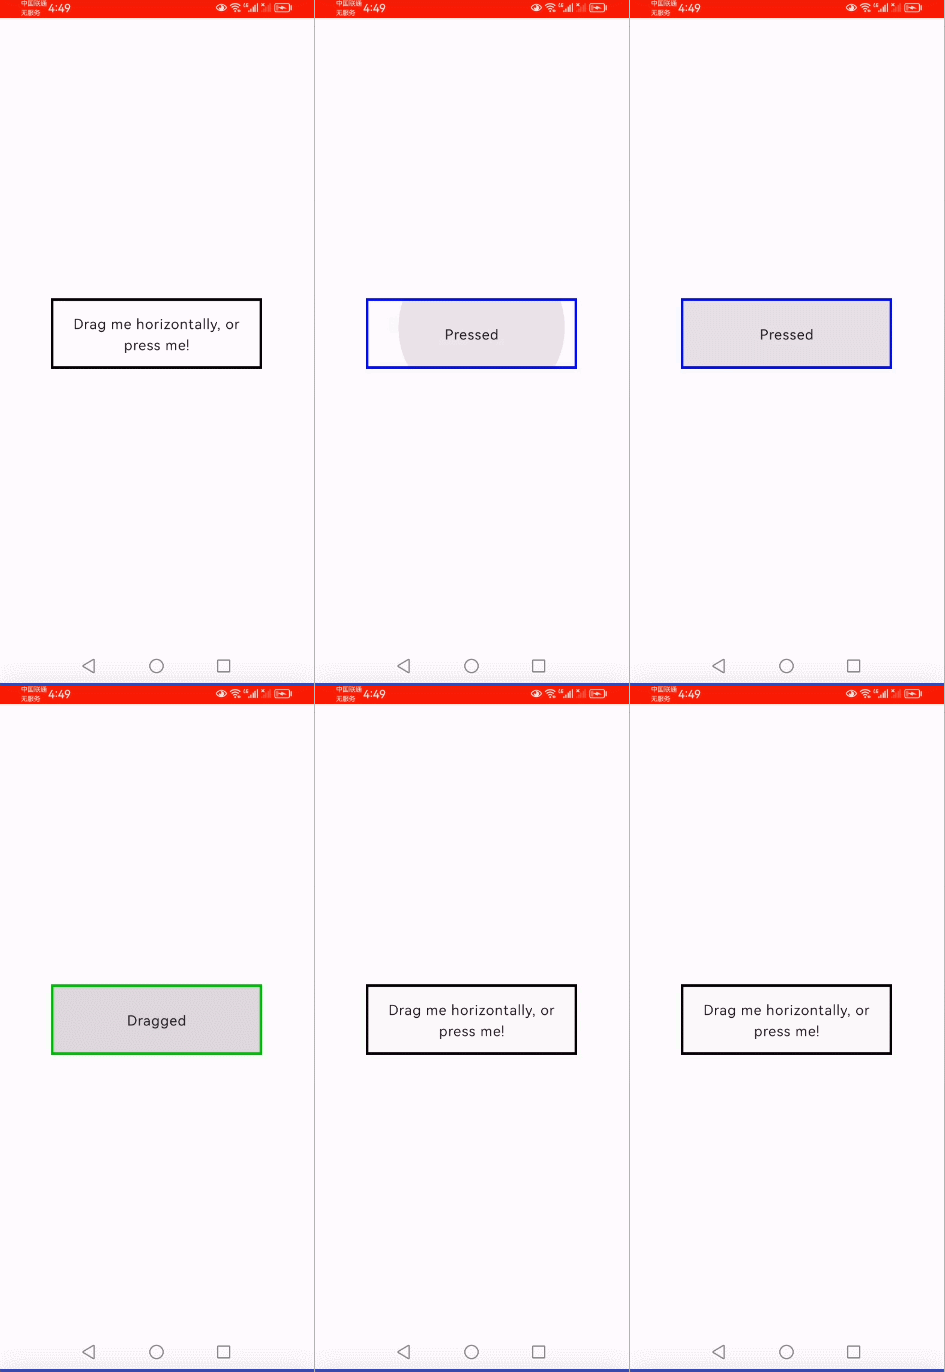
将以上代码放入项目运行效果
- 按下时 文字变化 边框边蓝
- 拖拽时 文字变化 边框变绿

官方示例2
以下是省略代码
 val interactions = remember { mutableStateListOf<Interaction>() }  //创建了个 集合
//用来记录 交互事件    添加或从集合中移除
 LaunchedEffect(interactionSource) {
        interactionSource.interactions.collect { interaction ->
            when (interaction) {
                is PressInteraction.Press -> interactions.add(interaction)
                is PressInteraction.Release -> interactions.remove(interaction.press)
                is PressInteraction.Cancel -> interactions.remove(interaction.press)
                is DragInteraction.Start -> interactions.add(interaction)
                is DragInteraction.Stop -> interactions.remove(interaction.start)
                is DragInteraction.Cancel -> interactions.remove(interaction.start)
            }
        }
    }

//集合状态变化 文字变化
  val text = when (interactions.lastOrNull()) {
        is DragInteraction.Start -> "Dragged"
        is PressInteraction.Press -> "Pressed"
        else -> "No state"
    }

//判断集合中 交互状态  显示不同的效果
 val pressed = interactions.any { it is PressInteraction.Press }
                Text(
                    text = if (pressed) "Pressed" else "Not pressed",
                    style = LocalTextStyle.current.copy(textAlign = TextAlign.Center),
                    modifier = Modifier.fillMaxSize().wrapContentSize()
                )
val dragged = interactions.any { it is DragInteraction.Start }
                Text(
                    text = if (dragged) "Dragged" else "Not dragged",
                    style = LocalTextStyle.current.copy(textAlign = TextAlign.Center),
                    modifier = Modifier.fillMaxSize().wrapContentSize()
                )
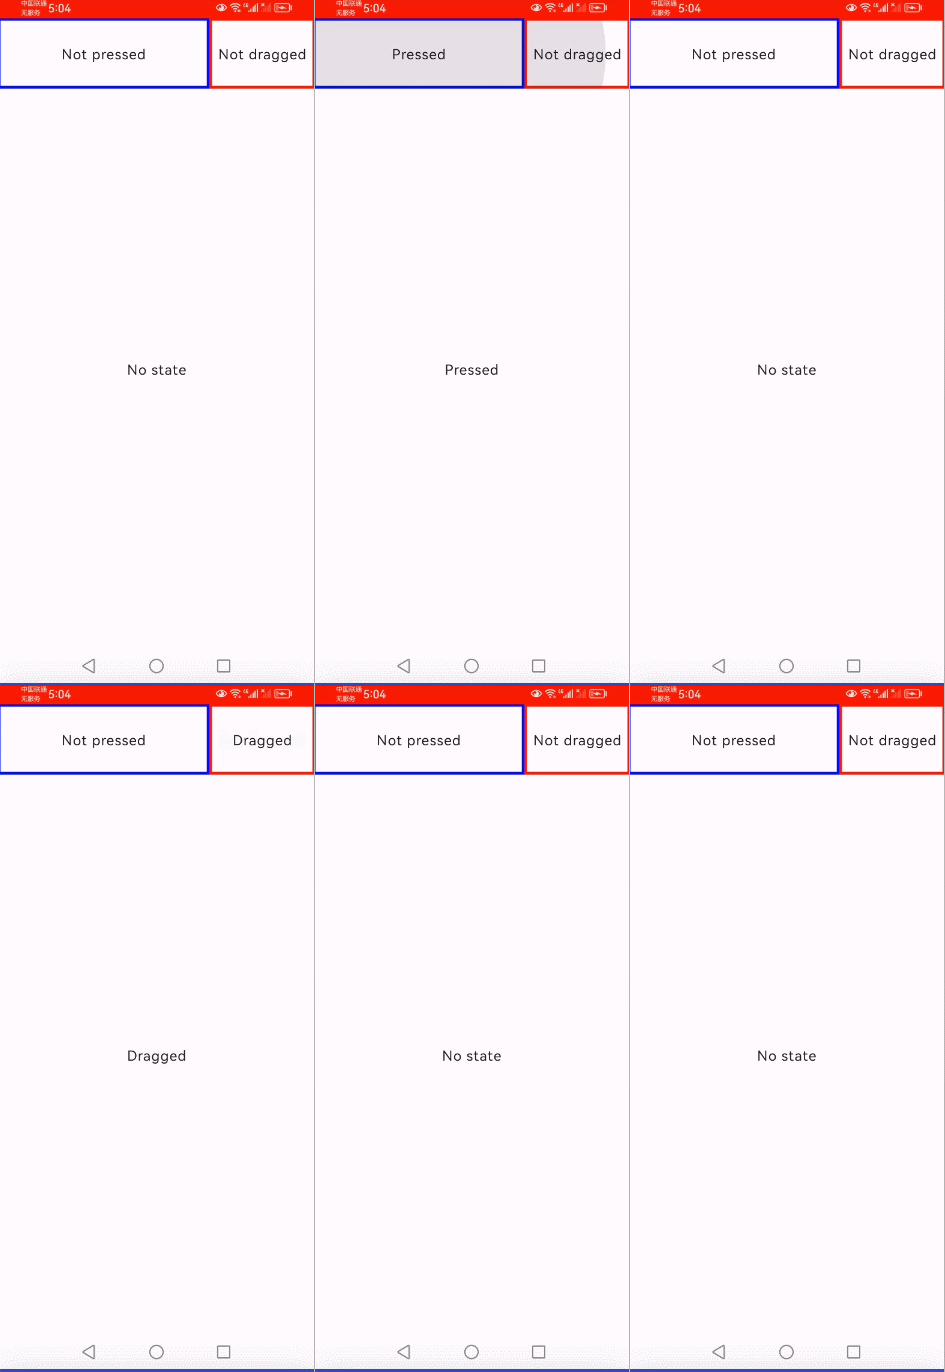
效果

使用
前面我们玩过的
TextField
Button
Switch
等组件 都有 interactionSource 属性
并且
Modifier.indication(
interactionSource = interactionSource,
indication = LocalIndication.current
)
也可以设置interactionSource
下面我们就简单玩玩它
实现输入框获取到焦点时 提示文字的改变
- collectIsDraggedAsState 拖拽交互
- collectIsFocusedAsState 焦点交互
- collectIsHoveredAsState 悬停交互
- collectIsPressedAsState 点击交互
创建两个TextField 可以用来切换焦点
直接上代码吧
   val inPut = remember {
        mutableStateOf("")
    }

    val interactionSource = remember { MutableInteractionSource() }

    //获取到当前焦点状态
    val isFocused by interactionSource.collectIsFocusedAsState()

    Column(modifier = Modifier.padding(10.dp)) {
        TextField(
            value = inPut.value,
            onValueChange ={
                inPut.value = it
            },
            modifier = Modifier
                .fillMaxWidth()
                .height(50.dp),
            shape = CircleShape,
            colors = TextFieldDefaults.textFieldColors(
                focusedIndicatorColor = Color.Transparent,
                disabledIndicatorColor = Color.Transparent,
                unfocusedIndicatorColor = Color.Transparent,
            ),
            placeholder = {
                Text(text = "${if(isFocused)"请输入内容" else "这是一个提示语"}")
            },
            interactionSource = interactionSource,
        )

        Spacer(modifier = Modifier.height(20.dp))

        TextField(
            value = inPut.value,
            onValueChange ={
                inPut.value = it
            },
            modifier = Modifier
                .fillMaxWidth()
                .height(50.dp),
            shape = CircleShape,
            colors = TextFieldDefaults.textFieldColors(
                focusedIndicatorColor = Color.Transparent,
                disabledIndicatorColor = Color.Transparent,
                unfocusedIndicatorColor = Color.Transparent,
            ),
            placeholder = {
                Text(text = "这是一个提示语")
            },
        )
    }
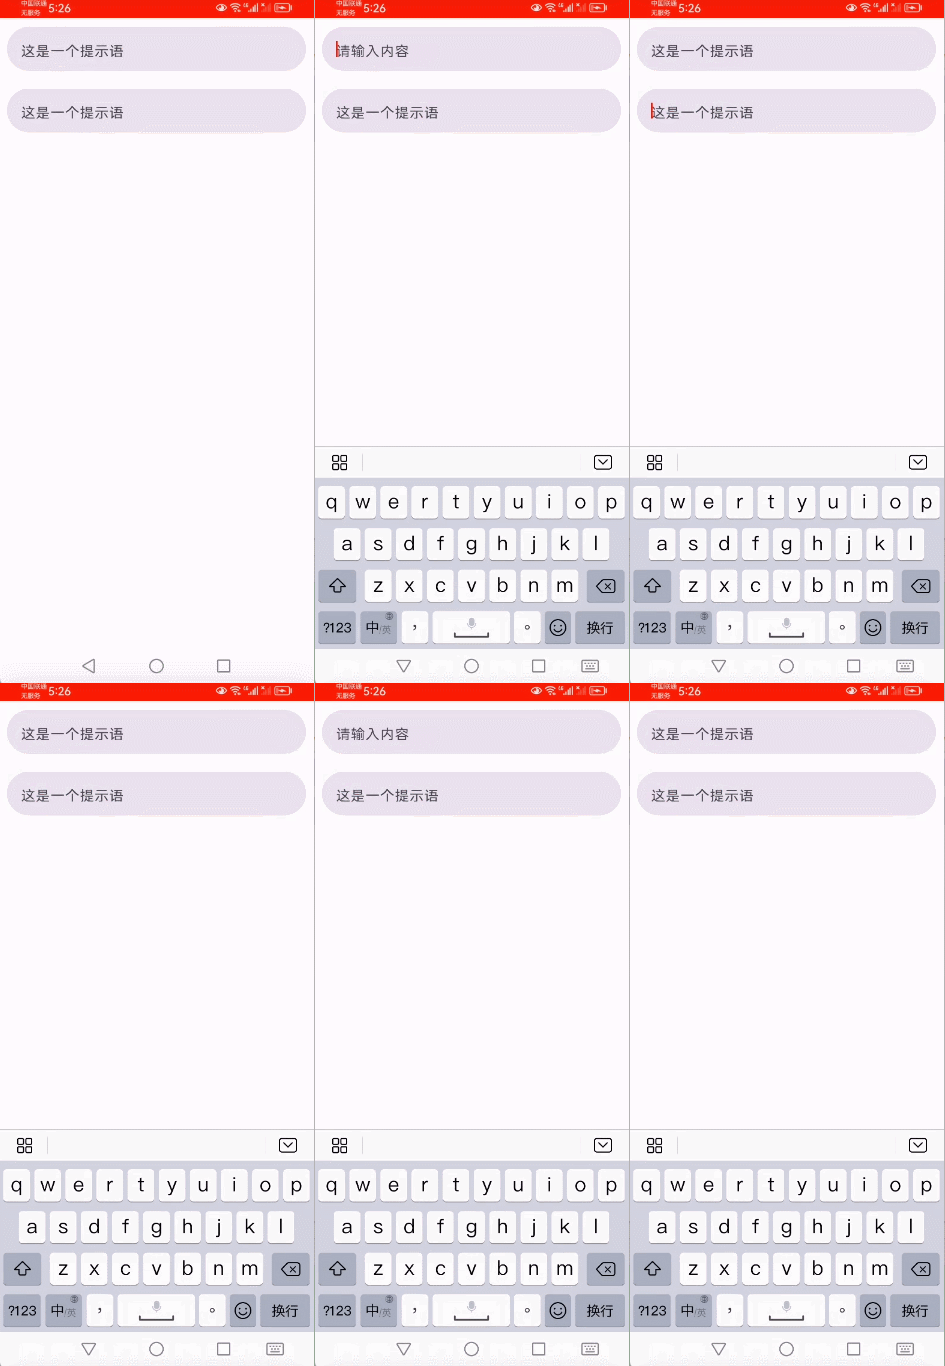
效果 上边的TextField 获取和失去焦点时,文字改变

更多的用法一般是
当TextField 获取到焦点时边框或者背景变化 用以表示我们选中了该输入框
于是 我们包一层
@ExperimentalMaterial3Api
@Composable
fun MyTextField(
    value: String,
    onValueChange: (String) -> Unit,
    modifier: Modifier = Modifier,
    placeholder: @Composable (() -> Unit)? = null,
) {
    val interactionSource = remember { MutableInteractionSource() }
    //获取到当前焦点状态
    val isFocused by interactionSource.collectIsFocusedAsState()

    val color = when{
        isFocused -> Color.Red
        else -> Color.Black
    }

    TextField(
        value = value,
        onValueChange = onValueChange,
        modifier = modifier.border(3.dp,color, shape = CircleShape),
        shape = CircleShape,
        colors = TextFieldDefaults.textFieldColors(
            focusedIndicatorColor = Color.Transparent,
            disabledIndicatorColor = Color.Transparent,
            unfocusedIndicatorColor = Color.Transparent,
        ),
        placeholder = placeholder,
        interactionSource = interactionSource,
    )

}
然后使用
   val inPut = remember {
        mutableStateOf("")
    }

    Column(modifier = Modifier.padding(10.dp)) {
        MyTextField(
            value = inPut.value,
            onValueChange ={
                inPut.value = it
            },
            modifier = Modifier
                .fillMaxWidth()
                .height(50.dp),
            placeholder = {
                Text(text = "这是一个提示语")
            }
        )

        Spacer(modifier = Modifier.height(20.dp))

        MyTextField(
            value = inPut.value,
            onValueChange ={
                inPut.value = it
            },
            modifier = Modifier
                .fillMaxWidth()
                .height(50.dp),
            placeholder = {
                Text(text = "这是一个提示语")
            }
        )
    }
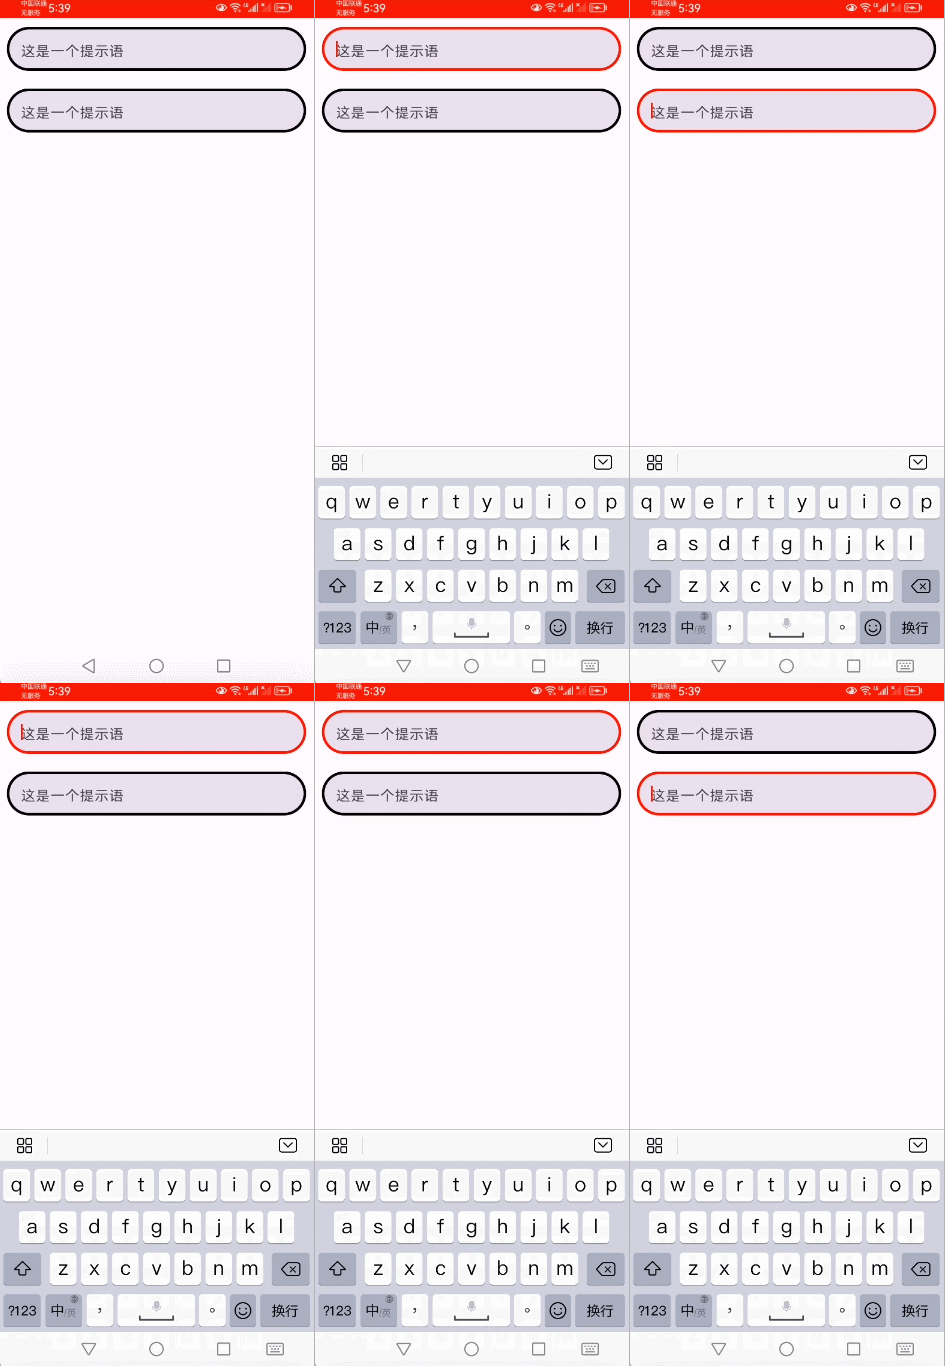
效果如下


 63
63

 被折叠的 条评论
为什么被折叠?


