


 超级会员免费看
欢迎关注我的公众号,后续将会及时更新更多AI前沿内容和实践。
公众号:Aifastlane

1.基础内容
1.1 学习连接和内容
视频教程 | 《书生·浦语大模型实战营》github地址 | 使用教程和文件
注意:使用的Tutorial使用的是camp2分支,而不是main或者其他分支,安装错误容易出现使用问题
1.2 LLM基础简介
1.2.1 什么是大模型?
大模型通常指的是机器学习或人工智能领域中参数数量巨大、拥有庞大计算能力和参数规模的模型。这些模型利用大量数据进行训练,并且拥有数十亿甚至数千亿个参数。大模型的出现和发展得益于增长的数据量、计算能力的提升以及算法优化等因素。这些模型在各种任务中展现出惊人的性能,比如自然语言处理、计算机视觉、语音识别等。这种模型通常采用深度神经网络结构,如 Transformer、BERT、GPT( Generative Pre-trained Transformer )等。
大模型的优势在于其能够捕捉和理解数据中更为复杂、抽象的特征和关系。通过大规模参数的学习,它们可以提高在各种任务上的泛化能力,并在未经过大量特定领域数据训练的情况下实现较好的表现。然而,大模型也面临着一些挑战,比如巨大的计算资源需求、高昂的训练成本、对大规模数据的依赖以及模型的可解释性等问题。因此,大模型的应用和发展也需要在性能、成本和道德等多个方面进行权衡和考量。
1.2.2 InternLM 模型全链条开源
InternLM 是一个开源的轻量级训练框架,旨在支持大模型训练而无需大量的依赖。通过单一的代码库,它支持在拥有数千个 GPU 的大型集群上进行预训练,并在单个 GPU 上进行微调,同时实现了卓越的性能优化。在 1024 个 GPU 上训练时,InternLM 可以实现近 90% 的加速效率。
基于 InternLM 训练框架,上海人工智能实验室已经发布了两个开源的预训练模型:InternLM-7B 和 InternLM-20B。
Lagent 是一个轻量级、开源的基于大语言模型的智能体(agent)框架,支持用户快速地将一个大语言模型转变为多种类型的智能体,并提供了一些典型工具为大语言模型赋能。通过 Lagent 框架可以更好的发挥 InternLM 的全部性能。相关框架参加如下:
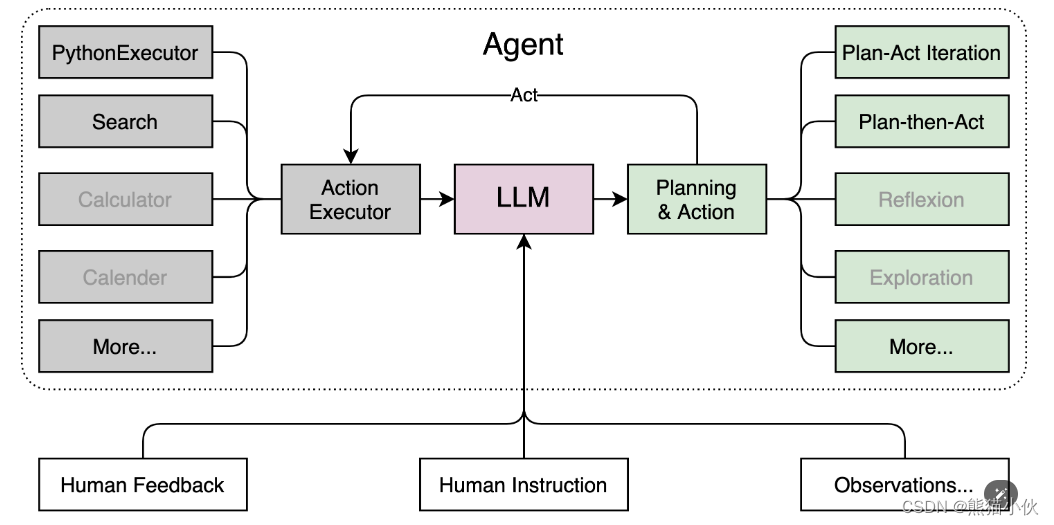 Lagent 的特性总结如下:
a.流式输出:提供 stream_chat 接口作流式输出,本地就能演示酷炫的流式 Demo。
b.接口统一,设计全面升级,提升拓展性,包括:
– Model : 不论是 OpenAI API, Transformers 还是推理加速框架 LMDeploy 一网打尽,模型切换可以游刃有余;
– Action: 简单的继承和装饰,即可打造自己个人的工具集,不论 InternLM 还是 GPT 均可适配;
– Agent:与 Model 的输入接口保持一致,模型到智能体的蜕变只需一步,便捷各种 agent 的探索实现;
c.文档全面升级,API 文档全覆盖。
浦语·灵笔是基于书生·浦语大语言模型研发的视觉-语言大模型,提供出色的图文理解和创作能力,结合了视觉和语言的先进技术,能够实现图像到文本、文本到图像的双向转换。使用浦语·灵笔大模型可以轻松的创作一篇图文推文,也能够轻松识别一张图片中的物体,并生成对应的文本描述。
1.2.3 初步介绍 XComposer2 相关知识
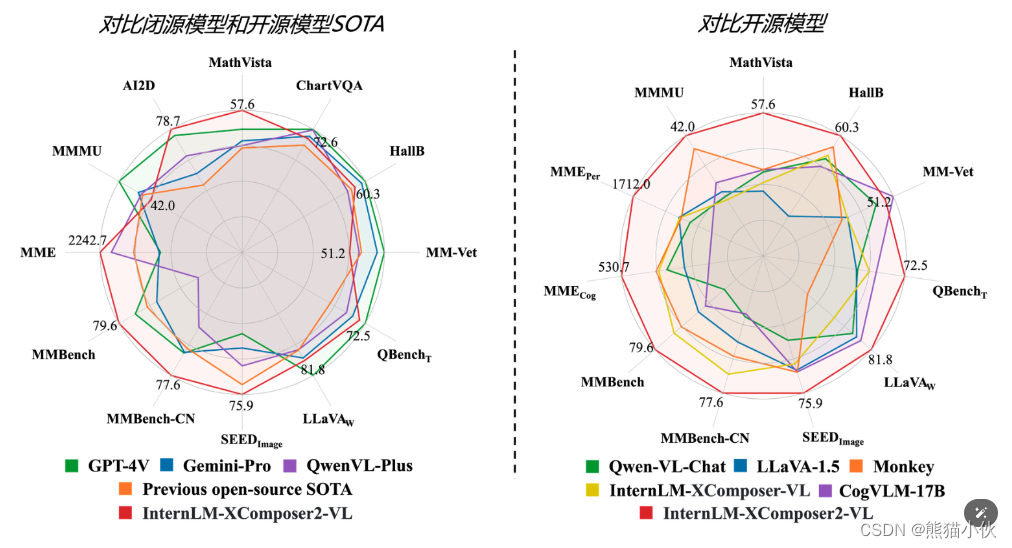
浦语·灵笔2 是基于 书生·浦语2 大语言模型研发的突破性的图文多模态大模型,具有非凡的图文写作和图像理解能力,在多种应用场景表现出色,总结起来其具有:
- 自由指令输入的图文写作能力: 浦语·灵笔2 可以理解自由形式的图文指令输入,包括大纲、文章细节要求、参考图片等,为用户打造图文并貌的专属文章。生成的文章文采斐然,图文相得益彰,提供沉浸式的阅读体验。
- 准确的图文问题解答能力:浦语·灵笔2 具有海量图文知识,可以准确的回复各种图文问答难题,在识别、感知、细节描述、视觉推理等能力上表现惊人。
- 杰出的综合能力: 浦语·灵笔2-7B 基于 书生·浦语2-7B 模型,在13项多模态评测中大幅领先同量级多模态模型,在其中6项评测中超过 GPT-4V 和 Gemini Pro。
1.3 LLM 权重下载方法
(1)huggingface模型往往无法在线下载 (不推荐,有云梯的可以试试)
官方离线下载 | model hub搜索页 (手动下载) | internlm/internlm-xcomposer2-4khd-7b模型下载地址
使用 Hugging Face 官方提供的 huggingface-cli 命令行工具。安装依赖:
pip install -U huggingface_hub
然后新建 python 文件,填入以下代码,运行即可。
- resume-download:断点续下
- local-dir:本地存储路径。(linux 环境下需要填写绝对路径)
import os

# 下载模型
os.system('huggingface-cli download --resume-download internlm/internlm-chat-7b --local-dir your_path')
以下内容将展示使用 huggingface_hub 下载模型中的部分文件
import os
from huggingface_hub import hf_hub_download  # Load model directly

hf_hub_download(repo_id="internlm/internlm-7b", filename="config.json")
作业:使用huggface下载internlm-20b的config文件
# huggingface下载
import os
from huggingface_hub import hf_hub_download  # Load model directly

hf_hub_download(repo_id="internlm/internlm-20b", filename="config.json")

(2) modelscope下载(推荐,阿里的开源社区只要网速够好就行)
缺点:就是使用的时候要把里面的transformer接口全都换掉,下载链接和地址也需要替换
优点:国内镜像源,速度非常快
方法参见 ref: 大模型(LLM)下载的四种方式
pip install modelscope

from modelscope import snapshot_download
# 下载权重模型
model_dir = snapshot_download('Shanghai_AI_Laboratory/internlm-xcomposer2-4khd-7b')

# 下载地址
`~/.cache/modelscope/hub/Shanghai_AI_Laboratory/internlm-xcomposer2-4khd-7b`

# 使用
import torch
from modelscope import snapshot_download, AutoModel, AutoTokenizer

torch.set_grad_enabled(False)
# init model and tokenizer
model_dir = snapshot_download('Shanghai_AI_Laboratory/internlm-xcomposer2-4khd-7b')
model = AutoModel.from_pretrained(model_dir, trust_remote_code=True).cuda().eval()
tokenizer = AutoTokenizer.from_pretrained(model_dir, trust_remote_code=True)
(3)使用替代huggingface国内镜像网站(https://hf-mirror.com/)替换,(如果一定要从hugggingface下载,推荐)
优点:使用非常简便,相关模型基本都有
缺点:不被墙,速度一般;不过有些数据集有内置的下载脚本,那就需要手动改一下脚本内的地址来实现了。
# 使用之前替换掉相关下载环境变量地址(非侵入式下载),替换掉your_script.py即可
HF_ENDPOINT=https://hf-mirror.com python your_script.py

#或者
export HF_ENDPOINT=https://hf-mirror.com
2. 演示demo实践
2.1 本地环境
-
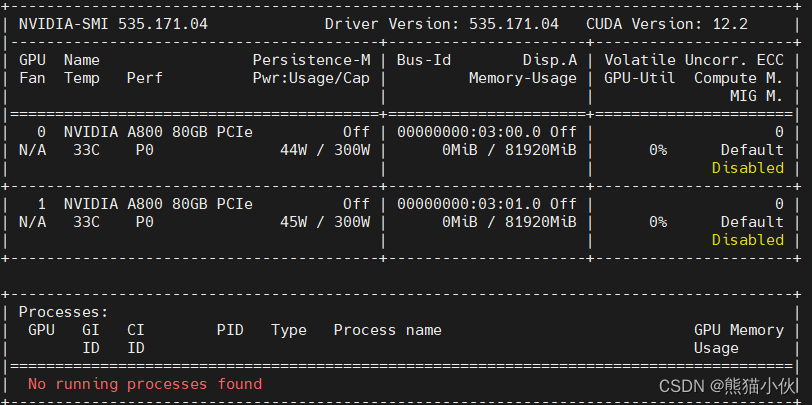
本地环境 2 x A800

-
系统: ubuntu 22.04

-
需要安装cuda = 11.7 , cudnn, 只装cudatoolkit不能适配deepspeach. 自行更换conda,pip下载源
##### cuda 11.7 : https://developer.nvidia.com/cuda-11-7-1-download-archive
wget https://developer.download.nvidia.com/compute/cuda/11.7.1/local_installers/cuda_11.7.1_515.65.01_linux.run
sudo sh cuda_11.7.1_515.65.01_linux.run

# ~/.bashrc
export CUDA_HOME=/usr/local/cuda-11.7
export LD_LIBRARY_PATH=${CUDA_HOME}/lib64
export PATH=${CUDA_HOME}/bin:${PATH}


##### cudnn :https://developer.nvidia.com/cudnn-downloads
##Installation Instructions:
wget https://developer.download.nvidia.com/compute/cuda/repos/ubuntu2204/x86_64/cuda-keyring_1.1-1_all.deb
sudo dpkg -i cuda-keyring_1.1-1_all.deb
sudo apt-get update
sudo apt-get -y install cudnn
##To install for CUDA 11, perform the above configuration but install the CUDA 11 specific package:
sudo apt-get -y install cudnn-cuda-11
##(不执行) To install for CUDA 12, perform the above configuration but install the CUDA 12 specific package:
sudo apt-get -y install cudnn-cuda-12
注意:主要是为了长期使用,还有算力使用不用排队和等待,选择了本地的GPU。
如果有算力困难或者没有多卡的话,可以去参加报名,之后申请体验Insternstudio
-
算力平台:https://studio.intern-ai.org.cn/
问卷中的核销码为邀请码,如额外需要充值算力或者其他任何疑问请联系浦语小助手(微信号搜索:InternLM)
2.2 demo实战要求
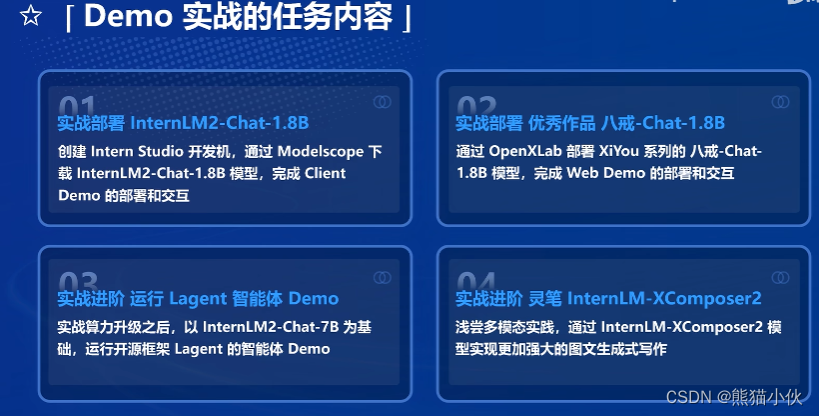 基础作业:
基础作业:
使用 InternLM-Chat-7B 模型生成 300 字的小故事(需截图)。
熟悉 hugging face 下载功能,使用 huggingface_hub python 包,下载 InternLM-20B 的 config.json 文件到本地(需截图下载过程)。
进阶作业(可选做)
完成浦语·灵笔的图文理解及创作部署(需截图)
完成 Lagent 工具调用 Demo 创作部署(需截图)
整体实训营项目:
时间周期:即日起致课程结束
即日开始可以在班级群中随机组队完成一个大作业项目,一些可提供的选题如下:
人情世故大模型:一个帮助用户撰写新年祝福文案的人情事故大模型
中小学数学大模型:一个拥有一定数学解题能力的大模型
心理大模型:一个治愈的心理大模型
工具调用类项目:结合 Lagent 构建数据集训练 InternLM 模型,支持对 MMYOLO 等工具的调用
其他基于书生·浦语工具链的小项目都在范围内,欢迎大家充分发挥想象力。
2.3 部署 InternLM2-Chat-7B 模型进行智能对话
2.3.1 安装基础环境配置
# step1 建立环境, 与 studio-conda 等效的配置方案
conda create -n intern_clean python=3.9 -y
conda install cudatoolkit==11.7
conda activate intern_clean

# step2 安装torch环境
# 推荐使用以下命令安装Pytorch,以准确复现结果:
pip install torch==2.0.1+cu117 torchvision==0.15.2+cu117 torchaudio==2.0.2 --index-url https://download.pytorch.org/whl/cu117
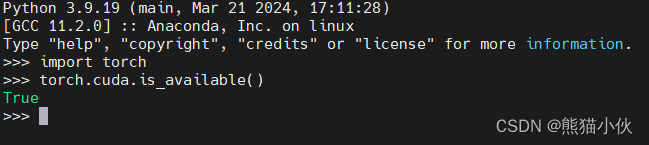
安装完成,验证torch可以调用GPU
# step3:并在环境中安装运行 demo 所需要的依赖。
# 升级pip
python -m pip install --upgrade pip

pip install huggingface-hub==0.17.3
pip install transformers==4.34
pip install psutil==5.9.8
pip install accelerate==0.24.1
pip install streamlit==1.32.2
pip install matplotlib==3.8.3
pip install modelscope==1.9.5
pip install sentencepiece==0.1.99
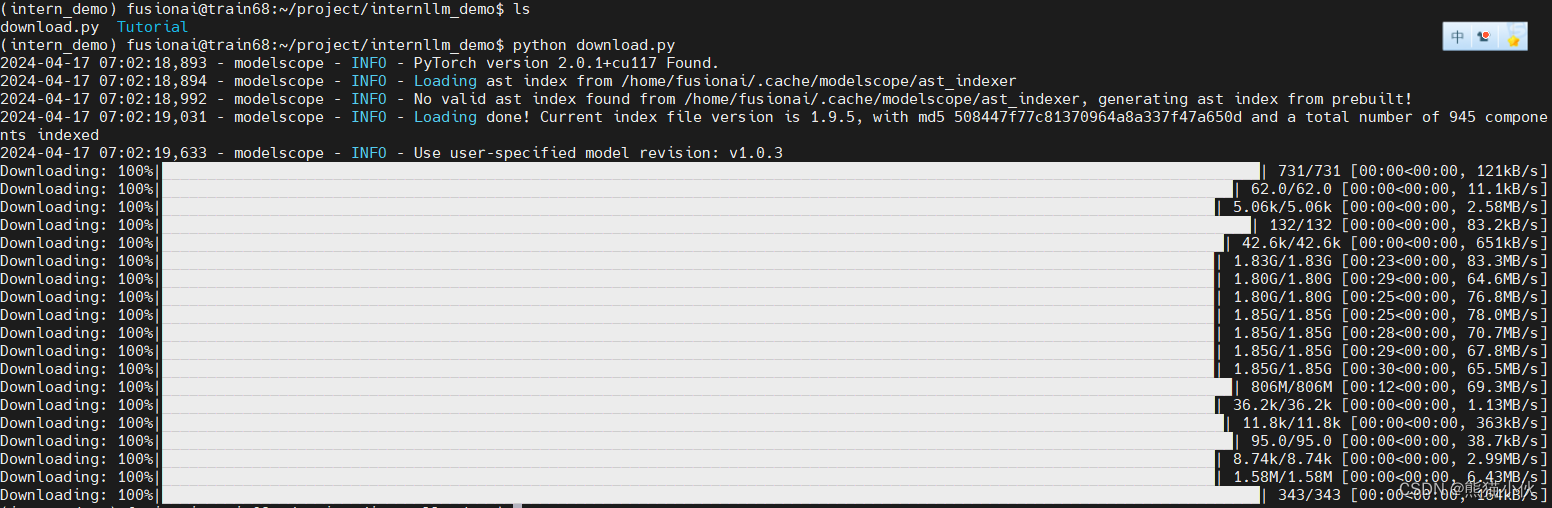
2.3.2 下载模型
import torch
from modelscope import snapshot_download, AutoModel, AutoTokenizer
import os
model_dir = snapshot_download('Shanghai_AI_Laboratory/internlm2-chat-7b', revision='v1.1.0')
注:如果有希望下载到指定路径,可以指定cache_dir='/xxx_dir
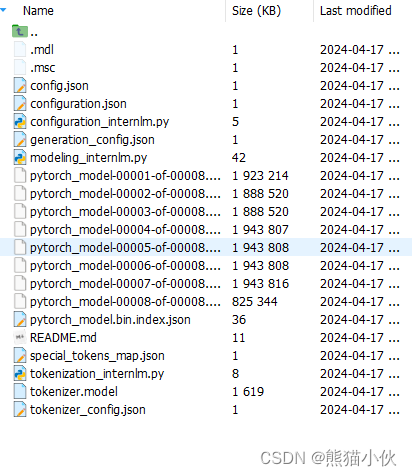
默认的下载位置:
~/.cache/modelscope/hub/Shanghai_AI_Laboratory/
2.3.4 代码准备
首先 clone 代码,在 /root 路径下新建 code 目录,然后切换路径, clone 代码.
cd /xxxx_dir
git clone https://gitee.com/internlm/InternLM.git

#切换 commit 版本,与教程 commit 版本保持一致,可以让大家更好的复现。
cd InternLM
git checkout 3028f07cb79e5b1d7342f4ad8d11efad3fd13d17
InternLM/web_demo.py 修改成本地模型加载位置
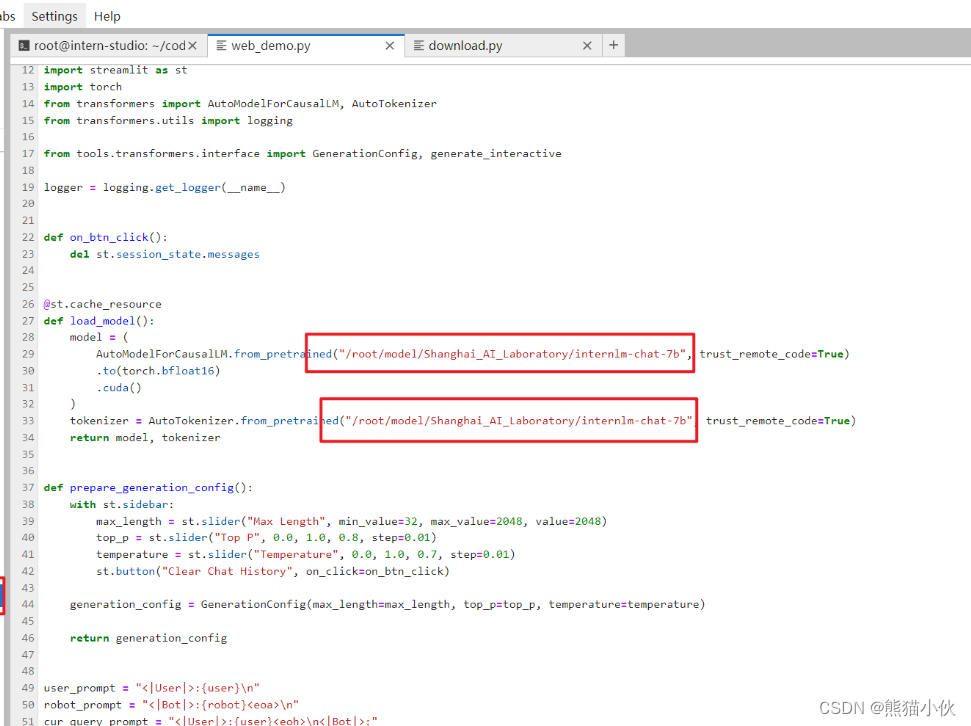
注意:这个开始的时候下载错误,应该是xx/internlm2-chat-7b,而不是internlm-chat-7b这个是老版本
2.3.5 web运行
# 修改成本地运行和指定端口,0.0.0.0表示服务器地址,端口自己定
streamlit run web_demo.py --server.address 0.0.0.0 --server.port 6006

可以通过web打开 http://服务器ip:6006
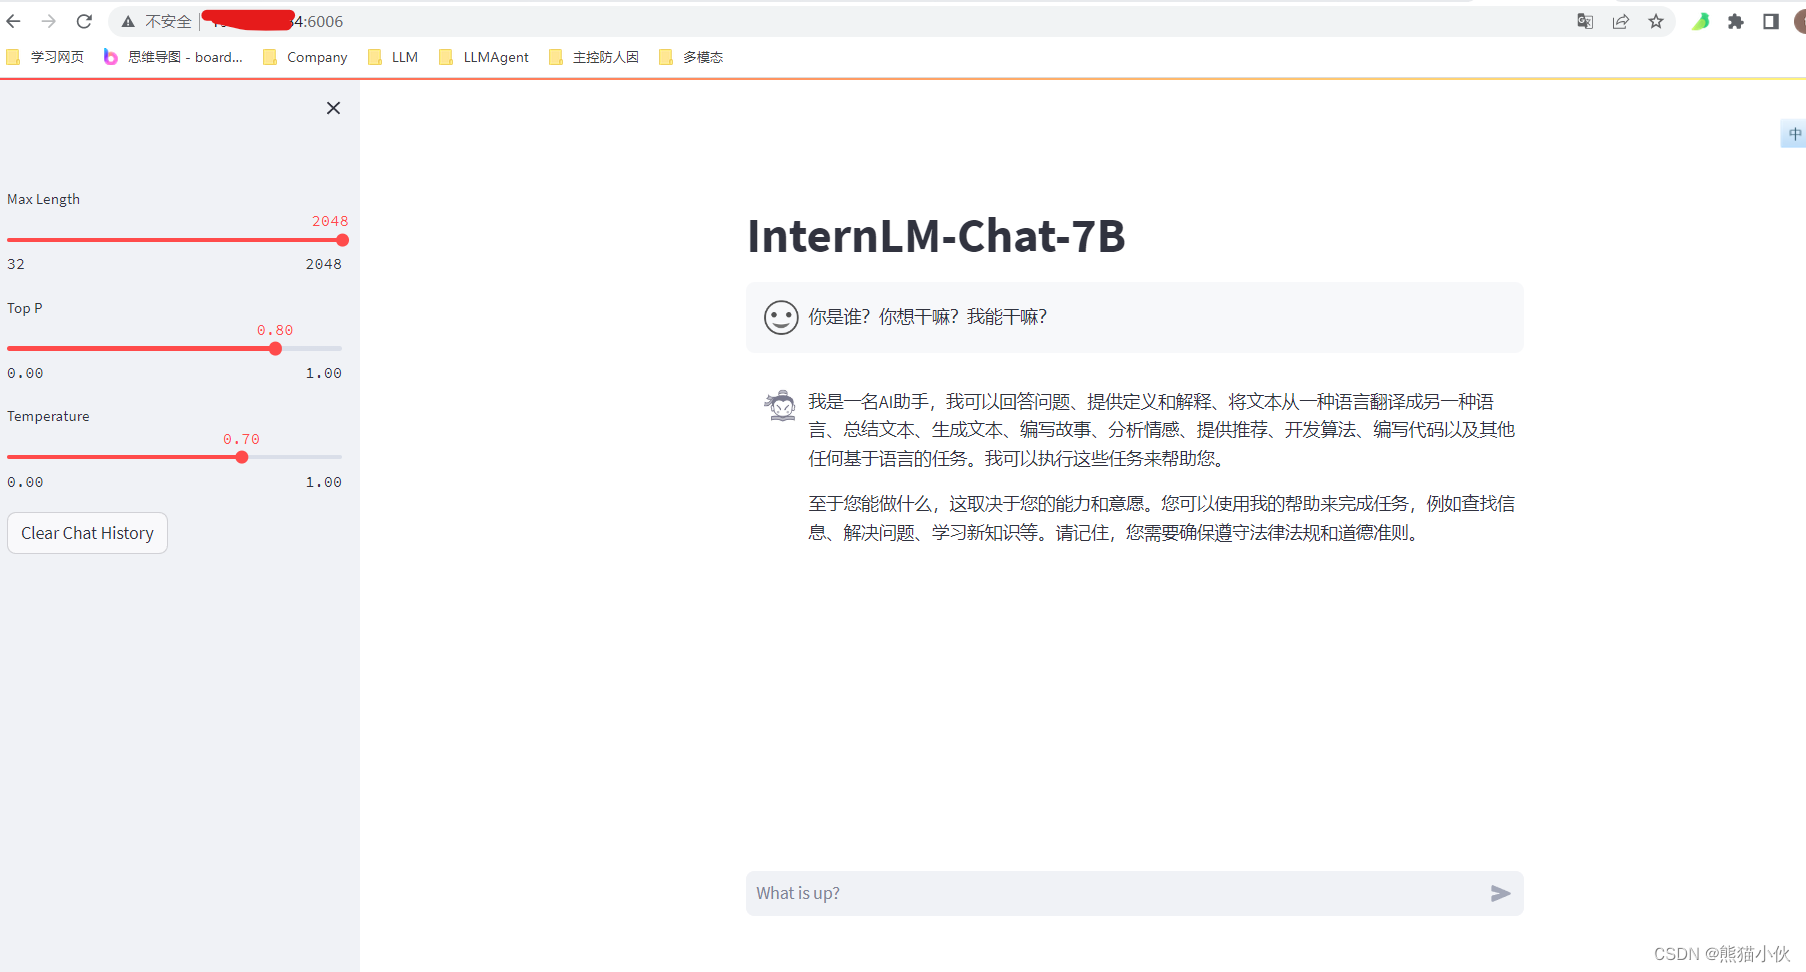
2.3.5 对话系统demo
修改一下model_name_or_path,改成你刚才的下载地址
import torch
from transformers import AutoTokenizer, AutoModelForCausalLM


model_name_or_path = "xxxxx_xxx/Shanghai_AI_Laboratory/internlm2-chat-7b"

tokenizer = AutoTokenizer.from_pretrained(model_name_or_path, trust_remote_code=True)
model = AutoModelForCausalLM.from_pretrained(model_name_or_path, trust_remote_code=True, torch_dtype=torch.bfloat16, device_map='auto')
model = model.eval()

system_prompt = """You are an AI assistant whose name is InternLM (书生·浦语).
- InternLM (书生·浦语) is a conversational language model that is developed by Shanghai AI Laboratory (上海人工智能实验室). It is designed to be helpful, honest, and harmless.
- InternLM (书生·浦语) can understand and communicate fluently in the language chosen by the user such as English and 中文.
"""

messages = [(system_prompt, '')]

print("=============Welcome to InternLM chatbot, type 'exit' to exit.=============")

while True:
   input_text = input("User  >>> ")
   input_text = input_text.replace(' ', '')
   if input_text == "exit":
       break
   response, history = model.chat(tokenizer, input_text, history=messages)
   messages.append((input_text, response))
   print(f"robot >>> {response}")
作业:使用 InternLM2-Chat-7B 模型生成 300 字的小故事(需截图)

2.3.6 其他优秀项目
简单介绍 八戒-Chat-1.8B、Chat-嬛嬛-1.8B、Mini-Horo-巧耳(实战营优秀作品)
八戒-Chat-1.8B、Chat-嬛嬛-1.8B、Mini-Horo-巧耳 均是在第一期实战营中运用 InternLM2-Chat-1.8B 模型进行微调训练的优秀成果。其中,八戒-Chat-1.8B 是利用《西游记》剧本中所有关于猪八戒的台词和语句以及 LLM API 生成的相关数据结果,进行全量微调得到的猪八戒聊天模型。作为 Roleplay-with-XiYou 子项目之一,八戒-Chat-1.8B 能够以较低的训练成本达到不错的角色模仿能力,同时低部署条件能够为后续工作降低算力门槛。
当然,同学们也可以参考其他优秀的实战营项目,具体模型链接如下:
八戒-Chat-1.8B:https://www.modelscope.cn/models/JimmyMa99/BaJie-Chat-mini/summary
Chat-嬛嬛-1.8B:https://openxlab.org.cn/models/detail/BYCJS/huanhuan-chat-internlm2-1_8b
Mini-Horo-巧耳:https://openxlab.org.cn/models/detail/SaaRaaS/Horowag_Mini
git clone https://gitee.com/InternLM/Tutorial
# 切换到camp2分支,里面有八戒相关实践,基本都是一样的。
# 可以参考bajie_download.py , bajie_chat.py
git checkout remotes/origin/camp2
2.4 部署使用 Lagent 运行 InternLM2-Chat-7B 模型
2.4.1 环境安装
基础环境参见2.3 , 使用相关环境
git clone https://gitee.com/internlm/lagent.git
# git clone https://github.com/internlm/lagent.git
cd /root/demo/lagent
git checkout 581d9fb8987a5d9b72bb9ebd37a95efd47d479ac
pip install -e . # 源码安装
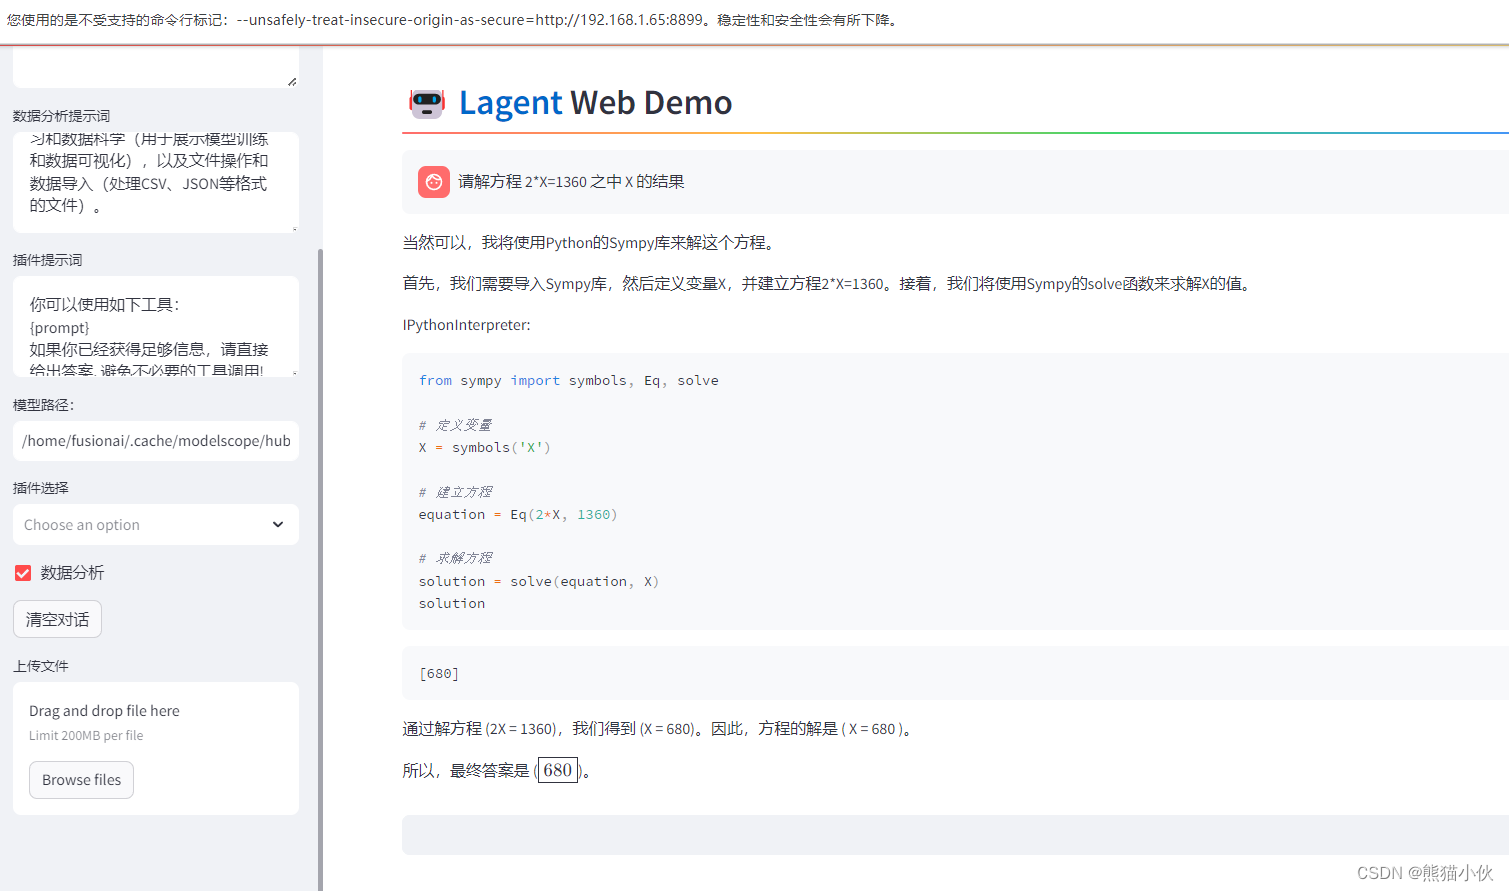
2.4.2 使用 Lagent 运行 InternLM2-Chat-7B 模型为内核的智能体
example/internlm2_agent_web_demo_hf.py 其中71行修改成7b版本,修改成 ~/.cache/modelscope/hub/Shanghai_AI_Laboratory/internlm2-chat-7b的默认路径,或者其他下载的local的路径
 实际运行如下指令:
# pip install streamlit
streamlit run examples/internlm2_agent_web_demo_hf.py --server.address 0.0.0.0 --server.port 6006
进阶作业1: 完成 Lagent 工具调用 Demo 创作部署
 可以正常运行,结果如下:
问题总结
1.网页显示问题:
按照教程安装lagent也切换了版本(使用的是main分支),但是一运行就提示这个divider有问题。网页也打不开。
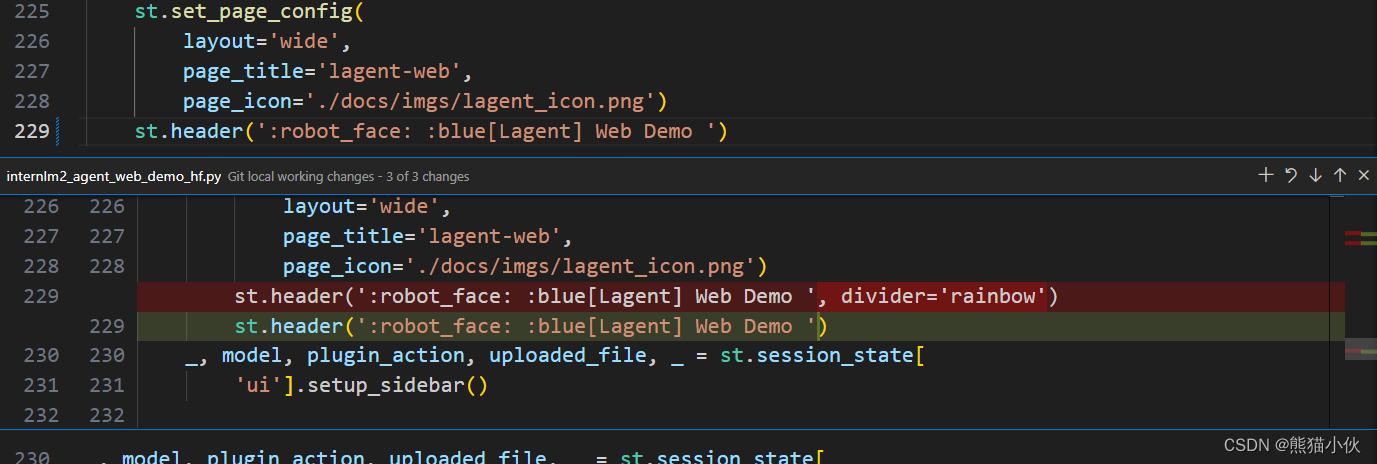
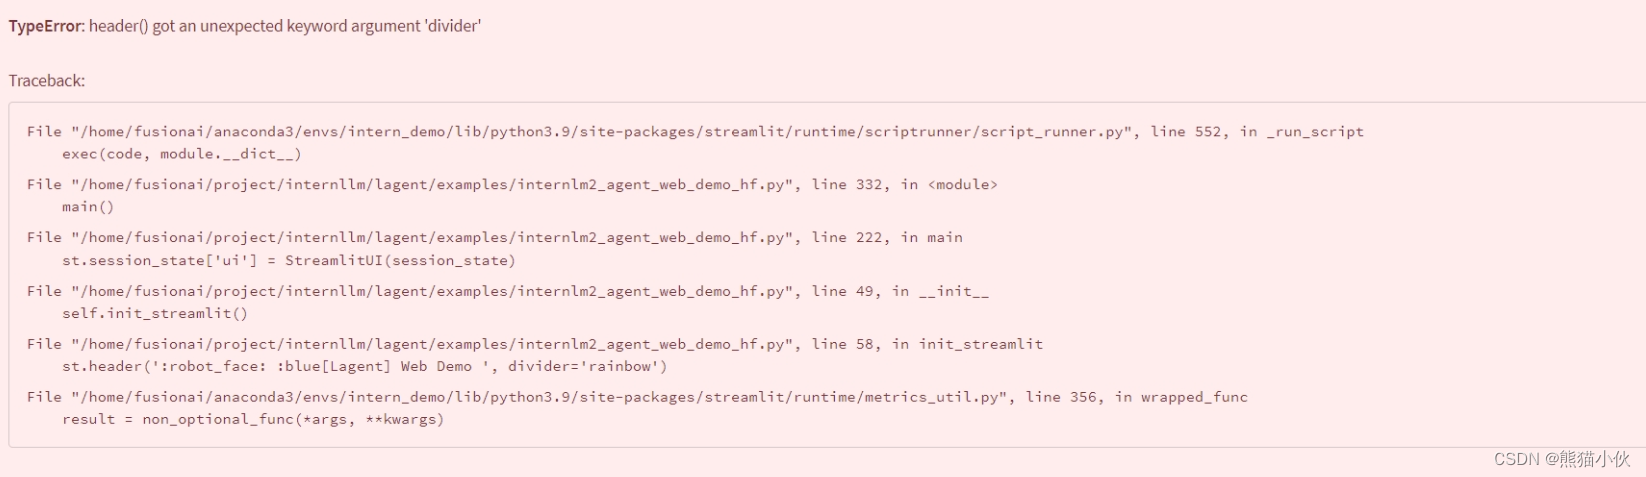 我把divider='rainbow’去掉可以正常运行,
但是网页回答全是错的,有点困惑。
 2. 解决方法
(1)网页显示有问题原因: streamlit 安装的版本有点问题,如下更改
streamlit == 1.24.0 ->streamlit==1.32.2
(2) 模型回答有问题原因,如下更改
Shanghai_AI_Laboratory/internlm-chat-7b --> Shanghai_AI_Laboratory/internlm2-chat-7b
注意一定使用camp2这个分支,这个更新较快,main分支还是旧版会有问题。
2.5 部署使用浦语·灵笔2 模型
2.5.1 安装
Step 1. 创建一个 conda 环境并激活。
conda create -n intern_clean python=3.9 -y
conda install cudatoolkit==11.7
conda activate intern_clean
Step 2. 安装 PyTorch (我们使用 PyTorch 2.0.1 / CUDA 11.7 测试通过)
pip3 install torch torchvision torchaudio

# 推荐使用以下命令安装Pytorch,以准确复现结果:
# pip install torch==2.0.1+cu117 torchvision==0.15.2+cu117 torchaudio==2.0.2 --index-url https://download.pytorch.org/whl/cu117
Step 3. 安装需要的包
pip install transformers==4.33.2 timm==0.4.12 sentencepiece==0.1.99 gradio==4.13.0 markdown2==2.4.10 xlsxwriter==3.1.2 einops
可选: 4-bit测试额外需要安装的包
pip install auto_gptq
可选: 微调 (Fine-tuning)
官方地址 | flash-att使用pip安装卡死问题解决 |
#pip 安装有点问题,需要调整
#pip install flash-attn --no-build-isolation

# 使用源码编译
git clone https://github.com/Dao-AILab/flash-attention.git
#进入 flash-attention 目录,执行python setup.py install的方式来安装最新版的flash-attn,安装时间在1个小时左右。flash-attn==2.5.7
python setup.py install

# (选做)如果需要使用指定版本,经过源码编译之后,再重新安装指定版本比较好
pip install flash-attn==1.0.4
微调需要安装deepspeed,peft (用于 LoRA 微调)
# install deepspeed
pip install deepspeed

# install peft
pip install peft
2.5.2 相关使用问题解决
使用过程中发现较多问题,花了不少时间修复,希望能给大家帮助
-
requests.exceptions.HTTPError: 404 Client Error: Not Found for url: https://www.modelscope.cn/api/v1/models/openai/clip-vit-large-patch14-336/revisions原因:cv的模型需要从openai下载,一般下载不了
处理:更换下载地址。
修改~/.cache/modelscope/hub/Shanghai_AI_Laboratory/internlm-xcomposer2-4khd-7b/build_mlp.py中下载地址:
'openai/clip-vit-large-patch14-336'->AI-ModelScope/clip-vit-large-patch14-336 -
ValueError: The device_map provided does not give any device for the following parameters: plora_glb_GN, plora_sub_GN
不能多卡运行的问题解决,修改device_map
 # example/utils.py
 device_map = {
        'vit': 0,
        'vision_proj': 0,
        'model.tok_embeddings': 0,
        'plora_glb_GN': num_gpus - 1,
        'plora_sub_GN':num_gpus - 1,
        'model.norm': num_gpus - 1,
        'output': num_gpus - 1,
    }
2.5.3 模型下载
from modelscope import snapshot_download, AutoModel, AutoTokenizer
# 下载internlm-xcomposer2-7b
model_dir = snapshot_download('Shanghai_AI_Laboratory/internlm-xcomposer2-7b')
model = AutoModel.from_pretrained(model_dir, trust_remote_code=True).cuda().eval()
tokenizer = AutoTokenizer.from_pretrained(model_dir, trust_remote_code=True)

# 下载VLM大模型
model_dir = snapshot_download('Shanghai_AI_Laboratory/internlm-xcomposer2-vl-7b')
model = AutoModel.from_pretrained(model_dir, trust_remote_code=True).cuda().eval()
tokenizer = AutoTokenizer.from_pretrained(model_dir, trust_remote_code=True)
2.5.4 实际运行
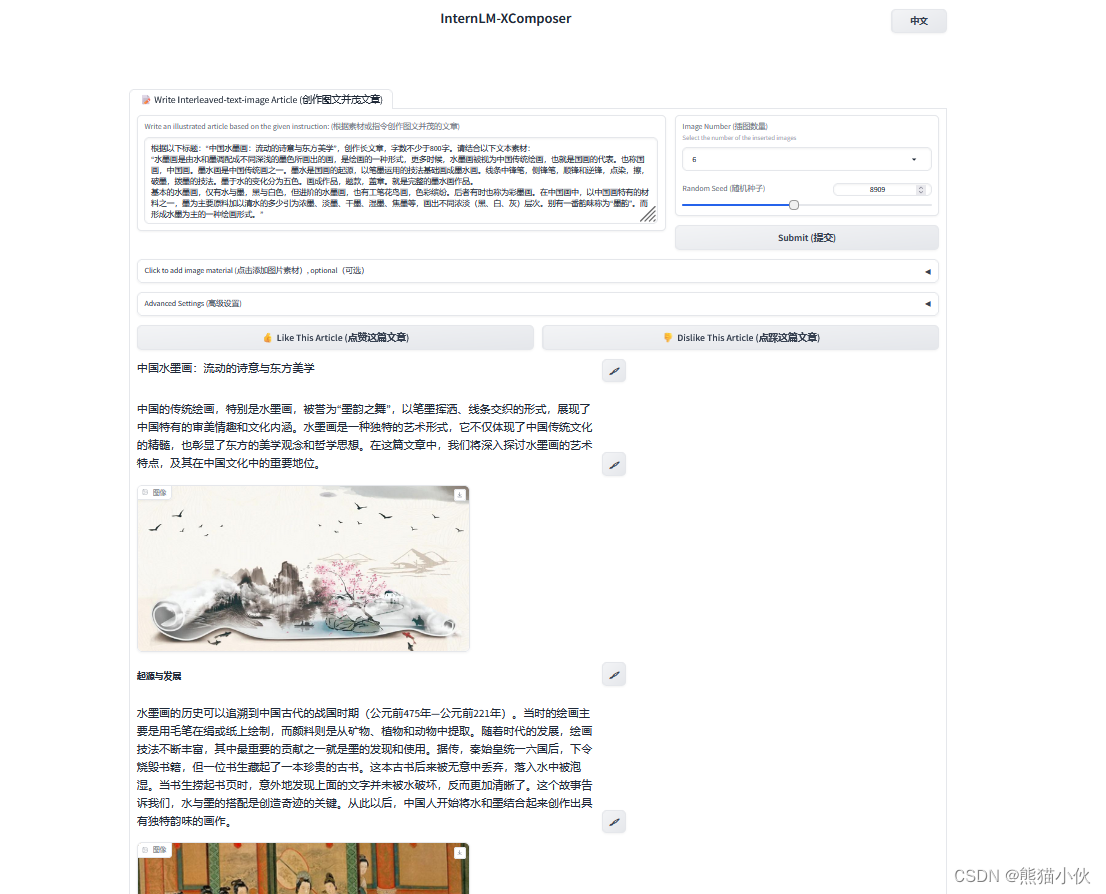
(1)图文写作实战
cd InternLM-XComposer
python examples/gradio_demo_composition.py  \
--code_path ~/.cache/modelscope/hub/Shanghai_AI_Laboratory/internlm-xcomposer2-7b \
--num_gpus 1 \
--port 6006
 测试 :
测试 :
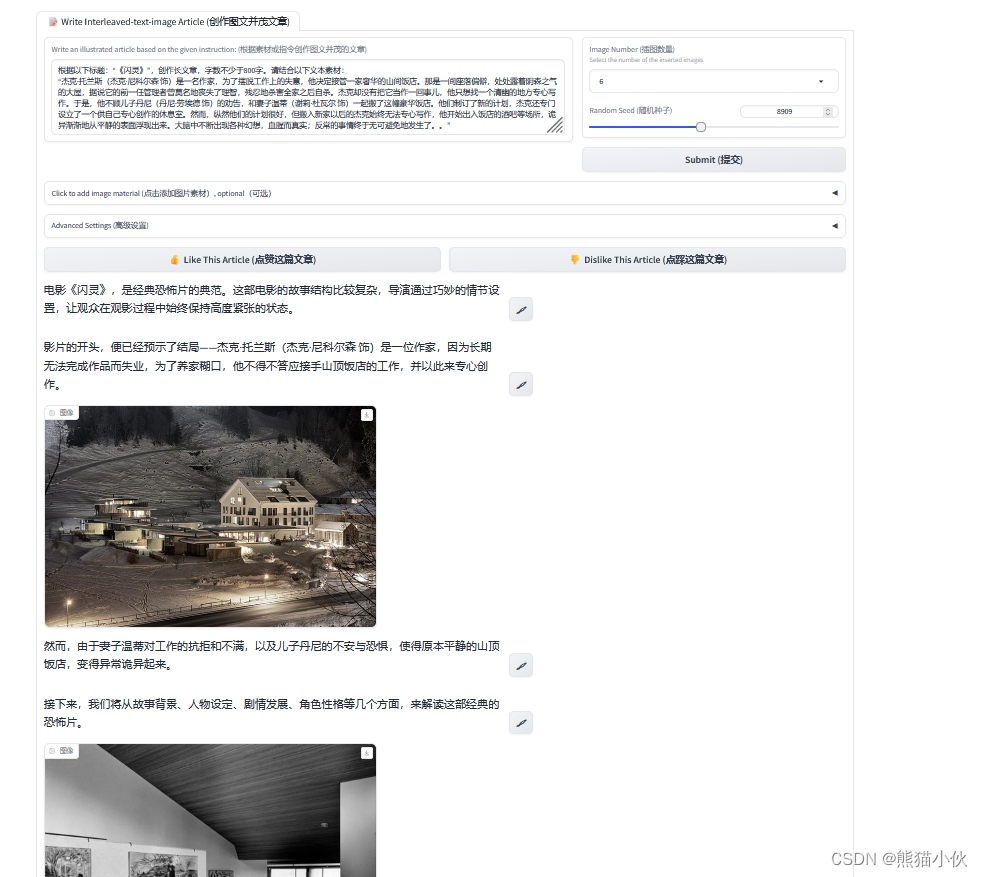
(1)图片生成 - 我自己也写了一个内容关于电影《闪灵》的理解,希望他给出一个类似小红书的样式,样式都是有的,但是有个小遗憾的话就是生成的图片质量好像没有那么阴森恐怖,甚至出现电影里面的特定图片。感觉对于特殊场景的理解生成的图片太泛化。
(2)算力需求 > 35g gpu ram
(2)理解图片含义
cd InternLM-XComposer

python examples/gradio_demo_chat.py  \
--code_path ~/.cache/modelscope/hub/Shanghai_AI_Laboratory/internlm-xcomposer2-vl-7b \
--num_gpus 1 \
--port 6006
 测试:
测试:
1.上传多张图片,经常会有一些胡言乱语,出现了幻想?还是多张图片之间有影响?
2.有一些程序逻辑图片,根本无法分析,给不出结果,可能逻辑性和内容不明显。
3.有一些流程图,我在问一些逻辑的时候,可能会陷入卡死循环状态,例如我问这几个框有哪些内容,他可能会在最后一个内容上一直输出同样的文字。


 1323
1323

 被折叠的 条评论
为什么被折叠?
被折叠的 条评论
为什么被折叠?
 到【灌水乐园】发言


