文章地址:[Python实战]你也能写的计时器程序
上次,公众号介绍了如何使用 Pyqt5 制作猜数游戏界面,并介绍了如何在 Pycharm 中使用 Qt Designer 生成 UI 文件。这次,我们要学习如何写一个简单的计时器程序。

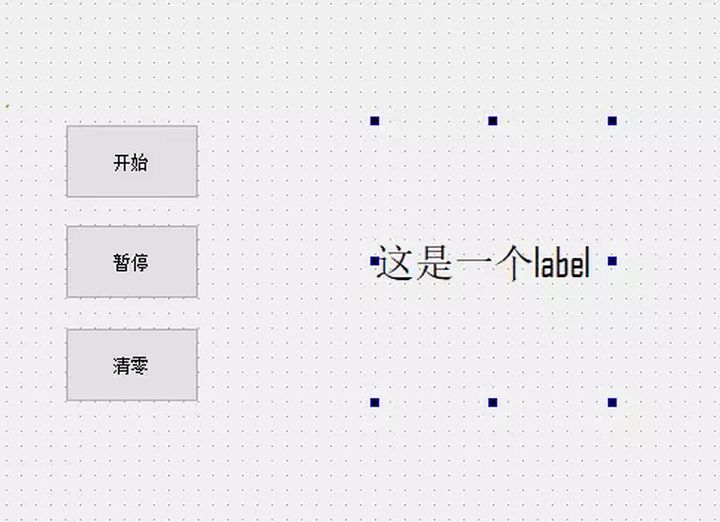
首先,我们使用 Qt Designer 来设计计时器的图形界面,参考如下:
左边画三个按钮,分别命名为:开始、暂停、清零。右边画一个标签,文本内容为空。当然,你也可以直接导入我提供的 Ui_timer.py 文件,然后编写其他部分代码。


QTimer 类提供了一次性和可供重复使用的定时器。要使用这个接口,我们首先要创建一个 QTimer 对象,并将 timeout 信号绑定到指定的函数上,接着调用QTimer 对象的 start 方法。这样,定时器就会以你设定的时间间隔恒定地发出 timeout 信号。
QTimer.start(ms) 方法,用于启动或重启计时器,ms 参数是时间间隔,单位是毫秒。QTimer.timeout.connect(method) 将定时器与方法绑定,当超过定时器设定的时间,就会调用该方法。
示例:
from PyQt5.QtCore import QTimer
# 实例化定时器
self.timer = QTimer(self)
# start(10) 将时间间隔设定为 10 毫秒
# 每过 10 毫秒,就会调用一次 self.MyFunc 方法
self.timer.timeout.connect(self.MyFunc)
self.timer.start(10)
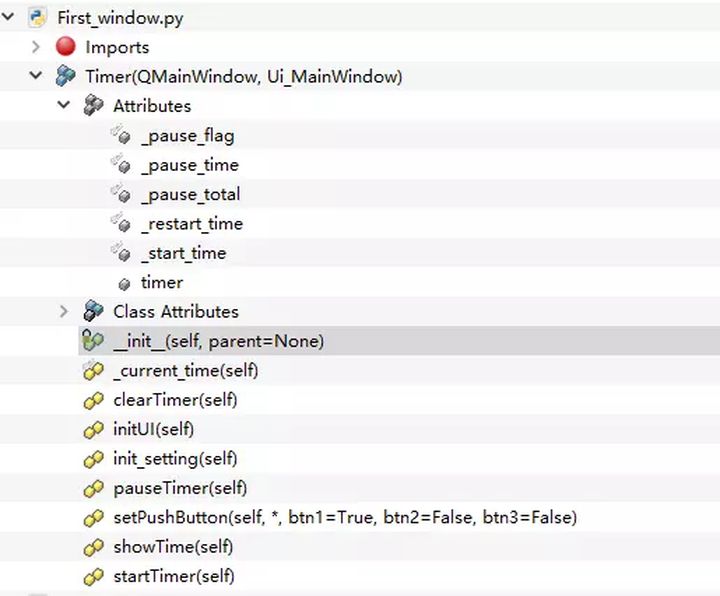
下面是总体的代码结构,包括类的属性及方法:

showTime 是之前提到的 QTimer.timeout.connect 函数所绑定的方法,只要定时器超时,就会调用这个函数。这个函数的作用是显示计时器的时间。
计时器的时间公式:当前时间 - 初始时间 - 暂停时间,这里关键的一步就是要计算暂停时间。所以,我们还需要两个类属性 self._pause_time 和 self._restart_time,分别表示暂停计时器那一刻的时间和再次启动计时器那一刻的时间,两个时间相减就得到总共暂停的时间。每当计时器暂停一次,self._pause_total 属性就要加上新的暂停时间。
def showTime(self):
# 如果暂停标志为真,self._pause_total 属性要加上暂停时间
# 并设置暂停标志为假
    if self._pause_flag:
        self._pause_total += self._restart_time - self._pause_time
        self._pause_flag = False
# 计算运行时间
    run_time = self._current_time - self._pause_total -
  self._start_time
# 将时间转换为文本
    text = convert(run_time)    # 标签显示文字
    self.label.setText(text)
convert 函数,为自定义的函数,把得到的单位为秒的时间转换成小时、分钟和秒三个部分,并返回格式化的字符串。int 充当向下取整的作用,注意这里不能使用 round 或者 math.ceil 等向上取整的函数,否则会出现两次 60 秒。
# 将时间表示为小时、分钟、秒的形式# 返回格式化字符串
def convert(raw_time):
    hour = int(raw_time // 3600)
    minute = int((raw_time % 3600) // 60)
    second = int(raw_time % 60)
    fmt = '{:0>2d}:{:0>2d}:{:0>2d}'
    return fmt.format(hour, minute, second)
下面是三个按钮分别绑定的函数。
开始按钮绑定 startTimer 函数, self._current_time 相当于 time.time() 也就是当前时间。如果第一次启动或者清零后的启动,就要初始化计时器启动时间 self._start_time。如果是暂停后的启动,就要更新 计时器重启时间 self._restart_time。之后,设置按钮的状态。
暂停按钮绑定 pauseTimer 函数。这个函数主要负责更新self._pause_flag,并记录暂停计时器这一刻的时间,并停止向定时器发送信号。也就说,这时就不再执行函数 showTime。最后,设置按钮状态。
清零按钮负责恢复至初始状态。
def startTimer(self):
# 发出计时信号
    self.timer.start(0)
# 如果 self._pause_flag 为假,更新开始时间
# 否则,更新重启时间
    if not self._pause_flag:
        self._start_time = self._current_time
    else:
        self._restart_time = self._current_time
# 设置按钮状态
    self.setPushButton(btn1=False, btn2=True, btn3=True)


def pauseTimer(self):
    self._pause_flag = True
    self._pause_time = self._current_time
# 停止发送信号
    self.timer.stop()
    self.setPushButton(btn1=True, btn2=False, btn3=True)


def clearTimer(self):
# 还原至初始状态
    self.init_setting()
    self.timer.stop()
    self.setPushButton()

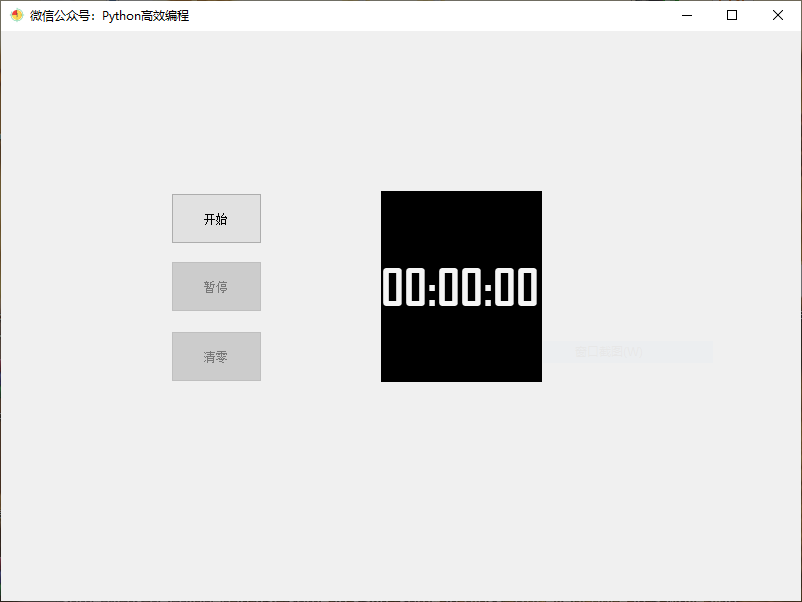
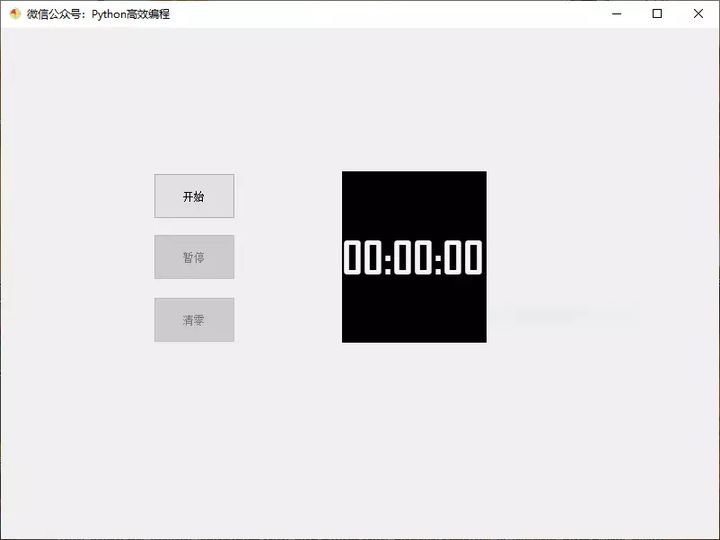
将 label 设定为黑底白字, 字体大小为: 50px,加粗。
self.label.setStyleSheet(
"QLabel{background:rgb(0, 0, 0);}"
"QLabel{color:rgb(250, 250, 250, 250);
font-size:50px; font-weight:bold}")
设定按钮状态,pushButton.setEnabled(boolen) 设定按钮是否可以点击,默认清零按钮不可点击。* 表示仅限关键字参数,必须通过关键字传参,不能通过位置参数传参。
def setPushButton(self, *, btn1=True, btn2=False, btn3=False):    # 设置按钮状态
     self.pushButton.setEnabled(btn1)
     self.pushButton_2.setEnabled(btn2)
     self.pushButton_3.setEnabled(btn3)
初始化设置:
def init_setting(self):
# 初始化设置
    self._start_time = None
    self._pause_flag = False
    self._pause_time = 0
    self._restart_time = 0
    self._pause_total = 0
    self.label.setText("00:00:00")
最后,我们可以使用 pyinstaller -w -i timer.ico First_window.py 命令生成 exe 文件。
好了,以上便是这篇文章的全部内容了。如果你喜欢这篇文章,请给我点赞、转发,分享给你的好友们!
如果你想要本次教程的相关源码,请关注公众号:Python高效编程,发送计时器 ,便会得到相应的下载地址。


 本文介绍如何使用Pyqt5和QTimer创建一个简单的计时器应用。通过Qt Designer设计界面,结合QTimer对象实现开始、暂停和清零功能。详细讲述了代码结构、时间计算逻辑以及按钮事件绑定,最后分享了生成exe文件的方法。


 12万+
12万+

 被折叠的 条评论
为什么被折叠?


