


Vue实现图片验证码、邮箱验证码以及Cookie记住我功能
前言
最近更新Vue和Spring Boot的文章偏多,算法类内容偏少,一方面因为最近在做毕设,用到前后端。另一方面是因为没时间,算法类文章整理费时,Vue和Spring Boot的文章整理起来偏简单。言归正传,接下来进入今天的主题,教大家如何实现图片验证码、邮箱验证码以及Cookie记住我功能。先分开讲解代码,文章最后会给出完整代码,涉及到的实体类最后也会一并给出。然后再提下这期的内容中Vue前端用到了阿里巴巴矢量图标库,因为Element UI的图标实在太少了,但是由于文章篇幅关系,下一篇文章教大家如何使用阿里巴巴矢量图标库。因此前端代码图标报错的小伙伴不要急,接着看下一篇就行
图片验证码实现
Vue前端实现
HTML部分
先定义一个放图片的容器,用于接收显示后端生成返回的Base64的图片
<div class="login-code" style="width:35%;height:40px;float:right;margin-right:13%;margin-top:5%">
   <img :src="codeUrl" @click="getCode" />
</div>
JS部分
去后端请求验证码图片并接收Base64图片与计算结果
getCode () {
      this.$axios.get('http://localhost:8443/api/getcode').then(resp => {
        if (resp && resp.status === 200) {
          this.codeUrl = resp.data.img
          this.loginForm.test_code = resp.data.result
          console.log(resp.data)
        }
      })
    },
Spring Boot后端实现
先配置pom.xml,在其中添加以下内容
<properties>
    <java.version>1.8</java.version>
    <hutool.version>5.2.5</hutool.version>
</properties>

<dependency>
    <groupId>org.projectlombok</groupId>
    <artifactId>lombok</artifactId>
</dependency>
<dependency>
    <groupId>com.github.whvcse</groupId>
    <artifactId>easy-captcha</artifactId>
    <version>1.6.2 </version>
</dependency>

<dependency>
    <groupId>cn.hutool</groupId>
    <artifactId>hutool-all</artifactId>
    <version>${hutool.version}</version>
</dependency>
后端代码实现
@CrossOrigin
@GetMapping(value = "api/getcode")
@ResponseBody
public ResponseEntity<Object> getCode(){
    // 算术类型 https://gitee.com/whvse/EasyCaptcha
    ArithmeticCaptcha captcha = new ArithmeticCaptcha(111, 36);
    // 几位数运算,默认是两位
    captcha.setLen(2);
    // 获取运算的结果
    String result ="";
    try {
        result = new Double(Double.parseDouble(captcha.text())).intValue()+"";
    }catch (Exception e){
        result = captcha.text();
    }

    // 验证码信息
    String finalResult = result;
    Map<String,Object> imgResult = new HashMap<String,Object>(2){{
        put("img", captcha.toBase64());
        put("result", finalResult);
    }};
    return ResponseEntity.ok(imgResult);
}
邮箱验证码实现

Vue前端实现
HTML部分
设置一个按钮来触发发送邮箱事件即可
<div class="css-9" style="width:100%;height:40px;float:left">
    <div class="school-yanzs">
      <el-form :model="ruleForm" :rules="rules" ref="ruleForm" label-width="100px" class="demo-ruleForm">
        <el-form-item label="" prop="code">
          <el-input v-model="ruleForm.code" prefix-icon="iconfont iconanquanjizhi" placeholder="邮箱验证码"
          style="width:390%;margin-left:-100px;float:left"></el-input>
        </el-form-item>
      </el-form>
    </div>
    <div class="school-pics">
      <el-button @click="getEmailCode()" :disabled="!show" style="height:40px;margin-top:8%">
        <span v-show="show">发送验证码</span>
        <span v-show="!show" class="count">{{count}} s后可点击重发</span>
      </el-button>
      <!-- <el-button style="height:37px;margin-top:8%" plain>获取验证码</el-button> -->
    </div>
  </div>
JS部分
去响应按钮事件,让Spring Boot去发送随机验证码,并返回随机验证码,用于验证与用户填写的验证码是否一致(验证验证码可在前端验证,也可在后端验证)
getEmailCode () {
      const that = this
      if (this.ruleForm.email === '') {
        this.$message.error('请先输入邮箱再点击获取验证码')
      } else {
        let regemail = /^[a-zA-Z0-9_-]+@[a-zA-Z0-9_-]+(\.[a-zA-Z0-9_-]+)+$/
        if (!regemail.test(this.ruleForm.email)) {
          this.$message({showClose: true, message: '请输入格式正确有效的邮箱号!', type: 'error'})
        } else {
          this.$axios.post('/mail', {
            'email': this.ruleForm.email
          }).then(function (res) {
            that.loginForm.test_ecode = res.data.ecode
            console.log(that.User.Test_Ecode)
          })
        }
        // 验证码倒计时
        if (!this.timer) {
          this.count = TIME_COUNT
          this.show = false
          this.timer = setInterval(() => {
            if (this.count > 0 && this.count <= TIME_COUNT) {
              this.count--
            } else {
              this.show = true
              clearInterval(this.timer)
              this.timer = null
            }
          }, 1000)
        }
      }
    },
Spring Boot后端实现
先配置pom.xml,在其中添加以下内容
<!--qq邮箱-->
<dependency>
    <groupId>org.springframework.boot</groupId>
    <artifactId>spring-boot-starter-mail</artifactId>
</dependency>
<dependency>
    <groupId>javax.activation</groupId>
    <artifactId>activation</artifactId>
    <version>1.1</version>
</dependency>
<dependency>
    <groupId>javax.mail</groupId>
    <artifactId>mail</artifactId>
    <version>1.4</version>
</dependency>
application.yml配置
spring:
  mail:
    default-encoding: UTF-8
    host: smtp.qq.com
    #这是你的邮箱
    username: xxxxxx@qq.com
    #这是你QQ邮箱内第三方POP3/SMTP服务密码需要开启,在QQ邮箱-设置-账户
    password: hxxxxxxdoxxxxiji
    properties:
      mail:
        smtp:
          auth: true
          starttls:
            enable: true
            required: true
如果你的application不是.yml请这样配置
spring.mail.default-encoding=UTF-8
spring.mail.host=smtp.qq.com
spring.mail.username=xxxxxx@qq.com
#这是你QQ邮箱内第三方POP3/SMTP服务密码需要开启,在QQ邮箱-设置-账户
spring.mail.password=hxxxxxxdoxxxxiji
spring.mail.properties.mail.smtp.auth=true
spring.mail.properties.mail.smtp.starttls.enable=true
spring.mail.properties.mail.smtp.starttls.required=true
后端代码实现
@Controller
public class MailController {
    @CrossOrigin
    @PostMapping(value = "/api/mail")
    @ResponseBody
    public RestResponse<String> getCheckCode(@RequestBody UsersBo usersBo){
        RestResponse restResponse = new RestResponse();
        String checkCode = String.valueOf(new Random().nextInt(899999) + 100000);
        tocheckCode = checkCode;
        //构建邮箱消息
        String message = "您的注册验证码为:"+checkCode;
        try {
            //发送消息
            mailService.sendSimpleMail(usersBo.getEmail(), "注册验证码", message);
        }catch (Exception e){
            restResponse.setData(e);
            restResponse.setEcode(checkCode);
            return restResponse;
        }
        restResponse.setData(checkCode);
        restResponse.setEcode(checkCode);
//        System.out.println("this is checkcode:" + checkCode);
        return restResponse;
    }
}
Cookie实现记住我
触发Cookie设置事件
      const self = this
      // 判断复选框是否被勾选 勾选则调用配置cookie方法
      if (self.loginForm.erememberMe === true) {
        console.log('loginForm.rememberMe == true')
        console.log(self.ruleForm.email + '|' + self.loginForm.erememberMe)
        // 传入账号名,密码,和保存天数3个参数
        self.setCookie(self.ruleForm.email, self.loginForm.erememberMe, 7)
      } else {
        console.log('清空Cookie')
        // 清空Cookie
        self.clearCookie()
      }
Cookie的设置,读取,清除
    // 设置cookie
    setCookie (cname, crMe, exdays) {
      var exdate = new Date() // 获取时间
      exdate.setTime(exdate.getTime() + 24 * 60 * 60 * 1000 * exdays) // 保存的天数
      // 字符串拼接cookie
      window.document.cookie = 'userEmail' + '=' + cname + ';path=/;expires=' + exdate.toGMTString()
      window.document.cookie = 'userStus' + '=' + crMe + ';path=/;expires=' + exdate.toGMTString()
    },
    // 读取cookie
    getCookie: function () {
      if (document.cookie.length > 0) {
        var arr = document.cookie.split('; ') // 这里显示的格式需要切割一下自己可输出看下
        console.log(arr)
        for (var i = 0; i < arr.length; i++) {
          var arr2 = arr[i].split('=') // 再次切割
          // 判断查找相对应的值
          if (arr2[0] === 'userEmail') {
            this.ruleForm.email = arr2[1] // 保存到保存数据的地方
          } else if (arr2[0] === 'userStus') {
            this.loginForm.erememberMe = Boolean(arr2[1])
            // console.log('this.loginFoorm.rme:' + this.loginForm.rememberMe)
          }
        }
      }
    },
    // 清除cookie
    clearCookie: function () {
      this.setCookie('', false, -1) // 修改2值都为空,天数为负1天就好了
    }
完整代码
Vue前端完整代码
CSS代码有些可删除,因为是我毕设其他布局的,因为时间关系,我没时间挑出来删除,不删除不影响运行,只是多了代码。
<template>
  <div class="emailtest" style="display: flex;justify-content: center;height:600px;width:1300px">
    <!-- <img src="./assets/logo.png"> -->
    <!-- <router-view/> -->
    <el-card class="login_box" shadow="always">
      <div class="login_left">
        <div class="huaweilogo">
          <el-image class="huaweilogo-image" :src="img_src"></el-image>
        </div>
        <div class="huaweiname">智慧课堂管理平台</div>
        <div class="huaweiworker">
          <div class="huaweiwork-name">小白wwj</div>
          <div class="huaweiwork-work">厦门理工 智慧课堂管理平台开发者</div>
        </div>
        <div class="huaweiwork-content">AI进校园,帮助教师在保证教学进度的同时关注每位学生的异常行为,
            帮助学校提早发现校园暴力,提早阻止校园暴力,帮助孩子健康快乐的学习成长。
        </div>
        <div class="huaweiemail">联系我们: 4779465@qq.com</div>
      </div>
      <div class="login_right" v-if="login">
        <div class="login_right-header">
          <div class="login_status"> 登录</div>
          <div class="pull_right">没有账号?
            <!-- <a href="" style="color:#005980;text-decoration-line: none">点此注册</a> -->
            <el-link href="http://localhost:8080/#/huaweisignup" :underline="false"
              style="font-size: 14px;margin-top:-2%;">点此注册</el-link>
          </div>
        </div>
        <div class="login_right-content">
          <div class="css-6" style="height:40px;width:74%;margin-top:2%;margin-left: 13%;">
            <div class="school-news">
              <el-form :model="ruleForm" :rules="rules" ref="ruleForm" label-width="100px" class="demo-ruleForm">
                <el-form-item label="" prop="email" >
                  <el-input  v-model="ruleForm.email" prefix-icon="iconfont iconyouxiang" placeholder="请输入邮箱"
                  style="width:165%;float:left;margin-left:-100px"></el-input>
                </el-form-item>
              </el-form>
            </div>
          </div>

          <el-input  v-model="code" prefix-icon="iconfont iconanquanjizhi" placeholder="验证码"
            style="width:37%;margin-top:5%;margin-left: 13%;float:left"></el-input>
          <div class="login-code" style="width:35%;height:40px;float:right;margin-right:13%;margin-top:5%">
            <img :src="codeUrl" @click="getCode" />
          </div>

          <div class="css-9" style="width:100%;height:40px;float:left">
            <div class="school-yanzs">
              <el-form :model="ruleForm" :rules="rules" ref="ruleForm" label-width="100px" class="demo-ruleForm">
                <el-form-item label="" prop="code">
                  <el-input v-model="ruleForm.code" prefix-icon="iconfont iconanquanjizhi" placeholder="邮箱验证码"
                  style="width:390%;margin-left:-100px;float:left"></el-input>
                </el-form-item>
              </el-form>
            </div>
            <div class="school-pics">
              <el-button @click="getEmailCode()" :disabled="!show" style="height:40px;margin-top:8%">
                <span v-show="show">发送验证码</span>
                <span v-show="!show" class="count">{{count}} s后可点击重发</span>
              </el-button>
              <!-- <el-button style="height:37px;margin-top:8%" plain>获取验证码</el-button> -->
            </div>
          </div>
        </div>
        <div class="login_right-middle">
          <div class="login_right-middle-left">
            <el-checkbox v-model="loginForm.erememberMe">记住我</el-checkbox>
          </div>
          <div class="login_right-middle-right">
            <el-link href="http://localhost:8080/#/huaweilogin" :underline="false"
              style="font-size: 14px;margin-top:-2%;">用户名密码登录</el-link>
          </div>
        </div>
        <el-button class="login_right-button" type="warning" @click="submit">登录</el-button>
        <el-link href="https://element.eleme.io" target="_blank" :underline="false"
              style="font-size: 14px;margin-top:-2%;margin-top:5%;margin-left:30%;margin-bottom:5%">已有账号,忘记密码?</el-link>
        <div class="line"><el-divider>其他方式登录</el-divider></div>
        <div class="others-login">
          <div class="others-logo"><i class="iconfont iconQQ" style="font-size:35px"></i></div>
          <div class="others-logo"><i class="iconfont iconweixin" style="font-size:35px"></i></div>
          <div class="others-logo"><i class="iconfont iconfacebook" style="font-size:35px"></i></div>
        </div>
      </div>
    </el-card>
  </div>
</template>

<script>
const TIME_COUNT = 60 // 设置一个全局的倒计时的时间
// import {getCodeImg} from './api/login'
export default {
  name: 'EmailTest',
  components: {
  },
  data () {
    // 邮箱校验
    let validateMobile = (rule, value, callback) => {
      if (!value) {
        callback(new Error('邮箱不可为空'))
      } else {
        if (value !== '') {
          let reg = /^[a-zA-Z0-9_-]+@[a-zA-Z0-9_-]+(\.[a-zA-Z0-9_-]+)+$/
          if (!reg.test(value)) {
            callback(new Error('请输入格式正确有效的邮箱号'))
          }
        }
        callback()
      }
    }
    // 验证码校验
    let validateCheckCode = (rule, value, callback) => {
      if (!value) {
        callback(new Error('验证码不可为空'))
      } else {
        if (value !== '') {
          let reg = /^[0-9]{6}$/
          if (!reg.test(value)) {
            callback(new Error('请输入收到的6位随机验证码'))
          }
        }
        callback()
      }
    }
    return {
      img_src: require('../assets/HuaWeiLogin/huaweilogo.png'),
      login: true,
      checked: true,
      codeUrl: '',
      show: true,
      disabledEdit: true,
      code: '',
      loginForm: {
        test_ecode: '',
        erememberMe: false,
        test_code: ''
      },
      ruleForm: {
        email: '',
        code: ''
      },
      rules: {
        email: [
          { validator: validateMobile, trigger: 'blur' }
        ],
        code: [
          { validator: validateCheckCode, trigger: 'blur' }
        ]
      }
    }
  },
  mounted: function () {
    this.getCookie()
  },
  watch: {
  },
  created () {
    this.getCode()
  },
  methods: {
    getCode () {
      this.$axios.get('http://localhost:8443/api/getcode').then(resp => {
        if (resp && resp.status === 200) {
          this.codeUrl = resp.data.img
          this.loginForm.test_code = resp.data.result
          console.log(resp.data)
        }
      })
    },
    getEmailCode () {
      const that = this
      if (this.ruleForm.email === '') {
        this.$message.error('请先输入邮箱再点击获取验证码')
      } else {
        let regemail = /^[a-zA-Z0-9_-]+@[a-zA-Z0-9_-]+(\.[a-zA-Z0-9_-]+)+$/
        if (!regemail.test(this.ruleForm.email)) {
          this.$message({showClose: true, message: '请输入格式正确有效的邮箱号!', type: 'error'})
        } else {
          this.$axios.post('/mail', {
            'email': this.ruleForm.email
          }).then(function (res) {
            console.log('111111111')
            that.loginForm.test_ecode = res.data.ecode
            console.log(that.User.Test_Ecode)
          })
        }
        // 验证码倒计时
        if (!this.timer) {
          this.count = TIME_COUNT
          this.show = false
          this.timer = setInterval(() => {
            if (this.count > 0 && this.count <= TIME_COUNT) {
              this.count--
            } else {
              this.show = true
              clearInterval(this.timer)
              this.timer = null
            }
          }, 1000)
        }
      }
    },
    submit () {
      const self = this
      // 判断复选框是否被勾选 勾选则调用配置cookie方法
      if (self.loginForm.erememberMe === true) {
        console.log('loginForm.rememberMe == true')
        console.log(self.ruleForm.email + '|' + self.loginForm.erememberMe)
        // 传入账号名,密码,和保存天数3个参数
        self.setCookie(self.ruleForm.email, self.loginForm.erememberMe, 7)
      } else {
        console.log('清空Cookie')
        // 清空Cookie
        self.clearCookie()
      }
      if (this.ruleForm.email !== '') {
        let regemail = /^[a-zA-Z0-9_-]+@[a-zA-Z0-9_-]+(\.[a-zA-Z0-9_-]+)+$/
        if (!regemail.test(this.ruleForm.email)) {
          this.$message({showClose: true, message: '请输入格式正确有效的邮箱号!', type: 'error'})
        } else {
          if (this.code !== '') {
            if (this.ruleForm.code !== '') {
              let regcode = /^[0-9]{6}$/
              if (!regcode.test(this.ruleForm.code)) {
                this.$message({showClose: true, message: '请输入收到的6位随机验证码!', type: 'error'})
              } else {
                if (this.code === this.loginForm.test_code) {
                  if (this.ruleForm.code === this.loginForm.test_ecode) {
                    // 这部分是去验证邮箱是否已注册,根据自己的后端数据库去修改
                    // this.$axios.post('/Elogin', {
                    //   email: this.ruleForm.email
                    // }).then(resp => {
                    //   if (resp && resp.data.code === 200) {
                    //     console.log(resp)
                    //     this.$message({showClose: true, message: '登录成功!', type: 'success'})
                    //   } else if (resp && resp.data.code === 400) {
                    //     this.$message({showClose: true, message: '该账号不存在!', type: 'error'})
                    //   }
                    // })

                    // 跳转页面
                    this.$router.push({
                      name: 'test2'
                      // params: {
                      //   useremail: this.loginForm.username
                      // }
                    })
                    this.$message({showClose: true, message: '登录成功!', type: 'success'})
                  } else {
                    this.$message({showClose: true, message: '邮箱验证码不匹配!', type: 'error'})
                  }
                } else {
                  this.$message({showClose: true, message: '图片验证码错误!', type: 'error'})
                }
              }
            } else {
              this.$message({showClose: true, message: '请输入收到邮箱的验证码!', type: 'error'})
            }
          } else {
            this.$message({showClose: true, message: '请输入右侧图片验证码的答案!', type: 'error'})
          }
        }
      } else {
        this.$message({showClose: true, message: '邮箱不可为空!', type: 'error'})
      }
    },
    // 设置cookie
    setCookie (cname, crMe, exdays) {
      var exdate = new Date() // 获取时间
      exdate.setTime(exdate.getTime() + 24 * 60 * 60 * 1000 * exdays) // 保存的天数
      // 字符串拼接cookie
      window.document.cookie = 'userEmail' + '=' + cname + ';path=/;expires=' + exdate.toGMTString()
      window.document.cookie = 'userStus' + '=' + crMe + ';path=/;expires=' + exdate.toGMTString()
    },
    // 读取cookie
    getCookie: function () {
      if (document.cookie.length > 0) {
        var arr = document.cookie.split('; ') // 这里显示的格式需要切割一下自己可输出看下
        console.log(arr)
        for (var i = 0; i < arr.length; i++) {
          var arr2 = arr[i].split('=') // 再次切割
          // 判断查找相对应的值
          if (arr2[0] === 'userEmail') {
            this.ruleForm.email = arr2[1] // 保存到保存数据的地方
          } else if (arr2[0] === 'userStus') {
            this.loginForm.erememberMe = Boolean(arr2[1])
            // console.log('this.loginFoorm.rme:' + this.loginForm.rememberMe)
          }
        }
      }
    },
    // 清除cookie
    clearCookie: function () {
      this.setCookie('', false, -1) // 修改2值都为空,天数为负1天就好了
    }
  }
}
</script>

<style>
  .huaweilogin{
    background-image: url("../assets/HuaWeiLogin/login_background.png");
    background-repeat: no-repeat;
    background-size: cover;
  }

  .login_box{
    width: 700px;
    height: 520px;
    padding-top: 0;
    margin-top: 5%;
    margin-left: 2%;
    margin-top: 3%;
  }

  .login_left{
    width: 350px;
    height: 520px;
    margin-left: 0px;
    float: left;
    background-image: url("../assets/HuaWeiLogin/login_box_background.png");
    background-repeat: no-repeat;
    background-size: cover;
  }
  .login_right{
    width: 350px;
    float: right;
    height: 520px;
    margin-top: -748;
  }

  .el-card__body{
    padding: 0px;
  }

  .huaweilogo{
    margin-top: 16%;
  }

  .huaweilogo-image{
    width: 175px;
    height: 50px;
    margin-left: 6%;
  }

  .huaweiname {
    color: lightslategray;
    font-size: 22px;
    margin-top: 16%;
    margin-left: 12%;
  }

  .huaweiworker {
    color: lightslategray;
    font-size: 12px;
    margin-top: 3%;
    height: 13px;
  }

  .huaweiwork-name {
    width: 20%;
    text-align: center;
    float: left;
    margin-left: 12%;
  }

  .huaweiwork-work {
    width: 60%;
    float: left;
  }

  .huaweiwork-content{
    margin-top: 4%;
    color: lightslategray;
    font-size: 14px;
    width: 80%;
    margin-left: 12%;
  }

  .huaweiemail{
    margin-top: 25%;
    color: lightslategray;
    font-size: 14px;
    margin-left: 12%;
  }

  .login_right-header{
    width: 100%;
    margin-top: 15%;
    height: 50px;
  }

  .login_status{
    font-weight: 700;
    color: #40485b;
    font-size: 22px;
    width: 20%;
    text-align: center;
    margin-left: 10%;
    float: left;
  }

  .pull_right{
    width: 50%;
    float: left;
    margin-top: 3%;
    font-size: 14px;
    margin-left: 20%;
  }

  .login_right-content{
    width: 100%;
    height: 170px;
  }

  .login_right-middle{
    width: 100%;
    height: 40px;
  }

  .login_right-middle-left{
    width: 20%;
    margin-left: 13%;
    margin-top: 2%;
    float: left;
  }

  .login_right-middle-right{
    width: 30%;
    margin-top: 2%;
    float: left;
    margin-left: 23%;
    text-align: right;
  }

  .login_right-button{
    width: 74%;
    height: 40px;
    background-color: #fe7300;
    color: white;
    margin-left: 13%;
  }

  .line{
    width: 74%;
    height: 30px;
    margin-left: 13%;
  }

  .others-login{
    width: 74%;
    height: 50px;
    margin-left: 13%;
  }

  .others-logo{
    widows: 20%;
    float: left;
    margin-left: 15%;
  }

  .school-yanzs{
    width: 38%;
    height: 80px;
    float: left;
    margin-top: 3%;
    margin-left: 13%;
  }

  .school-pics{
    width: 30%;
    height: 80px;
    float: left;
    margin-left: 0%;
    margin-top: 1%;
  }

</style>
Spring Boot后端完整代码
pom.xml和application.yml
这部分配置大家看前面就行,配置完整,别遗漏了
RestResponse类
/**
 * @ClassName: RestResponse
 * @Description: Response响应工具类
 * @Author:
 * @CreateDate: 2019-02-14 09:14
 * @Version: 1.0
 */
public class RestResponse<T> {
    public static final String SUCCESS_MSG = "操作成功";
    public static final String FAILURE_MSG = "操作失败";
    public static final Integer SUCCESS_CODE = 0;
    public static final Integer FAILURE_CODE = 300;

    private Integer code;
    public String Ecode;

    private String msg;
    private T data;

    public RestResponse() {
    }

    public RestResponse(Integer code, String msg, T data) {
        this.code = code;
        this.msg = msg;
        this.data = data;
    }

    public RestResponse(Integer code, String msg) {
        this.code = code;
        this.msg = msg;
        data = null;
    }

    public static RestResponse buildFailureResp(Exception e) {
        return new RestResponse(RestResponse.FAILURE_CODE, e.getMessage());
    }

    public static RestResponse buildFailureResp(String msg) {
        return new RestResponse(RestResponse.FAILURE_CODE, msg);
    }

    public static RestResponse buildSuccessResp(Object data) {
        return new RestResponse(RestResponse.SUCCESS_CODE, RestResponse.SUCCESS_MSG, data);
    }

    public static RestResponse buildSuccessResp() {
        return new RestResponse(RestResponse.SUCCESS_CODE, RestResponse.SUCCESS_MSG);
    }

    public Integer getCode() {
        return code;
    }

    public void setCode(Integer code) {
        this.code = code;
    }

    public void setEcode(String ecode){this.Ecode = ecode;}

    public String getEcode(){return Ecode;}

    public String getMsg() {
        return msg;
    }

    public void setMsg(String msg) {
        this.msg = msg;
    }

    public T getData() {
        return data;
    }

    public void setData(T data) {
        this.data = data;
    }
}
UsersBo
public class UsersBo {
    private String email;
    private String code;
    private String why;

    @Override
    public String toString() {
        return "UsersBo{" +
                "email='" + email + '\'' +
                '}';
    }

    public void setEmail(String email){this.email = email;}

    public String getEmail(){
        return email;
    }

    public void setCode(String code) {
        this.code = code;
    }

    public String getCode() {
        return code;
    }

    public String getWhy() {
        return why;
    }

    public void setWhy(String why) {
        this.why = why;
    }
}
MailController
发送邮件的方法
//导包
import com.example.wuwenjun.service.MailService;
import jdk.internal.instrumentation.Logger;
import lombok.extern.slf4j.Slf4j;
import com.example.wuwenjun.pojo.UsersBo;
import com.example.wuwenjun.pojo.RestResponse;
import org.springframework.beans.factory.annotation.Autowired;
import org.springframework.beans.factory.annotation.Value;
import org.springframework.stereotype.Controller;
import org.springframework.web.bind.annotation.*;

import java.io.File;
import java.util.List;
import java.util.Random;

//代码实现
@Controller
public class MailController {
    @CrossOrigin
    @PostMapping(value = "/api/mail")
    @ResponseBody
    public RestResponse<String> getCheckCode(@RequestBody UsersBo usersBo){
        RestResponse restResponse = new RestResponse();
        String checkCode = String.valueOf(new Random().nextInt(899999) + 100000);
        tocheckCode = checkCode;
        //构建邮箱消息
        String message = "您的注册验证码为:"+checkCode;
        try {
            //发送消息
            mailService.sendSimpleMail(usersBo.getEmail(), "注册验证码", message);
        }catch (Exception e){
            restResponse.setData(e);
            restResponse.setEcode(checkCode);
            return restResponse;
        }
        restResponse.setData(checkCode);
        restResponse.setEcode(checkCode);
//        System.out.println("this is checkcode:" + checkCode);
        return restResponse;
    }
}
CodeController
生成图片验证码及结果
import lombok.extern.slf4j.Slf4j;
import org.springframework.beans.factory.annotation.Value;
import org.springframework.stereotype.Controller;
import org.springframework.web.bind.annotation.*;
import org.springframework.http.ResponseEntity;
import com.wf.captcha.ArithmeticCaptcha;
import com.example.wuwenjun.pojo.SecurityProperties;
import com.example.wuwenjun.utils.RedisUtils;
import cn.hutool.core.util.IdUtil;

import java.util.HashMap;
import java.util.Map;
import java.util.concurrent.TimeUnit;

@Controller
@Slf4j
@RestController
public class CodeController {

    @CrossOrigin
    @GetMapping(value = "api/getcode")
    @ResponseBody
    public ResponseEntity<Object> getCode(){
        // 算术类型 https://gitee.com/whvse/EasyCaptcha
        ArithmeticCaptcha captcha = new ArithmeticCaptcha(111, 36);
        // 几位数运算,默认是两位
        captcha.setLen(2);
        // 获取运算的结果
        String result ="";
        try {
            result = new Double(Double.parseDouble(captcha.text())).intValue()+"";
        }catch (Exception e){
            result = captcha.text();
        }

        // 验证码信息
        String finalResult = result;
        Map<String,Object> imgResult = new HashMap<String,Object>(2){{
            put("img", captcha.toBase64());
            put("result", finalResult);
        }};
        return ResponseEntity.ok(imgResult);
    }
}
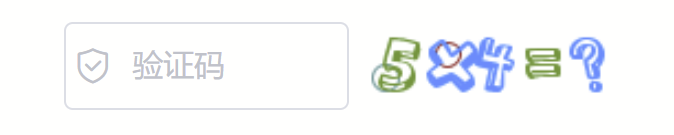
实现效果展示
图片验证码展示

记住我功能展示
cookie保存7天,无论你刷新还是重启电脑,都会保留账号信息

发送邮箱展示

登录验证结果

以上就是这期《Vue实现图片验证码、邮箱验证码以及Cookie记住我功能》的全部内容了。


 2500
2500


 被折叠的 条评论
为什么被折叠?
被折叠的 条评论
为什么被折叠?
 到【灌水乐园】发言


