


运行环境说明
Conda虚拟环境 | Python 3.10.13 | Pip 24.1.2 |
torch 2.1.1 | torchvision 0.16.1 | torchaudio 2.1.1 |
transformers 4.37.1 | accelerate | |
RTX 4060 8GB | CUDA 12.2 | Qwen-14B-Chat-Int4 |
确认下torch安装信息

模型推理
过程及输出结果如下所示:
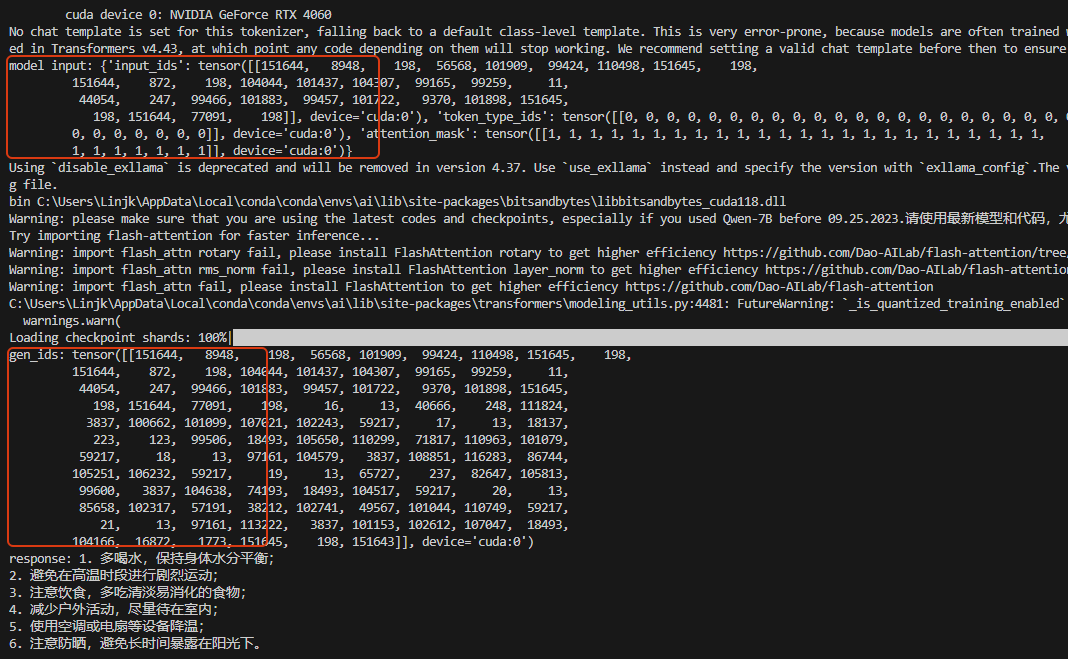
从如上过程输出可以看到,大模型大概按如下几步做了处理:
- 输入转为token
- 通过已训练好的模型内部自注意力的推理,得到输出token概率
- 重复推理,得到最终结果
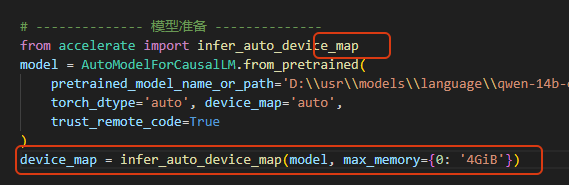
在如上代码可以看到,在加载模型的时候,torch_dtype参数的值是auto,即按照模型的默认精度加载的,我们也可以指定精度,如设置其值为: torch.float16等,另外device_map参数值是auto,则模型加载是会安装这个和顺序来尝试加载:GPU显存、CPU内存、磁盘。
当我们想指定模型可以占用的最大显存时,可以按如下配置:
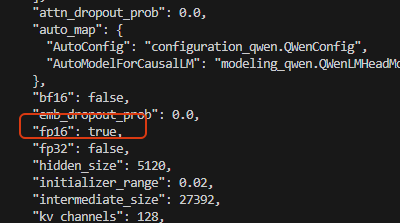
过程中,可以直接print(model)来输出一下模型的信息[print(model.config)可以输出模型的配置信息]:

查看模型的配置时,看到精度是fp16的:
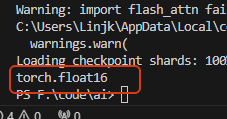
可以[list(model.parameters())[0].dtype]验证下:
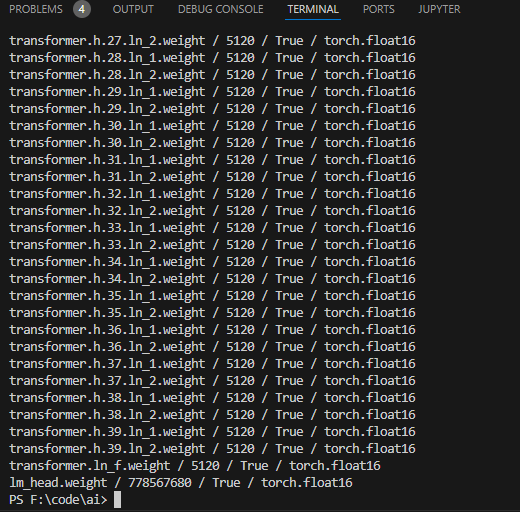
前面输出模型信息时,看到有40层,也可以输出每一层看看里面的参数:
计算下模型总参数量:
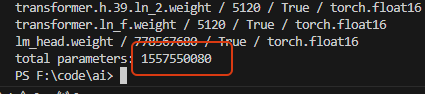
差不多就是14B的量级了。


 5886
5886


 被折叠的 条评论
为什么被折叠?
被折叠的 条评论
为什么被折叠?
 到【灌水乐园】发言


