


一、nginx特性介绍
nginx优点
nginx是一个高性能web的反向代理服务器,Apache擅长处理动态资源,nginx擅长处理静态资源。
1.在高并发的情况下nginx是Apache服务器不错替代品能支持50000个并发连接数相应。
2.使用epoll and kqueue作为开发模型
3.作为负载均衡服务器:nginx可支持PHP程序对外进行服务,也支持HTTP代理服务器对外进行服务。
4nginx消耗CPU资源小,3万并发连接下10个nginx一共只消耗150M内存。
5.配置简单成本低廉,支持Rewrite重写规则
6.内置的健康检查功能:后台某台服务器出问题了,不会影响前台访问
7.节省带宽稳定性高、支持动态编译
8.外围开发好模块多,可以不停重载配置文件
Nginx 的扩展功能
基于名称和IP的虚拟主机
支持keepalive
支持平滑升级
定制访问日志,支持使用日志缓冲区提高日志存储性能
支持URL重写
支持路径别名
支持基于IP及用户的访问控制
支持速率限制,支持并发数限制
Nginx 的应用类别
使用nginx结合FastCGI运行的PHP、 JSP 、Perl等程序
使用nginx作反代理、负载均衡、过滤规则
使用nginx运行静态HTML网页、图片
nginx与其他新技术的结合应用
nginx的模块分类
nginx的模块从结构上分为核心模块、基础模块和第三方模块
HTTP模块、EVENT模块和MAIL模块等属于核心模块
HTTP Access模块、HTTP FastCGI模块、HTTP Proxy模块和HTTP Rewrite模块属于基本模块
HTTP Upstream模块、Request Hash模块、Notice模块和HTTP Access Key模块属于第三方模块
二、安装nginx
01、关闭防火墙和setLinux
[root@localhost ~]# setenforce 0                                                                 \\关闭setlinux
[root@localhost ~]# systemctl stop firewalld                                             \\关闭防火墙
[root@localhost ~]#yum -y install wget vim
02、安装nginx软件建立环境
[root@localhost ~]# useradd -r -M -s /sbin/nologin nginx                        \\创建用户
[root@localhost ~]# mkdir -p /var/log/nginx                                      \\创建文件夹
[root@localhost ~]# chown -R nginx.nginx /var/log/nginx                         \\授权文件夹
[root@localhost ~]# cd /usr/src/
[root@localhost ~]#yum -y install wget
[root@localhost src]# wget http://nginx.org/download/nginx-1.12.0.tar.gz
[root@localhost src]#
[root@localhost ~]# yum -y install pcre-devel openssl openssl-devel gd-devel gcc gcc-c++
[root@localhost src]# tar -xf nginx-1.12.0.tar.gz                                           \\解压
[root@localhost src]# ls
debug  kernels  nginx-1.12.0  nginx-1.12.0.tar.gz
[root@localhost src]# cd nginx-1.12.0
[root@localhost nginx-1.12.0]# ./configure \                                                   \\编译安装
--prefix=/usr/local/nginx \
--user=nginx \
--group=nginx \
--with-debug \
--with-http_ssl_module \
--with-http_realip_module \
--with-http_image_filter_module \
--with-http_gunzip_module \
--with-http_gzip_static_module \
--with-http_stub_status_module \
--http-log-path=/var/log/nginx/access.log \
--error-log-path=/var/log/nginx/error.log
[root@localhost nginx-1.12.0]# make -j $(grep 'processor' /proc/cpuinfo | wc-l) && make install
三、对nginx进行配置
[root@localhost ~]# echo 'export PATH=/usr/local/nginx/sbin:$PATH' > /etc/profile.d/nginx.sh  \\环境配置
[root@localhost nginx-1.12.0]# . /etc/profile.d/nginx.sh
[root@localhost ~]# nginx -c /usr/local/nginx/conf/nginx.conf                \\可指定读取的文件(此项也可以不输入)
[root@localhost nginx-1.12.0]# nginx
[root@localhost nginx-1.12.0]# ss -antl
State       Recv-Q Send-Q                                                           Local Address:Port                                                                          Peer Address:Port
LISTEN      0      128                                                                          *:80                                                                                       *:*
LISTEN      0      128                                                                          *:22                                                                                       *:*
LISTEN      0      100                                                                  127.0.0.1:25                                                                                       *:*
LISTEN      0      128                                                                         :::22                                                                                      :::*
LISTEN      0      100                                                                        ::1:25                                                                                      :::*
在浏览器输入自己的ip:192.168.69.134显示如图成功

[root@localhost ~]# cd /usr/local/nginx/html/
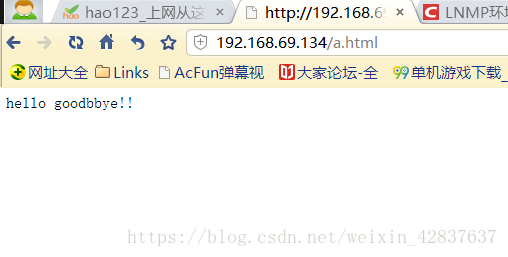
[root@localhost html]# vim a.html \\尝试创建html文件
hello goodbbye!!
在浏览器中输入:192.168.69.134/a.html,成功读取
四、关于nginx的一些配置设置
第一种在关于访问html的配置
大家注意如果需要把浏览文件放在某一个文件夹下
第一必须在/usr/local/nginx/html/目录下创建
第二必须第一修改配置在,举例子例如创建一个文件夹名字叫xiaoming
[root@localhost ~]# vim /usr/local/nginx/conf/nginx.conf
        location / {
            root   html;
            index  index.html index.htm;
        }

        location /xiaoming {                                              \\以下为增加项目
            root   html;
            index  index.html index.htm;
        }
第三我们创建目录和文件
[root@localhost html]# mkdir xiaoming
[root@localhost html]# cd xiaoming
[root@localhost xiaoming]# b.html
[root@localhost xiaoming]# vim b.htm
hello wo shi xiaoming
[root@localhost xiaoming]# nginx -s reload      \\重新加载nginx
在浏览器输入192.168.69.134/xiaoming/b.html
显示如下验证成功


 2066
2066


 被折叠的 条评论
为什么被折叠?
被折叠的 条评论
为什么被折叠?
 到【灌水乐园】发言


