


版本
AntdPro-Simple:V5.2.0(框架内置Umi版本V3.5.0)
@reduxjs/toolkit: V1.8.5
redux-persist: V6.0.0 (持久化存储)
redux-thunk: V2.4.1
1.新建redux仓库
src/store/index.ts
import { combineReducers } from 'redux'
import thunk from 'redux-thunk'
// 持久化存储
import { configureStore } from '@reduxjs/toolkit'
import { persistReducer, persistStore } from 'redux-persist'
import storage from 'redux-persist/es/storage'

import userInfoSlice from '@/store/slice/userInfoSlice'
import SimpleData from '@/store/slice/asyncSlice'
// 缓存数据配置
const persistConfig = {
    key: 'root',
    storage,
    blacklist: [ 'modalInfo', 'userInfoSlice', 'SimpleData' ] // 写在这块的数据不会存在storage
}

const reducers = combineReducers({
    userInfoSlice,
    SimpleData
})

const persistedReducer = persistReducer(persistConfig, reducers)

export const store = configureStore({
    reducer: persistedReducer,
    devTools: process.env.NODE_ENV !== 'production',
    middleware: [ thunk ]
})

export const persist = persistStore(store) // 数据持久化存储
2. 新建layouts组件
src/layouts/index.tsx
import { persist, store } from '@/store'
import { Provider } from 'react-redux'
import { PersistGate } from 'redux-persist/integration/react'

export default (props: { children: any }) => (
    <Provider store={store}>
        <PersistGate persistor={persist}>
            {props.children}
        </PersistGate>
    </Provider>
)
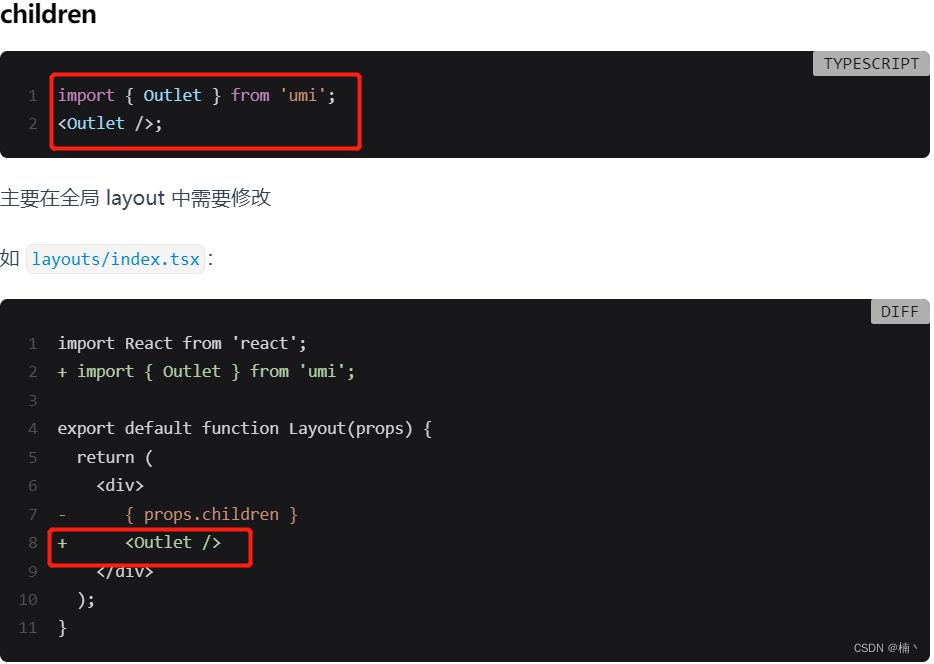
上面写法只适用于Umi3.x版本,因Umi4.x之后用的是V6.x版本的react-router-dom,所以要按照以下写法来更改:
3.配置路由
export const routes = [
    {
        path: '/login',
        layout: false,
        component: './Login'
    },
    {
        path: '/',
        redirect: '/page/pageA'
    },
    {
        flatMenu: true,
        component: '@/layouts/index',
        access: 'canSeeView',
        routes: [
            {
                name: 'PageA',
                path: '/page',
                icon: 'crown',
                routes: [
                    {
                        name: 'PageA-A',
                        path: '/page/pageA',
                        component: './PageA'
                    },
                    {
                        name: 'PageA-B',
                        path: '/page/pageB',
                        component: './PageB',
                    },
                    {
                        component: './404'
                    }
                ]
            },
            {
                name: 'PageB',
                path: '/PageB',
                component: './PageB'
            }
        ]
  ]
接下来就可以在store中新建slice, 然后在UI组件中使用了。


 735
735


 被折叠的 条评论
为什么被折叠?
被折叠的 条评论
为什么被折叠?
 到【灌水乐园】发言


