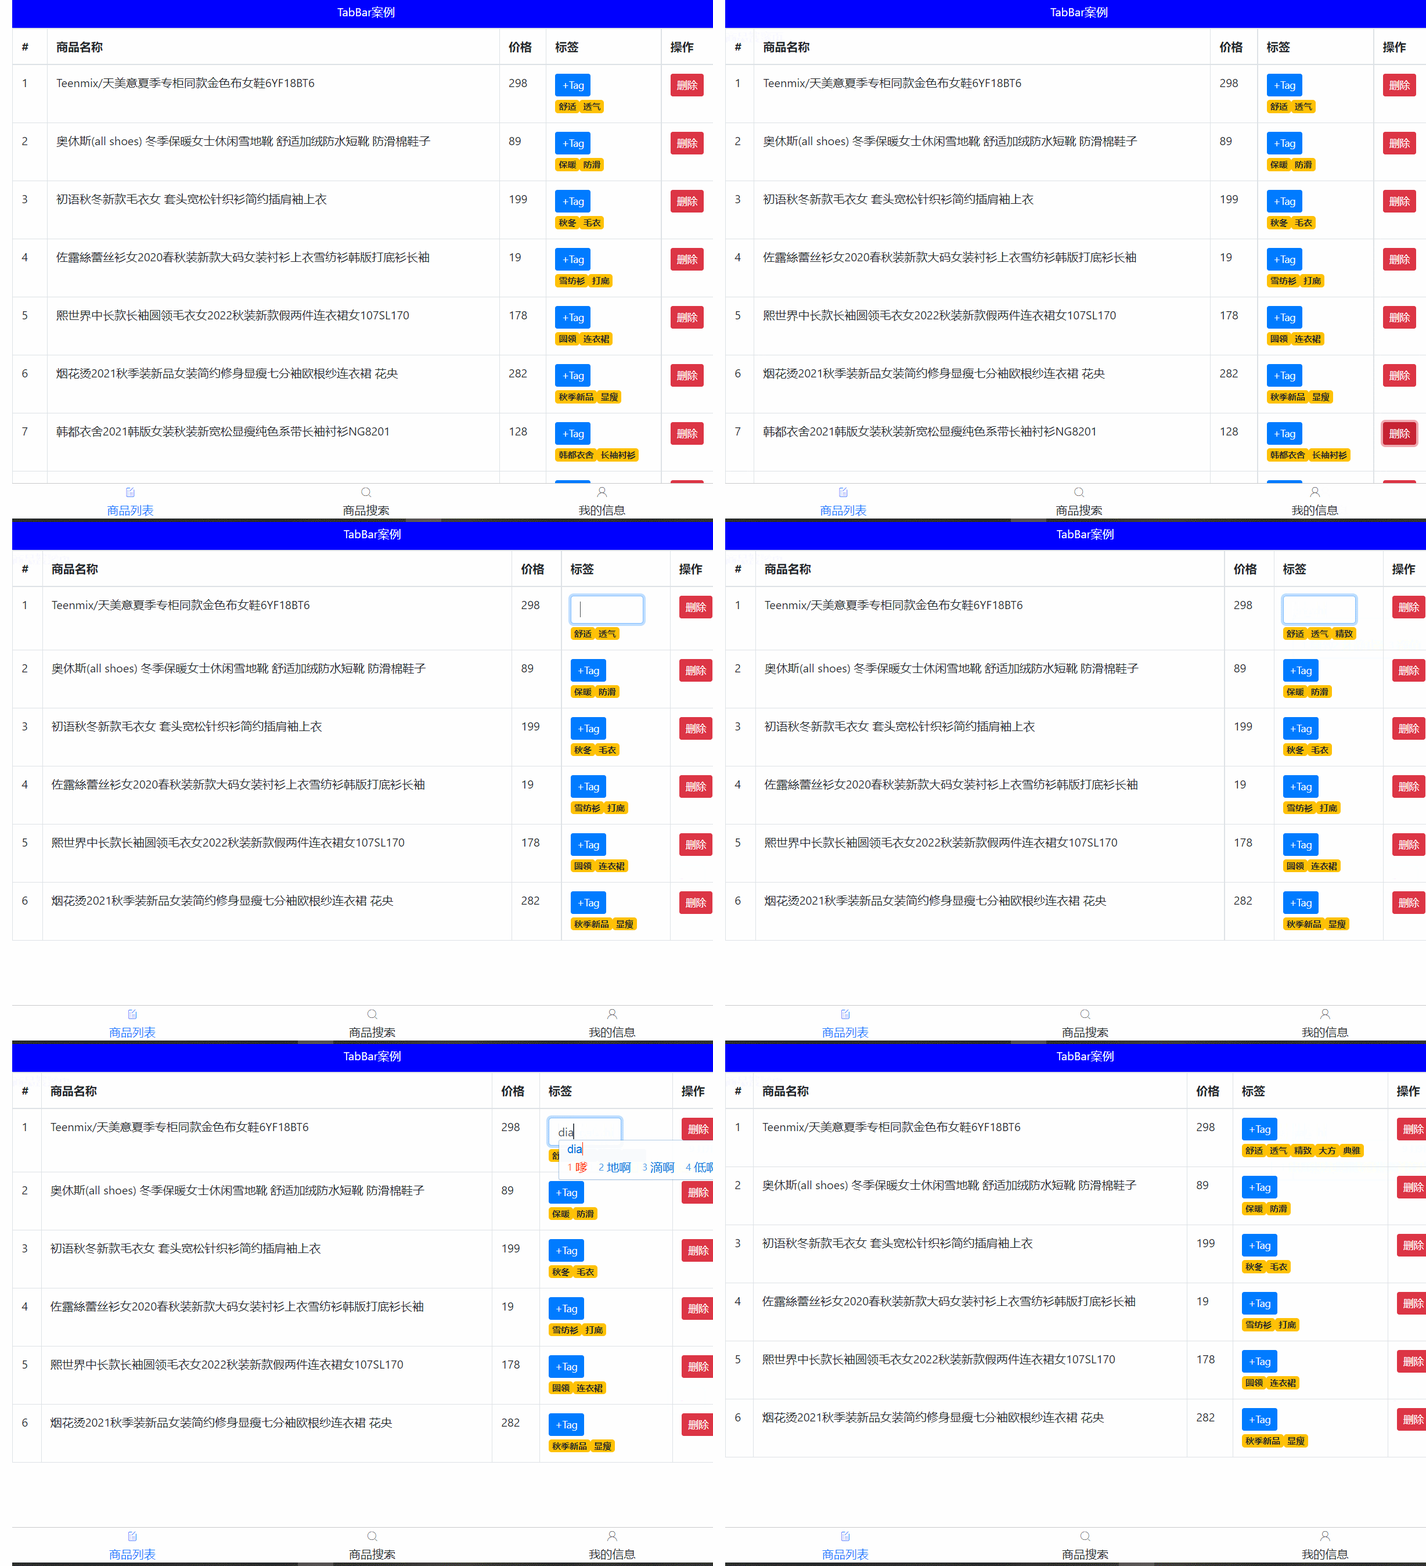
最终实现的大致效果如下:

这里一样采用组件封装的方式,大致如下:
组件拆分:
- MyHeader.vue – 复用之前的(上一个案例 vue--实现购物车 时里面封装的 头部组件)
- MyTabBar.vue – 底部导航
- MyTable.vue – 封装表格
三个页面
- - MyGoodsList.vue – 商品页
- - MyGoodsSearch.vue – 搜索页
- - MyUserInfo.vue – 用户信息页
需要安装的第三方包:
npm install less less-loader@5.0.0 -D
npm install bootstrap --save 并在main.js 引入和全局属性
npm install axios --save 并在main.js 引入和全局属性
在 components 下分别新建 MyHeader.vue、MyTabBar.vue、MyTable.vue三个组件
然后再在 src 下新建 views 目录,并在该目录下分别新建 MyGoodsList.vue、MyGoodsSearch.vue、MyUserInfo.vue 三个组件页面
在 App.vue 里先引入注册和使用头部组件并且将头部的背景颜色、字体颜色、标题传递给 MyHeader.vue ,在 MyHeader.vue 通过 props 进行接收:
App.vue,
<MyHeader :background="'blue'" :fontColor="'white'" title="TabBar案例"></MyHeader>MyHeader.vue,
<template>
  <div class="my-header"
       :style="{backgroundColor: background, color: color}"
  >{{title}}</div>
</template>

<script>
export default {
  props: {
    // 注意:外界在使用时,需要遵守变量名作为属性名,值的类型也要遵守
    background: String, // 外界传入此变量的类型为字符串
    color: {
      type: String, // 约束 color 值的类型
      default: '#fff', // 当前 color 的默认值(外界不传时使用默认值)
    },
    title: {
      type: String,
      required: true // 必须传入此变量的值
    }
  }
}
</script>

<style lang="less" scoped>
.my-header {
  height: 45px;
  line-height: 45px;
  text-align: center;
  background-color: #1d7bff;
  color: #fff;
  position: fixed;
  top: 0;
  left: 0;
  width: 100%;
  z-index: 2;
}
</style>
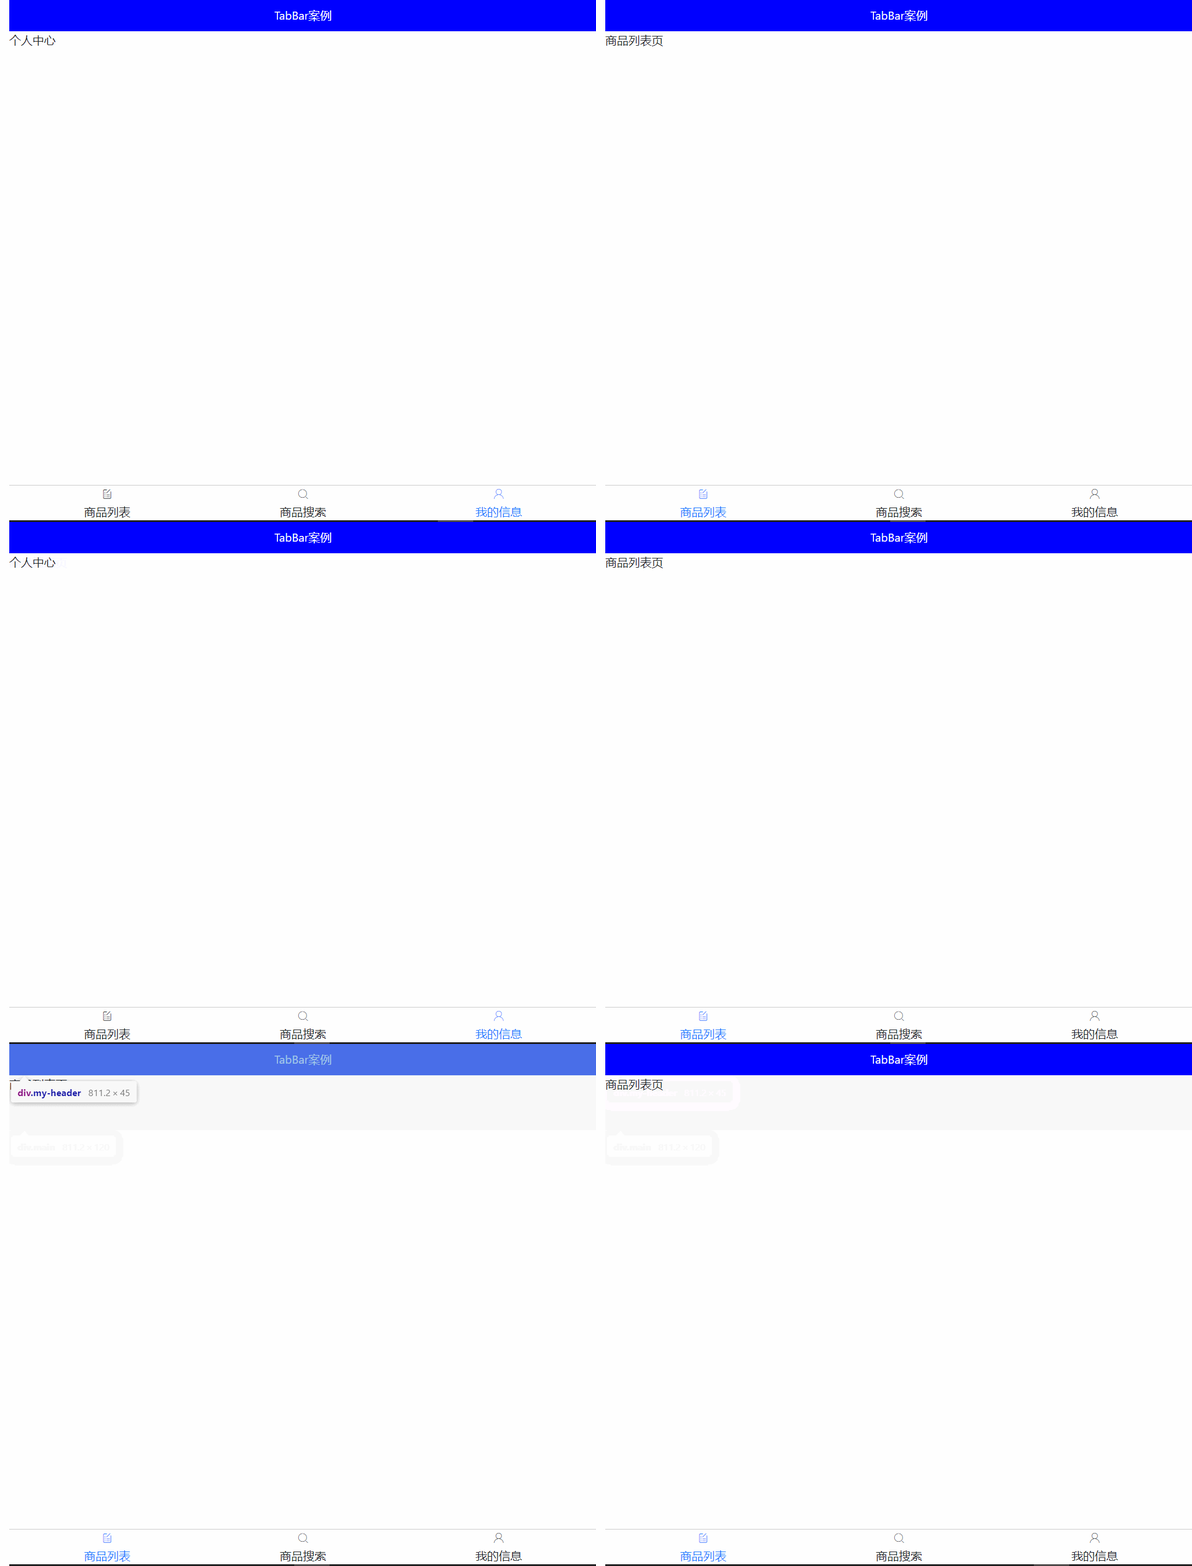
这样头部也就完成了,效果如下:

完成底部封装,也就是 MyTabBar.vue 导航:
将 TabBar 需要的字体图标放入 assets 里,并在 main.js 里引入
main.js,
import './assets/fonts/iconfont.css' // 引入字体图标的 css在 MyTabBar.vue 里完成基本的结构和样式
MyTabBar.vue,
<template>
  <div class="my-tab-bar">
  	<div class="tab-item">
      <!-- 图标 -->
      <span class="iconfont"></span>
      <!-- 文字 -->
      <span></span>
    </div>
  </div>
</template>

<script>
export default {

}
</script>

<style lang="less" scoped>
.my-tab-bar {
  position: fixed;
  left: 0;
  bottom: 0;
  width: 100%;
  height: 50px;
  border-top: 1px solid #ccc;
  display: flex;
  justify-content: space-around;
  align-items: center;
  background-color: white;
  .tab-item {
    display: flex;
    flex-direction: column;
    align-items: center;
  }
}

.current {
  color: #1d7bff;
}
</style>
为tabbar组件指定数据源 (数据源最少2个, 最多5个(validator) )
App.vue,
  data () {
    return {
      tabList: [
    {
        iconText: "icon-shangpinliebiao",
        text: "商品列表",
        componentName: "MyGoodsList"
    },
    {
        iconText: "icon-sousuo",
        text: "商品搜索",
        componentName: "MyGoodsSearch"
    },
    {
        iconText: "icon-user",
        text: "我的信息",
        componentName: "MyUserInfo"
    }
  ]
    }
  }
将 MyTabBar.vue 在 App.vue 里引入注册和使用,并通过 v-bind 传入底部导航的数据源
App.vue,
<MyTabBar :tabList="tabList"></MyTabBar>在 MyTabBar.vue 里通过 props 接收传入的数据并循环进行展示
MyTabBar.vue,
  	<div class="tab-item" v-for="(obj, index) in tabList" :key="index">
      <!-- 图标 -->
      <span class="iconfont" :class="obj.iconText"></span>
      <!-- 文字 -->
      <span>{{obj.text}}</span>
    </div>


    props: {
    tabList: {
      type: Array,
      required: true,
      // 自定义校验规则
      validator(val){ // val 其实就是接到的数组
        if(val.length >= 2 && val.length <= 5){
          return true // 符合条件
        }else{
          console.error('数据源必须2~5项');
          return false
        }
      }
    }
  }
这样也就实现了:

实现点击底部导航完成点谁谁高亮显示效果:
给每个 TabBar 绑定点击事件, 并传入对应的索引
MyTabBar.vue,
<div class="tab-item" v-for="(obj, index) in tabList" :key="index" @click="btn(index)">利用遍历的索引, 和点击保存的索引进行比较, 判断是否相等,若相同则给当前循环的标签设置动态class使其高亮显示,反之不高亮显示
  <div class="my-tab-bar">
  	<div class="tab-item"
    v-for="(obj, index) in tabList"
    :key="index"
    @click="btn(index)"
    :class="{current: index === selIndex}"
    >


    data () {
    return {
      selIndex: 0  // 默认第一个高亮
    }
   },


    methods: {
    btn(index){
      this.selIndex = index // 点谁就把谁的索引值保存起来
     }
   }

  .current {
    color: #1d7bff;
  }
最后效果如下:

点击底部 TabBar 实现切换中间的内容组件
一个挂载点需要切换不同的组件显示需要用到动态组件或者是路由,这里以动态组件为例
将新建好的 MyGoodsList.vue、MyGoodsSearch.vue、MyUserInfo.vue 三个组件在 App.vue 里引入注册
App.vue ,
    <div class="main">
      <component :is="comName"></component>
    </div>


    data () {
    return {
      comName: 'MyGoodsList', // 默认显示的组件
    }
  },
利用动态组件 component 里的 :is 属性来指定需要显示的组件名,默认显示 商品列表页
实现点击 TabBar 时进行显示不同的页面组件,在 MyTabBar.vue 里当点击导航时同时也需要将obj传递到点击事件里,然后在点击事件中通过 $emit 将 obj 里面的 componentName 传递给 App.vue ,在App.vue 里通过 v-on 自定义事件进行接收
MyTabBar.vue,
  	<div class="tab-item"
    v-for="(obj, index) in tabList"
    :key="index"
    @click="btn(index, obj)"
    :class="{current: index === selIndex}"
    >


    methods: {
    btn(index, obj){
      this.selIndex = index // 点谁就把谁的索引值保存起来
      // 把要切换的组件名传给父类
      this.$emit('changeCom', obj.componentName)
     }
    }
App.vue,
<MyTabBar :tabList="tabList" @changeCom="changeConFn"></MyTabBar>

  methods: {
    changeConFn(cName){
      // 将 MyTabBar.vue 里选出的组件名赋予给 is 属性的 comName 即可实现组件切换
      this.comName = cName
    }
  }


  .main {
    padding: 45px 0 51px 0;
   }
最后效果如下:

完成 商品列表 页面的数据填充:
封装MyTable.vue – 准备标签和样式
MyTable.vue,
<template>
  <table class="table table-bordered table-stripped">
    <!-- 表格标题区域 -->
    <thead>
      <tr>
        <th>#</th>
        <th>商品名称</th>
        <th>价格</th>
        <th>标签</th>
        <th>操作</th>
      </tr>
    </thead>
    <!-- 表格主体区域 -->
    <tbody>
      <tr >
        <td>1</td>
        <td>商品</td>
        <td>998</td>
        <td>xxx</td>
        <td>xxx</td>
      </tr>
    </tbody>
  </table>
</template>

<script>
export default {
  name: 'MyTable'
}
</script>


<style scoped lang="less">
.my-goods-list {
  .badge {
    margin-right: 5px;
  }
}
</style>
在 MyGoodsList.vue 里引入注册和使用
MyGoodsList.vue,
<MyTable></MyTable>大致效果如下:

在 main.js 里引入 bootstrap并配置axios的基地址
import 'bootstrap/dist/css/bootstrap.css'

import axios from 'axios'
// 配置基础地址
axios.defaults.baseURL = 'https://www.escook.cn'
// 将 axios 添加到 vue 原型上,这样就可在项目的任意地方使用
Vue.prototype.$axios = axios
在 MyGoodsList.vue 里请求数据并处理,然后在 data 里定义一个变量 list 保存请求到的数据,并通过 父传子 将保存好的数据传递给 MyTable.vue
MyGoodsList.vue,
    <MyTable :arr="list"></MyTable>

    data () {
    return {
      list: []
    }
  },
  created () {
    // 因为 axios 已经挂载到了全局上,因此无需引入,直接使用即可
    this.$axios({
      method: 'GET',
      url: '/api/goods'
    }).then(res => {
      // console.log(res);
      this.list = res.data.data
    }).catch(err => {
      console.log(err);
    })
  }
在 MyTable.vue 里通过 props 进行接收,并遍历数据
MyTable.vue,
  props: {
    arr: {
      type: Array,
      default: []
    }
  }


       <tbody>
      <tr v-for="obj in arr" :key="obj.id">
        <td>{{obj.id}}</td>
        <td>{{obj.goods_name}}</td>
        <td>{{obj.goods_price}}</td>
        <td>{{obj.tags}}</td>
        <td>
          <button class="btn btn-danger btn-sm">删除</button>
        </td>
      </tr>
    </tbody>
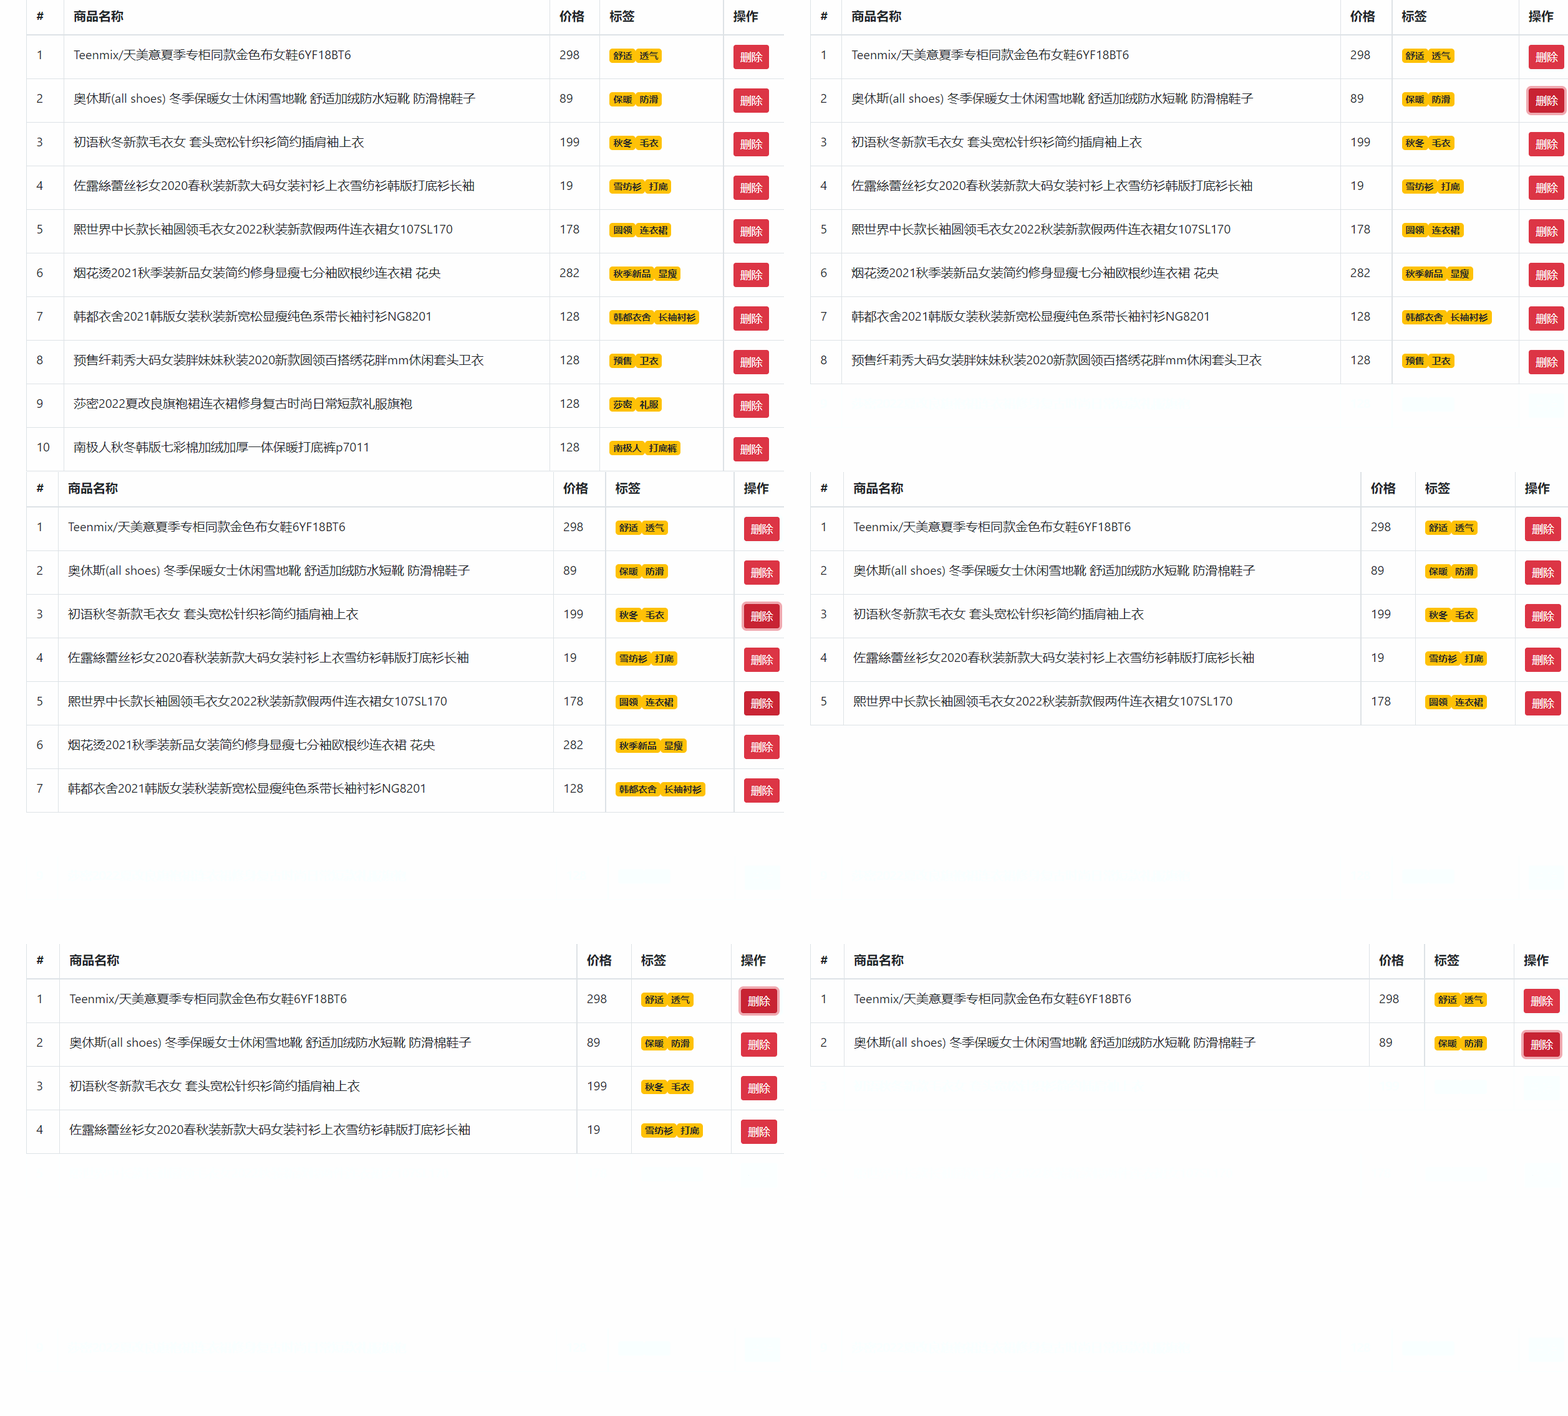
效果如下:

实现允许用户自定义表格头和表格单元格内容:
之前在 MyTable.vue 里将表格头都写死了,这样不利于复用

因此为了实现可以复用,我们可以将 tr里面的内容 换成 slot 插槽

同理我们也应该将表格的主体区域 tr 里的 td 换成 slot 插槽

这样可以最大程度上实现组件复用
然后在 MyGoodsList.vue 里通过 <template v-slot:>进行自定义
MyGoodsList.vue,
  <div>
    <MyTable :arr="list">
      <!-- v-slot: 等价于 # -->
      <template #header>
        <th>#</th>
        <th>商品名称</th>
        <th>价格</th>
        <th>标签</th>
        <th>操作</th>
      </template>
      <template v-slot: = 'body'>
        <td>{{obj.id}}</td>
        <td>{{obj.goods_name}}</td>
        <td>{{obj.goods_price}}</td>
        <td>{{obj.tags}}</td>
        <td>
          <button class="btn btn-danger btn-sm">删除</button>
        </td>
      </template>
    </MyTable>
  </div>
由于在 tbody 里需要用到 MyTable.vue 里的数据,因此需要通过 作用域插槽 将数据传递过去
MyTable.vue,
<slot name="body" :row="obj"></slot>在 MyGoodsList.vue 里的 template 标签里接收:
MyGoodsList.vue,
      <!-- scope的值:{row: obj} -->
      <template v-slot:body = 'scope'>
        <td>{{scope.row.id}}</td>
        <td>{{scope.row.goods_name}}</td>
        <td>{{scope.row.goods_price}}</td>
        <td>{{scope.row.tags}}</td>
        <td>
          <button class="btn btn-danger btn-sm">删除</button>
        </td>
      </template>
最后效果如下:

实现商品表格_tags铺设,使其标签列自定义显示:
![]()
在插槽里传入 td 标签
然后自定义 span 标签进行循环展示并传入样式
MyGoodsList.vue,
      <template v-slot:body = 'scope'>
           ...
        <td>
          <span v-for="(val, index) in scope.row.tags" :key="index" class="badge badge-warning">
            {{val}}
          </span>
        </td>
        ...
      </template>
效果如下:

实现点击删除按钮删除数据:
给删除按钮绑定点击事件
利用作用域插槽绑定id值,传给删除方法, 删除MyGoodsList.vue里数组里数据
MyGoodsList.vue,
<button class="btn btn-danger btn-sm" @click="delBtn(scope.row.id)">删除</button>通过对应的 id 查找数组里的数据对应的索引实现删除
MyGoodsList.vue,
  methods: {
    delBtn(id){
      const index = this.list.findIndex(obj => {
        obj.id === id
      })
      this.list.splice(index, 1)
    }
  }
效果如下:

实现商品表格_添加tab:
需求,
- 点击Tab, 按钮消失, 输入框出现
- 输入框自动聚焦
- 失去焦点, 输入框消失, 按钮出
- 监测input回车, 无数据拦截
- 监测input取消, 清空数据
- 监测input回车, 有数据添加
准备静态Tab标签按钮 – 并绑定事件,当点击按钮时,按钮消失输入框出现,这里利用 v-if 实现
MyGoodsList.vue,
      <template v-slot:body = 'scope'>
       ...
        <td>
          <input
          class="tag-input form-control"
          style="width: 100px;"
          type="text"
          v-if="scope.row.inputVisible"
          />
          <button
          v-else
          style="display: block;"
          class="btn btn-primary btn-sm add-tag"
          @click="scope.row.inputVisible = true"
          >+Tag</button>
         ...
        </td>
       ...
      </template>
在 main.js 里通过自定义指令, 让输入框自动聚焦
main.js,
// 全局指令
Vue.directive('gfocus', {
  inserted(el){
    // console.log(el);
    el.focus() // 触发标签的事件方法
  }
})
MyGoodsList.vue,
      <template v-slot:body = 'scope'>
       ...
        <td>
          <input
             ...
            v-gfocus
          />
         ...
        </td>
       ...
      </template>
监测失去焦点事件 – 给关联的对象属性设置 – 影响标签出现/隐藏
MyGoodsList.vue,
      <template v-slot:body = 'scope'>
       ...
        <td>
          <input
             ...
            @blur="scope.row.inputVisible = false"
          />
         ...
        </td>
       ...
      </template>
监测input的回车, 判断是否有值 – 给出提示 / 添加数据
监测input的取消, 清空数据
MyGoodsList.vue,
      <template v-slot:body = 'scope'>
       ...
        <td>
          <input
             ...
            @keydown.enter="enterFn(scope.row)"
            v-model="scope.row.inputValue"
            @keydown.esc="scope.row.inputValue = ''"
          />
         ...
        </td>
       ...
      </template>


   methods: {
    // 回车
    enterFn(obj){
      if(obj.inputValue.trim().length === 0) {
        alert('请输入数据')
        return
      }
      // 将表单里的数据添加到数组里的tags里
      obj.tags.push(obj.inputValue)

      obj.inputValue = ''
    }
  },
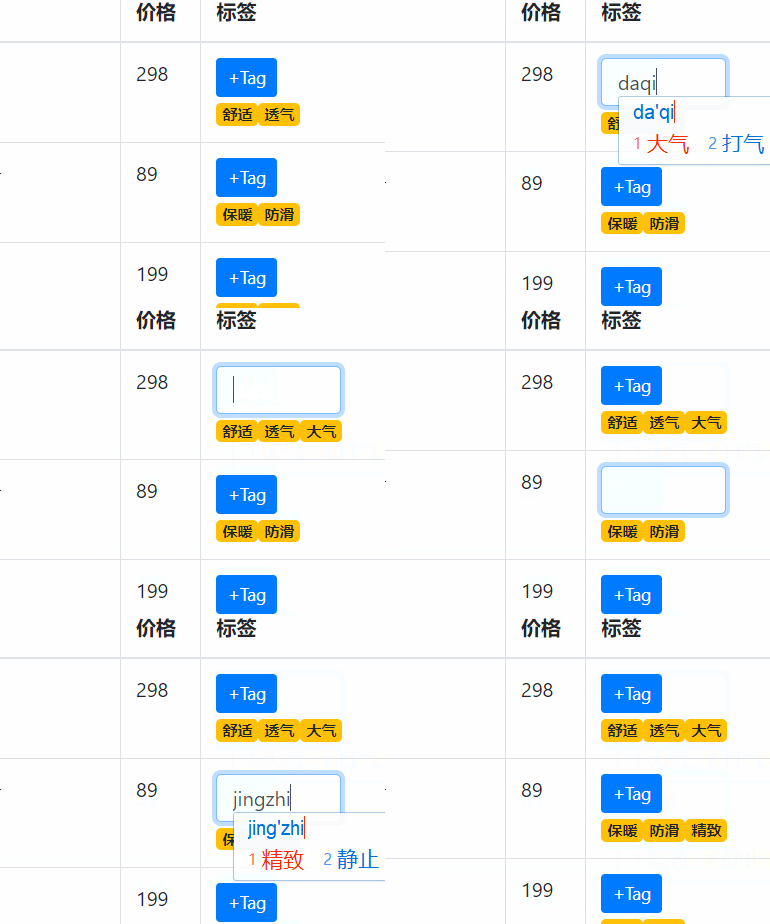
效果如下:

本案例的最终效果和源码:

main.js,
import 'bootstrap/dist/css/bootstrap.css'
import './assets/fonts/iconfont.css' // 引入字体图标的 css

import axios from 'axios'
// 配置基础地址
axios.defaults.baseURL = 'https://www.escook.cn'
// 将 axios 添加到 vue 原型上,这样就可在项目的任意地方使用
Vue.prototype.$axios = axios

// 全局指令
Vue.directive('gfocus', {
  inserted(el){
    // console.log(el);
    el.focus() // 触发标签的事件方法
  }
})
App.vue,
<template>
  <div>
    <MyHeader :background="'blue'" :fontColor="'white'" title="TabBar案例"></MyHeader>
    <div class="main">
      <component :is="comName"></component>
    </div>
    <MyTabBar :tabList="tabList" @changeCom="changeConFn"></MyTabBar>
  </div>
</template>

<script>
import MyHeader from './components/MyHeader'
import MyTabBar from './components/MyTabBar'
import MyGoodsList from './views/MyGoodsList'
import MyGoodsSearch from './views/MyGoodsSearch'
import MyUserInfo from './views/MyUserInfo'
export default {
  components: {
    MyHeader,
    MyTabBar,
    MyGoodsList,
    MyGoodsSearch,
    MyUserInfo
  },
  data () {
    return {
      comName: 'MyGoodsList', // 默认显示的组件
      tabList: [
    {
        iconText: "icon-shangpinliebiao",
        text: "商品列表",
        componentName: "MyGoodsList"
    },
    {
        iconText: "icon-sousuo",
        text: "商品搜索",
        componentName: "MyGoodsSearch"
    },
    {
        iconText: "icon-user",
        text: "我的信息",
        componentName: "MyUserInfo"
    }
  ],
    }
  },
  methods: {
    changeConFn(cName){
      // 将 MyTabBar.vue 里选出的组件名赋予给 is 属性的 comName 即可实现组件切换
      this.comName = cName
    }
  }
}
</script>
<style scoped>
.main {
  padding: 45px 0 51px 0;
}
</style>
MyHeader.vue,
<template>
  <div class="my-header"
       :style="{backgroundColor: background, color: color}"
  >{{title}}</div>
</template>

<script>
export default {
  props: {
    // 注意:外界在使用时,需要遵守变量名作为属性名,值的类型也要遵守
    background: String, // 外界传入此变量的类型为字符串
    color: {
      type: String, // 约束 color 值的类型
      default: '#fff', // 当前 color 的默认值(外界不传时使用默认值)
    },
    title: {
      type: String,
      required: true // 必须传入此变量的值
    }
  }
}
</script>

<style lang="less" scoped>
.my-header {
  height: 45px;
  line-height: 45px;
  text-align: center;
  background-color: #1d7bff;
  color: #fff;
  position: fixed;
  top: 0;
  left: 0;
  width: 100%;
  z-index: 2;
}
</style>
MyTable.vue,
<template>
  <table class="table table-bordered table-stripped">
    <!-- 表格标题区域 -->
    <thead>
      <tr>
        <!-- <th>#</th>
        <th>商品名称</th>
        <th>价格</th>
        <th>标签</th>
        <th>操作</th> -->
        <slot name="header"></slot>
      </tr>
    </thead>
    <!-- 表格主体区域 -->
    <tbody>
      <tr v-for="obj in arr" :key="obj.id">
        <!-- <td>{{obj.id}}</td>
        <td>{{obj.goods_name}}</td>
        <td>{{obj.goods_price}}</td>
        <td>{{obj.tags}}</td>
        <td>
          <button class="btn btn-danger btn-sm">删除</button>
        </td> -->
        <slot name="body" :row="obj"></slot>
      </tr>
    </tbody>
  </table>
</template>

<script>
export default {
  name: 'MyTable',
  props: {
    arr: {
      type: Array,
      default: []
    }
  }
}
</script>


<style scoped lang="less">
.my-goods-list {
  .badge {
    margin-right: 5px;
  }
}
</style>
MyTabBar.vue,
<template>
  <div class="my-tab-bar">
  	<div class="tab-item"
    v-for="(obj, index) in tabList"
    :key="index"
    @click="btn(index, obj)"
    :class="{current: index === selIndex}"
    >
      <!-- 图标 -->
      <span class="iconfont" :class="obj.iconText"></span>
      <!-- 文字 -->
      <span>{{obj.text}}</span>
    </div>
  </div>
</template>

<script>
export default {
  props: {
    tabList: {
      type: Array,
      required: true,
      // 自定义校验规则
      validator(val){ // val 其实就是接到的数组
        if(val.length >= 2 && val.length <= 5){
          return true // 符合条件
        }else{
          console.error('数据源必须2~5项');
          return false
        }
      }
    }
  },
  data () {
    return {
      selIndex: 0  // 默认第一个高亮
    }
  },
  methods: {
    btn(index, obj){
      this.selIndex = index // 点谁就把谁的索引值保存起来
      // 把要切换的组件名传给父类
      this.$emit('changeCom', obj.componentName)
    }
  }
}
</script>

<style lang="less" scoped>
.my-tab-bar {
  position: fixed;
  left: 0;
  bottom: 0;
  width: 100%;
  height: 50px;
  border-top: 1px solid #ccc;
  display: flex;
  justify-content: space-around;
  align-items: center;
  background-color: white;
  .tab-item {
    display: flex;
    flex-direction: column;
    align-items: center;
  }
}

.current {
  color: #1d7bff;
}
</style>
MyGoodsList.vue,
<template>
  <div>
    <MyTable :arr="list">
      <!-- v-slot: 等价于 # -->
      <template #header>
        <th>#</th>
        <th>商品名称</th>
        <th>价格</th>
        <th>标签</th>
        <th>操作</th>
      </template>
      <!-- scope的值:{row: obj} -->
      <template v-slot:body = 'scope'>
        <td>{{scope.row.id}}</td>
        <td>{{scope.row.goods_name}}</td>
        <td>{{scope.row.goods_price}}</td>
        <td>
          <input
          class="tag-input form-control"
          style="width: 100px;"
          type="text"
          v-if="scope.row.inputVisible"
          v-gfocus
          @blur="scope.row.inputVisible = false"
          @keydown.enter="enterFn(scope.row)"
          v-model="scope.row.inputValue"
          @keydown.esc="scope.row.inputValue = ''"
          />
          <button
          v-else
          style="display: block;"
          class="btn btn-primary btn-sm add-tag"
          @click="scope.row.inputVisible = true"
          >+Tag</button>
          <span v-for="(val, index) in scope.row.tags" :key="index" class="badge badge-warning">
            {{val}}
          </span>
        </td>
        <td>
          <button class="btn btn-danger btn-sm" @click="delBtn(scope.row.id)">删除</button>
        </td>
      </template>
    </MyTable>
  </div>
</template>

<script>
import MyTable from '../components/MyTable'
export default {
  components: {
    MyTable
  },
  data () {
    return {
      list: []
    }
  },
  created () {
    // 因为 axios 已经挂载到了全局上,因此无需引入,直接使用即可
    this.$axios({
      method: 'GET',
      url: '/api/goods'
    }).then(res => {
      // console.log(res);
      this.list = res.data.data
    }).catch(err => {
      console.log(err);
    })
  },
  methods: {
    delBtn(id){
      const index = this.list.findIndex(obj => {
        obj.id === id
      })
      this.list.splice(index, 1)
    },
    // 回车
    enterFn(obj){
      if(obj.inputValue.trim().length === 0) {
        alert('请输入数据')
        return
      }
      // 将表单里的数据添加到数组里的tags里
      obj.tags.push(obj.inputValue)
      obj.inputValue = ''
    }
  },

}
</script>

<style>
</style>
MyGoodsSearch.vue,
<template>
  <div>商品搜素页</div>
</template>

<script>
export default {

}
</script>

<style>

</style>
MyUserInfo.vue,
<template>
  <div>个人中心</div>
</template>

<script>
export default {

}
</script>

<style>

</style>


 525
525


 被折叠的 条评论
为什么被折叠?


