在menu中添加checkbox的一种思路

在menu中添加checkbox的一种思路

需求描述

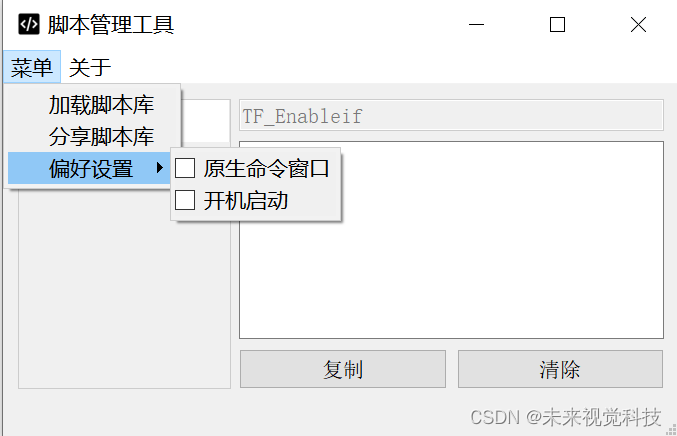
当我们利用qtdesigner创建menu后,想在menu中添加checkbox复选框,结果qtdesigner并不支持该操作
在这里插入图片描述

解决方法

找到ui转py后的文件,添加对应代码即可。
在这里插入图片描述

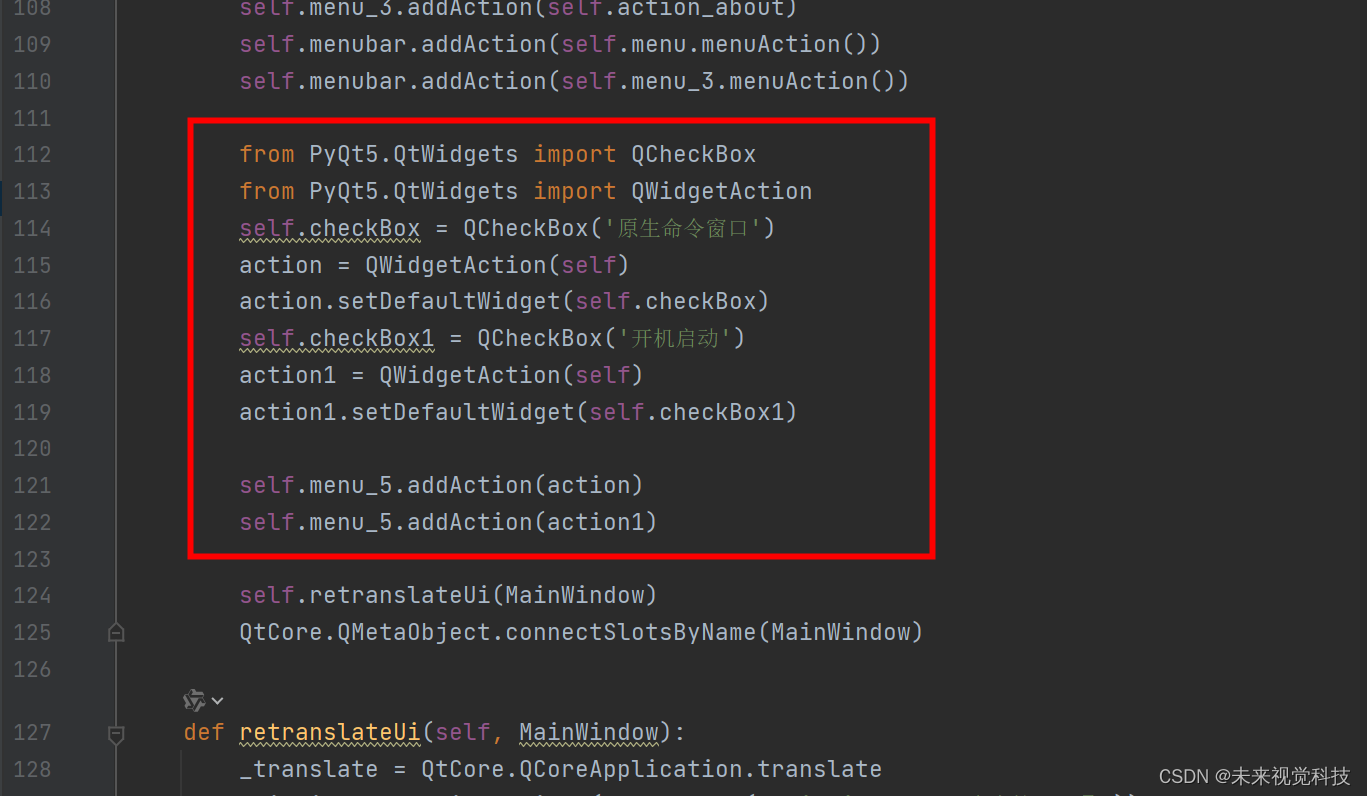
from PyQt5.QtWidgets import QCheckBox
from PyQt5.QtWidgets import QWidgetAction
self.checkBox = QCheckBox('原生命令窗口')
action = QWidgetAction(self)
action.setDefaultWidget(self.checkBox)
self.checkBox1 = QCheckBox('开机启动')
action1 = QWidgetAction(self)
action1.setDefaultWidget(self.checkBox1)

self.menu_5.addAction(action)
self.menu_5.addAction(action1)

这样你就可以得到一个带有checkbox的menu内容。
在这里插入图片描述

  • 2
    点赞
  • 2
    收藏
    觉得还不错? 一键收藏
  • 打赏
    打赏
  • 0
    评论
在Qt的QTableView添加复选框可以通过自定义一个QItemDelegate来实现。下面是一个简单的示例: 首先,我们定义一个继承自QItemDelegate的自定义委托类,名称为CheckBoxDelegate: ```cpp class CheckBoxDelegate : public QItemDelegate { public: CheckBoxDelegate(QObject* parent = nullptr) : QItemDelegate(parent) { } void paint(QPainter* painter, const QStyleOptionViewItem& option, const QModelIndex& index) const override { if (index.column() == 0) { QStyleOptionButton checkBoxOption; checkBoxOption.rect = option.rect; checkBoxOption.state = index.data(Qt::CheckStateRole).toBool() ? QStyle::State_On : QStyle::State_Off; QApplication::style()->drawControl(QStyle::CE_CheckBox, &checkBoxOption, painter); } else { QItemDelegate::paint(painter, option, index); } } QWidget* createEditor(QWidget* parent, const QStyleOptionViewItem& option, const QModelIndex& index) const override { if (index.column() == 0) { QCheckBox* checkBox = new QCheckBox(parent); return checkBox; } else { return QItemDelegate::createEditor(parent, option, index); } } void setEditorData(QWidget* editor, const QModelIndex& index) const override { if (index.column() == 0) { bool checked = index.data(Qt::CheckStateRole).toBool(); QCheckBox* checkBox = static_cast<QCheckBox*>(editor); checkBox->setChecked(checked); } else { QItemDelegate::setEditorData(editor, index); } } void setModelData(QWidget* editor, QAbstractItemModel* model, const QModelIndex& index) const override { if (index.column() == 0) { QCheckBox* checkBox = static_cast<QCheckBox*>(editor); model->setData(index, checkBox->isChecked(), Qt::CheckStateRole); } else { QItemDelegate::setModelData(editor, model, index); } } }; ``` 然后,在我们的QTableView使用这个自定义委托类来实现复选框的功能: ```cpp QTableView* tableView = new QTableView; QStandardItemModel* model = new QStandardItemModel; // 设置表格大小 model->setRowCount(3); model->setColumnCount(2); // 设置表头 model->setHeaderData(0, Qt::Horizontal, "复选框列"); model->setHeaderData(1, Qt::Horizontal, "其他列"); // 设置复选框数据 model->setData(model->index(0, 0), Qt::Checked, Qt::CheckStateRole); model->setData(model->index(1, 0), Qt::Unchecked, Qt::CheckStateRole); model->setData(model->index(2, 0), Qt::Checked, Qt::CheckStateRole); // 设置委托 CheckBoxDelegate* checkBoxDelegate = new CheckBoxDelegate(tableView); tableView->setItemDelegateForColumn(0, checkBoxDelegate); // 设置数据模型 tableView->setModel(model); ``` 上述代码创建了一个QTableView和一个QStandardItemModel,并通过数据模型设置了3行2列的数据。使用自定义委托类CheckBoxDelegate将第一列的数据设置为复选框。然后将数据模型设置到QTableView。 最后,我们通过`tableView->setModel(model)`将数据模型设置到QTableView完成复选框添加。 这样就可以在QTableView添加复选框了。记得在使用前先将相应的头文件导入:`#include <QCheckBox>`、`#include <QPainter>`、`#include <QStandardItemModel>`、`#include <QTableView>`、`#include <QItemDelegate>`。

“相关推荐”对你有帮助么?

  • 非常没帮助
  • 没帮助
  • 一般
  • 有帮助
  • 非常有帮助
提交
评论
添加红包

请填写红包祝福语或标题

红包个数最小为10个

红包金额最低5元

当前余额3.43前往充值 >
需支付:10.00
成就一亿技术人!
领取后你会自动成为博主和红包主的粉丝 规则
hope_wisdom
发出的红包

打赏作者

未来视觉科技

你的鼓励将是我创作的最大动力

¥1 ¥2 ¥4 ¥6 ¥10 ¥20
扫码支付:¥1
获取中
扫码支付

您的余额不足,请更换扫码支付或充值

打赏作者

实付
使用余额支付
点击重新获取
扫码支付
钱包余额 0

抵扣说明:

1.余额是钱包充值的虚拟货币,按照1:1的比例进行支付金额的抵扣。
2.余额无法直接购买下载,可以购买VIP、付费专栏及课程。

余额充值