


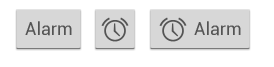
按钮(Button)由文本或图标(或文本和图标)组成,用于传达用户触摸时发生的操作。如下图三个按钮:
根据是否要使用带有文本,图标或两者的按钮,可以通过三种方式在布局中创建按钮:
对于文本,使用Button类:
<Button
    android:layout_width="wrap_content"
    android:layout_height="wrap_content"
    android:text="@string/button_text"
    ... />
带有图标或图片时,使用ImageButton类:
<ImageButton
    android:layout_width="wrap_content"
    android:layout_height="wrap_content"
    android:src="@drawable/button_icon"//调用drawable中的图标
    ... />
使用文本和图标,将Button类与android:drawableLeft属性一起使用:
<Button
    android:layout_width="wrap_content"
    android:layout_height="wrap_content"
    android:text="@string/button_text"
    android:drawableLeft="@drawable/button_icon"
    ... />
button的常见属性及属性值
| 属性 | 属性值 |
|---|---|
| android:id(唯一识别) | @android:xxx/@id/xxx |
| android:text(按钮框内容) | 自行定义 |
| android:layout_width(宽度) | match_parent(“填充满”父容器)/wrap_parent(据内容大小进行填充)/自行定义,如10dp |
| android:layout_height(高度) | 同上 |
| android:background (背景) | 例:#000000黑色/@android:color/background_light系统给出的样式、颜色或自行定义的样式颜色 |
| android:textColor(文本颜色) | 同上,支持度量单位:px(像素)/dp/sp/in/mm(毫米) |
| android:textSize(文本大小) | 如:16dp |
| android:paddingTop/paddingBottom(该控件内部内容距离该控件上/下边缘的边距) | 如:5dp |
| android:paddingRight/paddingLeft(该控件内部内容距离该控件右/左边缘的边距) | 如:10dp |
| android:layout_marginTop/layout_marginBottom(该属性所在控件的边缘与上/下部控件的边缘的距离) | |
| android:layout_marginRight/layout_marginLeft (该属性所在控件的边缘与右/左部控件的边缘的距离) | |
| android:gravity(自身内部元素的对齐方式) | center/center_vertical/center_horizontal/fill/left/right/bottom/top… |
| android:onClick(设置点击事件) | |
| android:clickable(是否允许点击) | true/false |
实现对按钮点击事件的监听:
1.使用匿名内部类
public class MainActivity extends Activity {

    @Override
    protected void onCreate(Bundle savedInstanceState) {
        super.onCreate(savedInstanceState);
        setContentView(R.layout.layout_main);
        Button btn = (Button) findViewById(R.id.btn);
        btn.setOnClickListener(new View.OnClickListener() {
            @Override
            public void onClick(View v) {
                Toast.makeText(MainActivity.this, "Clicked", Toast.LENGTH_SHORT).show();
            }
        });
    }
}
2.通过实现OnClickListener接口
public class MainActivity extends Activity implements View.OnClickListener {

    @Override
    protected void onCreate(Bundle savedInstanceState) {
        super.onCreate(savedInstanceState);
        setContentView(R.layout.activity_main);
        Button btn = (Button) findViewById(R.id.btn);
        //绑定监听
        btn.setOnClickListener(this);
    }
//重写onClick()方法
    @Override
    public void onClick(View v) {
        Toast.makeText(MainActivity.this, "Clicked", Toast.LENGTH_SHORT).show();
    }
}


 3502
3502

 被折叠的 条评论
为什么被折叠?
被折叠的 条评论
为什么被折叠?
 到【灌水乐园】发言


