


1. 场景模拟
子组件中的 add() 事件执行的时候, 使用emit调用父组件中的自定义事件,实现一次子向父组件的通信
2. 父组件页面
[1] TestEmit 为子组件,在调用过程中创建changeZidingyi() 事件,在子组件调用该方法的时候, 修改父组件中的数据
<TestEmit @changeZidingyi="sonChange" />
[2] 定义父组件中的响应数据和自定义方法,使用自定义方法中的参数获取子组件传递过来的数据
  setup() {
    let emitNum = ref(0);
    // 创建一个数据跟随子组件数据变动的方法,供子组件调用
    let sonChange = (v) => {
      emitNum.value = v;
    };

    return { emitNum, sonChange };
  },
[3] 父组件页面源码如下:
<template>
  <!-- <HelloWorld msg="Welcome to Your Vue.js App" /> -->
  <TestEmit @changeZidingyi="sonChange" />
  测试子组件向父组件通信: {{ emitNum }}
</template>

<script>
import HelloWorld from "./components/HelloWorld.vue";
import TestEmit from "./components/testEmit.vue";
import { ref } from "vue";
export default {
  name: "App",
  components: {
    HelloWorld,
    TestEmit,
  },
  setup() {
    let emitNum = ref(0);
    // 创建一个数据跟随子组件数据变动的方法,供子组件调用
    let sonChange = (v) => {
      emitNum.value = v;
    };

    return { emitNum, sonChange };
  },
};
</script>

<style>
#app {
  font-family: Avenir, Helvetica, Arial, sans-serif;
  -webkit-font-smoothing: antialiased;
  -moz-osx-font-smoothing: grayscale;
  text-align: center;
  color: #2c3e50;
  margin-top: 60px;
}
</style>
3.子组件页面 重点在于setup中传递的第二个参数context
[1] 使用emits 声明父组件中的自定义事件
emits: ["changeZidingyi"],
[2] 在子页面中使用context获取到emit中的数据 注意,context位于第二个位置,第一个位置的返回值是父传子用到的props
  setup(props, context) {
    console.log("页面中输出的数据是:", context);
    const { emit } = context;
  },
[3] 在add方法中调用emit中定义的父组件的自定义方法,并且将num的数据传递给父组件
    let num = ref(5);

    let add = () => {
      num.value++;
      emit("changeZidingyi", num.value);
    };

    return { num, add };
[4] 使用watchEffect让子组件在一开始加载的时候,就调用父组件的自定义方法,将初始值传递给父组件,保持页面数据的一致性
    // 监听num数据的变化情况
    watchEffect(() => {
      //   初始化的时候调用,保持两边数据一致
      if (num.value < 0) {
        num.value = 0;
      }
      emit("changeZidingyi", num.value);
    });
[5] 子组件全部代码如下
<template>
<dev>
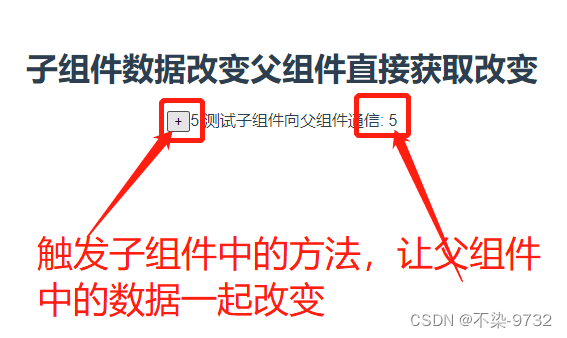
<h1>子组件数据改变父组件直接获取改变</h1>
<button @click="add()">+</button>{{ num }}
</dev>
</template>
<script>
import { ref, watchEffect } from "vue";
export default {
emits: ["changeZidingyi"],
setup(props, context) {
console.log("页面中输出的数据是:", context);
const { emit } = context;
let num = ref(5);
let add = () => {
num.value++;
emit("changeZidingyi", num.value);
};
// 监听num数据的变化情况
watchEffect(() => {
// 初始化的时候调用,保持两边数据一致
if (num.value < 0) {
num.value = 0;
}
emit("changeZidingyi", num.value);
});
return { num, add };
},
};
</script>


 6169
6169


 被折叠的 条评论
为什么被折叠?
被折叠的 条评论
为什么被折叠?
 到【灌水乐园】发言


