


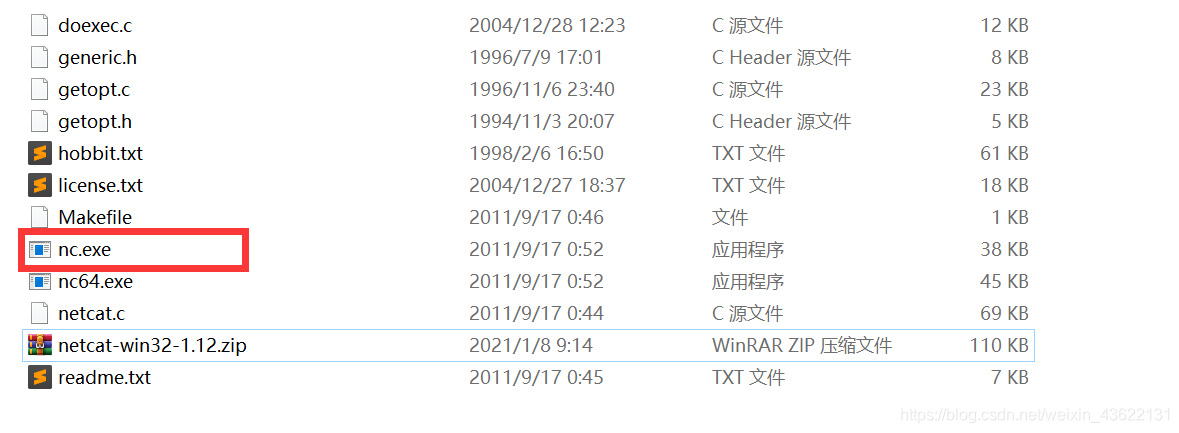
一、安装netcat
为了模拟输入流需要使用netcat工具,下载地址如下:
链接:https://pan.baidu.com/s/1mNuLCcQzRwu8R01gY5HCmQ
提取码:g336
解压后将nc.exe复制到C:\Windows\System32的文件夹下
进行测试
使用下面命令连接9000端口,向本机9000端口发送数据
nc -l -p 9000
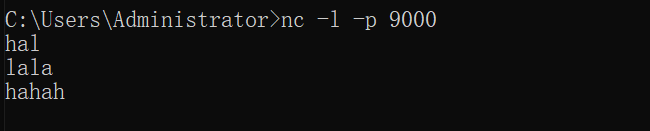
使用nc localhost 9000从9000端口读取发送的数据

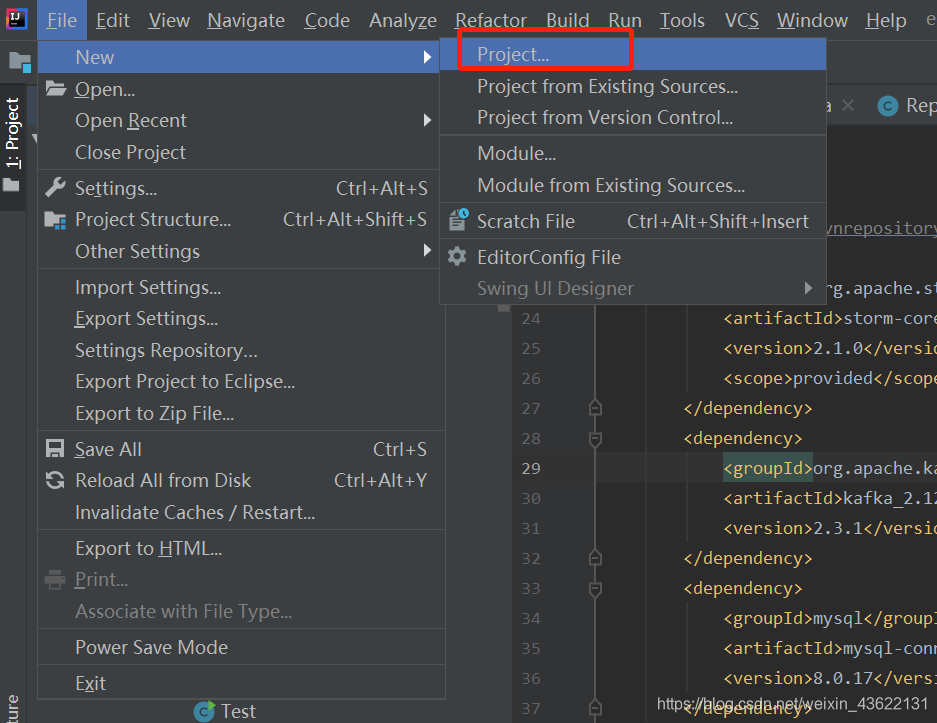
二、构建Flink项目
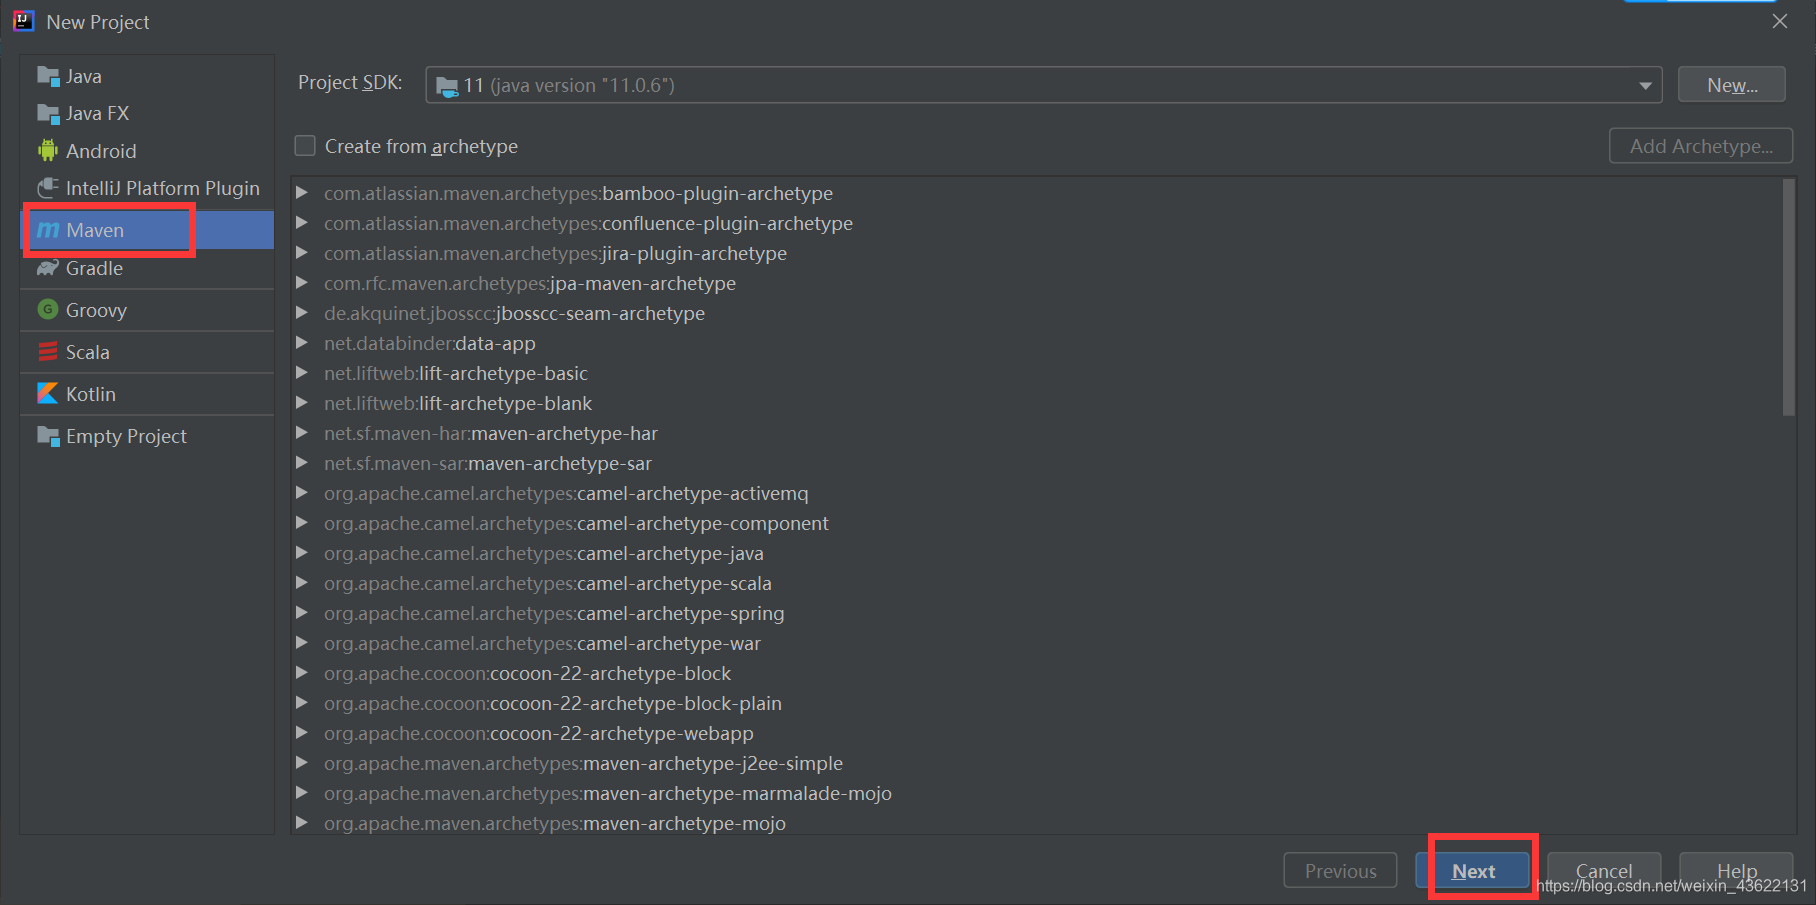
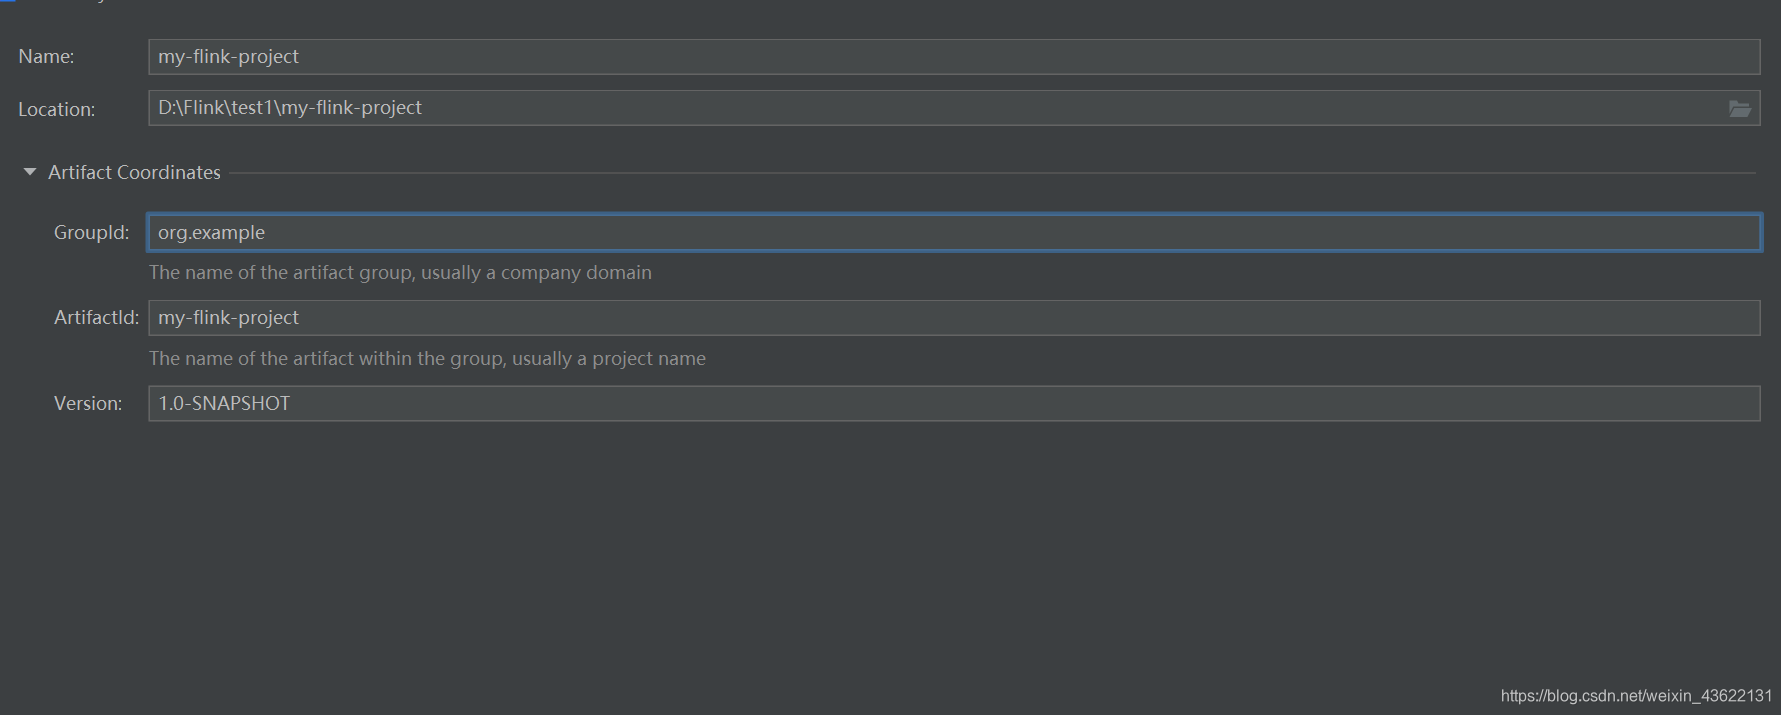
1.创建maven项目
创建maven项目
设置GroupId和ArtifactId
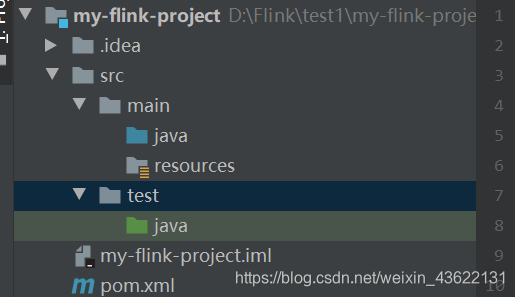
项目的目录结构
在pom.xml添加Flink所需依赖,这里flink版本、java版本和scala版本要和自己的对应
<properties>
	<project.build.sourceEncoding>UTF-8</project.build.sourceEncoding>
	<flink.version>1.12.0</flink.version>
	<java.version>1.8</java.version>
	<scala.binary.version>2.11</scala.binary.version>
	<maven.compiler.source>${java.version}</maven.compiler.source>
	<maven.compiler.target>${java.version}</maven.compiler.target>
</properties>
<dependencies>
		<!-- Apache Flink dependencies -->
		<!-- These dependencies are provided, because they should not be packaged into the JAR file. -->
		<dependency>
			<groupId>org.apache.flink</groupId>
			<artifactId>flink-java</artifactId>
			<version>${flink.version}</version>
			<scope>provided</scope>
		</dependency>
		<dependency>
			<groupId>org.apache.flink</groupId>
			<artifactId>flink-streaming-java_${scala.binary.version}</artifactId>
			<version>${flink.version}</version>
			<scope>provided</scope>
		</dependency>

		<!-- Add connector dependencies here. They must be in the default scope (compile). -->

		<!-- Example:

		<dependency>
			<groupId>org.apache.flink</groupId>
			<artifactId>flink-connector-kafka-0.10_${scala.binary.version}</artifactId>
			<version>${flink.version}</version>
		</dependency>
		-->

		<!-- Add logging framework, to produce console output when running in the IDE. -->
		<!-- These dependencies are excluded from the application JAR by default. -->
		<dependency>
			<groupId>org.slf4j</groupId>
			<artifactId>slf4j-log4j12</artifactId>
			<version>1.7.7</version>
			<scope>runtime</scope>
		</dependency>
		<dependency>
			<groupId>log4j</groupId>
			<artifactId>log4j</artifactId>
			<version>1.2.17</version>
			<scope>runtime</scope>
		</dependency>
	</dependencies>

	<build>
		<plugins>

			<!-- Java Compiler -->
			<plugin>
				<groupId>org.apache.maven.plugins</groupId>
				<artifactId>maven-compiler-plugin</artifactId>
				<version>3.1</version>
				<configuration>
					<source>${java.version}</source>
					<target>${java.version}</target>
				</configuration>
			</plugin>

			<!-- We use the maven-shade plugin to create a fat jar that contains all necessary dependencies. -->
			<!-- Change the value of <mainClass>...</mainClass> if your program entry point changes. -->
			<plugin>
				<groupId>org.apache.maven.plugins</groupId>
				<artifactId>maven-shade-plugin</artifactId>
				<version>3.0.0</version>
				<executions>
					<!-- Run shade goal on package phase -->
					<execution>
						<phase>package</phase>
						<goals>
							<goal>shade</goal>
						</goals>
						<configuration>
							<artifactSet>
								<excludes>
									<exclude>org.apache.flink:force-shading</exclude>
									<exclude>com.google.code.findbugs:jsr305</exclude>
									<exclude>org.slf4j:*</exclude>
									<exclude>log4j:*</exclude>
								</excludes>
							</artifactSet>
							<filters>
								<filter>
									<!-- Do not copy the signatures in the META-INF folder.
									Otherwise, this might cause SecurityExceptions when using the JAR. -->
									<artifact>*:*</artifact>
									<excludes>
										<exclude>META-INF/*.SF</exclude>
										<exclude>META-INF/*.DSA</exclude>
										<exclude>META-INF/*.RSA</exclude>
									</excludes>
								</filter>
							</filters>
							<transformers>
								<transformer implementation="org.apache.maven.plugins.shade.resource.ManifestResourceTransformer">
									<mainClass>myflink.StreamingJob</mainClass>
								</transformer>
							</transformers>
						</configuration>
					</execution>
				</executions>
			</plugin>
		</plugins>

		<pluginManagement>
			<plugins>

				<!-- This improves the out-of-the-box experience in Eclipse by resolving some warnings. -->
				<plugin>
					<groupId>org.eclipse.m2e</groupId>
					<artifactId>lifecycle-mapping</artifactId>
					<version>1.0.0</version>
					<configuration>
						<lifecycleMappingMetadata>
							<pluginExecutions>
								<pluginExecution>
									<pluginExecutionFilter>
										<groupId>org.apache.maven.plugins</groupId>
										<artifactId>maven-shade-plugin</artifactId>
										<versionRange>[3.0.0,)</versionRange>
										<goals>
											<goal>shade</goal>
										</goals>
									</pluginExecutionFilter>
									<action>
										<ignore/>
									</action>
								</pluginExecution>
								<pluginExecution>
									<pluginExecutionFilter>
										<groupId>org.apache.maven.plugins</groupId>
										<artifactId>maven-compiler-plugin</artifactId>
										<versionRange>[3.1,)</versionRange>
										<goals>
											<goal>testCompile</goal>
											<goal>compile</goal>
										</goals>
									</pluginExecutionFilter>
									<action>
										<ignore/>
									</action>
								</pluginExecution>
							</pluginExecutions>
						</lifecycleMappingMetadata>
					</configuration>
				</plugin>
			</plugins>
		</pluginManagement>
	</build>

	<!-- This profile helps to make things run out of the box in IntelliJ -->
	<!-- Its adds Flink's core classes to the runtime class path. -->
	<!-- Otherwise they are missing in IntelliJ, because the dependency is 'provided' -->
	<profiles>
		<profile>
			<id>add-dependencies-for-IDEA</id>

			<activation>
				<property>
					<name>idea.version</name>
				</property>
			</activation>

			<dependencies>
				<dependency>
					<groupId>org.apache.flink</groupId>
					<artifactId>flink-java</artifactId>
					<version>${flink.version}</version>
					<scope>compile</scope>
				</dependency>
				<dependency>
					<groupId>org.apache.flink</groupId>
					<artifactId>flink-streaming-java_${scala.binary.version}</artifactId>
					<version>${flink.version}</version>
					<scope>compile</scope>
				</dependency>
			</dependencies>
		</profile>
	</profiles>
2.编写代码
新建SocketWindowWordCount类
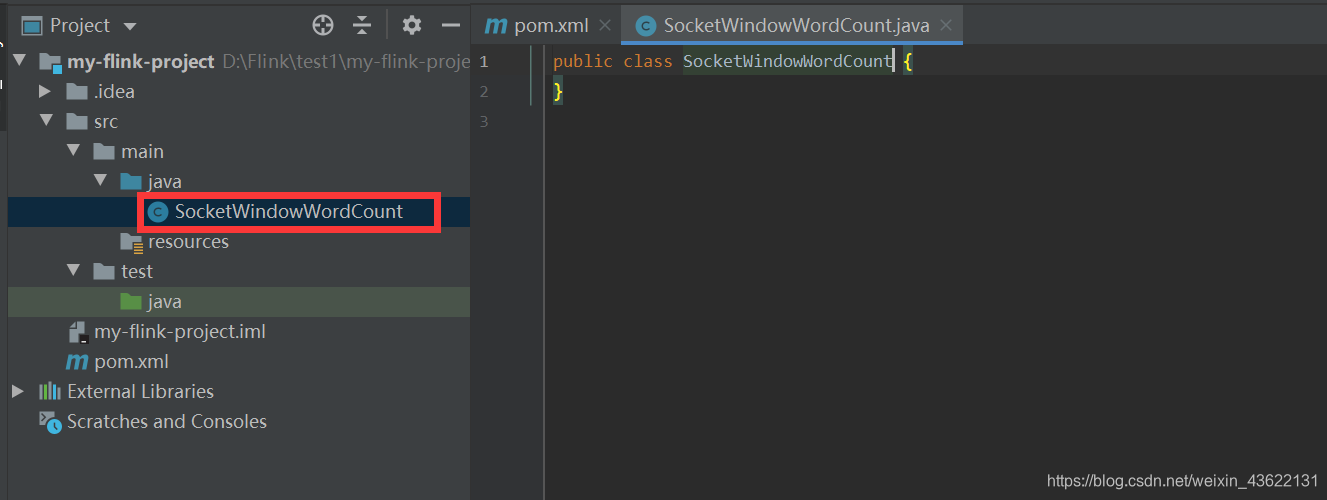
代码如下,首先尝试在window本地运行
import org.apache.flink.api.common.functions.FlatMapFunction;
import org.apache.flink.api.java.tuple.Tuple2;
import org.apache.flink.streaming.api.datastream.DataStream;
import org.apache.flink.streaming.api.environment.StreamExecutionEnvironment;
import org.apache.flink.streaming.api.windowing.time.Time;
import org.apache.flink.util.Collector;

public class SocketWindowWordCount {

    public static void main(String[] args) throws Exception {

        // 创建 execution environment
        StreamExecutionEnvironment env = StreamExecutionEnvironment.getExecutionEnvironment();

        // 通过连接 socket 获取输入数据,这里连接到本地9121端口,如果9121端口已被占用,请换一个端口
        DataStream<String> text = env.socketTextStream("localhost", 9121, "\n");

        // 解析数据,按 word 分组,开窗,聚合
        DataStream<Tuple2<String, Integer>> windowCounts = text
                .flatMap(new FlatMapFunction<String, Tuple2<String, Integer>>() {
                    @Override
                    public void flatMap(String value, Collector<Tuple2<String, Integer>> out) {
                        for (String word : value.split("\\s")) {
                            out.collect(Tuple2.of(word, 1));
                        }
                    }
                })
                .keyBy(0)
                .timeWindow(Time.seconds(5))//使用5秒的翻转窗口
                .sum(1);

        // 将结果打印到控制台,注意这里使用的是单线程打印,而非多线程
        windowCounts.print().setParallelism(1);

        env.execute("Socket Window WordCount");
    }
}
3.本地运行代码
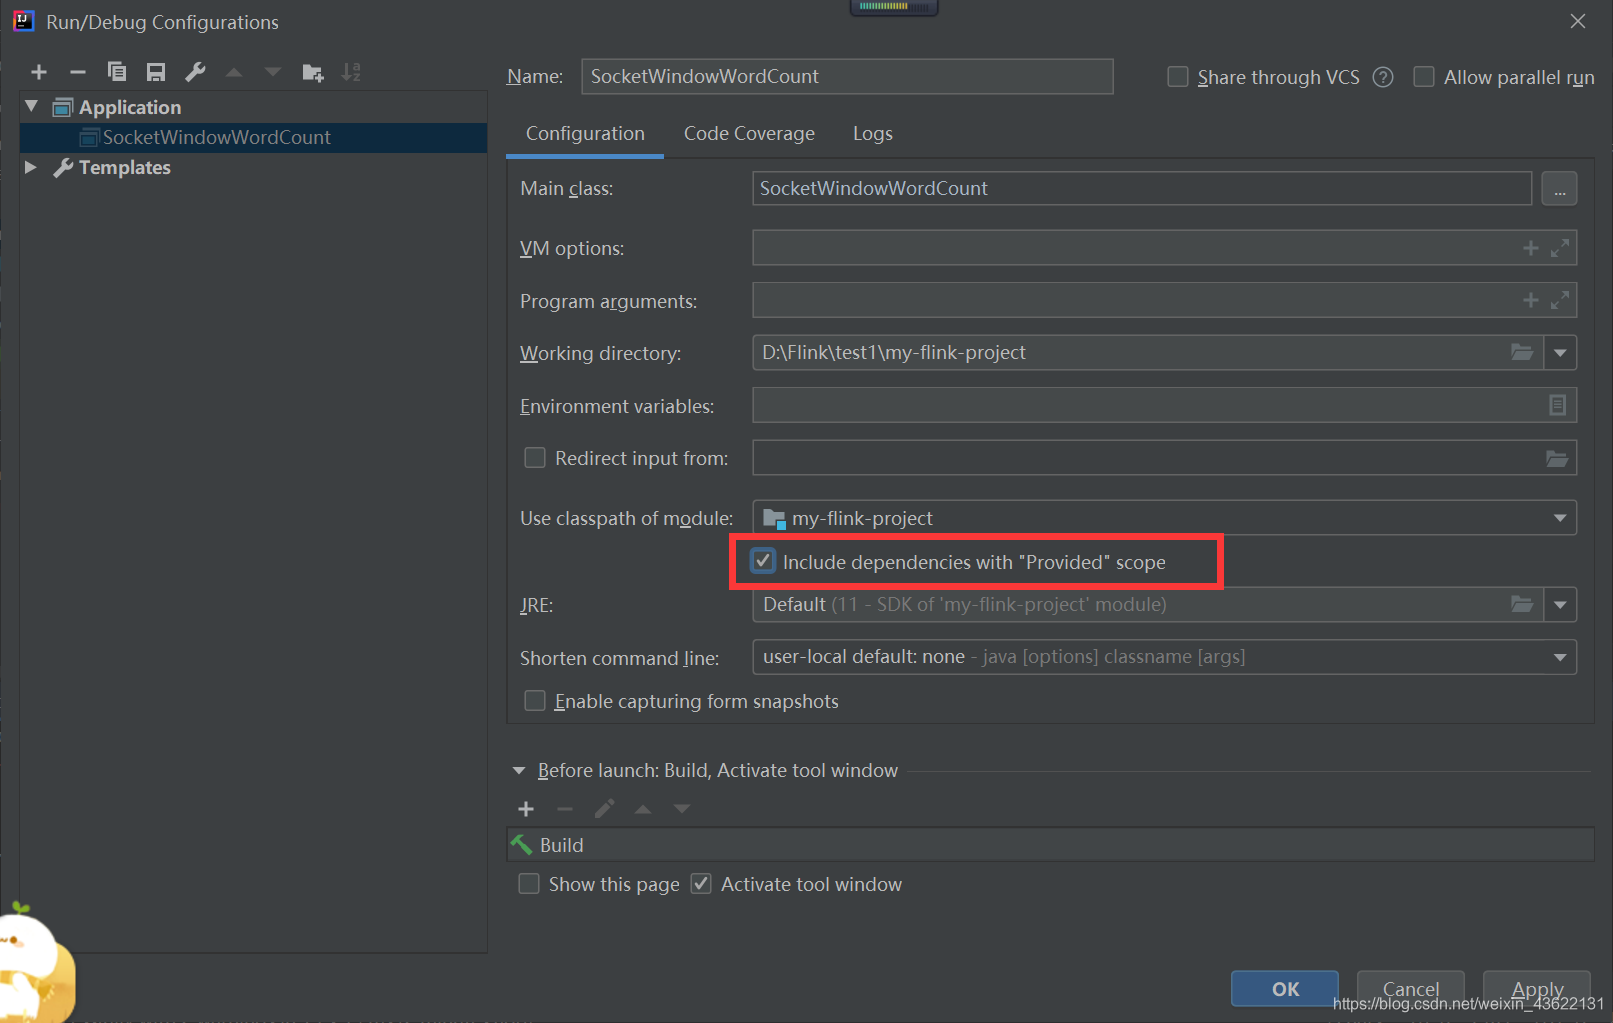
遇到找不到类的问题

使用下面方法解决
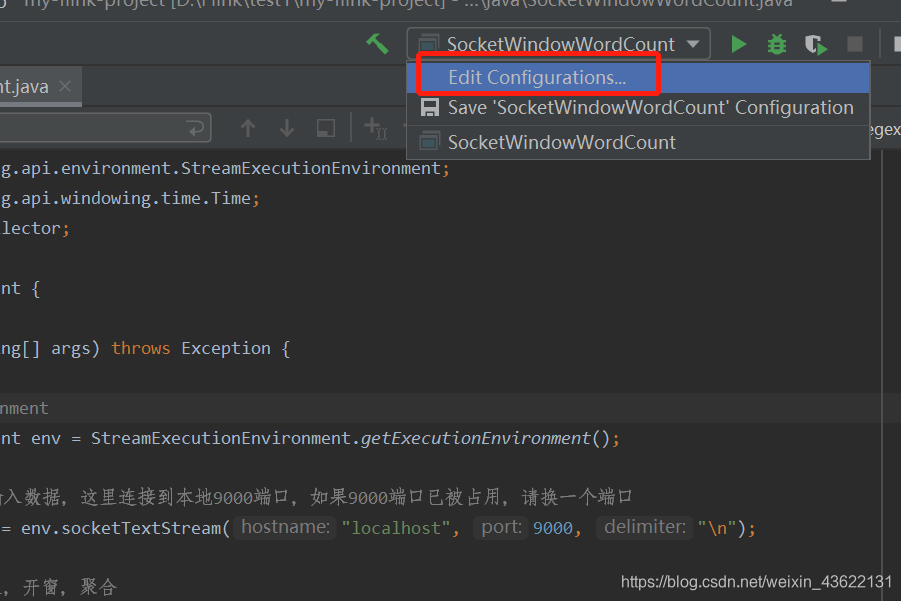
选中红框中的选项
然后又出现如下报错
原因是flink1.12版本,移除了flink-streaming-java 对 flink-clients 的依赖,需要手动加入clients依赖。
在在 pom 文件中手动添加依赖即可
<dependency>
            <groupId>org.apache.flink</groupId>
            <artifactId>flink-clients_2.12</artifactId>
            <version>1.12.0</version>
        </dependency>
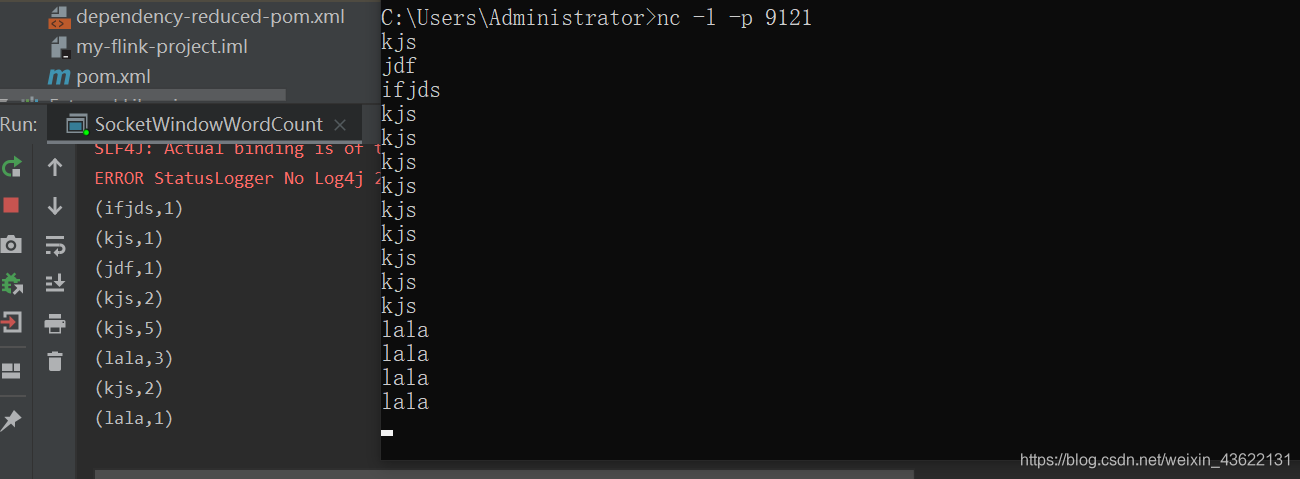
接下来运行成功

但是在输入数据之后报下面错误


经过分析发现没有设置时间的类型,flink的时间类型主要有三种:
- 处理时间 Processing Time:rocessing Time(处理时间)是指执行相应操作机器的系统时间
- 事件时间 Event Time:Event Time(事件时间)是每个独立事件在它生产设备上产生的时间
- 提取时间 Ingestion Time:ngestion Time是事件进入Flink的时间
我们这里添加一行,设置为处理时间env.setStreamTimeCharacteristic(TimeCharacteristic.ProcessingTime);
import org.apache.flink.api.common.functions.FlatMapFunction;
import org.apache.flink.api.java.tuple.Tuple2;
import org.apache.flink.streaming.api.TimeCharacteristic;
import org.apache.flink.streaming.api.datastream.DataStream;
import org.apache.flink.streaming.api.environment.StreamExecutionEnvironment;
import org.apache.flink.streaming.api.windowing.assigners.TumblingEventTimeWindows;
import org.apache.flink.streaming.api.windowing.time.Time;
import org.apache.flink.util.Collector;

public class SocketWindowWordCount {

    public static void main(String[] args) throws Exception {

        // 创建 execution environment
        StreamExecutionEnvironment env = StreamExecutionEnvironment.getExecutionEnvironment();
//        env.setStreamTimeCharacteristic(TimeCharacteristic.EventTime);
        env.setStreamTimeCharacteristic(TimeCharacteristic.ProcessingTime);

        // 通过连接 socket 获取输入数据,这里连接到本地9121端口,如果9121端口已被占用,请换一个端口
        DataStream<String> text = env.socketTextStream("localhost", 9121, "\n");;

        // 解析数据,按 word 分组,开窗,聚合
        DataStream<Tuple2<String, Integer>> windowCounts = text
                .flatMap(new FlatMapFunction<String, Tuple2<String, Integer>>() {
                    @Override
                    public void flatMap(String value, Collector<Tuple2<String, Integer>> out) {
                        for (String word : value.split("\\s")) {
                            out.collect(Tuple2.of(word, 1));
                        }
                    };

                })

                .keyBy(0)
                .timeWindow(Time.seconds(5))
//                .countWindow(2)
//                .window(TumblingEventTimeWindows.of(Time.seconds(20)))
                .sum(1);


        // 将结果打印到控制台,注意这里使用的是单线程打印,而非多线程
        windowCounts.print().setParallelism(1);

        env.execute("Socket Window WordCount");
    }
}
设置翻转窗口为5秒
除此之外还遇到一个log4j的问题,但是这个并不影响结果,由于强迫症还是把这个问题解决一下

在项目的resources中新建log4j2.xml文件并加上下面内容:
<?xml version="1.0" encoding="UTF-8"?>
<Configuration>
    <Appenders>
        <Console name="STDOUT" target="SYSTEM_OUT">
            <PatternLayout pattern="%d %-5p [%t] %C{2} (%F:%L) - %m%n"/>
        </Console>
        <RollingFile name="RollingFile" fileName="logs/strutslog1.log"
                     filePattern="logs/$${date:yyyy-MM}/app-%d{MM-dd-yyyy}-%i.log.gz">
            <PatternLayout>
                <Pattern>%d{MM-dd-yyyy} %p %c{1.} [%t] -%M-%L- %m%n</Pattern>
            </PatternLayout>
            <Policies>
                <TimeBasedTriggeringPolicy />
                <SizeBasedTriggeringPolicy size="1 KB"/>
            </Policies>
            <DefaultRolloverStrategy fileIndex="max" max="2"/>
        </RollingFile>
    </Appenders>
    <Loggers>
        <Logger name="com.opensymphony.xwork2" level="WAN"/>
        <Logger name="org.apache.struts2" level="WAN"/>
        <Root level="warn">
            <AppenderRef ref="STDOUT"/>
        </Root>
    </Loggers>

</Configuration>
再次运行,该问题解决

4.集群上运行代码
首先使用idea将项目打成jar包
其中代码部分需要做如下修改,因为我使用的flink集群在docker上,所以将监听的端口设置成宿主机的端口,这样就可以使集群从宿主机的端口上获取数据
import org.apache.flink.api.common.functions.FlatMapFunction;
import org.apache.flink.api.java.tuple.Tuple2;
import org.apache.flink.streaming.api.TimeCharacteristic;
import org.apache.flink.streaming.api.datastream.DataStream;
import org.apache.flink.streaming.api.environment.StreamExecutionEnvironment;
import org.apache.flink.streaming.api.windowing.assigners.TumblingEventTimeWindows;
import org.apache.flink.streaming.api.windowing.time.Time;
import org.apache.flink.util.Collector;

public class SocketWindowWordCount {

    public static void main(String[] args) throws Exception {

        // 创建 execution environment
        StreamExecutionEnvironment env = StreamExecutionEnvironment.getExecutionEnvironment();
//        env.setStreamTimeCharacteristic(TimeCharacteristic.EventTime);
        env.setStreamTimeCharacteristic(TimeCharacteristic.ProcessingTime);

        // 通过连接 socket 获取输入数据,这里连接到本地9121端口,如果9121端口已被占用,请换一个端口
        DataStream<String> text = env.socketTextStream("10.0.75.1", 9121, "\n");;

        // 解析数据,按 word 分组,开窗,聚合
        DataStream<Tuple2<String, Integer>> windowCounts = text
                .flatMap(new FlatMapFunction<String, Tuple2<String, Integer>>() {
                    @Override
                    public void flatMap(String value, Collector<Tuple2<String, Integer>> out) {
                        for (String word : value.split("\\s")) {
                            out.collect(Tuple2.of(word, 1));
                        }
                    };

                })

                .keyBy(0)
                .timeWindow(Time.seconds(5))
//                .countWindow(2)
//                .window(TumblingEventTimeWindows.of(Time.seconds(20)))
                .sum(1);


        // 将结果打印到控制台,注意这里使用的是单线程打印,而非多线程
        windowCounts.print().setParallelism(1);

        env.execute("Socket Window WordCount");
    }
}
按照如下操作对maven项目进行打包
设定主类
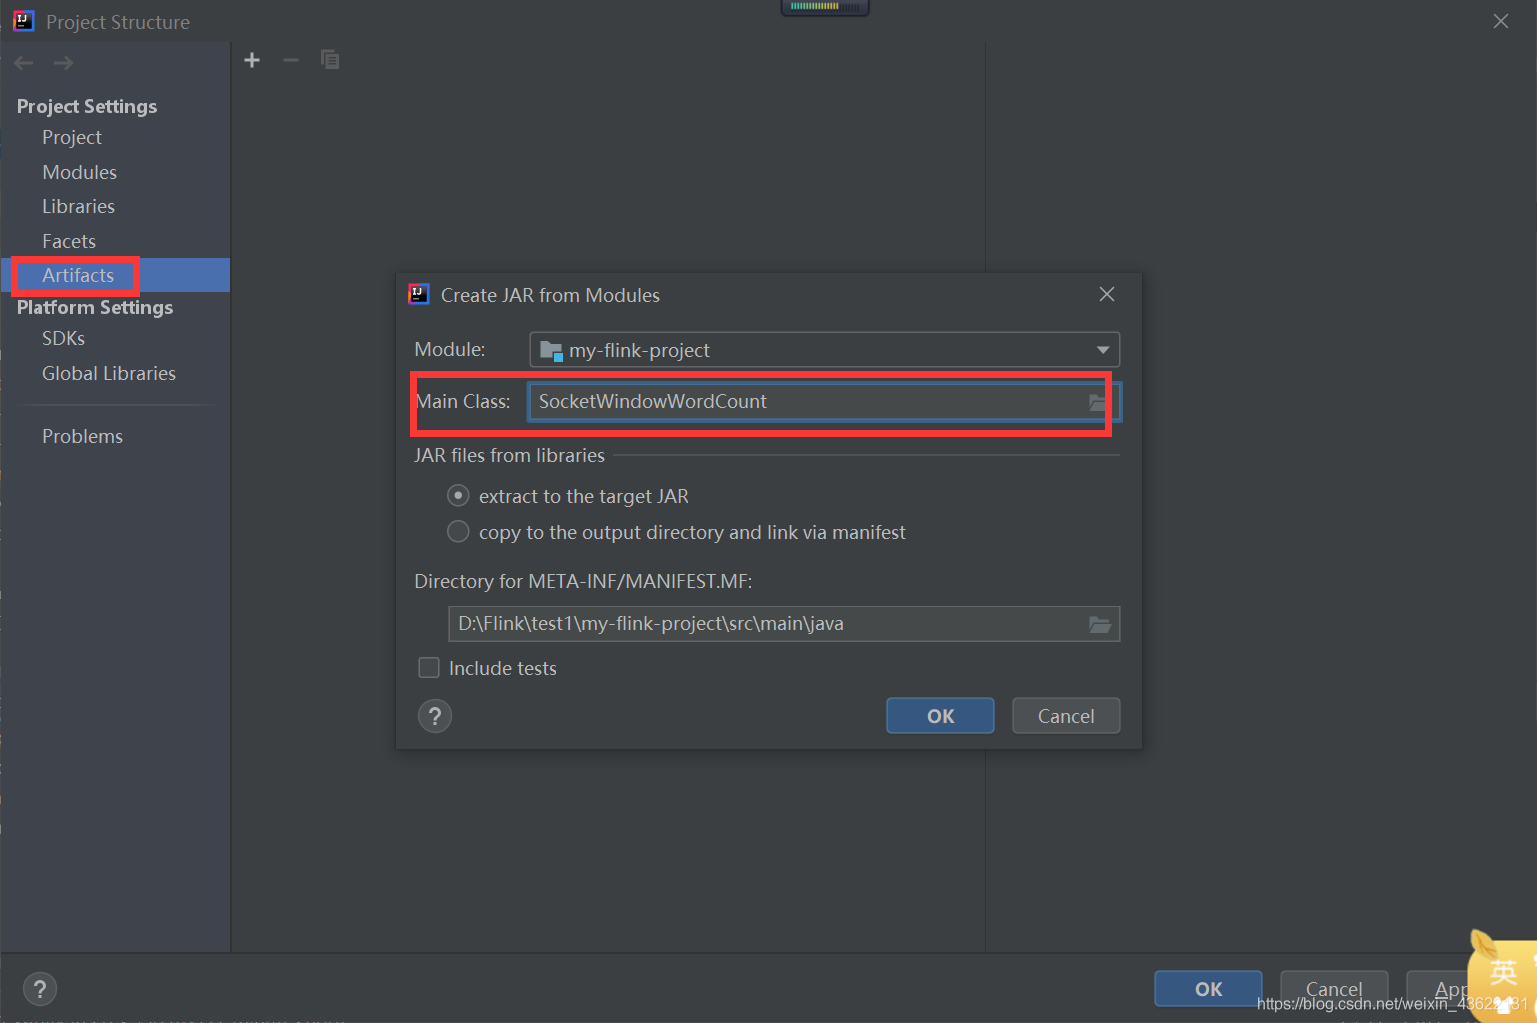
然后会在out目录中输出
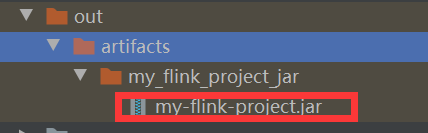
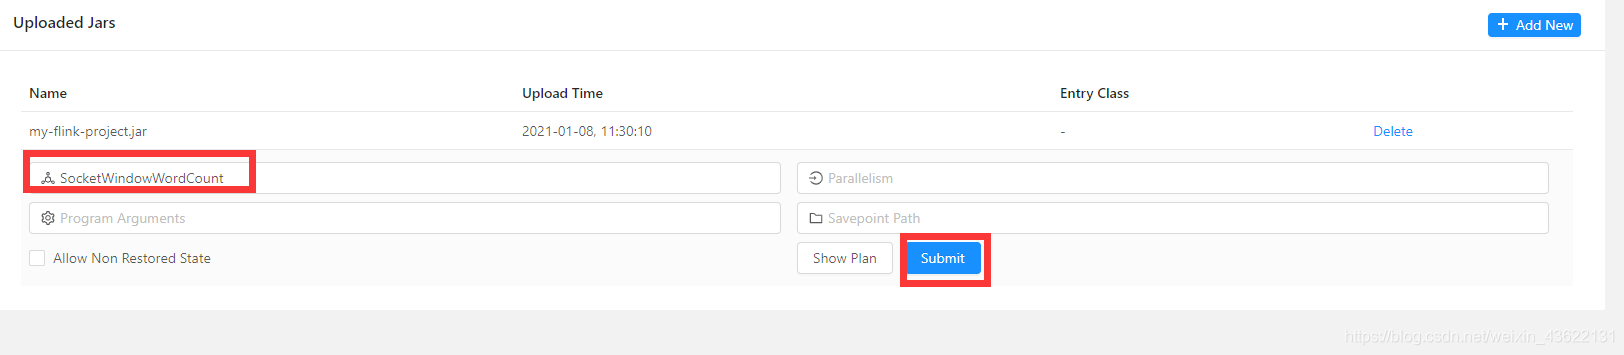
启动flink集群,在ui界面上提交刚刚打的jar包,设置主类然后提交
运行成功
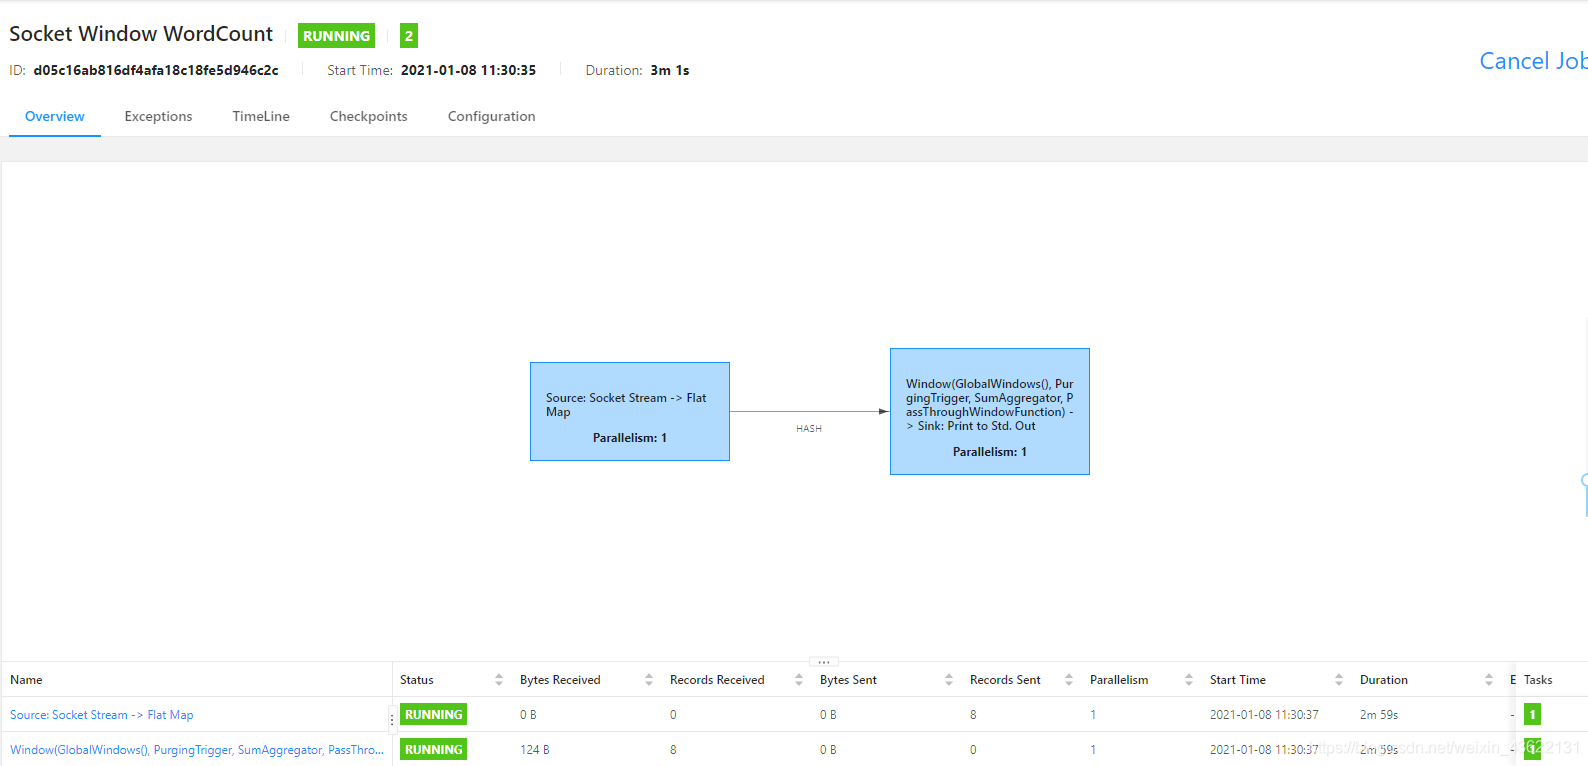
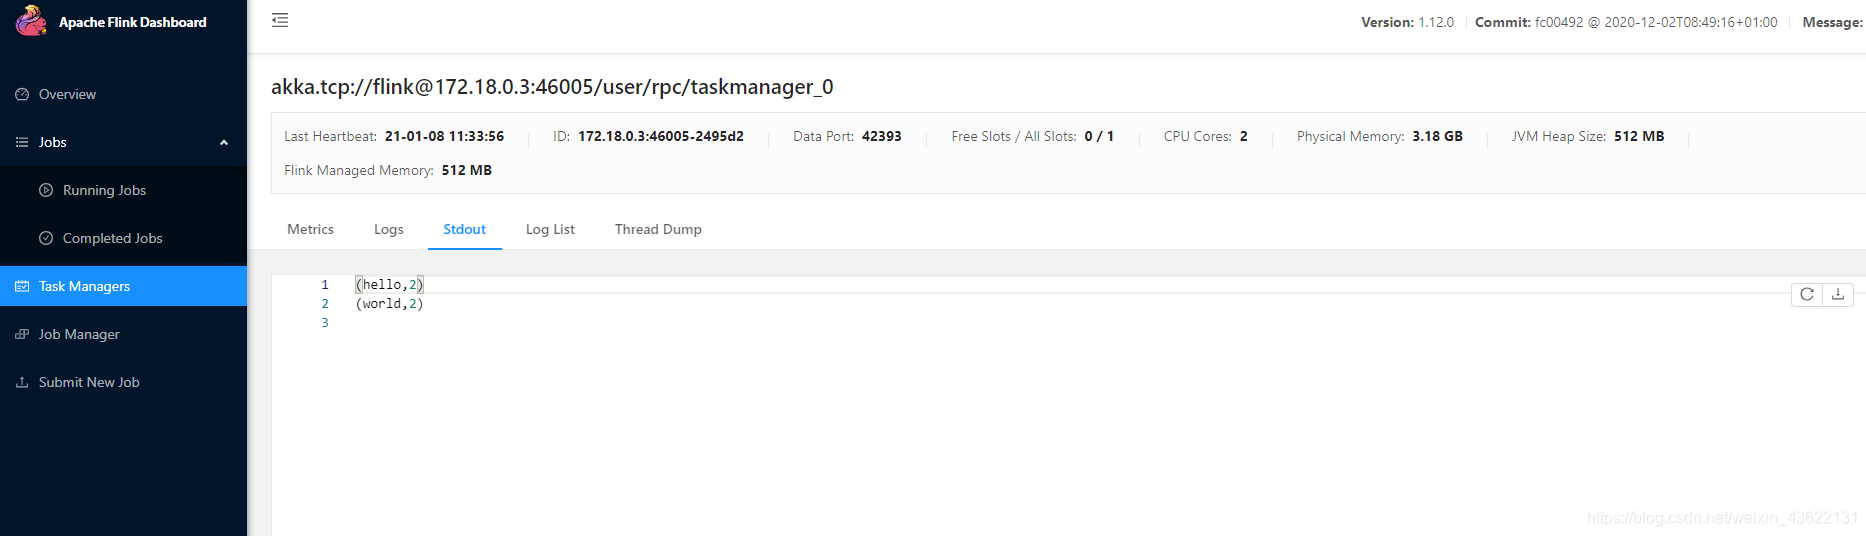
从日志中可以看到输出,代码在集群上运行成功


 587
587


 被折叠的 条评论
为什么被折叠?
被折叠的 条评论
为什么被折叠?
 到【灌水乐园】发言


