


文章目录
1 车辆统计项目
import cv2
import numpy as np

# 读取视频
cap = cv2.VideoCapture('./video/car.mp4')

# 循环读取视频每一帧
while True:
    ret, frame = cap.read()
    if ret:
        cv2.imshow('video',frame)

    key = cv2.waitKey(1)
    # 用户按esc推出
    if key == 27:
        break

# 最后释放资源
cap.release()
# 关闭窗口
cv2.destroyAllWindows()
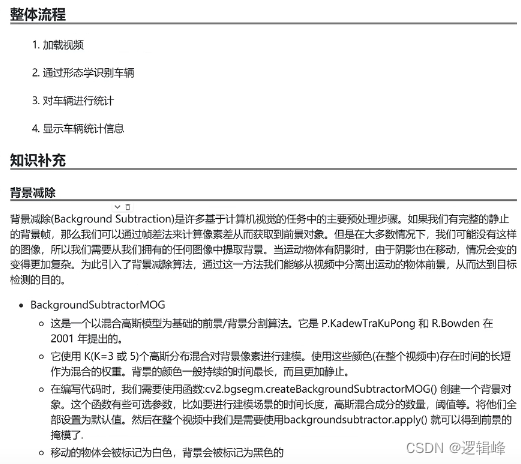
1.1 背景减除

import cv2
import numpy as np

cap = cv2.VideoCapture(0)
bgs = cv2.bgsegm.createBackgroundSubtractorMOG()
while True:
    ret, frame = cap.read()
    if ret:
        fgmask = bgs.apply(frame)
        cv2.imshow('video', fgmask)
    key = cv2.waitKey(1)
    # ESC键
    if key == 27:
        break
cap.release()
cv2.destroyAllWindows()
1.2 车辆统计
import cv2
import numpy as np

# 读取视频
cap = cv2.VideoCapture('./video/car.mp4')
# 创建mog对象
mog = cv2.bgsegm.createBackgroundSubtractorMOG()
# 获取腐蚀卷积核
kernel = cv2.getStructuringElement(cv2.MORPH_RECT, (5, 5))

# 最大外接矩形的宽
min_w = 40
# 最大外接矩形的高
min_h = 30
# 线高
line_high = 630
# 车辆集合
cars = []
# 阈值
offset = 6
# 计数
car_num = 0


# 计算外接矩形的中心点
def center(x, y, w, h):
    x1 = int(w / 2)
    y1 = int(h / 2)
    cx = int(x) + x1
    cy = int(y) + y1
    return cx, cy


# 循环读取视频每一帧
while True:
    ret, frame = cap.read()
    if ret:
        # 把原始帧进行灰度化,然后去噪
        # # 灰度
        gray = cv2.cvtColor(frame, cv2.COLOR_RGB2GRAY)
        # # 去噪
        blur = cv2.GaussianBlur(gray, (3, 3), 5)
        # 去背景
        mask = mog.apply(blur)
        # 腐蚀
        erode = cv2.erode(mask, kernel, iterations=2)
        # 膨胀2次
        dialte = cv2.dilate(erode, kernel, iterations=2)

        # 消除内部的小块
        # 闭运算
        close = cv2.morphologyEx(dialte, cv2.MORPH_CLOSE, kernel)
        # cv2.imshow('video',dialte)
        # cv2.imshow('close',close)

        # 划线
        cv2.line(frame, [10, line_high], [1270, line_high], [255, 0, 0], 2)

        # 查找轮廓
        contours, h = cv2.findContours(close, cv2.RETR_TREE, cv2.CHAIN_APPROX_SIMPLE)
        # 画出所有检测出来的轮廓
        for contour in contours:
            # 最大外接矩形
            (x, y, w, h) = cv2.boundingRect(contour)
            is_valid = (w >= min_w) and (h >= min_h)
            if not is_valid:
                continue
            # 要求坐标点都是整数
            cv2.rectangle(frame, (int(x), int(y)), (int(x + w), int(y + h)), (0, 0, 255), 2)

            # 如何计数
            # 把车抽象为一点,即外接矩形的中心点
            # 通过外接矩形,计算车的中心点
            cpoint = center(x, y, w, h)
            # 将符合条件的车存入列表
            cars.append(cpoint)
            cv2.circle(frame, (cpoint), 5, (0, 0, 255), -1)

            # 判断汽车是否过检测线
            for (x, y) in cars:
                if (line_high - offset) < y < (line_high + offset):
                    # 落入了有效区间
                    # 计数加一
                    car_num += 1
                    # 然后remove掉
                    cars.remove((x, y))
                    print(car_num)

        # 添加字符串
        cv2.putText(frame, 'Vechicle Count:' + str(car_num), [500, 60], cv2.FONT_HERSHEY_SIMPLEX, 2, [0, 0, 255], 5)
        cv2.imshow('frame', frame)

    key = cv2.waitKey(3)
    # 用户按esc推出
    if key == 27:
        break

# 最后释放资源
cap.release()
# 关闭窗口
cv2.destroyAllWindows()
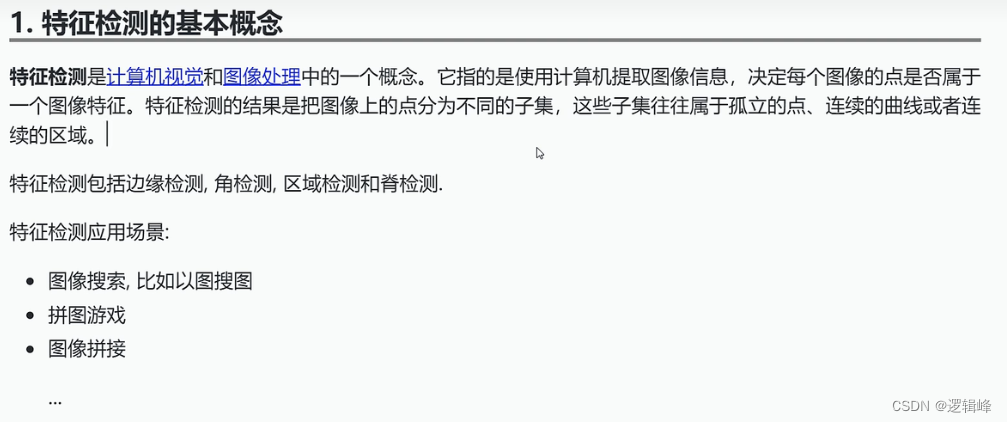
2 特征点检测和匹配
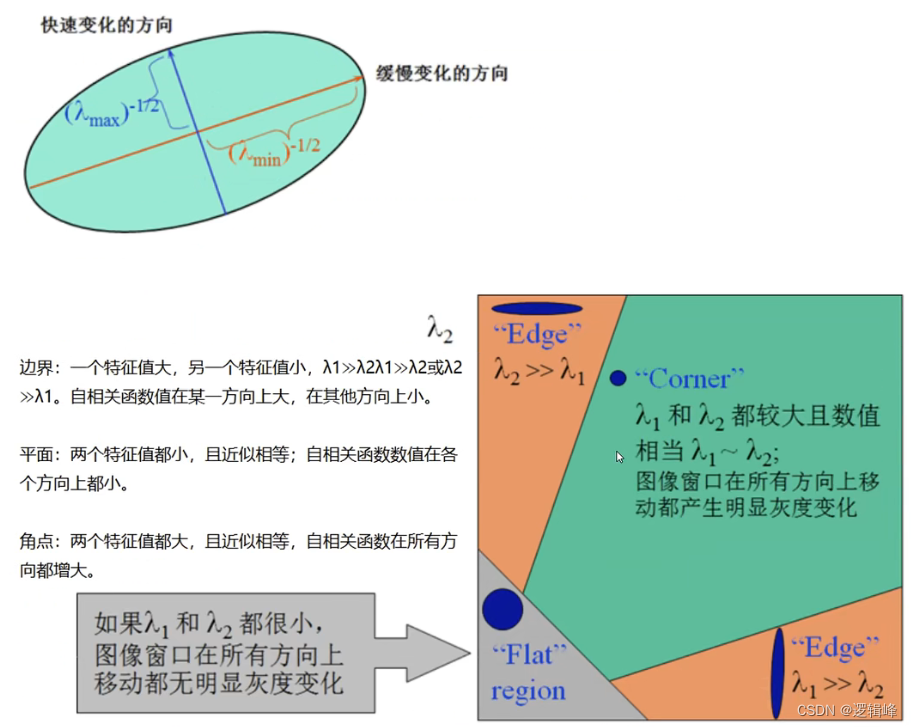
2.1 harris角点检测


import cv2
import numpy as np
img = cv2.imread('./image/dog.png')

# 变成灰度图片
gray = cv2.cvtColor(img, cv2.COLOR_RGB2GRAY)
# harris角点检测
dst = cv2.cornerHarris(gray, blockSize=2, ksize=3, k=0.04)
#返回的东西叫做角点响应.每一个像素点都能计算出一个角点响应来#
print(dst)
print(dst.shape)#显示角点
#我们认为角点响应大于0.01倍的dst.max()就可以认为是角点了.
img[dst > 0.01* dst.max()]= [0,0,255]
cv2.imshow('img',img)

cv2.waitKey(0)
cv2.destroyAllWindows()
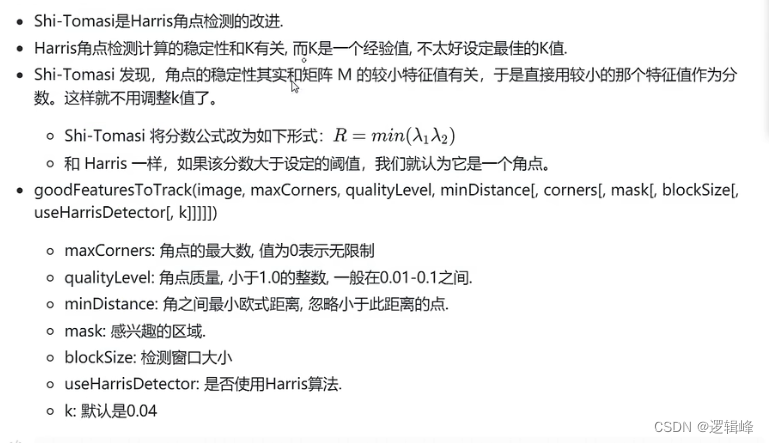
2.2 shi-tomasi角点检测
import cv2
import numpy as np
#harris
# bLockSize = 2
# ksize = 3
# k = e.e4
# Shi-Tomasi
maxCorners = 1000
ql = 0.01
minDistance = 10

img = cv2.imread('./image/dog.png')

#灰度化
gray = cv2.cvtColor(img,cv2.COLOR_BGR2GRAY)
corners = cv2.goodFeaturesToTrack(gray,maxCorners,ql, minDistance)
corners = np.int16(corners)
#Shi-Tomasi绘制角点
for i in corners:
    x,y = i.ravel()
    cv2.circle(img,(x,y), 3,(255,0,0),-1)

cv2.imshow('Shi-Tomasi',img)
cv2.waitKey(0)
cv2.destroyAllWindows()
2.3 SIFT关键点检测

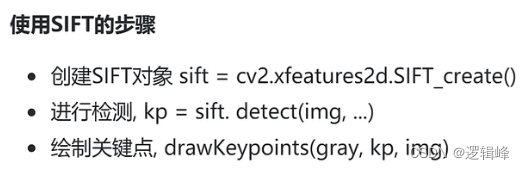
import cv2
import numpy as np

img = cv2.imread('./image/dog.png'
最低0.47元/天 解锁文章


 428
428


 被折叠的 条评论
为什么被折叠?
被折叠的 条评论
为什么被折叠?
 到【灌水乐园】发言


