


IoC容器与DI(xml开发)
目录
IoC与DI概念
IoC(控制翻转):在过去我们使用MVC三层架构去开发程序的时候,controller层会有service层的依赖,而service层又有dao层的依赖,这样导致的结果就是高耦合,依赖过强。所以spring引入了控制反转这个概念,其理念是将对象的控制权交给spring框架。利用配置文件、反射和接口创建对象放入spring对象容器中,在需要调用对象的时候从对象容器中获取,从而达到解耦的目的。
DI(依赖注入):依赖注入实际上和控制反转是一起出现的,一起存在的。依赖注入指的就是从对象容器中获取对象注入到我们初始化的对象中。
快速入门
代码示例
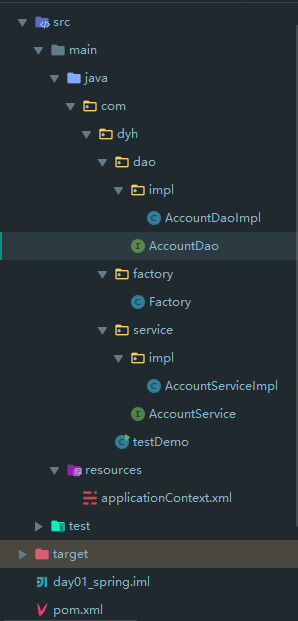
目录结构

首先创建maven项目,然后导入相关jar包依赖
pom.xml
<?xml version="1.0" encoding="UTF-8"?>
<project xmlns="http://maven.apache.org/POM/4.0.0"
         xmlns:xsi="http://www.w3.org/2001/XMLSchema-instance"
         xsi:schemaLocation="http://maven.apache.org/POM/4.0.0 http://maven.apache.org/xsd/maven-4.0.0.xsd">
    <modelVersion>4.0.0</modelVersion>

    <groupId>javaee</groupId>
    <artifactId>day01_spring</artifactId>
    <version>1.0-SNAPSHOT</version>

    <dependencies>
        <!--spring-->
        <dependency>
            <groupId>org.springframework</groupId>
            <artifactId>spring-context</artifactId>
            <version>5.1.9.RELEASE</version>
        </dependency>
    </dependencies>

</project>
创建AccountDao接口
package com.dyh.dao;

public interface AccountDao {
    /**
     * 保存账户
     */
    void saveAccount();
}
创建AccountDaoImpl实现类实现AccountDao接口
package com.dyh.dao.impl;

import com.dyh.dao.AccountDao;

public class AccountDaoImpl implements AccountDao {
    /**
     * 保存账户
     */
    @Override
    public void saveAccount() {
        System.out.println("模拟保存账户信息");
    }
}
创建spring配置文件,一般都叫做applicationContext.xml
<?xml version="1.0" encoding="UTF-8"?>
<beans xmlns="http://www.springframework.org/schema/beans"
       xmlns:xsi="http://www.w3.org/2001/XMLSchema-instance"
       xsi:schemaLocation="http://www.springframework.org/schema/beans http://www.springframework.org/schema/beans/spring-beans.xsd">

    <!--将AccountDaoImpl交个spring管理-->
    <bean id="accountDao" class="com.dyh.dao.impl.AccountDaoImpl"/>

</beans>
<bean>标签用于将类交给spring管理,其中id是唯一的,是自己配置的,class是这个类的全限定类名。用于解析配置文件后,通过全限定类名使用反射创建对象放入容器。
其中里面还有几个常用注解,在这里一并简单概述下。
id: 对象的唯一表示
class: 类的全限定类名
scope: 用于指定单例模式还是多例模式。
factory-bean: 指定用哪个bean创建对象,设置此属性后class属性将失效
factory-method: 指定用哪个方法创建对象,同factory-bean一起使用,或者方法为静态方法的时候,可以单独使用。
abstract: 设置bean是否为抽象类,默认为false,如果为true则不能被实例化。
init-method: 作用是指定一个无参方法作为类创建后调用的方法
destroy-method: 作用和init-method相反,是在对象注销的时候执行的方法。
创建测试类,尝试从对象容器中获取AccountDao对象
package com.dyh;

import com.dyh.dao.AccountDao;
import org.springframework.context.ApplicationContext;
import org.springframework.context.support.ClassPathXmlApplicationContext;

public class testDemo {
    public static void main(String[] args) {
        ApplicationContext applicationContext = new ClassPathXmlApplicationContext("applicationContext.xml");
        AccountDao accountDao = applicationContext.getBean("accountDao", AccountDao.class);
        accountDao.saveAccount();
    }
}
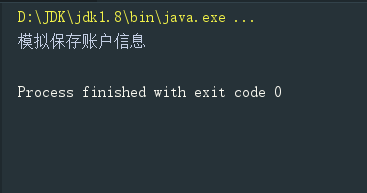
执行结果
其他内容
spring创建对象的三种方法
spring在创建对象的时候有三种方法,分别是无参构造创建,静态工厂方法创建,非静态工厂创建。一下是三中创建的代码示例
无参构造创建
无参构造创建实际上就是上面我们用的<bean>标签,因为idea是默认自带无参构造的,所以我们不用将无参构造写出来就可以创建,这种方法也是后面常用的方法。
因为和上面代码示例相同,就不再演示了。
静态工厂方法创建
静态工厂方法创建,原理上是创建一个类,类里有一个静态方法,使用此静态方法创建对象交给spring容器
代码示例
因为和快速入门的代码相差不大。在此只贴出不同的部分。
项目结构

工厂类
package com.dyh.factory;

import com.dyh.dao.AccountDao;
import com.dyh.dao.impl.AccountDaoImpl;

/**
 * 工厂类,用于配置各类工厂方法
 */
public class Factory {

    /**
     * 静态方法,创建AccountDao实现类对象
     *
     * @return AccountDao实现对象
     */
    public static AccountDao accountDao() {
        return new AccountDaoImpl();
    }

}
spring配置文件
<?xml version="1.0" encoding="UTF-8"?>
<beans xmlns="http://www.springframework.org/schema/beans"
       xmlns:xsi="http://www.w3.org/2001/XMLSchema-instance"
       xsi:schemaLocation="http://www.springframework.org/schema/beans http://www.springframework.org/schema/beans/spring-beans.xsd">

    <!--使用静态方法实现将,AccountDaoImpl交个spring管理-->
    <bean id="accountDao" class="com.dyh.factory.Factory" factory-method="accountDao"/>

</beans>
在这里class引用的是工厂类的全限定类名,使用Factory中的静态方法创建对象交个spring管理。
非静态工厂方法创建
非静态方法和静态方法的区别在于一个方法是静态的,一个不是静态的。非静态工厂方法需要将工厂类交给spring容器管理,随后在创建对象的时候需要使用factory-bean这个属性将工厂类设置进去,随后使用factory-method属性指定工厂方法。
代码示例
包结构和静态方法工厂是一样的,所以不在贴图,参考静态方法工厂即可,
工厂类
package com.dyh.factory;

import com.dyh.dao.AccountDao;
import com.dyh.dao.impl.AccountDaoImpl;

/**
 * 工厂类,用于配置各类工厂方法
 */
public class Factory {

    /**
     * 静态方法,创建AccountDao实现类对象
     *
     * @return AccountDao实现对象
     */
    public  AccountDao accountDao() {
        return new AccountDaoImpl();
    }

}
相比静态工厂方法,惟一的区别就是去掉了方法的static关键字,使静态方法变成非静态方法,
spring配置文件
<?xml version="1.0" encoding="UTF-8"?>
<beans xmlns="http://www.springframework.org/schema/beans"
       xmlns:xsi="http://www.w3.org/2001/XMLSchema-instance"
       xsi:schemaLocation="http://www.springframework.org/schema/beans http://www.springframework.org/schema/beans/spring-beans.xsd">

    <!--将工厂类交给spring管理-->
    <bean id="factory" class="com.dyh.factory.Factory"/>

    <!--使用静态方法实现将,AccountDaoImpl交个spring管理-->
    <bean id="accountDao" factory-bean="factory" factory-method="accountDao"/>

</beans>
可以看到accountDao这个对象使用factory-bean这个属性指定的是上面的工厂对象的id
,factory-method指定的是工厂类里的非静态方法
类对象属性注入的两种方法
假设我们还有service层的AccountService接口和AccountServiceImpl类,而这个类需要依赖于AccountDao的方法,那么我们需要将spring容器中的AccountDao这个对象注入到AccountService中
注入的方式有以下两种:
set注入
使用属性的set方法进行注入
其原理是利用对应属性的set方法,将属性注入
代码示例:
我们在上面项目的基础上创建了AccountService接口和接口实现类。并在接口实现类中定义了AccountDao
因为其他类的代码和上面一样,在此只贴出AccountService和AccountServiceImpl的代码
包结构
AccountService接口
package com.dyh.service;

/**
 * AccountService业务层接口
 */
public interface AccountService {
    /**
     * 保存账户
     */
    void saveAccount();
}
AccountServiceImpl实现类
package com.dyh.service.impl;

import com.dyh.dao.AccountDao;
import com.dyh.service.AccountService;

public class AccountServiceImpl implements AccountService {

//    依赖AccountDao
    private AccountDao accountDao;
//    属性set方法
    public void setAccountDao(AccountDao accountDao) {
        this.accountDao = accountDao;
    }

    /**
     * 保存账户
     */
    @Override
    public void saveAccount() {
//        调用AccountDao的saveAccount()方法
		System.out.println("我是AccountService层");
        accountDao.saveAccount();
    }
}
可以看到在AccountServcieImpl中,我们初始化了AccountDao接口,打算使用接口去接收实现类。并且生成了set方法,用于spring注入时使用
当然我们也要将AccountServiceImpl交个spring管理。
所以spring配置文件也有所更改,具体代码如下:
<?xml version="1.0" encoding="UTF-8"?>
<beans xmlns="http://www.springframework.org/schema/beans"
       xmlns:xsi="http://www.w3.org/2001/XMLSchema-instance"
       xsi:schemaLocation="http://www.springframework.org/schema/beans http://www.springframework.org/schema/beans/spring-beans.xsd">

    <!--将工厂类交给spring管理-->
    <bean id="factory" class="com.dyh.factory.Factory"/>

    <!--使用静态方法实现将,AccountDaoImpl交个spring管理-->
    <bean id="accountDao" factory-bean="factory" factory-method="accountDao"/>

    <!--将AccountServiceImpl交给spring管理-->
    <bean id="accountService" class="com.dyh.service.impl.AccountServiceImpl">
        <property name="accountDao" ref="accountDao"/>
    </bean>
</beans>
我们可以看到在配置文件里多了个accountServcie的对象,然后里面使用<property>标签对属性accountDao进行注入,后面使用引用的ref指向容器中的accountDao。
当然我们的testDemo也要更改
testDemo类
package com.dyh;

import com.dyh.service.AccountService;
import org.springframework.context.ApplicationContext;
import org.springframework.context.support.ClassPathXmlApplicationContext;

public class testDemo {
    public static void main(String[] args) {
        ApplicationContext applicationContext = new ClassPathXmlApplicationContext("applicationContext.xml");
        AccountService accountService = applicationContext.getBean("accountService",AccountService.class);
        accountService.saveAccount();
    }
}
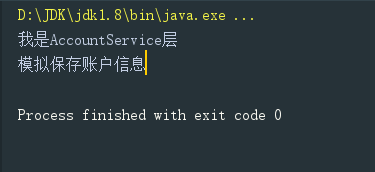
我们直接从spring 容器中获取accountService对象,并运行方法
运行结果
有参构造注入
我们也可以通过有参构造方法去将accountDao注入到accountServiceImpl中
只需要将配置文件改一下就可以变成有参构造注入,如果想的话,甚至可以把accoutServiceImpl中的set方法删掉也是不影响的。
首先还是要在AccountServcieImpl中生成有参构造方法
随后更改配置文件
代码示例:
首先包结构还是没有变化的
所以还是只贴更改过得部分
AccountServcieImpl
    package com.dyh.service.impl;

    import com.dyh.dao.AccountDao;
    import com.dyh.service.AccountService;

    public class AccountServiceImpl implements AccountService {

    //    依赖AccountDao
        private AccountDao accountDao;
//        生成有参构造
        public AccountServiceImpl(AccountDao accountDao) {
            this.accountDao = accountDao;
        }

        /**
         * 保存账户
         */
        @Override
        public void saveAccount() {
            System.out.println("我是AccountService层");
    //        调用AccountDao的saveAccount()方法
            accountDao.saveAccount();
        }
    }
我们可以看到set方法已经被替换成了有参构造方法
spring配置文件
<?xml version="1.0" encoding="UTF-8"?>
<beans xmlns="http://www.springframework.org/schema/beans"
       xmlns:xsi="http://www.w3.org/2001/XMLSchema-instance"
       xsi:schemaLocation="http://www.springframework.org/schema/beans http://www.springframework.org/schema/beans/spring-beans.xsd">

    <!--将工厂类交给spring管理-->
    <bean id="factory" class="com.dyh.factory.Factory"/>

    <!--使用静态方法实现将,AccountDaoImpl交个spring管理-->
    <bean id="accountDao" factory-bean="factory" factory-method="accountDao"/>

    <!--将AccountServiceImpl交给spring管理-->
    <bean id="accountService" class="com.dyh.service.impl.AccountServiceImpl">
        <constructor-arg name="accountDao" ref="accountDao"/>
    </bean>
</beans>
<property>标签变成了<constructor-arg>标签,这个标签的作用就是给构造方法里面传递的参数
里面同样有许多属性,在这里简单介绍下
- name:指定要传入的参数名
- value:注入基本类型数据
- ref:引用方式注入对象数据
- index:以构造方法的参数位置定位传入数据
- type:以构造方法的注入类型定位传入数据
运行截图

总结
从上述代码我们可以知道我们确实将接口的实现类和工厂类交给了spring管理,并通过读取配置文件后,从容器中得到我们需要的对象,并能执行对象中的方法。
同时我们也可以通过set方法或者有参构造方法进行数据的注入。


 1694
1694


 被折叠的 条评论
为什么被折叠?
被折叠的 条评论
为什么被折叠?
 到【灌水乐园】发言


