


 本文档详细介绍了如何在Linux环境中部署Seata 1.4.2,包括安装前的准备工作,如下载安装包、修改配置文件、开放端口等。重点讲解了如何在Nacos中配置Seata,修改`registry.conf`和`file.conf`,并创建启动脚本。同时,还提到了需先将配置文件上传至Nacos的public命名空间,然后克隆到Seata命名空间,确保服务能够正确启动并注册到Nacos。
springcloud在linux部署seata1.4.2搭建以及nacos中的配置,按步骤装完肯定能用
部署思路
部署seata说白了就是在服务器上启动一个seata的程序,改程序读取的nacos上的配置,启动成功后服务注册到自己的nacos上,从而在各个服务调用使用。
安装前准备
- 去官网下载安装包,这里用的seata-server-1.4.2.tar.gz
- 解压到usr/local下边 修改名字mv seata-server-1.4.2/ seata
- 开放seat端口我这里是8091
进行配置
修改配置文件
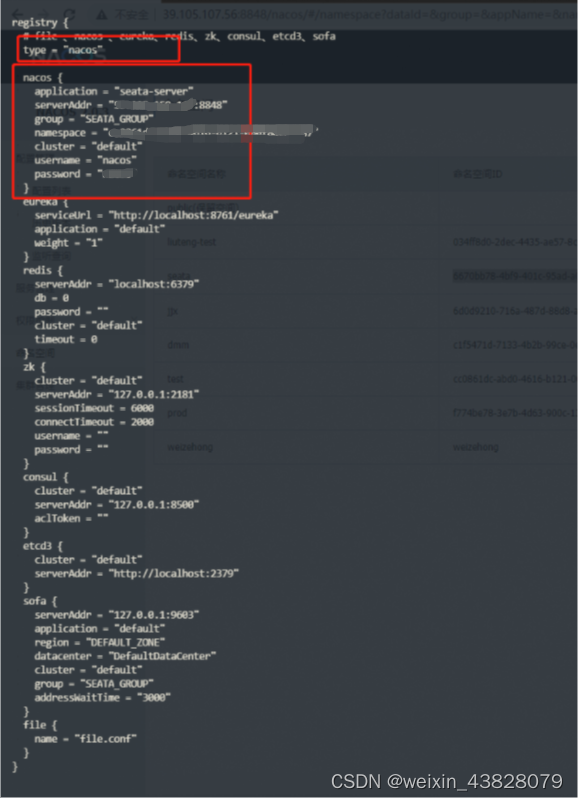
- 进入seata/conf目录修改registry.conf修改下图红框中的配置
下图中的serverAddr 是自己的nacos公网地址,namespace为nacos的命名空间,username password 为nacos的账号密码
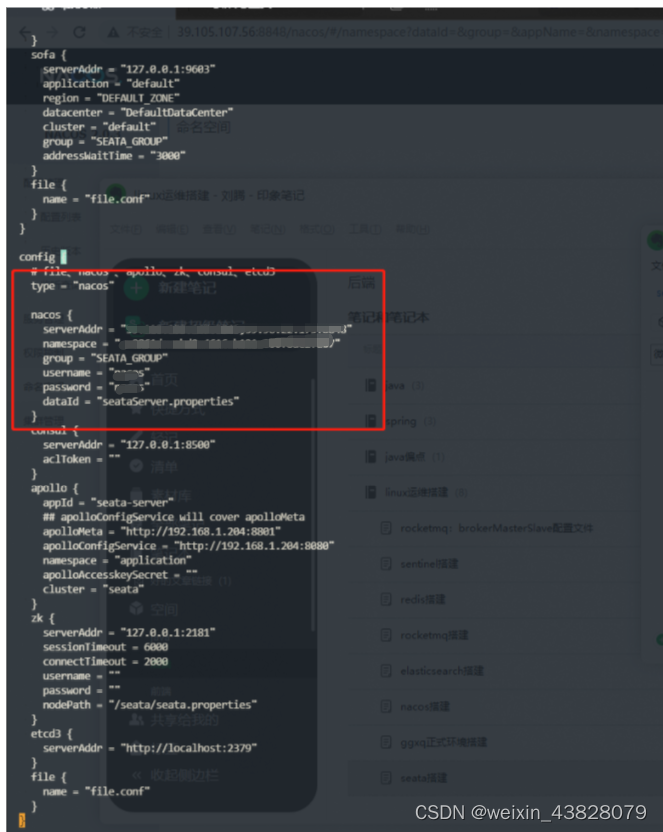
- 修改file.conf的配置,配置如下:
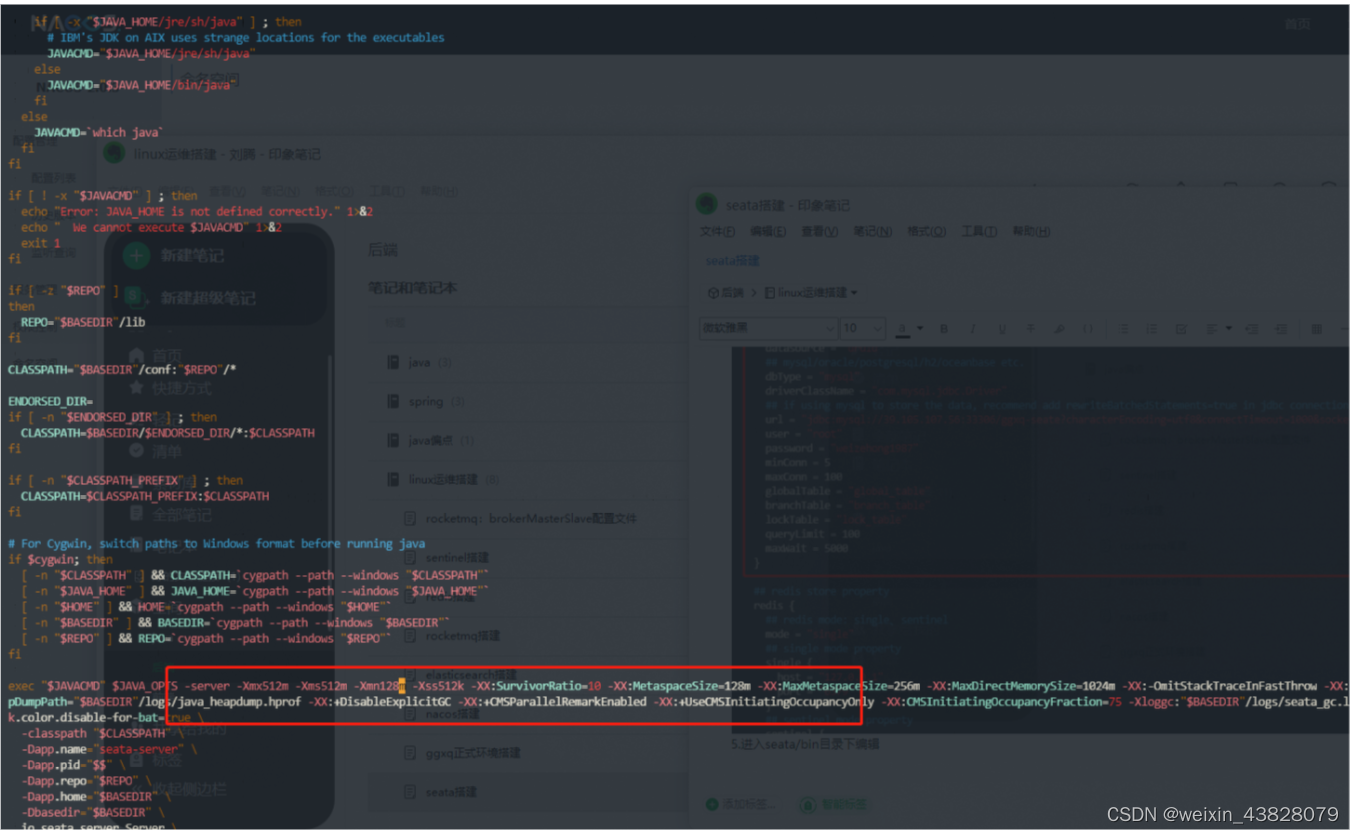
- 进入seata/bin目录下编辑,优化启动内存。
编写启动脚本
- start.sh
   	!/bin/sh
   	export LANG="en_US.UTF-8"
   	cd /usr/local/seata/seata/bin
   	runMessage=`ps aux | grep \`cat pidfile.txt\``
   	projectStartCommand="sh seata-server.sh"
   	if [[ $runMessage == *$projectStartCommand* ]]
   	then
   	    echo "Application has starting ,restarting..."
   	    kill -9 `cat pidfile.txt`
   	    nohup sh seata-server.sh -h 公网ip自行替换 -p 8091 -n 1  >seata.log 2>1 & echo $! > pidfile.txt
   	else
   	    echo "Application has stopped ,starting..."
   	    nohup sh seata-server.sh -h  公网ip自行替换 -p 8091 -n 1  >seata.log 2>1 & echo $! > pidfile.txt
   	fi
- stop.sh
#!/bin/sh
cd /usr/local/seata/seata/bin
PID=$(cat pidfile.txt)
if [ ${PID} ];
then
    echo 'Application is stpping...'
    echo kill $PID DONE
    kill $PID
else
    echo 'Application is already stopped...'
fi
补充启动脚本前需要将启动的配置文件写进nacos
- 编写config.txt到seata的bin同级目录,内容如下
service.vgroupMapping.ggxq-group=default
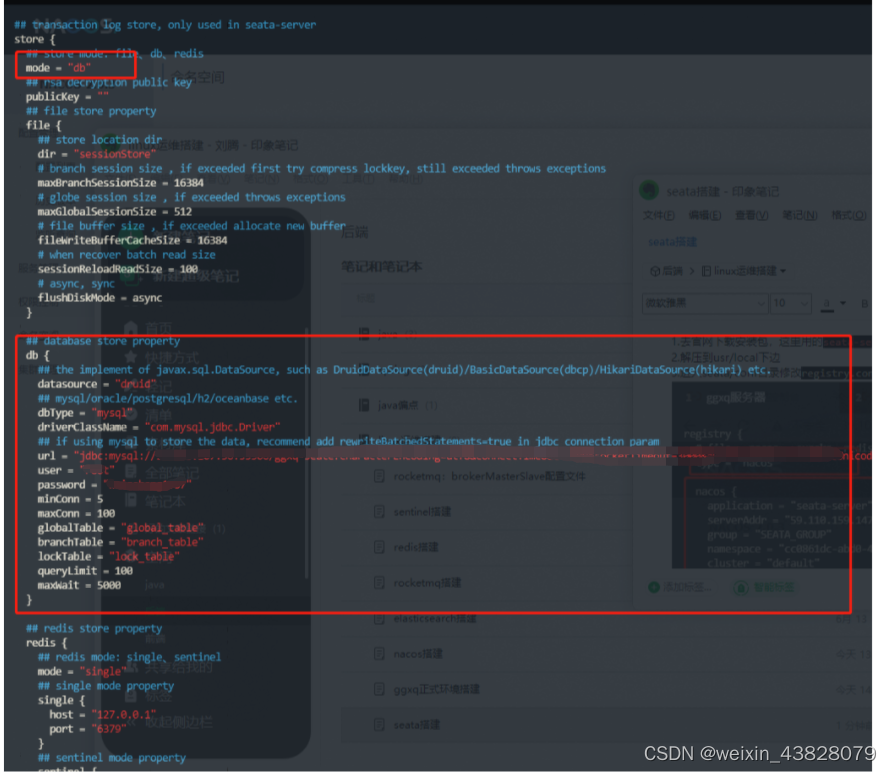
store.mode=db
store.db.datasource=druid
store.db.dbType=mysql
store.db.driverClassName=com.mysql.cj.jdbc.Driver
store.db.url= 自己的链接
store.db.user= mysql用户名
store.db.password=mysql密码
store.db.minConn=5
store.db.maxConn=30
store.db.globalTable=global_ta 最低0.47元/天 解锁文章


 290
290


 被折叠的 条评论
为什么被折叠?
被折叠的 条评论
为什么被折叠?
 到【灌水乐园】发言


