


前言
现在大部分的CPU都是多核,我们都知道想要提升我们应用程序的运行效率,就必须得充分利用多核CPU的计算能力;Java早已经为我们提供了多线程的API,但是实现方式略微麻烦,今天我们就来看看Java8在这方面提供的改善。
假设场景
现在你需要为在线教育平台提供一个查询用户详情的API,该接口需要返回用户的基本信息,标签信息,这两个信息存放在不同位置,需要远程调用来获取这两个信息;为了模拟远程调用,我们需要在代码里面延迟 1s;
public interface RemoteLoader {

    String load();

    default void delay() {
        try {
            Thread.sleep(1000L);
        } catch (InterruptedException e) {
            e.printStackTrace();
        }
    }
}

public class CustomerInfoService implements RemoteLoader {

    public String load() {
        this.delay();
        return "基本信息";
    }

}

public class LearnRecordService implements RemoteLoader {

    public String load() {
        this.delay();
        return "学习信息";
    }

}
同步方式实现版本
如果我们采用同步的方式来完成这个API接口,我们的实现代码:
@Test
public void testSync() {
    long start = System.currentTimeMillis();
    List<RemoteLoader> remoteLoaders = Arrays.asList(new CustomerInfoService(), new LearnRecordService());
    List<String> customerDetail = remoteLoaders.stream().map(RemoteLoader::load).collect(toList());
    System.out.println(customerDetail);
    long end = System.currentTimeMillis();
    System.out.println("总共花费时间:" + (end - start));
}
不出所料,因为调用的两个接口都是延迟了 1s ,所以结果大于2秒

Future实现的版本
接下来我们把这个例子用Java7提供的Future来实现异步的版本,看下效果如何呢?代码如下:
@Test
public void testFuture() {
    long start = System.currentTimeMillis();
    ExecutorService executorService = Executors.newFixedThreadPool(2);
    List<RemoteLoader> remoteLoaders = Arrays.asList(new CustomerInfoService(), new LearnRecordService());
    List<Future<String>> futures = remoteLoaders.stream()
            .map(remoteLoader -> executorService.submit(remoteLoader::load))
            .collect(toList());

    List<String> customerDetail = futures.stream()
            .map(future -> {
                try {
                    return future.get();
                } catch (InterruptedException | ExecutionException e) {
                    e.printStackTrace();
                }
                return null;
            })
            .filter(Objects::nonNull)
            .collect(toList());
    System.out.println(customerDetail);
    long end = System.currentTimeMillis();
    System.out.println("总共花费时间:" + (end - start));
}
这次我们采用多线程的方式来改造了我们这个例子,结果还是比较满意的,时间大概花费了1s多一点 
注意:这里我分成了两个Stream,如何合在一起用同一个Stream,那么在用future.get()的时候会导致阻塞,相当于提交一个任务执行完后才提交下一个任务,这样达不到异步的效果
这里我们可以看到虽然Future达到了我们预期的效果,但是如果需要实现将两个异步的结果进行合并处理就稍微麻一些,这里就不细说,后面主要看下CompletableFuture在这方面的改进
Java8并行流
以上我们用的是Java8之前提供的方法来实现,接下来我们来看下Java8中提供的并行流来实习我们这个例子效果怎样呢?
@Test
public void testParallelStream() {
    long start = System.currentTimeMillis();
    List<RemoteLoader> remoteLoaders = Arrays.asList(new CustomerInfoService(), new LearnRecordService());
    List<String> customerDetail = remoteLoaders.parallelStream().map(RemoteLoader::load).collect(toList());
    System.out.println(customerDetail);
    long end = System.currentTimeMillis();
    System.out.println("总共花费时间:" + (end - start));
}
运行的结果还是相当的满意,花费时间 1s 多点

和Java8之前的实现对比,我们发现整个代码会更加的简洁;
接下来我们把我们的例子改变一下,查询用户详情的接口还需要返回视频观看记录,用户的标签信息,购买订单
public class WatchRecordService implements RemoteLoader {
    @Override
    public String load() {
        this.delay();
        return "观看记录";
    }
}

public class OrderService implements RemoteLoader {
    @Override
    public String load() {
        this.delay();
        return "订单信息";
    }
}

public class LabelService implements RemoteLoader {
    @Override
    public String load() {
        this.delay();
        return "标签信息";
    }
}
我们继续使用Java8提供的并行流来实现,看下运行的结果是否理想
@Test
public void testParallelStream2() {
    long start = System.currentTimeMillis();
    List<RemoteLoader> remoteLoaders = Arrays.asList(
            new CustomerInfoService(),
            new LearnRecordService(),
            new LabelService(),
            new OrderService(),
            new WatchRecordService());
    List<String> customerDetail = remoteLoaders.parallelStream().map(RemoteLoader::load).collect(toList());
    System.out.println(customerDetail);
    long end = System.currentTimeMillis();
    System.out.println("总共花费时间:" + (end - start));
}
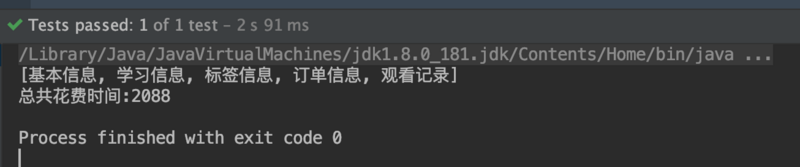
但是这次运行的结果不是太理想,花费时间超过了2秒
CompletableFuture
基本的用法
@Test
public void testCompletableFuture() {
    CompletableFuture<String> future = new CompletableFuture<>();
    new Thread(() -> {
        doSomething();
        future.complete("Finish");          //任务执行完成后 设置返回的结果
    }).start();
    System.out.println(future.join());      //获取任务线程返回的结果
}

private void doSomething() {
    System.out.println("doSomething...");
}
这种用法还有个问题,就是任务出现了异常,主线程会无感知,任务线程不会把异常给抛出来;这会导致主线程会一直等待,通常我们也需要知道出现了什么异常,做出对应的响应;改进的方式是在任务中try-catch所有的异常,然后调用future.completeExceptionally(e) ,代码如下:
@Test
public void testCompletableFuture() throws ExecutionException, InterruptedException {
    CompletableFuture<String> future = new CompletableFuture<>();
    new Thread(() -> {
        try {
            doSomething();
            future.complete("Finish");
        } catch (Exception e) {
            future.completeExceptionally(e);
        }
    }).start();
    System.out.println(future.get());
}

private void doSomething() {
    System.out.println("doSomething...");
    throw new RuntimeException("Test Exception");
}
从现在来看CompletableFuture的使用过程需要处理的事情很多,不太简洁,你会觉得看起来很麻烦;但是这只是表象,Java8其实对这个过程进行了封装,提供了很多简洁的操作方式;接下来我们看下如何改造上面的代码
@Test
public void testCompletableFuture2() throws ExecutionException, InterruptedException {
    CompletableFuture<String> future = CompletableFuture.supplyAsync(() -> {
        doSomething();
        return "Finish";
    });
    System.out.println(future.get());
}
这里我们采用了supplyAsync,这下看起来简洁了许多,世界都明亮了; Java8不仅提供允许任务返回结果的supplyAsync,还提供了没有返回值的runAsync;让我们可以更加的关注业务的开发,不需要处理异常错误的管理
CompletableFuture异常处理
如果说主线程需要关心任务到底发生了什么异常,需要对其作出相应操作,这个时候就需要用到exceptionally
@Test
public void testCompletableFuture2() throws ExecutionException, InterruptedException {
    CompletableFuture<String> future = CompletableFuture
            .supplyAsync(() -> {
                doSomething();
                return "Finish";
            })
            .exceptionally(throwable -> "Throwable exception message:" + throwable.getMessage());
    System.out.println(future.get());
}
使用CompletableFuture来完成我们查询用户详情的API接口
@Test
public void testCompletableFuture3() throws ExecutionException, InterruptedException {
    long start = System.currentTimeMillis();
    List<RemoteLoader> remoteLoaders = Arrays.asList(
            new CustomerInfoService(),
            new LearnRecordService(),
            new LabelService(),
            new OrderService(),
            new WatchRecordService());
    List<CompletableFuture<String>> completableFutures = remoteLoaders
            .stream()
            .map(loader -> CompletableFuture.supplyAsync(loader::load))
            .collect(toList());

    List<String> customerDetail = completableFutures
            .stream()
            .map(CompletableFuture::join)
            .collect(toList());

    System.out.println(customerDetail);
    long end = System.currentTimeMillis();
    System.out.println("总共花费时间:" + (end - start));
}
这里依然是采用的两个Stream来完成的,执行的结果如下:

这个结果不太满意,和并行流的结果差不多,消耗时间 2秒多点;在这种场景下我们用CompletableFuture做了这么多工作,但是效果不理想,难道就有没有其他的方式可以让它在快一点吗?
为了解决这个问题,我们必须深入了解下并行流和CompletableFuture的实现原理,它们底层使用的线程池的大小都是CPU的核数Runtime.getRuntime().availableProcessors();那么我们来尝试一下修改线程池的大小,看看效果如何?
自定义线程池,优化CompletableFuture
使用并行流无法自定义线程池,但是CompletableFuture可以
@Test
public void testCompletableFuture4() throws ExecutionException, InterruptedException {
    long start = System.currentTimeMillis();
    List<RemoteLoader> remoteLoaders = Arrays.asList(
            new CustomerInfoService(),
            new LearnRecordService(),
            new LabelService(),
            new OrderService(),
            new WatchRecordService());

    ExecutorService executorService = Executors.newFixedThreadPool(Math.min(remoteLoaders.size(), 50));

    List<CompletableFuture<String>> completableFutures = remoteLoaders
            .stream()
            .map(loader -> CompletableFuture.supplyAsync(loader::load, executorService))
            .collect(toList());

    List<String> customerDetail = completableFutures
            .stream()
            .map(CompletableFuture::join)
            .collect(toList());

    System.out.println(customerDetail);
    long end = System.currentTimeMillis();
    System.out.println("总共花费时间:" + (end - start));
}
我们使用自定义线程池,设置最大的线程池数量50,来看下执行的结果 
这下执行的结果比较满意了,1秒多点;理论上来说这个结果可以一直持续,直到达到线程池的大小50
并行流和CompletableFuture两者该如何选择
这两者如何选择主要看任务类型,建议
- 如果你的任务是计算密集型的,并且没有I/O操作的话,那么推荐你选择Stream的并行流,实现简单并行效率也是最高的
- 如果你的任务是有频繁的I/O或者网络连接等操作,那么推荐使用CompletableFuture,采用自定义线程池的方式,根据服务器的情况设置线程池的大小,尽可能的让CPU忙碌起来
CompletableFuture的其他常用方法
- thenApply、thenApplyAsync:
假如任务执行完成后,还需要后续的操作,比如返回结果的解析等等;可以通过这两个方法来完成 - thenCompose、thenComposeAsync:
允许你对两个异步操作进行流水线的操作,当第一个操作完成后,将其结果传入到第二个操作中 - thenCombine、thenCombineAsync:允许你把两个异步的操作整合;比如把第一个和第二个操作返回的结果做字符串的连接操作
总结
- Java8并行流的使用方式
- CompletableFuture的使用方式、异常处理机制,让我们有机会管理任务执行中发送的异常
- Java8并行流和CompletableFuture两者该如何选择
- CompletableFuture的常用方法
源于:juejin.cn/post/6897844374093496328


 4881
4881


 被折叠的 条评论
为什么被折叠?
被折叠的 条评论
为什么被折叠?
 到【灌水乐园】发言


