


继续撸后台,之前用户的身份验证和用户信息都是写死在代码里了,现在我们把他搬到数据库里。数据库访问,我使用了Spring Data JPA。
使用数据库验证用户登录
使用JPA访问数据库是一件轻松愉快的事,至少针对目前的需求是这样。
- 先定义好Entity类型,如UserEntity,RoleEntity等等。
@Entity
@Data
@NoArgsConstructor
@AllArgsConstructor
public class UserEntity {
    @Id
    @GeneratedValue(strategy= GenerationType.IDENTITY)
    Long id;
    String userName;
    String password;
    String name;
    Instant lastLogin;

    @ManyToOne(fetch = FetchType.EAGER)
    RoleEntity role;
}

@Entity
@Data
@NoArgsConstructor
@AllArgsConstructor
public class RoleEntity {
    @Id
    @GeneratedValue(strategy= GenerationType.IDENTITY)
    Long id;
    String name;
}
- 然后是UserEntity对应的的Repository接口
public interface UserRepository extends JpaRepository<UserEntity, Long>, JpaSpecificationExecutor<UserEntity> {
    UserEntity findOneByUserName(String userName);
}
- 最后在LoginController中将Repository接口注入进去
public class LoginController {
    @Autowired
    UserRepository userRepository;
到这里,数据库访问用户数据的前提就已经准备好了,接下来我们还需要改造login接口,让他从数据库获取用户数据并验证密码。
public ApiResult login(HttpServletRequest request, @RequestBody ReqLogin params) {
    UserEntity user = userRepository.findOneByUserName(params.getUsername());
    if(user == null || !user.getPassword().equals(params.getPassword()))
        return new ApiResult(20001, null, "用户名或密码不正确");

    HttpSession session = request.getSession(true);
    session.setAttribute("user", user);

    Map<String, Object> r = new HashMap<>();
    r.put("token", session.getId());
    return new ApiResult(20000, r);
}
由于session对象内的数据结构发生变化,info接口也做相应的改动
public ApiResult info(HttpServletRequest request){
    HttpSession session = request.getSession();
    if(session == null)
        return new ApiResult(20001, null, "无效的token");
    UserEntity user = (UserEntity)session.getAttribute("user");
    Map<String, Object> r = new HashMap<>();
    r.put("username", user.getUserName());
    r.put("name", user.getName());
    List<String> roles = new ArrayList<>();
    roles.add(user.getRole().getName());
    r.put("roles", roles);
    return new ApiResult(20000, r);
}
最后,创建好数据库,运行api server,会自动建表
Hibernate: create table role_entity (id bigint not null auto_increment, name varchar(255), primary key (id)) engine=InnoDB
Hibernate: create table user_entity (id bigint not null auto_increment, last_login datetime, name varchar(255), password varchar(255), user_name varchar(255), role_id bigint, primary key (id)) engine=InnoDB
Hibernate: alter table user_entity add constraint FKc50fb2m5pqs8711tbas2jljlu foreign key (role_id) references role_entity (id)
清空浏览器cookies,回到登录界面,点击登录,此时会收到错误

在数据库里手动插入用户数据和角色数据

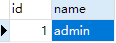
再次尝试,登陆成功!使用数据库验证用户登录完成!
密码加密存储
刚才你一定发现了,数据库里存储的密码是明文的,风险安全比较大。我们采用MD5哈希后再存储,继续修改login接口,将接口部分代码替换如下:
    public ApiResult login(HttpServletRequest request, @RequestBody ReqLogin params) throws Exception{
        UserEntity user = userRepository.findOneByUserName(params.getUsername());
        if(user == null)
            return new ApiResult(20001, null, "用户名不存在");

        MessageDigest messageDigest = MessageDigest.getInstance("MD5");
        messageDigest.update(params.getPassword().getBytes("UTF-8"));

        if(!user.getPassword().equals(MD5Encoder.encode(messageDigest.digest())))
            return new ApiResult(20001, null, "用户名或密码不正确");

        HttpSession session = request.getSession(true);
        session.setAttribute("user", user);

        Map<String, Object> r = new HashMap<>();
        r.put("token", session.getId());
        return new ApiResult(20000, r);
    }
别忘了,‘111111’ 的MD5值是‘96e79218965eb72c92a549dd5a330112’,提前更新到数据库里即可

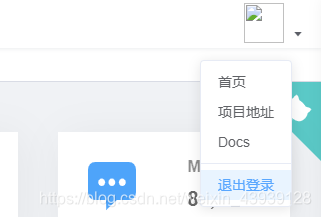
用户注销接口
阅读vue-admin-template前端代码不难发现,用户注销的实现在 store/modules/user.js 和 api/user.js 中
import { login, logout, getInfo } from '@/api/user'
//省略
  logout({ commit, state }) {
    return new Promise((resolve, reject) => {
      logout(state.token).then(() => {
        commit('SET_TOKEN', '')
        commit('SET_ROLES', [])
        removeToken()
        resetRouter()
        resolve()
      }).catch(error => {
        reject(error)
      })
    })
  },
export function logout() {
  return request({
    url: '/user/logout',
    method: 'post'
  })
}
前端的处理流程是先向api server发起logout请求,请求成功后清除store中的token和用户角色数据,以及cookie中的token数据
我们直接在LoginController实现这logout接口,让X-Token失效即可完成这项功能。
@RequestMapping("/logout")
@ResponseBody
public ApiResult logout(HttpServletRequest request){
    HttpSession session = request.getSession();
    if(session == null)
        return new ApiResult(20001, null, "无效的token");
    session.invalidate();
    return new ApiResult(20000, true);
}
经过测试,前端用户现在可以正常注销登陆了。
使用拦截器对接口进行校验
到现在为止,我们一共在Controller中实现了3个接口——login, logout, info,后续会增加更多地接口,除了login接口不需要登录就可以访问,其他接口访问前提都是需要用户登录的。难道我们每个接口都写一遍这个代码?
HttpSession session = request.getSession();
if(session == null)
    return new ApiResult(20001, null, "无效的token");
没这个必要,根据login的实现我们知道,已经登陆的用户,服务端对应的session应该是含有user属性的,我们可以据此配置一个拦截器,对除login以外的所有接口统一进行登录校验。先写一个拦截器类LoginInterception
package com.zy.report.config;

import com.fasterxml.jackson.databind.ObjectMapper;
import com.zy.report.vo.ApiResult;
import org.springframework.web.servlet.HandlerInterceptor;

import javax.servlet.http.HttpServletRequest;
import javax.servlet.http.HttpServletResponse;
import java.io.IOException;
import java.io.PrintWriter;

public class LoginInterception implements HandlerInterceptor {
    @Override
    public boolean preHandle(HttpServletRequest httpServletRequest, HttpServletResponse response, Object o) throws Exception {
        if(httpServletRequest.getSession().getAttribute("user") == null){
            writeJson(response, new ApiResult(50008));
            return false;
        }
        return true;
    }

    public void writeJson(HttpServletResponse resp , ApiResult apiResult ){
        PrintWriter out = null;
        try {
            ObjectMapper mapper = new ObjectMapper();
            resp.setContentType("application/json;charset=UTF-8");
            out = resp.getWriter();
            out.write(mapper.writeValueAsString(apiResult));
            out.flush();
        } catch (IOException e) {
            e.printStackTrace();
        }finally{
            if(out != null){
                out.close();
            }
        }
    }

}
最后还需要在配置类中加入这个拦截器,跟CORSConfiguration写在一起就行
@Configuration
public class CORSConfiguration extends WebMvcConfigurationSupport {
    @Override
    public void addInterceptors(InterceptorRegistry registry) {
        registry.addInterceptor(new LoginInterception()).addPathPatterns("/**").excludePathPatterns("/user/login");
    }
需要一提的是,因为我们拦截的都是XHR请求,如果发现越权访问返回重定向对前端是没有影响的,目前我们使用的前端 utils/request组件对所有XHR的响应进行了统一处理,所以我们这里只需要50008错误代码,由前端request组件提示错误信息,并将界面路由到登录页面。
utils/request.js
      // 50008: Illegal token; 50012: Other clients logged in; 50014: Token expired;
      if (res.code === 50008 || res.code === 50012 || res.code === 50014) {
        // to re-login
        store.dispatch("user/resetToken").then(() => {
          location.reload();
        });
以上都准备妥当后重启api server,进入登陆页面点击登录,出错了!浏览器控制台输出如下
Access to XMLHttpRequest at 'http://localhost:10200/user/info' from origin 'http://localhost:9527'
 has been blocked by CORS policy: Response to preflight request doesn't pass access control check:
  No 'Access-Control-Allow-Origin' header is present on the requested resource.
由拦截器引起的CORS配置无效?
哎?这不是我们之前遇到过的CORS错误吗?仔细查看Network记录,login请求处理顺利,但info接口的OPTIONS预检请求似乎被刚设置的拦截器拦截了,还返回了ApiResult数据……,而login请求处理顺利是因为被我们拦截规则排除在外了。
OPTIONS 预检请求
OPTIONS /user/info HTTP/1.1
Host: localhost:10200
//省略
Accept-Language: zh-CN,zh;q=0.9,en;q=0.8
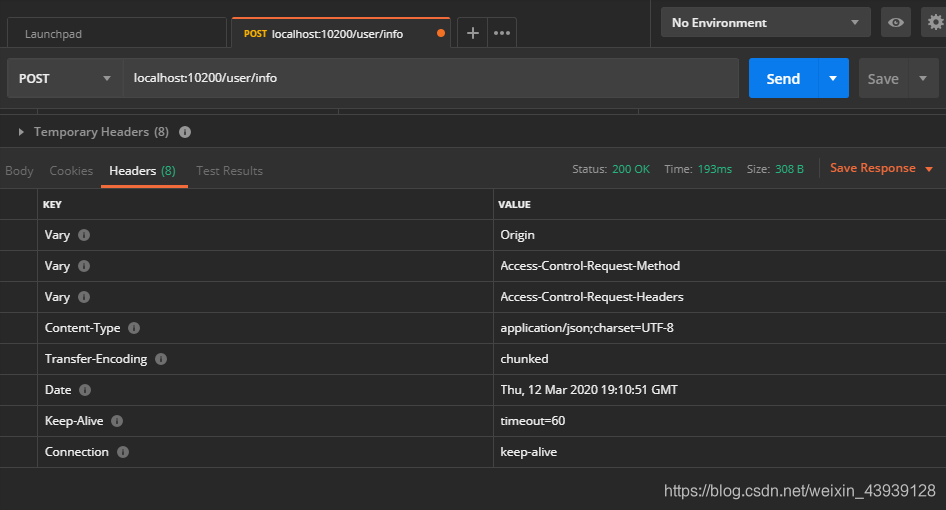
响应
HTTP/1.1 200
X-Token: d4f0b6a5-b3ad-4a9c-bbed-f6dbac2e1819
Content-Type: application/json;charset=UTF-8
//省略
Connection: keep-alive
{"code":50008,"data":null,"message":null}
这也许是拦截器在CORS处理机制之前被触发了?我们来看下之前我们是怎么配置CORS的
public class CORSConfiguration extends WebMvcConfigurationSupport {
    @Override
    public void addCorsMappings(CorsRegistry registry) {
        registry.addMapping("/**")
                .allowedMethods("*")
                .allowedOrigins("*")
                .allowedHeaders("*");
        super.addCorsMappings(registry);
    }
我们是通过继承WebMvcConfigurationSupport ,并重写其addCorsMappings方法来实现的。要解决这个问题就要弄明白这背后的工作原理,从查看WebMvcConfigurationSupport 源码开始。因为我们重写了他的addCorsMappings方法,很容易便能找到包含CORS配置的CorsRegistry对象的去向,以下是WebMvcConfigurationSupport.java的部分源码:
@Bean
@SuppressWarnings("deprecation")
public RequestMappingHandlerMapping requestMappingHandlerMapping(
		@Qualifier("mvcContentNegotiationManager") ContentNegotiationManager contentNegotiationManager,
		@Qualifier("mvcConversionService") FormattingConversionService conversionService,
		@Qualifier("mvcResourceUrlProvider") ResourceUrlProvider resourceUrlProvider) {

	RequestMappingHandlerMapping mapping = createRequestMappingHandlerMapping();
	mapping.setOrder(0);
	mapping.setInterceptors(getInterceptors(conversionService, resourceUrlProvider));
	mapping.setContentNegotiationManager(contentNegotiationManager);
	mapping.setCorsConfigurations(getCorsConfigurations());
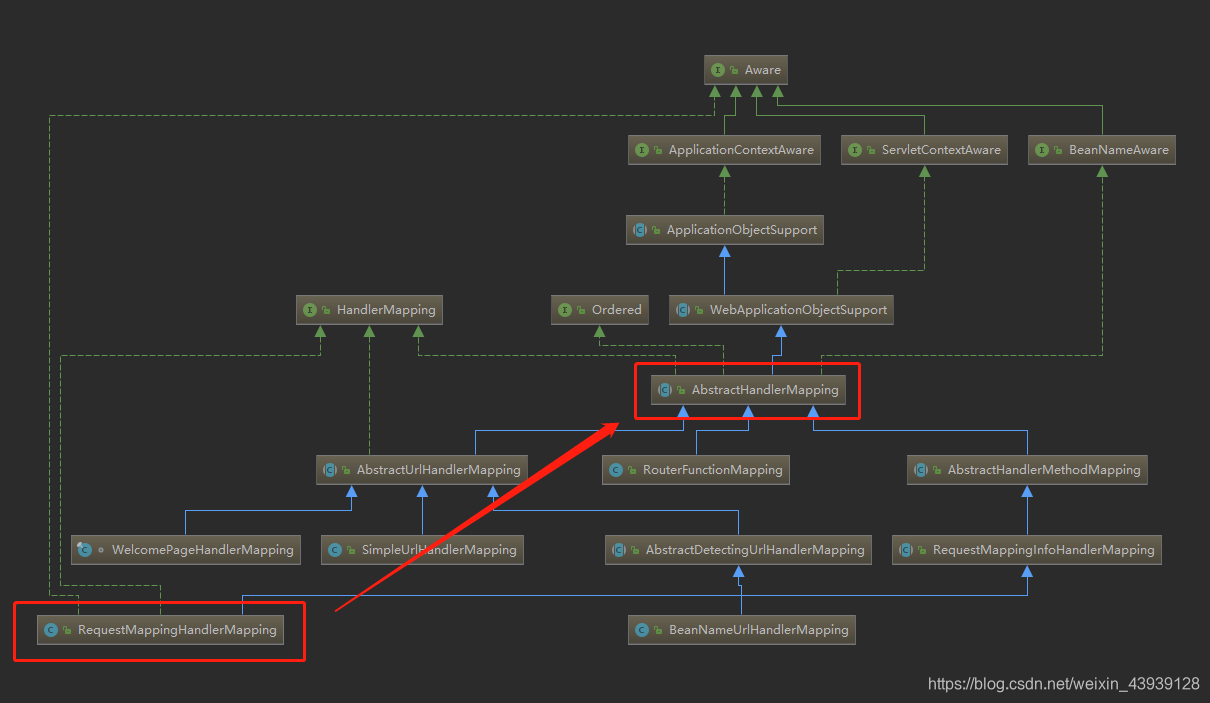
我们可以看到WebMvcConfigurationSupport用我们addCorsMappings提供的CORS配置,初始化了RequestMappingHandlerMapping 对象。说到这里,我们可能要稍微了解一下相关的体系架构,不然不清楚RequestMappingHandlerMapping是个什么东西。
简单来看,请求比较好理解,比如前端向后端发起一个POST /user/login,这就是一个请求,而Controller中实现的login、logout接口,就是请求处理器,也叫Handler。
DispatcherServlet在收到前端的请求后,就会使用HandlerMapping去查找该请求的请求处理器,最后由请求处理器来处理这个请求。AbstractHandlerMapping就是这个HandlerMapping接口的抽象类。我们可以把一个HandlerMapping想象成一个Map,请求当做key,请求处理器当做value。这一过程就好比在一Map数据结构中,通过key获得value一样,当然实际情况要复杂。
见上图,根据不同类型的请求和请求处理器,AbstractHandlerMapping还可以继续细分成AbstactUrlHandlerMapping和AbstractHandlerMethodMapping。
- AbstractUrlHandlerMapping可以细分为由BeanNameUrlHandlerMapping和SimpleUrlHandlerMapping实现
- AbstractHandlerMethodMapping最终由RequestMappingHandlerMapping来实现
我估计大家平常都喜欢用@Controller和@RequestMapping注解来实现请求处理,RequestMappingHandlerMapping当属功臣,正是它为DispatcherServlet实现了这个功能。RequestMappingHandlerMapping的“key”是RequestMappingInfo,“value”则是HandlerMethod。RequestMappingInfo描述了我们在@RequestMapping里写的url,method等参数,HandlerMethod则是描述了我们编写的login方法,info方法等。
当然Spring还支持其他方式来实现请求的处理,比如一个实现Controller或是HttpRequestHandler接口的类,BeanNameUrlHandlerMapping和SimpleUrlHandlerMapping则是为他们服务的。
AbstractHandlerMapping提供的getHandler接口,其功能就是根据请求,获得对应的请求处理器
public final HandlerExecutionChain getHandler(HttpServletRequest request) throws Exception;
这里返回的HandlerExecutionChain又是什么?大概看一下他的源码,应该可以理解,他应该是除了包含请求执行器,还有各种拦截器。DispatcherServlet拿到这个HandlerExecutionChain 后,应该是先执行拦截器,随后才会执行请求处理器。
public class HandlerExecutionChain {
	private static final Log logger = LogFactory.getLog(HandlerExecutionChain.class);
	private final Object handler;
	@Nullable
	private HandlerInterceptor[] interceptors;
	@Nullable
	private List<HandlerInterceptor> interceptorList;
	private int interceptorIndex = -1;
回到正题,跟我们问题相关的地方就是,AbstractHandlerMapping抽象层就已经对CORS预检请求进行了特殊关照,并提供了相关接口来接收CORS配置和进行处理。而且我们也在WebMvcConfigurationSupport中初始化RequestMappingHandlerMapping对象的源码中看到了这一句:
mapping.setCorsConfigurations(getCorsConfigurations());
CORS配置确实也是传入了HandlerMapping,那为什么我们的CORS配置没有生效呢?从现象上看很容易让人猜测到是拦截器顺序导致的,为了确认是不是这个原因,让我们再看一下AbstractHandlerMapping::getHandler的具体细节吧:
public final HandlerExecutionChain getHandler(HttpServletRequest request) throws Exception {
	//省略
	if (hasCorsConfigurationSource(handler) || CorsUtils.isPreFlightRequest(request)) {
		CorsConfiguration config = (this.corsConfigurationSource != null ? this.corsConfigurationSource.getCorsConfiguration(request) : null);
		CorsConfiguration handlerConfig = getCorsConfiguration(handler, request);
		config = (config != null ? config.combine(handlerConfig) : handlerConfig);
		executionChain = getCorsHandlerExecutionChain(request, executionChain, config);
	}

	return executionChain;
代码最后部分的意思是,如果检测到请求处理器是一个CORS配置类,或者正在处理的是一个预检请求,就通过getCorsHandlerExecutionChain重新生成executionChain,让我们继续跟进getCorsHandlerExecutionChain函数:
protected HandlerExecutionChain getCorsHandlerExecutionChain(HttpServletRequest request,
		HandlerExecutionChain chain, @Nullable CorsConfiguration config) {

	if (CorsUtils.isPreFlightRequest(request)) {
		HandlerInterceptor[] interceptors = chain.getInterceptors();
		chain = new HandlerExecutionChain(new PreFlightHandler(config), interceptors);
	}
	else {
		chain.addInterceptor(0, new CorsInterceptor(config));
	}
	return chain;
}
再次确认,如果是一个CORS的预检请求,那么就通过new HandlerExecutionChain重新构建HandlerExecutionChain,对了,PreFlightHandler是AbstractHandlerMapping里的一个内联类,看一下他的具体实现,还有HandlerExecutionChain构造函数:
private class PreFlightHandler implements HttpRequestHandler, CorsConfigurationSource {

	@Nullable
	private final CorsConfiguration config;

	public PreFlightHandler(@Nullable CorsConfiguration config) {
		this.config = config;
	}

	@Override
	public void handleRequest(HttpServletRequest request, HttpServletResponse response) throws IOException {
		corsProcessor.processRequest(this.config, request, response);
	}

	@Override
	@Nullable
	public CorsConfiguration getCorsConfiguration(HttpServletRequest request) {
		return this.config;
	}
}
//HandlerExecutionChain构造函数
public HandlerExecutionChain(Object handler, @Nullable HandlerInterceptor... interceptors) {
	if (handler instanceof HandlerExecutionChain) {
		HandlerExecutionChain originalChain = (HandlerExecutionChain) handler;
		this.handler = originalChain.getHandler();
		this.interceptorList = new ArrayList<>();
		CollectionUtils.mergeArrayIntoCollection(originalChain.getInterceptors(), this.interceptorList);
		CollectionUtils.mergeArrayIntoCollection(interceptors, this.interceptorList);
	}
	else {
		this.handler = handler;
		this.interceptors = interceptors;
	}
}
很明显,构造函数里的handler参数并不是HandlerExecutionChain类型,按照构造函数的实现,拦截器被保留下来了,但这个请求的处理器被替换为了PreFlightHandler 对象,于是这个请求处理器的实际工作变成了:
corsProcessor.processRequest(this.config, request, response);
看到这里,我们遇到的CORS配置不生效的原因好像就找到了,因为CORS的实现是放在请求处理器中完成的,而请求处理器是在拦截器之后才会启用,所以,在我们的实现里,CORS请求处理器就没有机会执行了。
找到原因那就好办,我们可以在自己的拦截器中对预检请求放行就好了,回到我们LoginInterception类的实现,稍作修改:
public class LoginInterception implements HandlerInterceptor {
    @Override
    public boolean preHandle(HttpServletRequest httpServletRequest, HttpServletResponse response, Object o) throws Exception {
        if(CorsUtils.isPreFlightRequest(httpServletRequest))
            return true;
        if(httpServletRequest.getSession().getAttribute("user") == null){
            writeJson(response, new ApiResult(50008));
            return false;
        }
        return true;
    }
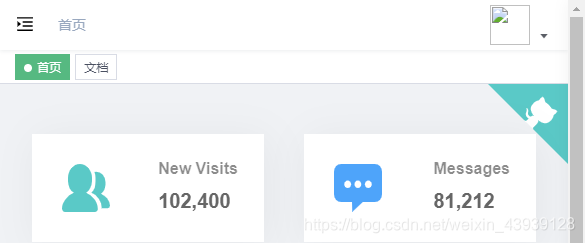
重启api server,点击登录

久违了的dashboard界面出现了!
接下来用postman对api server进行越权访问测试
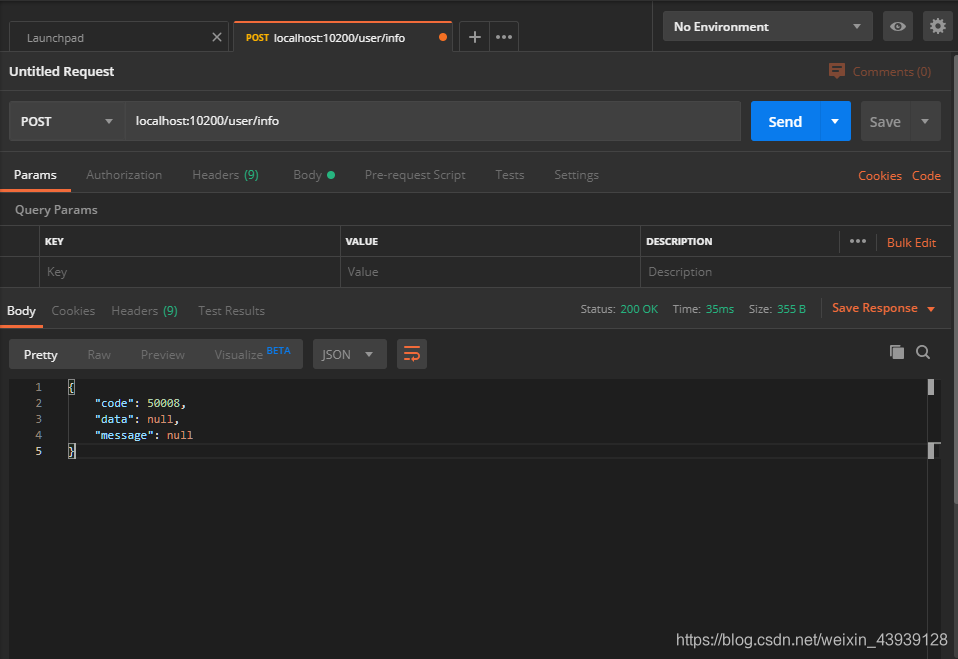
正如我们期待
Token生成时机的问题
不过,我又发现一个小问题,我们的api server处理前端请求时,无论用户有没有登录,都会生成一个session id并回传到前端,这是烂费资源且没有必要的。api server只有用户登录成功后才需要返回一个session id。
让我们对LoginInterception拦截器再做一点小修改:
public class LoginInterception implements HandlerInterceptor {
    @Override
    public boolean preHandle(HttpServletRequest httpServletRequest, HttpServletResponse response, Object o) throws Exception {
        if(CorsUtils.isPreFlightRequest(httpServletRequest))
            return true;
        HttpSession session = httpServletRequest.getSession(false);
        if(session == null || session.getAttribute("user") == null){
            writeJson(response, new ApiResult(50008));
            return false;
        }
        return true;
    }
这次好了,api server再也不会为未登录用户生成token了!


 1960
1960


 被折叠的 条评论
为什么被折叠?
被折叠的 条评论
为什么被折叠?
 到【灌水乐园】发言


