


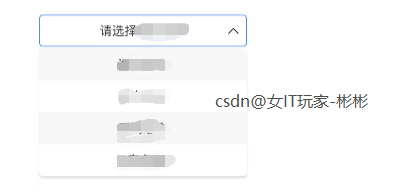
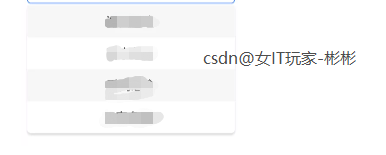
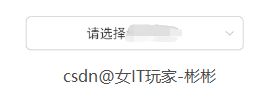
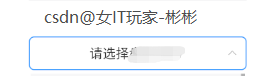
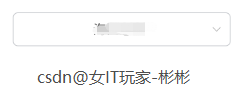
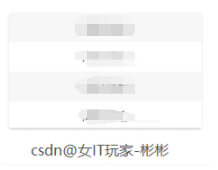
UI设计图
箭头有动画。
思路
-
自定义一个类继承RelativeLayout,用相对布局的好处就是,文本可以显示在正中间,箭头图标不会占走位置,使文本位置偏移。
-
该控件可以自定义属性atts。
-
控件能够通用,不care数据类型
-
菜单项使用Listview,用PopupWindow弹出
代码实现
atts.xml
<!-- 自定义dropDownMenu -->
    <declare-styleable name="DropDownMenu">
        <!--  文本显示位置  -->
        <attr name="textGravity">
            <flag name="top" value="0x30" />
            <flag name="bottom" value="0x50" />
            <flag name="left" value="0x03" />
            <flag name="right" value="0x05" />
            <flag name="center_vertical" value="0x10" />
            <flag name="fill_vertical" value="0x70" />
            <flag name="center_horizontal" value="0x01" />
            <flag name="fill_horizontal" value="0x07" />
            <flag name="center" value="0x11" />
            <flag name="fill" value="0x77" />
            <flag name="clip_vertical" value="0x80" />
            <flag name="clip_horizontal" value="0x08" />
            <flag name="start" value="0x00800003" />
            <flag name="end" value="0x00800005" />
        </attr>
        <!--   弹窗宽度(建议与显示框等长)     -->
        <attr name="popupWidth" format="dimension" />
        <!--   菜单显示栏默认字     -->
        <attr name="placeholder" format="string" />
        <!--   菜单显示栏字体颜色     -->
        <attr name="textColor" format="color" />
        <!--   菜单显示栏字体大小     -->
        <attr name="menuTextSize" format="dimension" />
        <!--   菜单显示栏图标     -->
        <attr name="menuIcon" format="reference" />
        <!--   下拉菜单展示的元素个数     -->
        <attr name="showMenuItemCount" format="integer" />
    </declare-styleable>
listview的布局样式
ps:这个listview 样式不建议修改
bg_border_shadow_gray_4dp.xml
上左右带一点边框,下边框有阴影,四角微圆。
<?xml version="1.0" encoding="utf-8"?>
<layer-list xmlns:android="http://schemas.android.com/apk/res/android" >
<!-- 阴影部分 -->
<!-- 个人觉得更形象的表达:top代表下边的阴影高度,left代表右边的阴影宽度。其实也就是相对应的offset,solid中的颜色是阴影的颜色,也可以设置角度等等 -->
<item
android:left="1dp"
android:top="1dp"
android:right="1dp"
android:bottom="1dp">
<shape android:shape="rectangle" >
<solid android:color="#0F000000" />
<corners
android:bottomLeftRadius="@dimen/dp_5"
android:bottomRightRadius="@dimen/dp_5"
android:topLeftRadius="@dimen/dp_5"
android:topRightRadius="@dimen/dp_5" />
</shape>
</item>
<!-- 背景部分 -->
<!-- 形象的表达:bottom代表背景部分在上边缘超出阴影的高度,right代表背景部分在左边超出阴影的宽度(相对应的offset) -->
<item
android:left="2dp"
android:top="2dp"
android:right="2dp"
android:bottom="2dp">
<shape android:shape="rectangle" >
<solid android:color="#DDDDDD" />
<corners
android:bottomLeftRadius="@dimen/dp_5"
android:bottomRightRadius="@dimen/dp_5"
android:topLeftRadius="@dimen/dp_5"
android:topRightRadius="@dimen/dp_5" />
</shape>
</item>
<item
android:left="2dp"
android:top="2dp"
android:right="2dp"
android:bottom="4dp">
<shape android:shape="rectangle" >
<solid android:color="#FFFFFF" />
<corners
android:bottomLeftRadius="@dimen/dp_5"
android:bottomRightRadius="@dimen/dp_5"
android:topLeftRadius="@dimen/dp_5"
android:topRightRadius="@dimen/dp_5" />
</shape>
</item>
</layer-list>listview_drop_down_menu.xml
很简单的listview布局,重点在于padding要适配阴影
<?xml version="1.0" encoding="utf-8"?>
<LinearLayout xmlns:android="http://schemas.android.com/apk/res/android"
android:layout_width="match_parent"
android:layout_height="wrap_content"
android:background="@drawable/bg_border_shadow_gray_4dp"
android:orientation="vertical">
<ListView
android:paddingLeft="@dimen/dp_2"
android:paddingRight="@dimen/dp_2"
android:paddingBottom="@dimen/dp_4"
android:id="@+id/lv"
android:divider="@null"
android:layout_width="match_parent"
android:layout_height="wrap_content"/>
</LinearLayout>创建DropDownMenu类
创建好了就可以直接用了
public class DropDownMenu extends RelativeLayout {
// 菜单显示栏字体颜色
private int textColor = 0xaa333333;
// 默认显示字
private String placeholder = "请选择";
// 菜单显示栏字体大小
private int menuTextSize = 14;
// 弹窗宽度(建议与显示框等长)
private int popupWidth = 150;
// 图标(一般是箭头)
private int menuIcon;
//菜单项被选中位置 初始没有菜单被选中记为-1
private int selectPosition = -1;
// 文本显示位置
private Integer textGravity;
// 菜单项显示个数,默认4个
int showMenuItemCount = 4;
// 菜单项适配器
private BaseAdapter adapter;
// 弹窗位置偏移,因为会存在弹窗存在初始margin
int xoff = 10;
int yoff = 10;
// 主容器,DropDownMenu自身的 RelativeLayout
public RelativeLayout mainLy;
public DropDownMenu(Context context) {
this(context, null);
}
public DropDownMenu(Context context, @Nullable AttributeSet attrs) {
this(context, attrs, 0);
}
// xml传属性,自定义属性attrs
public DropDownMenu(Context context, @Nullable AttributeSet attrs, int defStyleAttr) {
super(context, attrs, defStyleAttr);
TypedArray a = context.obtainStyledAttributes(attrs, R.styleable.DropDownMenu);
textColor = a.getColor(R.styleable.DropDownMenu_textColor, textColor);
menuTextSize = a.getDimensionPixelSize(R.styleable.DropDownMenu_menuTextSize, menuTextSize);
menuIcon = a.getResourceId(R.styleable.DropDownMenu_menuIcon, menuIcon);
placeholder = a.getString(R.styleable.DropDownMenu_placeholder);
textGravity = a.getInt(R.styleable.DropDownMenu_textGravity, CENTER);
popupWidth = a.getDimensionPixelSize(R.styleable.DropDownMenu_popupWidth, popupWidth);
showMenuItemCount = a.getInt(R.styleable.DropDownMenu_showMenuItemCount,showMenuItemCount);
a.recycle();
// 初始化布局
initViews(context);
}
public void setAdapter(BaseAdapter madapter) {
adapter = madapter;
}
private void initViews(Context context) {
// LinearLayout容器布局
// setOrientation(LinearLayout.HORIZONTAL);
setPadding(dp2Px(10), dp2Px(0), dp2Px(10), dp2Px(0));
// setGravity(Gravity.CENTER_VERTICAL);
// 容器内容
addContentView();
// 点击事件
this.setOnClickListener(new OnClickListener() {
@Override
public void onClick(View v) {
if(mainLy == null){
mainLy = (RelativeLayout) v;
}
if(v.isActivated()) {
v.setActivated(false);
} else {
v.setActivated(true);
}
parentClick();
}
});
}
/**
* 容器内容
*/
private void addContentView() {
// 文本
TextView tv = new TextView(getContext());
tv.setSingleLine();
tv.setEllipsize(TextUtils.TruncateAt.END);
// tv.setGravity(Gravity.CENTER);
tv.setTextSize(TypedValue.COMPLEX_UNIT_PX, menuTextSize);
// tv.setLayoutParams(new LinearLayout.LayoutParams(0, WRAP_CONTENT, 1));
tv.setTextColor(textColor);
tv.setText(placeholder);
tv.setGravity(textGravity);
tv.setPadding(dp2Px(0), dp2Px(8), dp2Px(5), dp2Px(8));
//设置第一个块位置
LayoutParams paramsOne = new LayoutParams(LayoutParams.MATCH_PARENT, LayoutParams.MATCH_PARENT);
paramsOne.addRule(RelativeLayout.CENTER_IN_PARENT);
tv.setLayoutParams(paramsOne);
addView(tv,0);
// 箭头图标
ImageView imageView = new ImageView(getContext());
imageView.setImageDrawable(getResources().getDrawable(menuIcon));
//设置第二个块位置
LayoutParams paramsTwo = new LayoutParams(LayoutParams.WRAP_CONTENT, LayoutParams.WRAP_CONTENT);
paramsTwo.addRule(RelativeLayout.ALIGN_PARENT_RIGHT);
paramsTwo.addRule(RelativeLayout.CENTER_VERTICAL);
imageView.setLayoutParams(paramsTwo);
// imageView.setLayoutParams(new LayoutParams(dp2Px(10),dp2Px(10)));
addView(imageView,1);
}
public void parentClick() {
View tv = getChildAt(0);
// 开关菜单
switchPopupWindow(tv);
}
PopupWindow mBankPopupwindow ;
/**
* 开关菜单,箭头动画
* @param targetView 弹窗显示的位置在targetView下方
*/
private void switchPopupWindow(View targetView) {
if (mBankPopupwindow != null && mBankPopupwindow.isShowing() ) {
mBankPopupwindow.dismiss();
} else {
if (mBankPopupwindow == null) {
mBankPopupwindow = initmPopupWindowView();
}
ImageView iv = (ImageView) getChildAt(1);
// 反方向
iv.animate().setDuration(300).rotation(180).start();
// 原方向
// iv.animate().setDuration(300).rotation(0).start();//旋转0度是复位
// dp转px,解决不同手机错位问题,Popupwindow设置宽度后左边有空隙所以用-,上边距自己设为10
mBankPopupwindow.showAsDropDown(targetView, -dp2Px(xoff), yoff);
}
}
/**
* 初始化popupWindow 弹窗
* @return PopupWindow
*/
private PopupWindow initmPopupWindowView() {
// 构造popwindow布局
LinearLayout ly = new LinearLayout(getContext());
ly.setOrientation(LinearLayout.HORIZONTAL);
View customView = View.inflate(getContext() ,R.layout.listview_drop_down_menu, null);
ly.addView(customView);
ListView mListView = customView.findViewById(R.id.lv);
// 简单测试
// String[] site_list = new String[]{"ss","dd","saa"};
// ArrayAdapter<String> adapter = new ArrayAdapter<String>(getContext(), R.layout.listview_item, R.id.tv, site_list);//创建arrayAdapter,第一个参数是context ,第二个参数是item的样式,第三个参数是数据
mListView.setAdapter(adapter);
setListViewHeightBasedOnChildren(mListView,showMenuItemCount);
mListView.setOnItemClickListener((parent, view, position, id) -> {
if(mBankPopupwindow!=null) {
mBankPopupwindow.dismiss();
onListViewItemClick(((TextView)view.findViewById(R.id.content)).getText().toString(),position);
}
});
// 生成PopupWindow
final PopupWindow popupwindow = generatePopupWindow(ly);
popupwindow.setOnDismissListener(new PopupWindow.OnDismissListener() {
@Override
public void onDismiss() {
//改变显示的按钮图片为正常状态
if(mainLy!=null){
if(mainLy.isActivated()) {
mainLy.setActivated(false);
} else {
mainLy.setActivated(true);
}
}
closeMenu();
}
});
return popupwindow;
}
/**
* 生成PopupWindow
*/
public PopupWindow generatePopupWindow(View customView) {
final PopupWindow popupwindow = new PopupWindow(customView,
popupWidth, LinearLayout.LayoutParams.WRAP_CONTENT);
popupwindow.setBackgroundDrawable(new ColorDrawable(Color.TRANSPARENT));
popupwindow.setOutsideTouchable(true); // 点击外面消失
// popupwindow.setAnimationStyle(R.style.popup_animation); // 动画
// popupwindow.setFocusable(false);
popupwindow.setFocusable(true); // 设置这个,可正常点击的消失和显示
popupwindow.setClippingEnabled(false); // 设置这个,popupwindow的高度就不会被dialog或者其他容器限制了。
return popupwindow;
}
/**
* 关闭菜单,箭头动画
*/
public void closeMenu() {
ImageView iv = (ImageView) getChildAt(1);
// 反方向
// iv.animate().setDuration(300).rotation(180).start();
// 原方向
iv.animate().setDuration(300).rotation(0).start();//旋转0度是复位
}
/**
* 菜单项点击事件
* @param s
* @param position
*/
public void onListViewItemClick(String s,int position) {
TextView tv = (TextView) getChildAt(0);
tv.setText(s);
selectPosition = position;
}
public int getSelectPosition() {
return selectPosition;
}
private int dp2Px(float value) {
DisplayMetrics dm = getResources().getDisplayMetrics();
return (int) TypedValue.applyDimension(TypedValue.COMPLEX_UNIT_DIP, value, dm);
// return ViewUtil.dipTopx(getContext(),value);
}
/**
* 动态改变listview的最大高度
* @param listView
*/
public void setListViewHeightBasedOnChildren(ListView listView,int showMenuItemCount) {
ListAdapter listAdapter = listView.getAdapter();
if (listAdapter == null) {
return;
}
int totalHeight = 0;
int newCount = listAdapter.getCount() > showMenuItemCount ? showMenuItemCount : listAdapter.getCount();
for (int i = 0; i < newCount; i++) {
View listItem = listAdapter.getView(i, null, listView);
listItem.measure(0, 0);
totalHeight += listItem.getMeasuredHeight();
}
ViewGroup.LayoutParams params = listView.getLayoutParams();
params.height = totalHeight + (listView.getDividerHeight() * (newCount - 1));
listView.setLayoutParams(params);
}
}4 使用
在你要使用下拉菜单的布局文件上
<com.xxx.xxx.widget.DropDownMenu
    android:layout_marginTop="@dimen/dp_38"
    android:layout_marginBottom="@dimen/dp_140"
    android:id="@+id/menu_warehouse"
    android:layout_width="@dimen/dp_234"
    android:layout_height="@dimen/dp_36"
    android:background="@drawable/bg_border_press"
    app:textGravity="center"
    app:textColor="#ff333333"
    app:menuTextSize="@dimen/sp_14"
    app:placeholder="请选择盘点仓库"
    app:popupWidth="@dimen/dp_234"
    app:menuIcon="@mipmap/ic_arrow"
    app:showMenuItemCount="4"/>
bg_border_press.xml --- 菜单显示栏边框样式
四角带圆的边框,点击时边框变蓝色
<?xml version="1.0" encoding="utf-8"?>
<selector xmlns:android="http://schemas.android.com/apk/res/android">
<item android:state_activated="true">
<shape >
<corners android:topLeftRadius="@dimen/dp_5" android:topRightRadius="@dimen/dp_5"
android:bottomLeftRadius="@dimen/dp_5" android:bottomRightRadius="@dimen/dp_5"/>
<solid android:color="@color/white" />
<!-- 边框的颜色-->
<stroke
android:width="1dp"
android:color="#409eff" />
<padding
android:bottom="1dp"
android:left="1dp"
android:right="1dp"
android:top="1dp" />
</shape>
</item>
<item android:state_activated="false">
<shape >
<corners android:topLeftRadius="@dimen/dp_5" android:topRightRadius="@dimen/dp_5"
android:bottomLeftRadius="@dimen/dp_5" android:bottomRightRadius="@dimen/dp_5"/>
<solid android:color="@color/white" />
<!-- 边框的颜色-->
<stroke
android:width="0.8dp"
android:color="#BEC1C6" />
<padding
android:bottom="1dp"
android:left="1dp"
android:right="1dp"
android:top="1dp" />
</shape>
</item>
<item >
<shape >
<corners android:topLeftRadius="@dimen/dp_5" android:topRightRadius="@dimen/dp_5"
android:bottomLeftRadius="@dimen/dp_5" android:bottomRightRadius="@dimen/dp_5"/>
<solid android:color="@color/white" />
<!-- 边框的颜色-->
<stroke
android:width="0.8dp"
android:color="#BEC1C6" />
<padding
android:bottom="1dp"
android:left="1dp"
android:right="1dp"
android:top="1dp" />
</shape>
</item>
</selector>ic_arrow.png(阿里巴巴矢量图标库里找的)

准备listview item的布局文件item_drop_down_menu_warehouse.xml
ps: 一个id为content的Textview 是必须的,点击菜单项的时候需要把这个Textview 的text显示在显示框上。
<?xml version="1.0" encoding="utf-8"?>
<TextView
xmlns:android="http://schemas.android.com/apk/res/android"
android:paddingBottom="@dimen/dp_8"
android:paddingTop="@dimen/dp_8"
android:gravity="center"
android:id="@+id/content"
android:layout_width="match_parent"
android:textColor="#ff333333"
android:textSize="@dimen/sp_14"
android:layout_height="wrap_content"></TextView>listview 的适配器 DropDownMenuListAdapter
我的listviewItem布局很简单,就一个Textview
public class DropDownMenuListAdapter<T> extends BaseAdapter {
private Context context;
private List<T> list;
private int layoutId;//单布局
private int variableId;
public DropDownMenuListAdapter(Context context, List<T> list, int layoutId, int variableId) {
this.context = context;
this.list = list;
this.layoutId = layoutId;
this.variableId = variableId;
}
@Override
public int getCount() {
return list.size();
}
@Override
public Object getItem(int position) {
return list.get(position);
}
@Override
public long getItemId(int position) {
return position;
}
@Override
public View getView(int position, View convertView, ViewGroup parent) {
ViewHolder holder;
if (convertView == null) {
convertView = LayoutInflater.from(context).inflate(layoutId, null);
holder = new ViewHolder();
holder.tv = convertView.findViewById(variableId);
convertView.setTag(holder);
} else {
holder = (ViewHolder) convertView.getTag();
}
// 强制转换成你的数据类型
WarehouseBean item = (WarehouseBean) getItem(position);
holder.tv.setText(item.getName());
// 菜单项的背景色
if(position%2 == 0) {
holder.tv.setBackgroundColor(Color.parseColor("#f7f7f8"));
} else {
holder.tv.setBackgroundColor(Color.parseColor("#FFFFFF"));
}
return convertView;
}
private static class ViewHolder {
public TextView tv;
}
}JAVA代码上使用下拉菜单控件(只给出关键代码)
@BindView(R.id.menu_warehouse)
DropDownMenu menu_warehouse; // 下拉菜单控件
private void initView() {
// 数据
List<WarehouseBean> list = new ArrayList<>();
for (int i=0;i<10;i++) {
WarehouseBean cangkuBean = new WarehouseBean();
cangkuBean.setId(i);
cangkuBean.setName("XXXXX");
list.add(cangkuBean);
}
// 下拉菜单listview 的adapter
DropDownMenuListAdapter cangkuAdapter = new DropDownMenuListAdapter(getContext(), list, R.layout.item_drop_down_menu_warehouse, R.id.content);
menu_warehouse.setAdapter(cangkuAdapter);
}总结
至此一个好看的下拉控件就做好了,觉得哪里不好的,小伙伴可以提出建议,代码量有点多,如果运行不起来缺文件还是缺代码的,请联系我。同等做法的,我还写了一个使用databinding的,有空再放上代码。


 869
869

 被折叠的 条评论
为什么被折叠?
被折叠的 条评论
为什么被折叠?
 到【灌水乐园】发言


