


目录
论文链接:https://csis.gmu.edu/ksun/publications/SP23_GraphSPD.pdf
代码链接:https://github.com/SunLab-GMU/GraphSPD
本文主要参考的就是源码readme
安装
1. 安装OS
- 我安装的是Ubuntu 20.04桌面版
- 阿里云下载可能速度会快点
- 安装教程的话随便找一个参考就好,我的配置如下:
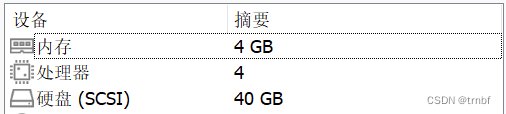
- 建议配置:
RAM: >2GB
Disk: >30GB
CPU: >1 core
2. 下载源码
- 安装
git
sudo apt install git
- 将源代码下载到用户的主目录
cd ~
git clone https://github.com/SunLab-GMU/GraphSPD.git
3. 安装依赖
cd ~/GraphSPD/
chmod +x install_dep.sh
./install_dep.sh
4. 容易出错的地方!!!
- 首先查看安装依赖的python文件,会出现问题的是最后的两个命令
#!/bin/bash

# install pip
sudo apt install python3-pip -y

# install python modules
pip3 install numpy pandas

# install pytorch
pip install torch==1.11.0+cpu torchvision==0.12.0+cpu torchaudio==0.11.0 --extra-index-url https://download.pytorch.org/whl/cpu

# install clang
pip3 install clang==6.0.0.2
sudo apt install clang -y
sudo ln -s /usr/lib/x86_64-linux-gnu/libclang-*.so.1 /usr/lib/x86_64-linux-gnu/libclang.so

# install pytorch-geometric
pip install torch-scatter torch-sparse torch-cluster torch-spline-conv torch-geometric -f https://data.pyg.org/whl/torch-1.11.0+cpu.html

# install java 8
sudo apt-get install openjdk-8-jre
pytorch-geometric安装
-
我一开始就直接运行的安装文件中的命令,然后得到的版本是这样
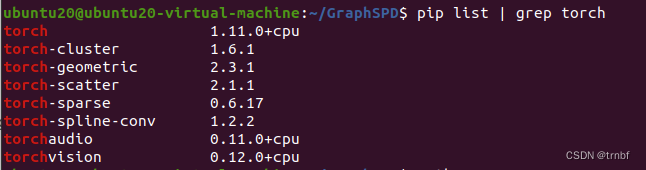
-
主要问题就是torch-geometric的版本
2.3.1过高,我就是卸载之后重装了低版本的
torch-geometric官网可以查看与pytorch对应的版本,torch=1.11.0可用的是 2.1.0 和 2.0.4 ,这俩应该都可以,我重新安装的版本是2.1.0。
# 先卸载再安装
pip uninstall torch-geometric
pip install torch-geometric==2.1.0
java安装
java的版本和joern的版本必须对应
我安装的版本是:jdk11和joern2.0.58
如果不知道旧版joern对应的哪个版本的jdk,可以先随便安装一个jdk,如果跟joern的版本不对应的话,在运行joern的时候会出现提示需要哪个版本的jdk,然后删掉错误的jdk版本,重新下载jdk就行。
运行代码
所有的命令都在
~/GraphSPD/文件夹下进行
该项目运行在纯CPU环境中
1. 预处理
1.1 使用测试补丁样例
-
在
~/GraphSPD/raw_patch/文件夹中有10个测试补丁 -
首先下载好补丁相关的代码文件
python3 get_ab_file.py nginx nginx 02cca547
python3 get_ab_file.py nginx nginx 661e4086
python3 get_ab_file.py nginx nginx 9a3ec202
python3 get_ab_file.py nginx nginx dac90a4b
python3 get_ab_file.py nginx nginx fc785b12
python3 get_ab_file.py nginx nginx 60a8ed26
python3 get_ab_file.py nginx nginx bd7dad5b
python3 get_ab_file.py nginx nginx 4c5a49ce
python3 get_ab_file.py nginx nginx 71eb19da
python3 get_ab_file.py nginx nginx 56f53316
In the above, the third column refers to the owner (i.e., nginx), the fourth column refers to the repository (i.e., nginx), and the last column refers to the commit ID (e.g., 02cca547).
As the result, the pre-patch and post-patch files will be stored in ~/GraphSPD/ab_file/.
1.2 使用自己的补丁样例
python3 get_ab_file.py [owner] [repository] [commitID]
这里的[owner]、[repository]、[commitID]是指Github补丁的作者名、仓库名、commit ID
2. Generate PatchCPGs
- 生成补丁的PatchCPG
chmod -R +x ./joern
sudo python3 gen_cpg.py
python3 merge_cpg.py
gen_cpg.py会分别生成pre-patch和post-patch文件的CPGmerge_cpg.py会融合两个CPGs为PatchCPG- PatchCPGs 保存在
~/GraphSPD/testdata/
3. 运行PatchGNN模型
- 运行下面的命令:
python3 test.py
-
预测结果保存在文件:
~/GraphSPD/logs/test_results.txt中 -
运行下面的命令查看结果
cat logs/test_results.txt
- 预测结果包含PatchCPG文件路径和预测结果,其中1表示安全补丁,0表示非安全补丁
filename,prediction
./testdata/fc785b12/out_slim_ninf_noast_n1_w.log,0
./testdata/dac90a4b/out_slim_ninf_noast_n1_w.log,1
./testdata/60a8ed26/out_slim_ninf_noast_n1_w.log,1
./testdata/71eb19da/out_slim_ninf_noast_n1_w.log,0
./testdata/9a3ec202/out_slim_ninf_noast_n1_w.log,1
./testdata/bd7dad5b/out_slim_ninf_noast_n1_w.log,1
./testdata/661e4086/out_slim_ninf_noast_n1_w.log,1
./testdata/02cca547/out_slim_ninf_noast_n1_w.log,0
./testdata/4c5a49ce/out_slim_ninf_noast_n1_w.log,0
./testdata/56f53316/out_slim_ninf_noast_n1_w.log,0


 1159
1159


 被折叠的 条评论
为什么被折叠?
被折叠的 条评论
为什么被折叠?
 到【灌水乐园】发言


