


springboot集成elasiticsearch
1、版本选择
springboot2.2.2
elasiticsearch6.7.1
2、centos7安装elasiticsearch6.7.1
-
centos7安装elasiticsearch6.7.1
elasiticsearch下载:elasiticsearch下载如果虚拟机可以联网,可以直接下载: wget https://artifacts.elastic.co/downloads/elasticsearch/elasticsearch-6.7.1.zip -
将下载好的zip文件上传到linux的/opt目录下,然后解压:
	unzip  elasticsearch/elasticsearch-6.7.1.zip
	mv elasticsearch-6.7.1  es6.7
- 进入es6.7中,修改elasticsearch.yml文件
为了能让Elasticsearch-head访问,添加如下内容(Elasticsearch-head可以去githup下载,下载后解压直接打到index.html):
	http.cors.enabled: true
	http.cors.allow-origin: "*"
去掉#http.port: 9200的注释,将端口修改为9500(也可以不修改)
http.port: 9500
	启动elasticsearch
		进入到es6.7下
			cd  es6.7/
			./bin/elasticsearch
-
如果启动成功,有如下标志
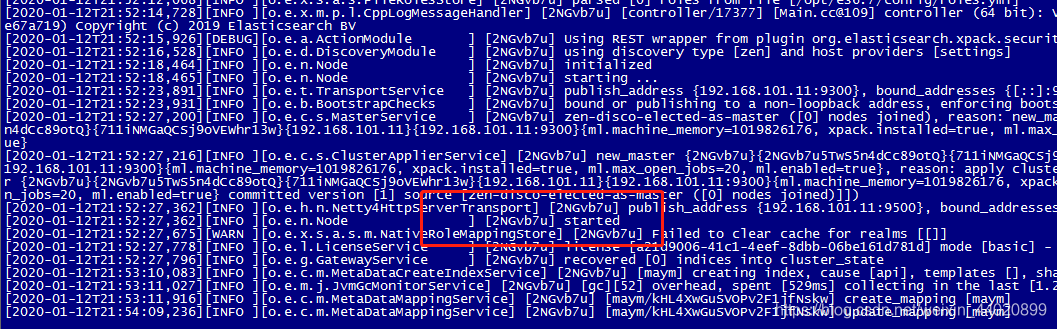
-
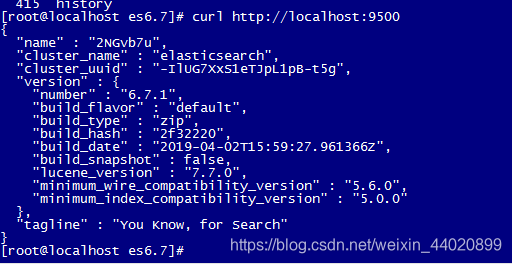
测试,使用命令 curl http://localhost:9500测试
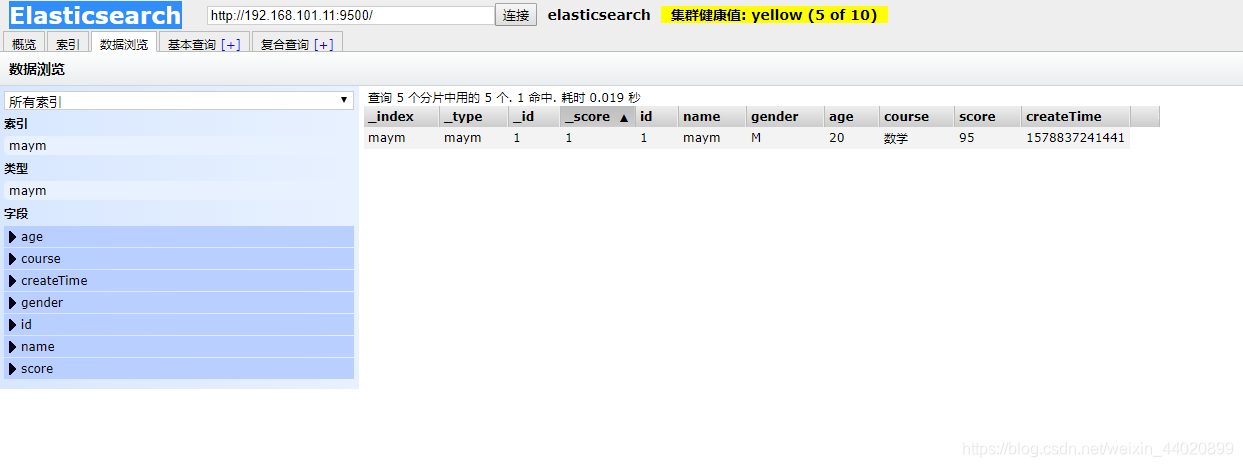
3、使用Elasticsearch-head连接
打开Elasticsearch-head的index.html,输入地址,如果出现如下画面,连接成功
4、springboot集成elasticsearch
- 引入依赖
		<dependency>
            <groupId>org.springframework.boot</groupId>
            <artifactId>spring-boot-starter-data-elasticsearch</artifactId>
        </dependency>
- yml配置
	server:
	  port: 8080

	spring:
	  mvc:
	    view:
	      prefix: /static/*
	      suffix: .html

	  datasource:
	    driver-class-name: com.mysql.cj.jdbc.Driver
	    url: jdbc:mysql://localhost:3306/sunny
	    username: root
	    password: root

	  data:
	    elasticsearch:
	      cluster-name: elasticsearch
	      cluster-nodes: 192.168.101.11:9300
- 创建实体类
 最低0.47元/天 解锁文章


 534
534


 被折叠的 条评论
为什么被折叠?
被折叠的 条评论
为什么被折叠?
 到【灌水乐园】发言


