


SpringSecurity自定义登录界面和权限管理
SpringSecurity环境
pom.xml
pom.xml依赖
	<parent>
		<groupId>org.springframework.boot</groupId>
		<artifactId>spring-boot-starter-parent</artifactId>
		<version>2.4.2</version>
		<relativePath/> <!-- lookup parent from repository -->
	</parent>

	<dependency>
			<groupId>org.springframework.boot</groupId>
			<artifactId>spring-boot-starter-web</artifactId>
		</dependency>

		<dependency>
			<groupId>org.springframework.boot</groupId>
			<artifactId>spring-boot-devtools</artifactId>
			<scope>runtime</scope>
			<optional>true</optional>
		</dependency>

		<dependency>
			<groupId>mysql</groupId>
			<artifactId>mysql-connector-java</artifactId>
		</dependency>

		<dependency>
			<groupId>org.springframework.boot</groupId>
			<artifactId>spring-boot-starter-test</artifactId>
		</dependency>

		<!-- SpringSecurity的依赖 -->
		<dependency>
			<groupId>org.springframework.boot</groupId>
			<artifactId>spring-boot-starter-security</artifactId>
		</dependency>

		<dependency>
			<groupId>org.springframework.boot</groupId>
			<artifactId>spring-boot-configuration-processor</artifactId>
			<optional>true</optional>
		</dependency>

		<dependency>
			<groupId>org.springframework.boot</groupId>
			<artifactId>spring-boot-starter-aop</artifactId>
		</dependency>
SpringSecurity使用
自带的登录界面
SpringSecurity配置类
@Configuration
@EnableWebSecurity
public class SecurityConfig extends WebSecurityConfigurerAdapter {


    @Override
    protected void configure(AuthenticationManagerBuilder auth) throws Exception {
        //新版本必须对密码进行加密,设置加密算法
        auth.inMemoryAuthentication().passwordEncoder(new BCryptPasswordEncoder())
                //注册用户:用户名,密码(进行对应的加密),用户的角色,可以对应多个角色
                //以后可以将用户的信息从数据库中读出,这里做演示
                .withUser("admin").password(new BCryptPasswordEncoder().encode("1234")).roles("ADMIN","ANOTHER");
    }

    @Override
    protected void configure(HttpSecurity http) throws Exception {
        http
                .cors().and()
                //设置全部路径需要认证
                .antMatcher("/**").authorizeRequests()
                //匹配的路径全部运行通过
                .antMatchers("/toLogin","/login**","/logout**").permitAll()
                //设置路径和权限
                .antMatchers("/admin/**").hasRole("ADMIN")
                //所有路径需要认证
                .anyRequest().authenticated()
                .and()
                //开启登录
                .formLogin()
                .permitAll()
                .and()
                //开启登出
                .logout()
                .and()
                .csrf().disable();
    }
}
这个类继承自WebSecurityConfigurerAdapter
注意:使用 @Configuration 和 @EnableWebSecurity 两个注解
一个是把这个类视为配置类,另一个是开启SpringSecurity。
我们重写两个方法
- protected void configure(AuthenticationManagerBuilder auth)
- protected void configure(HttpSecurity http)
浏览器输入http://localhost:8080/login 可以看到登录界面

输入账号和密码会跳转到 / 路径下这里没有配置页面所以报错。

自定义登录界面
修改添加configure方法中的配置为下面这样
                .and()
                //开启登录
                .formLogin()
                //登录页面路径
                .loginPage("/toLogin")
                //执行登录的路径
                .loginProcessingUrl("/login")
                //登录成功后转发页面
                .successForwardUrl("/index")
                .permitAll()
没有配置前登录界面路径为 /login 现在修改为/toLogin
现在使用/login 进行执行登录,并在登录成功之后转发到 /index
测试需要用到自定义的登录页面和Controller
@Controller
public class TestController {

    @RequestMapping("/index")
    @ResponseBody
    public String login(){
        return "登录成功,进入首页";
    }

    @RequestMapping("/toLogin")
    public String toLogin(){
        return "/toLogin.html";
    }

}
toLogin.html 我们自定义的登录界面
<!DOCTYPE html>
<html lang="en">
<head>
    <meta charset="UTF-8">
    <title>登录界面</title>
</head>
<body>
    <form action="/login" method="post">
        <input name="username">
        <input name="password" type="password">
        <button type="submit">登录</button>
    </form>
</body>
</html>
浏览器输入http://localhost:8080/toLogin 可以看到登录界面被修改为我们自己写的html

执行登录
顺带一提登出也可以进行自定义配置 , 可以自己去测试一下
.and()
                //开启登出
                .logout()
                //执行登出路径
                .logoutUrl("/logout")
                //登出成功后转发页面
                .logoutSuccessUrl("/exit")
权限管理
 //注册用户:用户名,密码(进行对应的加密),用户的角色,可以对应多个角色
 //以后可以将用户的信息从数据库中读出,这里做演示
 .withUser("admin").password(new BCryptPasswordEncoder().encode("1234")).roles("ADMIN","ANOTHER");
//设置路径和权限
.antMatchers("/admin/**").hasRole("ADMIN")
这两行代码就是对权限的管理
我们增加一个角色不包含ADMIN角色
        //新版本必须对密码进行加密,设置加密算法
        auth.inMemoryAuthentication().passwordEncoder(new BCryptPasswordEncoder())
                //注册用户:用户名,密码(进行对应的加密),用户的角色,可以对应多个角色
                //以后可以将用户的信息从数据库中读出,这里做演示
                .withUser("admin").password(new BCryptPasswordEncoder().encode("1234")).roles("ADMIN","ANOTHER")
                .and()
                .withUser("user").password(new BCryptPasswordEncoder().encode("1234")).roles();
测试使用的controller
@Controller
public class TestController {

    @RequestMapping("/index")
    @ResponseBody
    public String login(){
        return "登录成功,进入首页";
    }

    @RequestMapping("/toLogin")
    public String toLogin(){
        return "/toLogin.html";
    }

    @RequestMapping("/admin/index")
    @ResponseBody
    public String admin(){
        return "这是管理员能进的首页";
    }

}
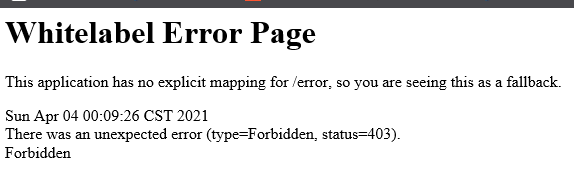
浏览器输入http://localhost:8080/toLogin 使用admin账号登录,登录后浏览器输入http://localhost:8080/admin/index

使用user账号


 98
98


 被折叠的 条评论
为什么被折叠?
被折叠的 条评论
为什么被折叠?
 到【灌水乐园】发言


