


Ceedling
Ceedling 是一个用 Ruby 语言编写的自动化测试框架,一个 C 项目构建系统,是对 Ruby Rake 的一个延申。Ceedling 主要目标是以测试为驱动的 C 语言开发,集成CMock、Unity、CException三个开源项目。
文章目录
1.环境搭建
1.1 Ruby环境
Windows下,我们使用官方的RubyInstaller安装Ruby环境。RubyInstaller Archives Link <-----,选择合适的Ruby版本。
PS C:\Users\coral> Ruby -v
ruby 2.7.2p137 (2020-10-01 revision 5445e04352) [x64-mingw32]
PS C:\Users\coral> Ruby --version
ruby 2.7.2p137 (2020-10-01 revision 5445e04352) [x64-mingw32]
1.2 Ceedling安装
首先我们要知道 gem (类似于 python 的 pip 、Ubuntu 中的 apt-get 、Node.js 的 NPM 等等)是一个管理 Ruby 库和程序的标准包,通过 gem 可以十分便捷的安装、升级和卸载软件。
常见的 Ruby gem 指令:
| Command | Description |
|---|---|
| gem -v | gem版本 |
| gem -h | help |
| gem install -h | install帮助 |
| gem update | 更新所有包 |
| gem install -v PACKAGEVERSION | 安装指定版本的软件包 |
| gem environment | 查看gem的环境 |
有了上面的知识储备,我们现在来安装 Ceedling
gem install Ceedling -v 0.30.0
1.3 GCC编译器
对于 Linux 操作系统,可能会自带 GCC 编译环境,但是Windows想要使用 GCC 编译器,一般需要安装 MINGW 或者 Cygwin 。
这里我们使用 MINGW 支持 GCC 编译。
2. Demo测试
2.1 生成一个 Sample 项目
ceedling example temp_sensor
2.2 项目测试
ceedling test:all
3. 创建myProject
3.1 ceedling基本使用
PS D:\Desktop\workspace\demo> ceedling
Welcome to Ceedling!
Commands:
  ceedling example PROJ_NAME [DEST]  # new specified example project (in DEST...
  ceedling examples                  # list available example projects
  ceedling help [COMMAND]            # Describe available commands or one spe...
  ceedling new PROJECT_NAME          # create a new ceedling project
  ceedling upgrade PROJECT_NAME      # upgrade ceedling for a project (not re...
  ceedling version                   # return the version of the tools installed
打开powershell或者cmd,执行ceedling,会得到上述所示提示。
| Command | Description |
|---|---|
| ceedling examples | 列出ceedling官方的examples |
| ceedling example exampleName | 下载example到当前文件路径 |
| ceedling new PROJECT_NAME | 创建一个空的ceedling测试项目 |
| ceedling version | ceedling安装版本 |
3.2 ceedling new myProject
PS D:\Desktop\workspace> ceedling new myProject
Welcome to Ceedling!
      create  myProject/project.yml

Project 'myProject' created!
 - Execute 'ceedling help' from myProject to view available test & build tasks
3.3 进入workspace
PS D:\Desktop\workspace> cd .\myProject\
PS D:\Desktop\workspace\myProject> ls


    Directory: D:\Desktop\workspace\myProject


Mode                LastWriteTime         Length Name
----                -------------         ------ ----
d-----        7/30/2021  10:51 AM                src
d-----        7/30/2021  10:51 AM                test
-a----        7/30/2021  10:51 AM           2516 project.yml
此时,我们为src和test文件分别书写一个main.c和test_main.c文件。
//main.c
void main(){
	printf("hello world!\n");
}
//test_main.c
void setUp(void)
{
}

void tearDown(void)
{
}

void testMain(){
	printf("succeed!\n");
}
3.4 “ceedling test:all” or “ceedling”
PS D:\Desktop\workspace\myProject> ceedling


Test 'test_main.c'
------------------
Generating runner for test_main.c...
Compiling test_main_runner.c...
Compiling test_main.c...
test/test_main.c: In function 'testMain':
test/test_main.c:10:2: warning: implicit declaration of function 'printf' [-Wimplicit-function-declaration]
  printf("succeed!\n");
  ^~~~~~
test/test_main.c:10:2: warning: incompatible implicit declaration of built-in function 'printf'
test/test_main.c:10:2: note: include '<stdio.h>' or provide a declaration of 'printf'
test/test_main.c:1:1:
+#include <stdio.h>
 void setUp(void)
test/test_main.c:10:2:
  printf("succeed!\n");
  ^~~~~~
Compiling unity.c...
Compiling cmock.c...
Linking test_main.out...
Running test_main.out...

-----------
TEST OUTPUT
-----------
[test_main.c]
  - "succeed!"

--------------------
OVERALL TEST SUMMARY
--------------------
TESTED:  1
PASSED:  1
FAILED:  0
IGNORED: 0
这样,你就实现了一个简单的ceedling测试项目了。
4. Ceedling使用gcovr测试代码覆盖
4.1 安装gcovr
这要求你的电脑现在拥有python环境
pip install gcovr
安装成功之后查看对应的version
C:\Users\coral>gcovr --version
gcovr 5.0
Copyright 2013-2018 the gcovr authors
Copyright 2013 Sandia Corporation
Under the terms of Contract DE-AC04-94AL85000 with Sandia Corporation,
the U.S. Government retains certain rights in this software.
4.2 ceedling new myProject_gcov
C:\Users\coral>ceedling new myProject_gcov
Welcome to Ceedling!
      create  myProject_gcov/project.yml

Project 'myProject_gcov' created!
 - Execute 'ceedling help' from myProject_gcov to view available test & build tasks
此时我们创建了一个空的ceedling项目,现在打开project.yml文件,使项目支持gcov代码覆盖检查。
:plugins:
  :load_paths:
    - "#{Ceedling.load_path}"
  :enabled:
    - stdout_pretty_tests_report
    - module_generator
    - gcov  #添加gcov功能
4.3 创建测试代码
在src和test文件,创建所需的测试函数和代码。
//test_myGcov.c
#include "myGcov.h"
void setUp(void)
{
}

void tearDown(void)
{
}
void testMyGCOV(){
	myGcov();
}
//myGcov.c
#include "myGcov.h"
void myGcov(){
	printf("this is myGcov!\n");
}
//myGcov.h
#include <stdio.h>
void myGcov();
然后执行ceedling gcov:all utils:gcov
C:\Users\coral\myProject_gcov>ceedling gcov:all utils:gcov


Test 'test_myGcov.c'
--------------------
Generating runner for test_myGcov.c...
Compiling test_myGcov_runner.c...
Compiling test_myGcov.c...
Linking test_myGcov.out...
Running test_myGcov.out...
Creating a gcov HTML report in 'build/artifacts/gcov'... Done in 0.926 seconds.

-----------------
GCOV: TEST OUTPUT
-----------------
[test_myGcov.c]
  - "this is myGcov!"

--------------------------
GCOV: OVERALL TEST SUMMARY
--------------------------
TESTED:  1
PASSED:  1
FAILED:  0
IGNORED: 0


---------------------------
GCOV: CODE COVERAGE SUMMARY
---------------------------
myGcov.c Lines executed:100.00% of 3
myGcov.c No branches
myGcov.c Calls executed:100.00% of 1
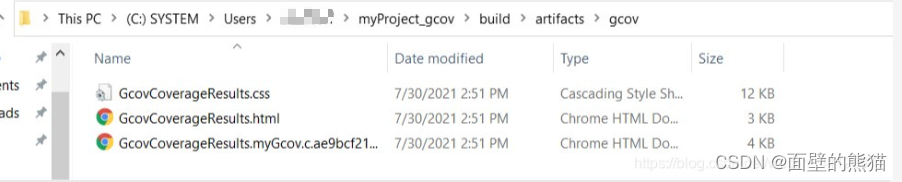
cd xx\xx\myProject_gcov\build\artifacts\gcov
可以看见覆盖率测试报告,如下


 958
958


 被折叠的 条评论
为什么被折叠?
被折叠的 条评论
为什么被折叠?
 到【灌水乐园】发言


