


前言
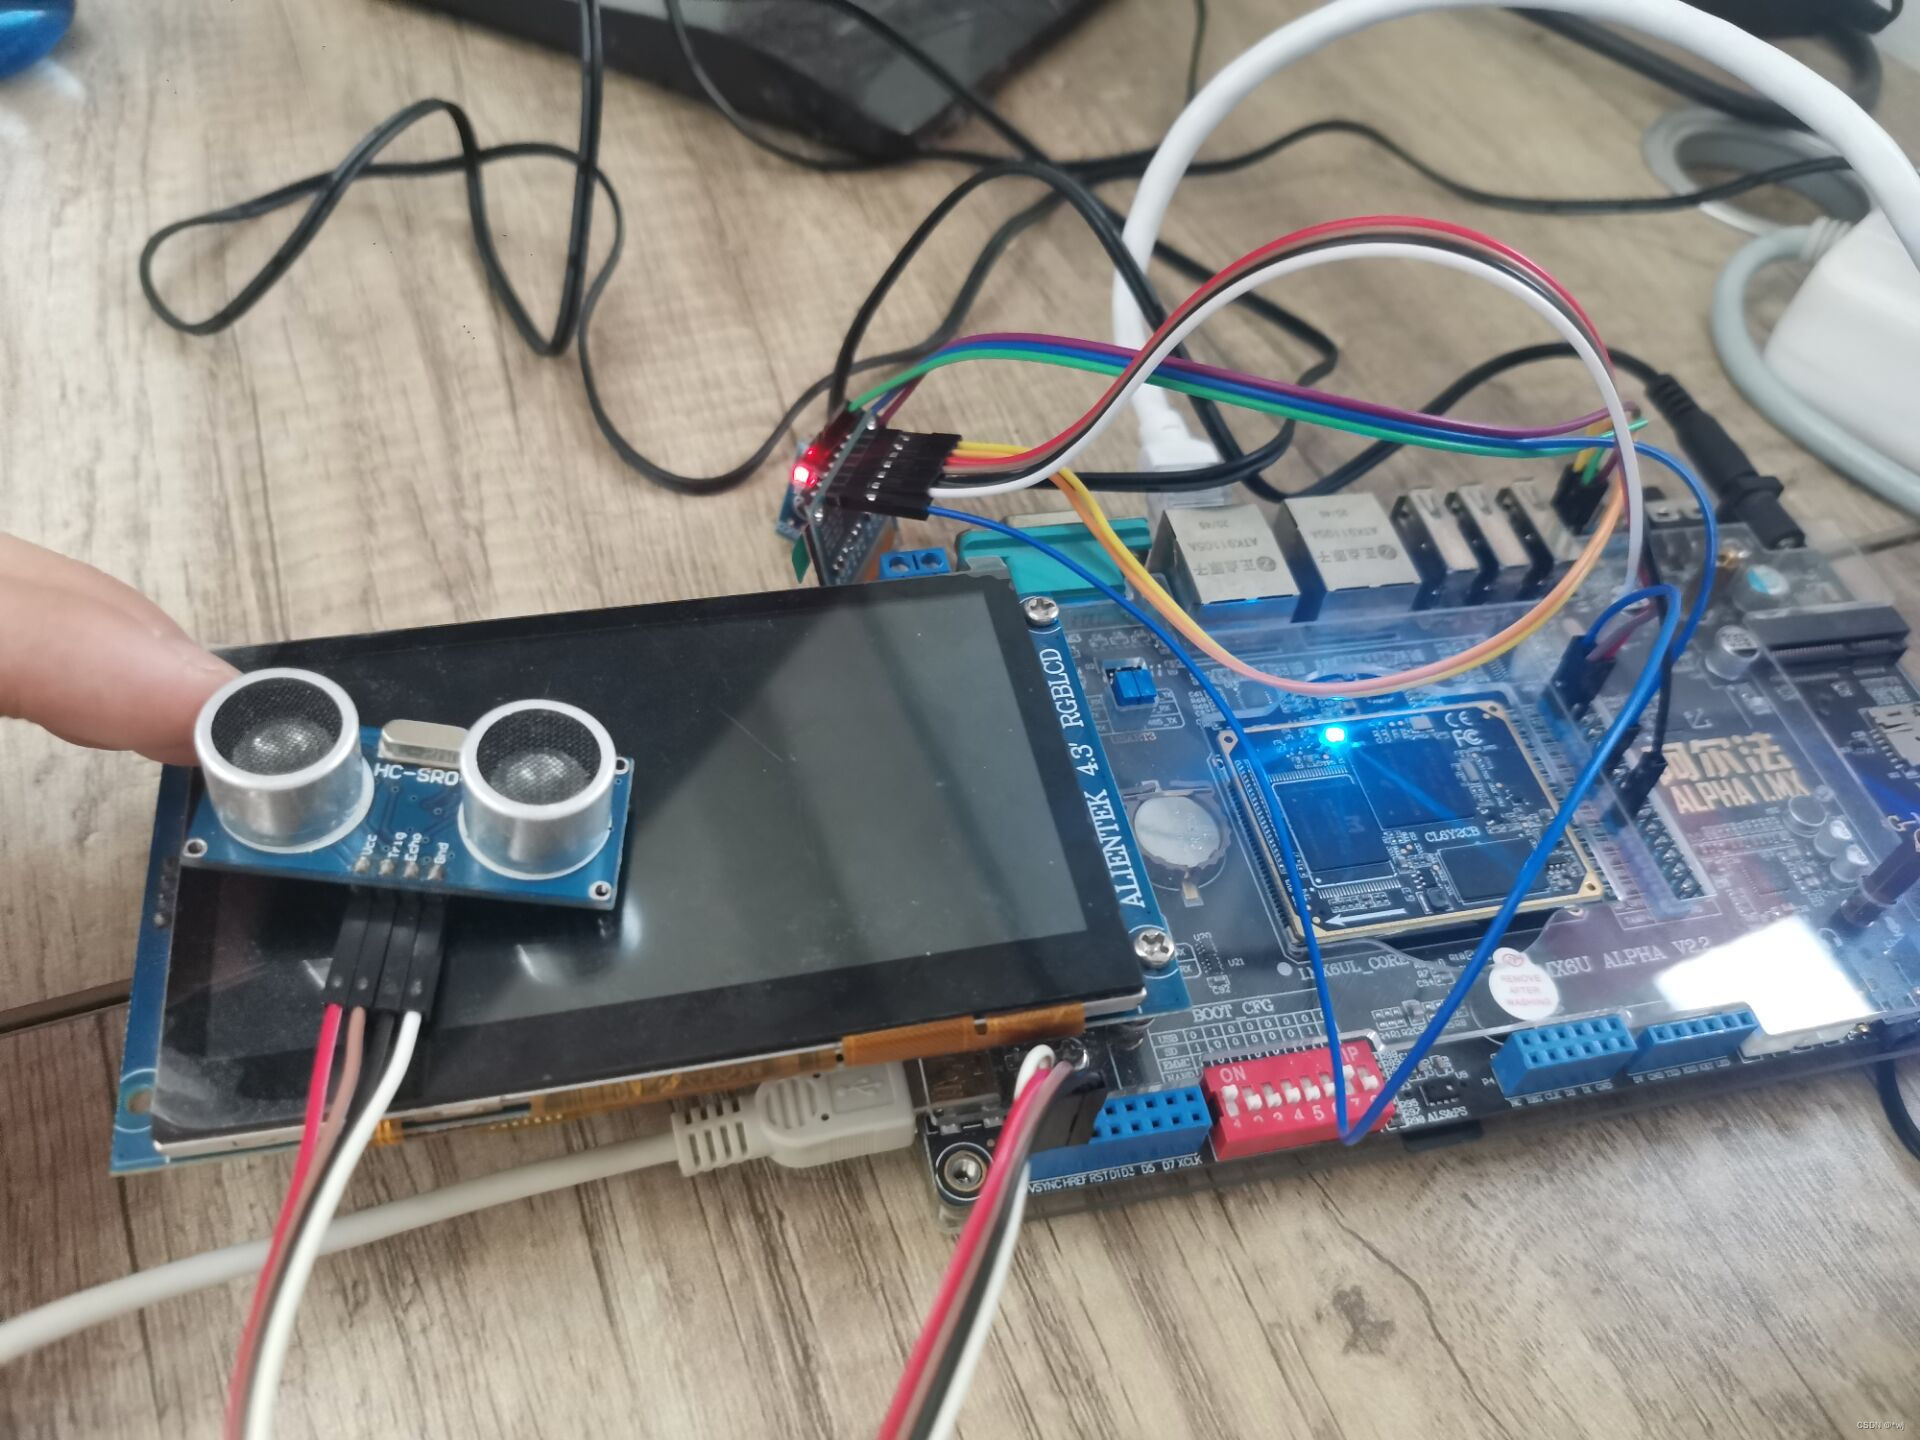
基于imx6ull的驱动开发移植超声波模块,所需硬件的接线如下:
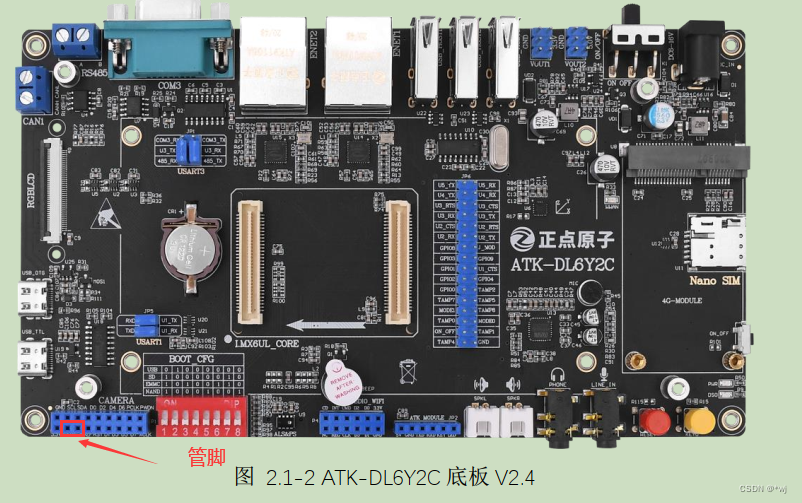
imx6ull开发板:正点原子阿尔法
超声波模块:4脚sr04
杜邦线:若干
接线如下:
3.3v —— 连接开发板的3.3V
trig —— 连接开发板的GPIO4_19
echo —— 连接开发板的GPIO4_20
GND —— 连接开发板的GND
查芯片手册:
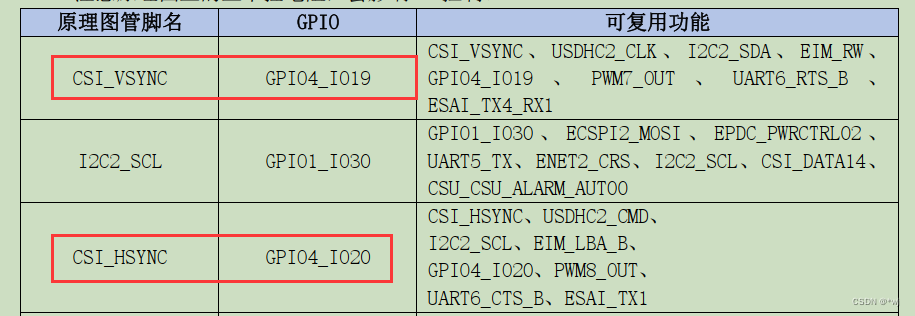
GPIO4_19管脚在正点原子开发板的对应的是CSI_VSYNC管脚
GPIO4_20管脚在正点原子开发板的对应的是CSI_HSYNC管脚
一、修改设备树文件
1.在设备树的根节点下面添加以下内容
   sr04 {  /* for imx6ull */
        compatible = "my,sr04";
        trig-gpios = <&gpio4 19 GPIO_ACTIVE_HIGH>;
        echo-gpios = <&gpio4 20 GPIO_ACTIVE_HIGH>;
    };
2.编译设备树
然后重新编译设备树文件,将新生成的.dtb文件拷贝到网络方式启动的文件夹下面【或者直接烧写进flash中,从flash启动】
make dtbs
二、代码
目录结构如下:
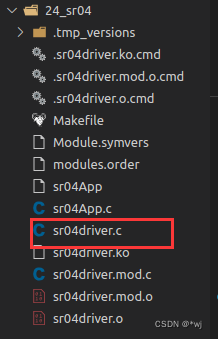
1.驱动代码
新建一个sr04driver.c文件,输入以下内容:
#include <linux/init.h>
#include <linux/module.h>
#include <linux/fs.h>
#include <linux/cdev.h>
#include <linux/uaccess.h>
#include <linux/types.h>
#include <linux/kernel.h>
#include <linux/delay.h>
#include <linux/ide.h>
#include <linux/errno.h>
#include <linux/gpio.h>
#include <asm/mach/map.h>
#include <linux/of.h>
#include <linux/of_address.h>
#include <linux/of_gpio.h>
#include <asm/io.h>
#include <linux/device.h>
#include <linux/timer.h>
// #include <asm/spinlock.h>
#include <linux/jiffies.h>
#include <linux/platform_device.h>
#include <linux/of_irq.h>
#include <linux/wait.h>
// #include <linux/sched/signal.h>
#include <linux/poll.h>
// #include <asm/atomic.h>
#include <linux/atomic.h>


static int major=0;/*主设备号*/

static struct class *sr04_class;
static struct gpio_desc *sr04_echo;
static struct gpio_desc *sr04_trig;
static int irq;
static u64 sr04_data_ns = 0;
static wait_queue_head_t sr04_wq;

static ssize_t sr04_read (struct file *file, char __user *buf, size_t size, loff_t *off)
{
	int err;
	int timeout;
	/*发出至少10us的触发信号*/
	gpiod_set_value(sr04_trig, 1);
	udelay(15);
	gpiod_set_value(sr04_trig, 0);

	/* 等待数据 */
	timeout = wait_event_interruptible_timeout(sr04_wq, sr04_data_ns, HZ);
	if (timeout)
	{
		err = copy_to_user(buf, &sr04_data_ns, 4);
		sr04_data_ns = 0;
		return 4;
	}
	else
	{
		return -EAGAIN;
	}
	return 0;

}

static int sr04_open (struct inode *inode, struct file *file)
{
	printk("%s %s line %d\n", __FILE__, __FUNCTION__, __LINE__);
	return 0;
}

static struct file_operations sr04_ops={
	.owner		= THIS_MODULE,
	.open		= sr04_open,
	.read		= sr04_read,
};

static irqreturn_t sr04_isr(int irq, void *dev_id)
{
	int val = gpiod_get_value(sr04_echo);

	if(val)
	{
		/*上升沿*/

sr04_data_ns = ktime_get_ns();
	}
	else
	{
		/*下降沿*/
		sr04_data_ns = ktime_get_ns() - sr04_data_ns;
		/* 2. 唤醒APP:去同一个链表把APP唤醒 */
		wake_up(&sr04_wq);
	}

	return IRQ_HANDLED; // IRQ_WAKE_THREAD;
}


static int sr04_probe(struct platform_device *pdev)
{
	int err;

	printk("%s %s line %d\n", __FILE__, __FUNCTION__, __LINE__);

	/*1.获取硬件信息*/
	sr04_echo=gpiod_get(&pdev->dev, "echo", GPIOD_IN);
	if (IS_ERR(sr04_echo)) {
		printk("%s %s line %d\n", __FILE__, __FUNCTION__, __LINE__);
	}
	sr04_trig=gpiod_get(&pdev->dev, "trig", GPIOD_OUT_LOW);
	if (IS_ERR(sr04_trig)) {
		printk("%s %s line %d\n", __FILE__, __FUNCTION__, __LINE__);
	}

	/*得到irq*/
	irq = gpiod_to_irq(sr04_echo);
	/*申请中断并设置为双边沿触发*/
	err = request_irq(irq, sr04_isr, IRQF_TRIGGER_RISING|IRQF_TRIGGER_FALLING, "sr04", NULL);
	if (err != 0) {
		printk("request_irq is err\n");
	}

	/*2.创建设备节点*/
	device_create(sr04_class, NULL, MKDEV(major, 0), NULL, "sr04");

    return 0;
}

static int sr04_remove(struct platform_device *pdev)
{
	printk("%s %s line %d\n", __FILE__, __FUNCTION__, __LINE__);
	device_destroy(sr04_class, MKDEV(major, 0));
	free_irq(irq, NULL);
	gpiod_put(sr04_trig);
	gpiod_put(sr04_echo);
	return 0;
}

static const struct of_device_id my_sr04[] = {
    { .compatible = "my,sr04" },
    { },
};


static struct platform_driver sr04={
	.driver = {
		.name = "sr04",
		.of_match_table = my_sr04,
	},
	.probe = sr04_probe,
	.remove	= sr04_remove,
};


static int __init sr04_init(void)
{
	int err;
	printk("%s %s line %d\n", __FILE__, __FUNCTION__, __LINE__);
	/*确定主设备号*/
	major=register_chrdev(major, "mysr04", &sr04_ops);
	/*创建类*/
	sr04_class=class_create(THIS_MODULE, "sr04");
	if (IS_ERR(sr04_class)) {
		printk("%s %s line %d\n", __FILE__, __FUNCTION__, __LINE__);
		unregister_chrdev(major, "mysr04");
		return PTR_ERR(sr04_class);
	}

	init_waitqueue_head(&sr04_wq);//初始化队列

	err=platform_driver_register(&sr04);

	return 0;
}

static void __exit sr04_exit(void)
{
	printk("%s %s line %d\n", __FILE__, __FUNCTION__, __LINE__);
	platform_driver_unregister(&sr04);
	class_destroy(sr04_class);
	unregister_chrdev(major, "mysr04");
}

module_init(sr04_init);
module_exit(sr04_exit);

MODULE_LICENSE("GPL");
MODULE_AUTHOR("wj");
2.APP程序
新建一个sr04App.c,输入以下内容:
#include <sys/types.h>
#include <sys/stat.h>
#include <fcntl.h>
#include <unistd.h>
#include <stdio.h>
#include <string.h>
#include <poll.h>
#include <signal.h>
#include <unistd.h>


/*
 * ./sr04_test /dev/sr04
 *
 */
int main(int argc, char **argv)
{
	int fd;
	int ns;

	int i;

	// /* 1. 判断参数 */
	// if (argc != 2)
	// {
	// 	printf("Usage: %s <dev>\n", argv[0]);
	// 	return -1;
	// }


	/* 2. 打开文件 */
//	fd = open(argv[1], O_RDWR | O_NONBLOCK);
	fd = open(argv[1], O_RDWR);
	if (fd == -1)
	{
		printf("can not open file %s\n", argv[1]);
		return -1;
	}

	while (1)
	{
		if (read(fd, &ns, 4) == 4)
		{
			printf("get distance: %d ns\n", ns);
			printf("get distance: %d mm\n", ns*340/2/1000000);  /* mm */
		}
		else
			printf("get distance: -1\n");
		sleep(1);
	}

	close(fd);

	return 0;
}
3.Makefile
新建一个Makefile,输入以下内容
KERNELDIR := /home/wj/linux/alientek-linux/linux-imx-rel_imx_4.1.15_2.1.0_ga_alientek
CURRENT_PATH := $(shell pwd)

obj-m := sr04driver.o

build: kernel_modules

kernel_modules:
	$(MAKE) -C $(KERNELDIR) M=$(CURRENT_PATH) modules

clean:
	$(MAKE) -C $(KERNELDIR) M=$(CURRENT_PATH) clean
三、编译
1.编译驱动程序
make
将生成的sr04driver.ko文件拷贝到自己的根文件目录中
2.编译测试应用
arm-linux-gnueabihf-gcc -o sr04App sr04App.c
将生成的sro4APP可执行程序拷贝到自己的根文件目录中
四、上机运行
cd /驱动模块所在目录
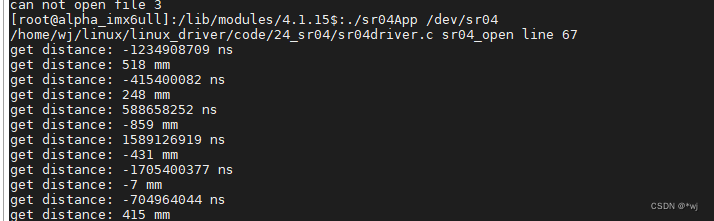
insmod sr04driver.ko
./sr04App /dev/sr04
运行结果如下:
参考链接:参考链接


 759
759


 被折叠的 条评论
为什么被折叠?
被折叠的 条评论
为什么被折叠?
 到【灌水乐园】发言


