


1.IOC容器
控制反转
1.1 IOC底层原理
- xml解析
- 工厂模式
- 反射
1.2 IOC两种实现方式(两个接口)
1.2.1 BeanFactory
- spring内部使用接口
- 加载配置文件的时候不会创建对象,在获取对象的时候才去创建对象
1.2.2 ApplicationContext
- BeanFactory接口的子接口,提供更多更强大的功能,一般由开发人员使用
- 加载配置文件的时候就会创建对象
- 实现类:
1)FileSystemXmlApplicationContext:盘路径
2)ClassPathXmlApplicationContext:类路径
…
1.3 IOC操作
1.3.1 Bean管理
- Spring创建对象
- Spring注入属性
1.3.2 Bean管理实现方式
1.3.2.1 基于xml配置文件方式实现
1.3.2.1.1 创建对象
<bean id="user" class="com.lyl.spring5.entity.User"></bean>
- 使用bean标签
- bean标签常用属性
- id:获取对象唯一标识
- class:全限定类名
- name:类似id,不推荐用
- 创建对象时,默认执行无参构造
1.3.2.1.2 注入属性
1)DI:依赖注入
- 使用set方法注入
<!--方式一 -->
<bean id="book" class="com.lyl.spring5.entity.Book">
        <property name="bname" value="三国演义"></property>
        <property name="bauthor" value="吴承恩"></property>
</bean>
<!--方式二:pp名称空间注入-->
xmlns:p="http://www.springframework.org/schema/p"
<bean id="book" class="com.lyl.spring5.entity.Book" p:bname="三国演义" p:bauthor="吴承恩">
</bean>
- 使用有参构造注入
<bean id="order" class="com.lyl.spring5.entity.Order">
        <constructor-arg name="oname" value="iphone13"></constructor-arg>
        <constructor-arg name="address" value="中南海"></constructor-arg>
</bean>
- xml注入其他类型属性
<!--向属性中设置null值 -->
<bean id="book" class="com.lyl.spring5.entity.Book">
<property name="bname" value="三国演义"></property>
<property name="bauthor" value="吴承恩"></property>
<property name="address">
<null></null>
</property>
</bean>
<!--向属性中设置特殊符号 -->
<bean id="book" class="com.lyl.spring5.entity.Book">
<property name="bname" value="三国演义"></property>
<property name="bauthor" value="吴承恩"></property>
<!--属性值包含特殊符号
1 把<>进行转义:<或者>
2 把带特殊符号内容写入CDATA
-->
<property name="address">
<value><![CDATA[<<北京>>]]></value>
</property>
</bean>
- 注入属性-外部bean
<bean id="userService" class="com.lyl.spring5.service.UserService">
   <property name="userDao" ref="userDao"></property>
</bean>
<bean id="userDao" class="com.lyl.spring5.dao.UserDaoImpl"></bean>
- 注入属性-内部bean和级联赋值
<!--方式一 -->
<bean id="emp" class="com.lyl.spring5.entity.Emp">
    <property name="ename" value="刘亦菲"></property>
    <property name="gender" value="女"></property>
    <property name="dept">
        <bean id="dept" class="com.lyl.spring5.entity.Dept">
            <property name="dname" value="经纪部门"></property>
        </bean>
    </property>
</bean>
<--方式二 -->
<bean id="emp" class="com.lyl.spring5.entity.Emp">
    <property name="ename" value="刘亦菲"></property>
    <property name="gender" value="女"></property>
    <property name="dept" ref="dept"></property>
</bean>
<bean id="dept" class="com.lyl.spring5.entity.Dept">
    <property name="dname" value="经纪部门"></property>
</bean>
<--方式三 -->
<bean id="emp" class="com.lyl.spring5.entity.Emp">
    <property name="ename" value="刘亦菲"></property>
    <property name="gender" value="女"></property>
    <property name="dept" ref="dept"></property>
    <property name="dept.dname" value="公关部"></property>
</bean>
<bean id="dept" class="com.lyl.spring5.entity.Dept"></bean>
- 注入属性-注入集合属性
<bean id="student" class="com.lyl.spring5.entity.Student">
     <!--数组类型属性注入 -->
     <property name="courses">
         <array>
             <value>juc课程</value>
             <value>Spring5课程</value>
             <value>SpringCloud课程</value>
         </array>
     </property>
     <!--list类型属性注入 -->
     <property name="list">
         <list>
             <value>张三</value>
             <value>李四</value>
         </list>
     </property>
     <!--map类型属性注入 -->
     <property name="map">
         <map>
             <entry key="JAVA" value="java"></entry>
             <entry key="PHP" value="php"></entry>
             <entry key="C" value="c"></entry>
         </map>
     </property>
     <!--set类型属性注入 -->
     <property name="set">
         <set>
             <value>MYSQL</value>
             <value>REDIS</value>
         </set>
     </property>
 </bean>
- 注入属性-注入集合属性,在集合里面设置对象类型
<property name="courseList">
  <list>
      <ref bean="course1"></ref>
      <ref bean="course2"></ref>
  </list>
</property>
<bean id="course1" class="com.lyl.spring5.entity.Course">
	<property name="cname" value="SpringBoot"></property>
</bean>
<bean id="course2" class="com.lyl.spring5.entity.Course">
    <property name="cname" value="SpringCloud"></property>
</bean>
- 注入属性-把集合注入属性提取出来
<?xml version="1.0" encoding="UTF-8"?>
<beans xmlns="http://www.springframework.org/schema/beans"
       xmlns:xsi="http://www.w3.org/2001/XMLSchema-instance"
       xmlns:util="http://www.springframework.org/schema/util"
       xsi:schemaLocation="http://www.springframework.org/schema/beans http://www.springframework.org/schema/beans/spring-beans.xsd
                           http://www.springframework.org/schema/util http://www.springframework.org/schema/util/spring-util.xsd">

    <util:list id="gameList">
        <value>英雄联盟</value>
        <value>三国志13</value>
        <value>三国群英传</value>
    </util:list>

    <bean id="game" class="com.lyl.spring5.entity.Game">
        <property name="list" ref="gameList"></property>
    </bean>
</beans>
1.3.2.2 基于注解方式实现
- @Component
- @Controller
- @Service
- @Repository
上面注解功能都是一样的
1.3.2.2.1 创建对象
- 开启组件扫描
<?xml version="1.0" encoding="UTF-8"?>
<beans xmlns="http://www.springframework.org/schema/beans"
       xmlns:xsi="http://www.w3.org/2001/XMLSchema-instance"
       xmlns:context="http://www.springframework.org/schema/context"
       xsi:schemaLocation="http://www.springframework.org/schema/beans http://www.springframework.org/schema/beans/spring-beans.xsd
                           http://www.springframework.org/schema/context http://www.springframework.org/schema/context/spring-context.xsd">

    <!--开启组件扫描 -->
    <context:component-scan base-package="com.lyl.spring5"></context:component-scan>

</beans>
package com.lyl.spring5.service;
import org.springframework.stereotype.Component;
import org.springframework.stereotype.Controller;
import org.springframework.stereotype.Repository;
import org.springframework.stereotype.Service;
/**
* @ClassName UserService
* @Description TODO
* @Author liyulong
* @Date 2021/11/21 20:55
* @Version 1.0
**/
//@Component
//@Controller
@Service
//@Repository
public class UserService {
public void add(){
System.out.println("service add ......");
}
}
@Test
public void test1(){
ApplicationContext applicationContext = new ClassPathXmlApplicationContext("bean.xml");
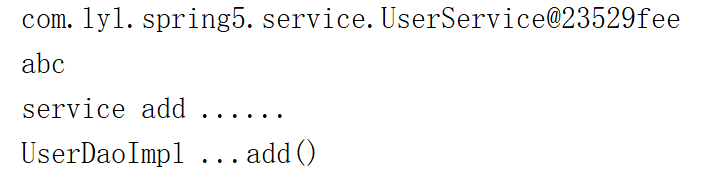
UserService userService = applicationContext.getBean("userService", UserService.class);
System.out.println(userService);
userService.add();
}
- 组件扫描细节说明
<?xml version="1.0" encoding="UTF-8"?>
<beans xmlns="http://www.springframework.org/schema/beans"
       xmlns:xsi="http://www.w3.org/2001/XMLSchema-instance"
       xmlns:context="http://www.springframework.org/schema/context"
       xsi:schemaLocation="http://www.springframework.org/schema/beans http://www.springframework.org/schema/beans/spring-beans.xsd
                           http://www.springframework.org/schema/context http://www.springframework.org/schema/context/spring-context.xsd">

    <!--开启组件扫描 -->
    <!--<context:component-scan base-package="com.lyl.spring5"></context:component-scan>-->

    <!--示例1
        use-default-filters="false":表示不使用默认filter,自己配置filter
        context:include-filter:设置扫描哪些内容
    -->
    <context:component-scan base-package="com.lyl.spring5" use-default-filters="false">
        <context:include-filter type="annotation" expression="org.springframework.stereotype.Component"></context:include-filter>
    </context:component-scan>

    <!--示例2
        context:exclude-filter:设置不扫描哪些内容
    -->
    <context:component-scan base-package="com.lyl.spring5">
        <context:exclude-filter type="annotation" expression="org.springframework.stereotype.Repository"></context:exclude-filter>
    </context:component-scan>
</beans>
1.3.2.2.2 属性注入
- @AutoWired:根据属性类型进行自动注入
- @Qualifier:根据属性名称进行自动注入,需要和@AutoWired一起使用
- @Resource:可以根据类型注入,可以根据名称进行注入
- @Value:注入普通类型属性
package com.lyl.spring5.dao;

public interface UserDao {

    public void add();

}

package com.lyl.spring5.dao;

import org.springframework.stereotype.Repository;

/**
 * @ClassName UserDaoImpl
 * @Description TODO
 * @Author liyulong
 * @Date 2021/11/21 21:13
 * @Version 1.0
 **/
@Repository
public class UserDaoImpl implements UserDao{

    @Override
    public void add() {
        System.out.println("UserDaoImpl ...add()");
    }
}

package com.lyl.spring5.service;

import com.lyl.spring5.dao.UserDao;
import org.springframework.beans.factory.annotation.Autowired;
import org.springframework.stereotype.Component;
import org.springframework.stereotype.Controller;
import org.springframework.stereotype.Repository;
import org.springframework.stereotype.Service;

/**
 * @ClassName UserService
 * @Description TODO
 * @Author liyulong
 * @Date 2021/11/21 20:55
 * @Version 1.0
 **/
//@Component
//@Controller
@Service
//@Repository
public class UserService {

    @Value(value = "abc")
    private String name;

//    @Autowired
//    @Qualifier(value = "userDaoImpl")
//    @Resource
    @Resource(name="userDaoImpl")
    private UserDao userDao;

    public void add(){
        System.out.println("service add ......");
        userDao.add();
    }

}

@Test
    public void test1(){
        ApplicationContext applicationContext = new ClassPathXmlApplicationContext("bean.xml");
        UserService userService = applicationContext.getBean("userService", UserService.class);
        System.out.println(userService);
        userService.add();
    }
1.3.2.2.3 完全注解开发
package com.lyl.spring5.config;

import org.springframework.context.annotation.ComponentScan;
import org.springframework.context.annotation.Configuration;

/**
 * @ClassName SpringConfig
 * @Description TODO
 * @Author liyulong
 * @Date 2021/11/21 21:27
 * @Version 1.0
 **/
@Configuration
@ComponentScan(basePackages = {"com.lyl.spring5"})
public class SpringConfig {

}

@Test
public void test2(){
    ApplicationContext applicationContext = new AnnotationConfigApplicationContext(SpringConfig.class);
    UserService userService = applicationContext.getBean("userService", UserService.class);
    System.out.println(userService);
    userService.add();
}
1.3.3 Bean管理-FactoryBean
1.3.3.1 普通Bean
在配置文件中定义bean的类型就是返回类型
1.3.3.2 工厂Bean
在配置文件中定义bean类型可以和返回类型不一致
package com.lyl.spring5.factoryBean;

import com.lyl.spring5.entity.Course;
import com.lyl.spring5.entity.Game;
import org.springframework.beans.factory.FactoryBean;

/**
 * @ClassName MyBean
 * @Description 工厂Bean
 * @Author liyulong
 * @Date 2021/11/21 17:53
 * @Version 1.0
 **/
public class MyBean implements FactoryBean<Course> {

    @Override
    public Course getObject() throws Exception {
        Course course = new Course();
        course.setCname("abc");
        return course;
    }

    @Override
    public Class<?> getObjectType() {
        return null;
    }

    @Override
    public boolean isSingleton() {
        return false;
    }
}
<?xml version="1.0" encoding="UTF-8"?>
<beans xmlns="http://www.springframework.org/schema/beans"
       xmlns:xsi="http://www.w3.org/2001/XMLSchema-instance"
       xsi:schemaLocation="http://www.springframework.org/schema/beans http://www.springframework.org/schema/beans/spring-beans.xsd">

    <bean id="myBean" class="com.lyl.spring5.factoryBean.MyBean">
    </bean>

</beans>
1.3.4 Bean管理-Bean作用域
Spring可以设置创建的Bean是单实例还是多实例
Spring默认创建的Bean是单实例
@Test
    public void test3() {
        //1.加载spring配置文件
        ApplicationContext applicationContext = new ClassPathXmlApplicationContext("bean3.xml");
        //2.获取bean对象
        Game game1 = applicationContext.getBean("game", Game.class);
        Game game2 = applicationContext.getBean("game", Game.class);
        System.out.println(game1 == game2 ? "单实例" : "多实例");
    }

1.3.4.1 如何设置单实例或者多实例
- 在Spring配置文件中bean标签属性scope用于设置单实例或者多实例
- scope属性值
默认值:singleton(单实例)
prototype:多实例
request:不常用
session:不常用
<bean id="game" class="com.lyl.spring5.entity.Game" scope="prototype">
   <property name="list" ref="gameList"></property>
</bean>

1.3.4.2 singleton和prototype区别
- singleton单实例,prototype多实例
- singleton加载Spring配置文件时就会创建单实例对象;prototype不是在加载Spring配置文件时创建对象,而是在调用getBean方法时创建多实例对象
1.3.5 Bean管理-Bean生命周期
对象从创建到销毁的过程
- 通过构造器创建Bean实例(无参构造)
- 为Bean的属性设置值和引用其他Bean(调用set方法)
- 把Bean实例传递给Bean的后置处理器方法postProcessBeforeInitialization
- 调用Bean的初始化方法(需要进行配置)
- 把Bean实例传递给Bean的后置处理器方法postProcessAfterInitialization
- Bean使用
- Bean销毁(当容器关闭时,调用Bean的销毁方法,需要进行配置)
package com.lyl.spring5.entity;
/**
* @ClassName Orders
* @Description TODO
* @Author liyulong
* @Date 2021/11/21 19:50
* @Version 1.0
**/
public class Orders {
private String oname;
public Orders() {
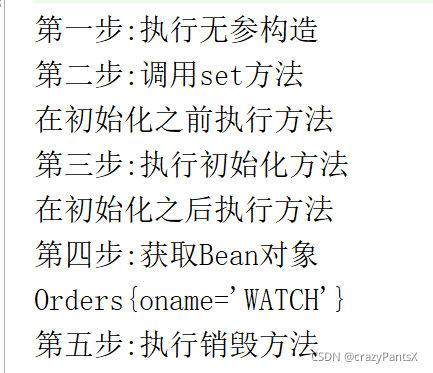
System.out.println("第一步:执行无参构造");
}
public void setOname(String oname) {
this.oname = oname;
System.out.println("第二步:调用set方法");
}
public void init(){
System.out.println("第三步:执行初始化方法");
}
public void destroy(){
System.out.println("第五步:执行销毁方法");
}
@Override
public String toString() {
return "Orders{" +
"oname='" + oname + '\'' +
'}';
}
}
package com.lyl.spring5.bean;
import org.springframework.beans.BeansException;
import org.springframework.beans.factory.config.BeanPostProcessor;
/**
* @ClassName MyBeanPost
* @Description Bean后置处理器
* @Author liyulong
* @Date 2021/11/21 20:01
* @Version 1.0
**/
public class MyBeanPost implements BeanPostProcessor {
@Override
public Object postProcessBeforeInitialization(Object bean, String beanName) throws BeansException {
System.out.println("在初始化之前执行方法");
return bean;
}
@Override
public Object postProcessAfterInitialization(Object bean, String beanName) throws BeansException {
System.out.println("在初始化之后执行方法");
return bean;
}
}
<?xml version="1.0" encoding="UTF-8"?>
<beans xmlns="http://www.springframework.org/schema/beans"
       xmlns:xsi="http://www.w3.org/2001/XMLSchema-instance"
       xsi:schemaLocation="http://www.springframework.org/schema/beans http://www.springframework.org/schema/beans/spring-beans.xsd">

    <bean id="orders" class="com.lyl.spring5.entity.Orders" init-method="init" destroy-method="destroy">
        <property name="oname" value="WATCH"></property>
    </bean>
    <!--配置后置处理器 -->
    <bean id="myBeanPost" class="com.lyl.spring5.bean.MyBeanPost"></bean>
</beans>
@Test
    public void test5() {
        //1.加载spring配置文件
        ApplicationContext applicationContext = new ClassPathXmlApplicationContext("bean5.xml");
        //2.获取bean对象
        Orders orders = applicationContext.getBean("orders", Orders.class);
        System.out.println("第四步:获取Bean对象");
        System.out.println(orders);
        //3.销毁
        ((ClassPathXmlApplicationContext) applicationContext).close();
    }
1.3.6 Bean管理-xml自动装配
根据指定装配规则(属性名称或者属性类型),Spring自动将匹配的属性值进行注入
<?xml version="1.0" encoding="UTF-8"?>
<beans xmlns="http://www.springframework.org/schema/beans"
       xmlns:xsi="http://www.w3.org/2001/XMLSchema-instance"
       xsi:schemaLocation="http://www.springframework.org/schema/beans http://www.springframework.org/schema/beans/spring-beans.xsd">

    <!-- 实现自动装配
        Bean标签属性autowire配置自动装配
        byName:根据属性名称注入
        byType;根据属性类型注入
    -->
    <bean id="emp" class="com.lyl.spring5.autowire.Emp" autowire="byName"></bean>

    <bean id="dept" class="com.lyl.spring5.autowire.Dept"></bean>

</beans>
1.3.6 Bean管理-引入外部属性文件
1.3.6.1 直接配置
<?xml version="1.0" encoding="UTF-8"?>
<beans xmlns="http://www.springframework.org/schema/beans"
       xmlns:xsi="http://www.w3.org/2001/XMLSchema-instance"
       xsi:schemaLocation="http://www.springframework.org/schema/beans http://www.springframework.org/schema/beans/spring-beans.xsd">

    <!--直接配置 -->
    <bean id="druidDataSource" class="com.alibaba.druid.pool.DruidDataSource">
        <property name="driverClassName" value="com.mysql.jdbc.Driver"></property>
        <property name="url" value="jdbc:mysql://localhost:3306/userDb"></property>
        <property name="username" value="root"></property>
        <property name="password" value="root"></property>
    </bean>

</beans>
1.3.6.2 引入外部属性文件
prop.driverClassName=driverClassName
prop.url=jdbc:mysql://localhost:3306/userDb
prop.username=root
prop.password=root
<?xml version="1.0" encoding="UTF-8"?>
<beans xmlns="http://www.springframework.org/schema/beans"
       xmlns:xsi="http://www.w3.org/2001/XMLSchema-instance"
       xmlns:context="http://www.springframework.org/schema/context"
       xsi:schemaLocation="http://www.springframework.org/schema/beans http://www.springframework.org/schema/beans/spring-beans.xsd
                           http://www.springframework.org/schema/context http://www.springframework.org/schema/context/spring-context.xsd">

    <!--引入外部属性文件 -->
    <context:property-placeholder location="classpath:jdbc.properties"></context:property-placeholder>

    <bean id="druidDataSource" class="com.alibaba.druid.pool.DruidDataSource">
        <property name="driverClassName" value="${prop.driverClassName}"></property>
        <property name="url" value="${prop.url}"></property>
        <property name="username" value="${prop.username}"></property>
        <property name="password" value="${prop.password}"></property>
    </bean>
</beans>
@Test
    public void test7() {
        //1.加载spring配置文件
        ApplicationContext applicationContext = new ClassPathXmlApplicationContext("bean7.xml");
        //2.获取bean对象
        DruidDataSource druidDataSource = applicationContext.getBean("druidDataSource", DruidDataSource.class);
        System.out.println(druidDataSource.getDriverClassName());
        System.out.println(druidDataSource.getUrl());
        System.out.println(druidDataSource.getUsername());
        System.out.println(druidDataSource.getPassword());
    }

2.AOP
面向切面编程
2.1 AOP底层原理
2.1.1 动态代理
2.1.1.1 有接口情况
JDK动态代理
package com.lyl.spring5;

public interface UserDao {

    public int add(int a,int b);

    public String update(String id);

}

package com.lyl.spring5;

/**
 * @ClassName UserDaoImpl
 * @Description TODO
 * @Author liyulong
 * @Date 2021/11/21 22:55
 * @Version 1.0
 **/
public class UserDaoImpl implements UserDao {

    @Override
    public int add(int a, int b) {
        System.out.println("UserDaoImpl...add方法执行");
        return a + b;
    }

    @Override
    public String update(String id) {
        System.out.println("UserDaoImpl...update方法执行");
        return id;
    }
}

package com.lyl.spring5;

import java.lang.reflect.InvocationHandler;
import java.lang.reflect.Method;
import java.lang.reflect.Proxy;
import java.util.Arrays;

/**
 * @ClassName JDKProxy
 * @Description TODO
 * @Author liyulong
 * @Date 2021/11/21 22:56
 * @Version 1.0
 **/
public class JDKProxy {

    public static void main(String[] args) {
        //创建接口实现类代理对象
        Class[] interfaces = {UserDao.class};
        UserDaoImpl userDaoImpl = new UserDaoImpl();
        UserDao userDao = (UserDao) Proxy.newProxyInstance(JDKProxy.class.getClassLoader(), interfaces, new InvocationHandler() {

            //目标对象
            private Object obj;

            {
                this.obj = userDaoImpl;
            }

            /**
             * 增强逻辑
             * @param proxy
             * @param method
             * @param args
             * @return
             * @throws Throwable
             */
            @Override
            public Object invoke(Object proxy, Method method, Object[] args) throws Throwable {

                //方法之前
                System.out.println("方法之前执行..." + method.getName() + ",传递的参数..." + Arrays.toString(args));

                Object result = method.invoke(obj, args);

                //方法之后
                System.out.println("方法之后执行..." + obj);

                return result;
            }
        });
        int result = userDao.add(1, 2);
        System.out.println("result:" + result);
    }
}
2.1.1.2 没有接口情况
CGLIB动态代理
2.2 AOP术语
- 连接点:可以被增强的方法
- 切入点:实际真正被增强的方法
- 通知(增强):实际增加的增强逻辑
1)前置通知
2)后置通知
3)环绕通知
4)异常通知
5)最终通知 - 切面:把通知应用到切入点的过程,是一个动作
2.3 AOP操作
Spring框架一般都是基于AspectJ实现AOP操作
2.3.1 基于AspectJ实现AOP操作
2.3.1.1 切入点表达式
- 表示对那个类的那个方法进行增强
- 语法结构
execution([权限修饰符][返回类型][全限定类名]方法名称)
2.3.1.2 基于注解方式实现
package com.lyl.spring5.config;
import org.springframework.context.annotation.ComponentScan;
import org.springframework.context.annotation.Configuration;
import org.springframework.context.annotation.EnableAspectJAutoProxy;
/**
* @ClassName SpringConfig
* @Description 配置类
* @Author liyulong
* @Date 2021/11/22 20:15
* @Version 1.0
**/
@Configuration
@ComponentScan(basePackages = {"com.lyl.spring5"})
@EnableAspectJAutoProxy
public class SpringConfig {
}
package com.lyl.spring5.annoaop;
import org.springframework.stereotype.Component;
/**
* @ClassName User
* @Description 目标类(被增强类)
* @Author liyulong
* @Date 2021/11/22 20:13
* @Version 1.0
**/
@Component
public class User {
public void add() {
// int a = 10/0;
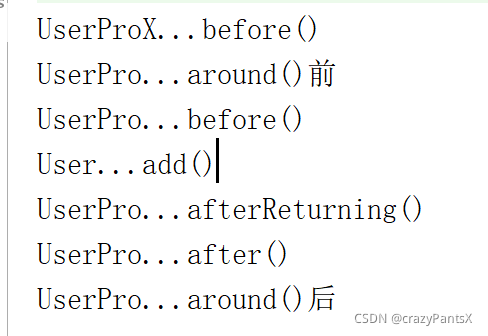
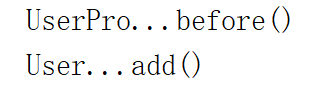
System.out.println("User...add()");
}
}
package com.lyl.spring5.annoaop;
import org.aspectj.lang.ProceedingJoinPoint;
import org.aspectj.lang.annotation.*;
import org.springframework.stereotype.Component;
/**
* @ClassName UserPro
* @Description 增强类
* @Author liyulong
* @Date 2021/11/22 20:14
* @Version 1.0
**/
@Component
@Aspect
public class UserPro {
//前置通知
@Before(value = "execution(* com.lyl.spring5.annoaop.User.add(..))")
public void before(){
System.out.println("UserPro...before()");
}
//后置通知
@AfterReturning(value = "execution(* com.lyl.spring5.annoaop.User.add(..))")
public void afterReturning(){
System.out.println("UserPro...afterReturning()");
}
//最终通知
@After(value = "execution(* com.lyl.spring5.annoaop.User.add(..))")
public void after(){
System.out.println("UserPro...after()");
}
//异常通知
@AfterThrowing(value = "execution(* com.lyl.spring5.annoaop.User.add(..))")
public void afterThrowing(){
System.out.println("UserPro...afterThrowing()");
}
//环绕通知
@Around(value = "execution(* com.lyl.spring5.annoaop.User.add(..))")
public void around(ProceedingJoinPoint proceedingJoinPoint) throws Throwable {
System.out.println("UserPro...around()前");
proceedingJoinPoint.proceed();
System.out.println("UserPro...around()后");
}
}
package com.lyl.spring5;
import com.lyl.spring5.annoaop.User;
import com.lyl.spring5.config.SpringConfig;
import org.springframework.context.ApplicationContext;
import org.springframework.context.annotation.AnnotationConfigApplicationContext;
/**
* @ClassName Test
* @Description 测试类
* @Author liyulong
* @Date 2021/11/22 20:22
* @Version 1.0
**/
public class Test {
@org.junit.Test
public void test1() {
ApplicationContext applicationContext = new AnnotationConfigApplicationContext(SpringConfig.class);
User user = applicationContext.getBean("user", User.class);
user.add();
}
}

- 重用切入点定义
@Pointcut
package com.lyl.spring5.annoaop;

import org.aspectj.lang.ProceedingJoinPoint;
import org.aspectj.lang.annotation.*;
import org.springframework.stereotype.Component;

/**
 * @ClassName UserPro
 * @Description 增强类
 * @Author liyulong
 * @Date 2021/11/22 20:14
 * @Version 1.0
 **/
@Component
@Aspect
public class UserPro {

    @Pointcut(value = "execution(* com.lyl.spring5.annoaop.User.add(..))")
    public void pointDemo(){

    }

    //前置通知
    @Before(value = "pointDemo()")
    public void before(){
        System.out.println("UserPro...before()");
    }


    //后置通知
    @AfterReturning(value = "pointDemo()")
    public void afterReturning(){
        System.out.println("UserPro...afterReturning()");
    }

    //最终通知
    @After(value = "pointDemo()")
    public void after(){
        System.out.println("UserPro...after()");
    }

    //异常通知
    @AfterThrowing(value = "pointDemo()")
    public void afterThrowing(){
        System.out.println("UserPro...afterThrowing()");
    }

    //环绕通知
    @Around(value = "pointDemo()")
    public void around(ProceedingJoinPoint proceedingJoinPoint) throws Throwable {
        System.out.println("UserPro...around()前");
        proceedingJoinPoint.proceed();
        System.out.println("UserPro...around()后");
    }

}
- 多个增强类对同一个方法进行增强
@Order
package com.lyl.spring5.annoaop;

import org.aspectj.lang.annotation.Aspect;
import org.aspectj.lang.annotation.Before;
import org.springframework.core.annotation.Order;
import org.springframework.stereotype.Component;

/**
 * @ClassName UserProX
 * @Description TODO
 * @Author liyulong
 * @Date 2021/11/22 20:39
 * @Version 1.0
 **/
@Component
@Aspect
@Order(1)
public class UserProX {

    //前置通知
    @Before(value = "execution(* com.lyl.spring5.annoaop.User.add(..))")
    public void before(){
        System.out.println("UserProX...before()");
    }

}

package com.lyl.spring5.annoaop;

import org.aspectj.lang.ProceedingJoinPoint;
import org.aspectj.lang.annotation.*;
import org.springframework.core.annotation.Order;
import org.springframework.stereotype.Component;

/**
 * @ClassName UserPro
 * @Description 增强类
 * @Author liyulong
 * @Date 2021/11/22 20:14
 * @Version 1.0
 **/
@Component
@Aspect
@Order(2)
public class UserPro {

    @Pointcut(value = "execution(* com.lyl.spring5.annoaop.User.add(..))")
    public void pointDemo(){

    }

    //前置通知
    @Before(value = "pointDemo()")
    public void before(){
        System.out.println("UserPro...before()");
    }


    //后置通知
    @AfterReturning(value = "pointDemo()")
    public void afterReturning(){
        System.out.println("UserPro...afterReturning()");
    }

    //最终通知
    @After(value = "pointDemo()")
    public void after(){
        System.out.println("UserPro...after()");
    }

    //异常通知
    @AfterThrowing(value = "pointDemo()")
    public void afterThrowing(){
        System.out.println("UserPro...afterThrowing()");
    }

    //环绕通知
    @Around(value = "pointDemo()")
    public void around(ProceedingJoinPoint proceedingJoinPoint) throws Throwable {
        System.out.println("UserPro...around()前");
        proceedingJoinPoint.proceed();
        System.out.println("UserPro...around()后");
    }

}
2.3.1.3 基于xml配置文件实现
不推荐
<?xml version="1.0" encoding="UTF-8"?>
<beans xmlns="http://www.springframework.org/schema/beans"
       xmlns:xsi="http://www.w3.org/2001/XMLSchema-instance"
       xmlns:context="http://www.springframework.org/schema/context"
       xmlns:aop="http://www.springframework.org/schema/aop"
       xsi:schemaLocation="http://www.springframework.org/schema/beans http://www.springframework.org/schema/beans/spring-beans.xsd
                           http://www.springframework.org/schema/context http://www.springframework.org/schema/context/spring-context.xsd
                           http://www.springframework.org/schema/aop http://www.springframework.org/schema/aop/spring-aop.xsd ">


    <bean id="user" class="com.lyl.spring5.annoaop.User"></bean>
    <bean id="userPro" class="com.lyl.spring5.annoaop.UserPro"></bean>

    <!--配置aop增强 -->
    <aop:config>

        <!--配置切入点 -->
        <aop:pointcut id="ap" expression="execution(* com.lyl.spring5.annoaop.User.add(..))"></aop:pointcut>

        <!--配置切面 -->
        <aop:aspect ref="userPro">
            <!--配置通知 -->
            <aop:before method="before" pointcut-ref="ap"></aop:before>
        </aop:aspect>

    </aop:config>
</beans>
@org.junit.Test
    public void test2() {
        ApplicationContext applicationContext = new ClassPathXmlApplicationContext("bean.xml");
        User user = applicationContext.getBean("user", User.class);
        user.add();
    }
3.jdbcTemplate
xml配置
<?xml version="1.0" encoding="UTF-8"?>
<beans xmlns="http://www.springframework.org/schema/beans"
       xmlns:xsi="http://www.w3.org/2001/XMLSchema-instance"
       xsi:schemaLocation="http://www.springframework.org/schema/beans http://www.springframework.org/schema/beans/spring-beans.xsd">

	<!--开启注解扫描 -->
    <context:component-scan base-package="com.lyl.spring5"></context:component-scan>

    <!--配置数据源 -->
    <bean id="druidDataSource" class="com.alibaba.druid.pool.DruidDataSource">
        <property name="driverClassName" value="com.mysql.jdbc.Driver"></property>
        <property name="url" value="jdbc:mysql://localhost:3307/user_db"></property>
        <property name="username" value="root"></property>
        <property name="password" value="root"></property>
    </bean>

    <!--配置jdbcTemplate -->
    <bean id="jdbcTemplate" class="org.springframework.jdbc.core.JdbcTemplate">
        <!--注入数据源 -->
        <property name="dataSource" ref="druidDataSource"></property>
    </bean>

</beans>
4.Spring事务
底层使用到了AOP原理
4.1 事物的四个特性(ACID)
- 原子性
- 一致性
- 隔离性
- 持久性
4.2 声明式事务管理
4.2.1 基于注解方式
<!--配置事务管理器 -->
<bean id="dataSourceTransactionManager" class="org.springframework.jdbc.datasource.DataSourceTransactionManager">
    <property name="dataSource" ref="druidDataSource"></property>
</bean>

<!--开启事务注解 -->
<tx:annotation-driven transaction-manager="dataSourceTransactionManager"></tx:annotation-driven>
package com.lyl.spring5.service;

import com.lyl.spring5.dao.BookDao;
import com.lyl.spring5.entity.User;
import org.springframework.beans.factory.annotation.Autowired;
import org.springframework.stereotype.Service;
import org.springframework.transaction.annotation.Transactional;

/**
 * @ClassName UserService
 * @Description TODO
 * @Author liyulong
 * @Date 2021/11/22 21:23
 * @Version 1.0
 **/
@Service
@Transactional
public class UserService {

    @Autowired
    private UserDao userDao;

    public void add(User user){
        userDao.add(user);
    }
}
4.2.2 基于xml配置文件方式
<?xml version="1.0" encoding="UTF-8"?>
<beans xmlns="http://www.springframework.org/schema/beans"
       xmlns:xsi="http://www.w3.org/2001/XMLSchema-instance"
       xmlns:context="http://www.springframework.org/schema/context"
       xmlns:tx="http://www.springframework.org/schema/tx"
       xmlns:aop="http://www.springframework.org/schema/aop"
       xsi:schemaLocation="http://www.springframework.org/schema/beans http://www.springframework.org/schema/beans/spring-beans.xsd
                          http://www.springframework.org/schema/context http://www.springframework.org/schema/context/spring-context.xsd
                          http://www.springframework.org/schema/tx http://www.springframework.org/schema/tx/spring-tx.xsd
                          http://www.springframework.org/schema/aop http://www.springframework.org/schema/aop/spring-aop.xsd">

    <!--开启注解扫描 -->
    <context:component-scan base-package="com.lyl.spring5"></context:component-scan>

    <!--配置数据源 -->
    <bean id="druidDataSource" class="com.alibaba.druid.pool.DruidDataSource">
        <property name="driverClassName" value="com.mysql.jdbc.Driver"></property>
        <property name="url" value="jdbc:mysql://localhost:3307/user_db"></property>
        <property name="username" value="root"></property>
        <property name="password" value="root"></property>
    </bean>

    <!--配置jdbcTemplate -->
    <bean id="jdbcTemplate" class="org.springframework.jdbc.core.JdbcTemplate">
        <!--注入数据源 -->
        <property name="dataSource" ref="druidDataSource"></property>
    </bean>

    <!--配置事务管理器 -->
    <bean id="dataSourceTransactionManager" class="org.springframework.jdbc.datasource.DataSourceTransactionManager">
        <property name="dataSource" ref="druidDataSource"></property>
    </bean>

    <!--配置通知 -->
    <tx:advice id="txAdvice">
        <!--配置事务参数 -->
        <tx:attributes>
            <!--指定那种规则的方法添加事务 -->
            <tx:method name="add*" isolation="DEFAULT" propagation="REQUIRED"/>
        </tx:attributes>
    </tx:advice>

    <!--配置切入点和切面 -->
    <aop:config>
        <!--配置切入点 -->
        <aop:pointcut id="ap" expression="execution(* com.lyl.spring5.service.UserService.*(..))"></aop:pointcut>
        <!--配置切面 -->
        <aop:advisor advice-ref="txAdvice" pointcut-ref="ap"></aop:advisor>
    </aop:config>
</beans>
4.2.3 完全注解方式
package com.lyl.spring5.config;

import com.alibaba.druid.pool.DruidDataSource;
import org.springframework.beans.factory.annotation.Autowired;
import org.springframework.context.annotation.Bean;
import org.springframework.context.annotation.ComponentScan;
import org.springframework.context.annotation.Configuration;
import org.springframework.jdbc.core.JdbcTemplate;
import org.springframework.jdbc.datasource.DataSourceTransactionManager;
import org.springframework.transaction.annotation.EnableTransactionManagement;

import javax.sql.DataSource;

/**
 * @ClassName TxConfig
 * @Description TODO
 * @Author liyulong
 * @Date 2021/11/22 23:02
 * @Version 1.0
 **/
@Configuration
@ComponentScan(basePackages = {"com.lyl.spring5"})
@EnableTransactionManagement
public class TxConfig {

    /**
     * 创建数据源
     *
     * @return
     */
    @Bean
    public DruidDataSource getDruidDataSource() {
        DruidDataSource druidDataSource = new DruidDataSource();
        druidDataSource.setDriverClassName("com.mysql.jdbc.Driver");
        druidDataSource.setUrl("jdbc:mysql://localhost:3307/user_db");
        druidDataSource.setUsername("root");
        druidDataSource.setPassword("root");
        return druidDataSource;
    }

    /**
     * 创建JdbcTemplate
     *
     * @param dataSource
     * @return
     */
    @Bean
    public JdbcTemplate getJdbcTemplate(DataSource dataSource) {
        JdbcTemplate jdbcTemplate = new JdbcTemplate();
        jdbcTemplate.setDataSource(dataSource);
        return jdbcTemplate;
    }

    /**
     * 创建事务管理器
     *
     * @param dataSource
     * @return
     */
    @Bean
    public DataSourceTransactionManager getDataSourceTransactionManager(DataSource dataSource) {
        DataSourceTransactionManager dataSourceTransactionManager = new DataSourceTransactionManager();
        dataSourceTransactionManager.setDataSource(dataSource);
        return dataSourceTransactionManager;
    }

}
4.3 事务管理API
PlatformTransactionManager

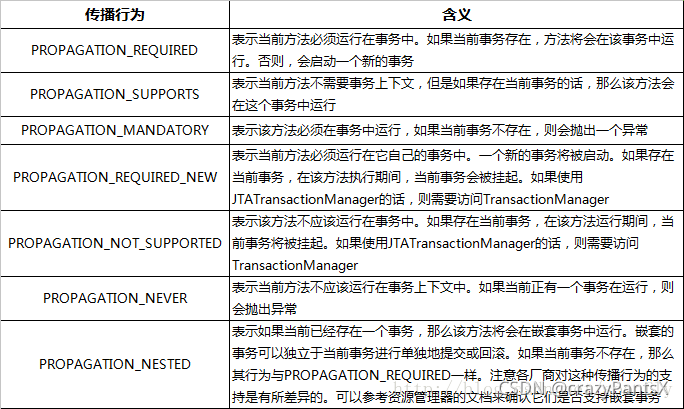
4.4 事务的传播行为
Propagation.REQUIRED(默认)
Propagation.SUPPORTS
Propagation.MANDATORY
Propagation.REQUIRES_NEW
Propagation.NOT_SUPPORTED
Propagation.NEVER
Propagation.NESTED
4.4 事务的隔离级别
解决的三个问题:
- 脏读:一个未提交事务读取到了另一个未提交事务的数据
- 不可重复读:一个未提交事务读取到了另一个提交事务修改的数据
- 幻读:一个未提交事务读取到了另一个提交事务添加的数据
Isolation.READ_UNCOMMITTED
Isolation.READ_COMMITTED(Oracle默认)
Isolation.REPEATABLE_READ(mysql默认)
Isolation.SERIALIZABLE
5.Spring5新功能
基于java8
5.1 自带通用的日志封装
详情参考这篇文章,
特别说明:web.xml中可以不配置
5.2 支持@Nullable注解
- 用在方法上:方法返回值可以为空
- 用在方法参数上:参数可以为空
- 用在属性上:属性值可以为空
5.3 支持函数式风格
/**
 * 函数式风格创建对象,并交给Spring容器管理
 */
@org.junit.Test
public void test3(){
    //1 创建GenericApplicationContext对象
    GenericApplicationContext context = new GenericApplicationContext();
    //2 注册对象
    context.refresh();
    context.registerBean("user",User.class,()->new User());
    User user = context.getBean("user", User.class);
//        User user = context.getBean("com.lyl.spring5.entity.User", User.class);
    System.out.println(user);
}
5.3 支持整合JUnit5
- 回顾Spring整合JUnit4
package com.lyl.spring5;

import com.lyl.spring5.service.BookService;
import org.junit.Test;
import org.junit.runner.RunWith;
import org.springframework.beans.factory.annotation.Autowired;
import org.springframework.test.context.ContextConfiguration;
import org.springframework.test.context.junit4.SpringJUnit4ClassRunner;

/**
 * @ClassName TestJUint
 * @Description TODO
 * @Author liyulong
 * @Date 2021/11/23 20:08
 * @Version 1.0
 **/
@RunWith(SpringJUnit4ClassRunner.class)
@ContextConfiguration("classpath:bean.xml")
public class TestJUnit {

    @Autowired
    private BookService bookService;

}
- spring5整合JUnit5
1)方式一
package com.lyl.spring5;

import com.lyl.spring5.service.BookService;
import org.junit.jupiter.api.Test;
import org.junit.jupiter.api.extension.ExtendWith;
import org.springframework.beans.factory.annotation.Autowired;
import org.springframework.test.context.ContextConfiguration;
import org.springframework.test.context.junit.jupiter.SpringExtension;

/**
 * @ClassName TestJUnit5
 * @Description Spring5整合JUnit5
 * @Author liyulong
 * @Date 2021/11/23 20:14
 * @Version 1.0
 **/
@ExtendWith(SpringExtension.class)
@ContextConfiguration("classpath:bean.xml")
public class TestJUnit5 {

    @Autowired
    private BookService bookService;

    @Test
    public void test() {
    }

}
2)方式二:使用复合注解
package com.lyl.spring5;

import com.lyl.spring5.service.BookService;
import org.junit.jupiter.api.Test;
import org.junit.jupiter.api.extension.ExtendWith;
import org.springframework.beans.factory.annotation.Autowired;
import org.springframework.test.context.ContextConfiguration;
import org.springframework.test.context.junit.jupiter.SpringExtension;
import org.springframework.test.context.junit.jupiter.SpringJUnitConfig;

/**
 * @ClassName TestJUnit5
 * @Description Spring5整合JUnit5
 * @Author liyulong
 * @Date 2021/11/23 20:14
 * @Version 1.0
 **/
@SpringJUnitConfig(locations = "classpath:bean.xml")
public class TestJUnit5 {

    @Autowired
    private BookService bookService;

    @Test
    public void test() {
    }

}
5.4 SpringWebflux
5.4.1 介绍
- 用于web开发,功能和SpringMVC类似.WebFlux使用当前一种比较流行的响应式编程来实现
- 传统web框架,如SpringMVC,都是基于Servlet容器;而WebFlux是一种异步非阻塞的框架,而该框架在Servlet3.1以后才支持,核心是基于Reactor的相关API来实现的
5.4.2 异步非阻塞
- 异步和同步针对调用者,调用者发送请求,如果发送请求之后不等待对方回应就去做其他事情就是异步,否则就是同步
- 阻塞和非阻塞针对被调用者,被调用者收到请求之后,做完请求任务之后才给出反馈,就是阻塞;收到请求之后马上给出反馈然后再去做事情就是非阻塞
5.4.3 WebFlux的优势
- 非阻塞:在有限资源下,提高系统吞吐量和伸缩性,以Reactor为基础实现响应式编程
- 函数式编程
5.4.4 响应式编程
5.4.4.1 介绍
响应式编程是一种面向数据流和变化传播的编程范式。这意味着可以在编程语言中很方便地表达静态或动态的数据流,而相关的计算模型会自动将变化的值通过数据流进行传播。
电子表格程序就是响应式编程的一个例子。单元格可以包含字面值或类似"=B1+C1"的公式,而包含公式的单元格的值会依据其他单元格的值的变化而变化。
5.4.4.2 java8实现
观察者模式,两个类:Observer和Observable
package com.lyl.reactordemo.reactor8;

import java.util.Observable;

/**
 * @ClassName ObserverDemo
 * @Description TODO
 * @Author liyulong
 * @Date 2021/11/23 21:04
 * @Version 1.0
 **/
public class ObserverDemo extends Observable {

    public static void main(String[] args) {
        ObserverDemo observerDemo = new ObserverDemo();
        //添加观察者
        observerDemo.addObserver((o,e)->{
            System.out.println("发生变化");
        });
        observerDemo.addObserver((o,e)->{
            System.out.println("收到被观察者通知,准备改变");
        });
        //监测数据变化
        observerDemo.setChanged();
        //通知
        observerDemo.notifyObservers();
    }

}
5.4.4.3 Reactor实现
- 响应式编程需要满足Reactive
- Reactor是满足Reactive规范的框架
- Reactor两个核心类,Mono和Flux,都实现了Publisher.
- Flux实现发布者:返回N个元素
- Mono实现发布者:返回0或者1个元素
- Flux和Mono都是数据流的发布者,都可以发出三种数据信号:
1)元素值
2)错误信号
3)完成信号
错误信号和完成信号都代表终止信号,终止信号告诉订阅者数据流结束了
错误信号终止数据流的同时会把错误信息传递给订阅者 - 代码演示
package com.lyl.reactordemo.reactor8;

import reactor.core.publisher.Flux;
import reactor.core.publisher.Mono;

import java.util.Arrays;
import java.util.List;
import java.util.stream.Stream;

/**
 * @ClassName TestReactor
 * @Description TODO
 * @Author liyulong
 * @Date 2021/11/23 21:26
 * @Version 1.0
 **/
public class TestReactor {

    public static void main(String[] args) {
        //just方法直接声明
        Flux.just(1, 2, 3, 4);
        Mono.just(1);

        //数组方法
        Integer[] array = {1, 2, 3, 4};
        Flux.fromArray(array);

        //集合方法
        List<Integer> list = Arrays.asList(array);
        Flux.fromIterable(list);

        //stream流
        Stream<Integer> stream = list.stream();
        Flux.fromStream(stream);

        //异常信号
        NullPointerException nullPointerException = new NullPointerException();
        Flux.error(nullPointerException);

    }
}
- 调用just或者其他方法只是声明数据流,数据流并没有发出,只有进行订阅之后才会触发数据流,不订阅什么都不会发生
Flux.just(1, 2, 3, 4).subscribe(System.out::println);
Mono.just(1).subscribe(System.out::println);
- 三种信号特点
1)错误信号和完成信号都是终止信号,不能共存
2)如果没有发送任何元素值,而是直接发送错误或者完成信号,表示是空数据流
3)如果没有错误信号也没有完成信号,表示是无限数据流 - 操作符
对数据流进行操作,就称为操作符
1)map:元素映射为新的元素
2)flatMap:元素映射为流
5.4.5 SpringWebFlux执行流程和核心API
SpringWebFlux基于Reactor,默认容器是Netty,Netty是一个高性能的NIO(异步非阻塞)框架
5.4.5.1 Netty
…
5.4.5.2 SpringWebFlux执行流程(类似SpringMVC)
SpringWebFlux核心控制器DispatchHandler,实现接口WebHandler
- DispatchHandler负责请求的处理
- HandlerMapping:根据请求查询到具体处理方法
- HandlerAdapter:处理请求
- HandlerResultHandler:响应结果处理
5.4.5.3 SpringWebFlux实现函数式编程两个接口
- RouterFunction:路由处理
- HandlerFunction:处理函数
5.4.6 SpringWebFlux基于注解编程
SpringBoot自动配置了相关允许容器,默认情况下使用Nett容器
package com.lyl.webfluxdemo1.entity;

import lombok.AllArgsConstructor;
import lombok.Data;
import lombok.NoArgsConstructor;

/**
 * @ClassName User
 * @Description TODO
 * @Author liyulong
 * @Date 2021/11/23 22:36
 * @Version 1.0
 **/
@Data
@AllArgsConstructor
@NoArgsConstructor
public class User {

    private String name;
    private String gender;
    private Integer age;

}


package com.lyl.webfluxdemo1.controller;

import com.lyl.webfluxdemo1.entity.User;
import com.lyl.webfluxdemo1.service.UserService;
import org.springframework.beans.factory.annotation.Autowired;
import org.springframework.web.bind.annotation.*;
import reactor.core.publisher.Flux;
import reactor.core.publisher.Mono;

/**
 * @ClassName UserController
 * @Description TODO
 * @Author liyulong
 * @Date 2021/11/23 22:52
 * @Version 1.0
 **/
@RestController
public class UserController {

    @Autowired
    private UserService userService;

    @GetMapping("/user/{id}")
    public Mono<User> getUserById(@PathVariable int id) {
        return userService.getUserById(id);
    }

    @GetMapping("/user")
    public Flux<User> getAllUser() {
        return userService.getAllUser();
    }

    @PostMapping("/user/save")
    public Mono<Void> saveUser(@RequestBody User user) {
        Mono<User> userMono = Mono.just(user);
        return userService.saveUserInfo(userMono);
    }

}

package com.lyl.webfluxdemo1.service;

import com.lyl.webfluxdemo1.entity.User;
import reactor.core.publisher.Flux;
import reactor.core.publisher.Mono;

public interface UserService {

    Mono<User> getUserById(int id);

    Flux<User> getAllUser();

    Mono<Void> saveUserInfo(Mono<User> userMono);

}

package com.lyl.webfluxdemo1.service.impl;

import com.lyl.webfluxdemo1.entity.User;
import com.lyl.webfluxdemo1.service.UserService;
import org.springframework.stereotype.Service;
import reactor.core.publisher.Flux;
import reactor.core.publisher.Mono;

import java.util.HashMap;
import java.util.Map;

/**
 * @ClassName UserServiceImpl
 * @Description TODO
 * @Author liyulong
 * @Date 2021/11/23 22:40
 * @Version 1.0
 **/
@Service
public class UserServiceImpl implements UserService {

    private final Map<Integer, User> users = new HashMap<>();

    public UserServiceImpl() {
        this.users.put(1, new User("lyl", "nan", 18));
        this.users.put(2, new User("wbx", "gou", 20));
        this.users.put(3, new User("haha", "weizhi", 8));
    }

    @Override
    public Mono<User> getUserById(int id) {

        return Mono.justOrEmpty(this.users.get(id));
    }

    @Override
    public Flux<User> getAllUser() {
        return Flux.fromIterable(this.users.values());
    }

    @Override
    public Mono<Void> saveUserInfo(Mono<User> userMono) {

        return userMono.doOnNext(person -> {
            int id = users.size() + 1;
            this.users.put(id, person);
        }).thenEmpty(Mono.empty());
    }


}
说明:
- SpringMVC:同步阻塞方式,基于SpringMVC+Servlet+Tomcat
- SpringWebFlux:异步非阻塞方式,基于SpringWebFlux+Reactor+Netty
5.4.7 SpringWebFlux基于函数式编程
package com.lyl.webfluxdemo1.handler;

import com.lyl.webfluxdemo1.entity.User;
import com.lyl.webfluxdemo1.service.UserService;
import org.springframework.http.MediaType;
import org.springframework.web.reactive.function.server.ServerRequest;
import org.springframework.web.reactive.function.server.ServerResponse;
import reactor.core.publisher.Flux;
import reactor.core.publisher.Mono;

import static org.springframework.web.reactive.function.BodyInserters.fromObject;

/**
 * @ClassName UserHandler
 * @Description TODO
 * @Author liyulong
 * @Date 2021/11/24 19:47
 * @Version 1.0
 **/
public class UserHandler {

    private final UserService userService;

    public UserHandler(UserService userService) {
        this.userService = userService;
    }

    public Mono<ServerResponse> getUserById(ServerRequest request) {
        int id = Integer.valueOf(request.pathVariable("id"));
        Mono<ServerResponse> notFound = ServerResponse.notFound().build();
        Mono<User> userMono = this.userService.getUserById(id);
        return userMono.
                flatMap(person -> ServerResponse.ok().contentType(MediaType.APPLICATION_JSON)
                        .body(fromObject(person)))
                .switchIfEmpty(notFound);
    }

    public Mono<ServerResponse> getAllUser(ServerRequest request) {
        Flux<User> allUser = this.userService.getAllUser();
        return ServerResponse.ok().contentType(MediaType.APPLICATION_JSON).body(allUser, User.class);
    }

    public Mono<ServerResponse> saveUserInfo(ServerRequest request) {
        Mono<User> userMono = request.bodyToMono(User.class);
        return ServerResponse.ok().build(this.userService.saveUserInfo(userMono));
    }

}
package com.lyl.webfluxdemo1;

import com.lyl.webfluxdemo1.handler.UserHandler;
import com.lyl.webfluxdemo1.service.UserService;
import com.lyl.webfluxdemo1.service.impl.UserServiceImpl;
import org.springframework.http.server.reactive.HttpHandler;
import org.springframework.http.server.reactive.ReactorHttpHandlerAdapter;
import org.springframework.web.reactive.function.server.RouterFunction;
import org.springframework.web.reactive.function.server.RouterFunctions;
import org.springframework.web.reactive.function.server.ServerResponse;
import reactor.netty.http.server.HttpServer;

import java.io.IOException;

import static org.springframework.http.MediaType.APPLICATION_JSON;
import static org.springframework.web.reactive.function.server.RequestPredicates.*;
import static org.springframework.web.reactive.function.server.RouterFunctions.toHttpHandler;

/**
 * @ClassName Server
 * @Description TODO
 * @Author liyulong
 * @Date 2021/11/24 20:06
 * @Version 1.0
 **/
public class Server {

    //创建Router路由
    public RouterFunction<ServerResponse> routingFunction() {
        //创建handler对象
        UserService userService = new UserServiceImpl();
        UserHandler userHandler = new UserHandler(userService);
        //设置路由
        return RouterFunctions.route(
                GET("/user/{id}").and(accept(APPLICATION_JSON)), userHandler::getUserById)
                .andRoute(GET("/users").and(accept(APPLICATION_JSON)), userHandler::getAllUser);
    }

    //创建服务器完成适配
    public void createReactorServer() {
        //路由和Handler适配
        RouterFunction<ServerResponse> routerFunction = routingFunction();
        HttpHandler httpHandler = toHttpHandler(routerFunction);
        ReactorHttpHandlerAdapter adapter = new ReactorHttpHandlerAdapter(httpHandler);

        //创建服务器
        HttpServer httpServer = HttpServer.create();
        httpServer.handle(adapter).bindNow();

    }

    public static void main(String[] args) throws IOException {
        Server server = new Server();
        server.createReactorServer();
        System.out.println("enter to exit");
        System.in.read();
    }

}
5.4.8 使用WebClient实现调用
package com.lyl.webfluxdemo1;

import com.lyl.webfluxdemo1.entity.User;
import org.springframework.http.MediaType;
import org.springframework.web.reactive.function.client.WebClient;
import reactor.core.publisher.Flux;

/**
 * @ClassName Client
 * @Description TODO
 * @Author liyulong
 * @Date 2021/11/24 20:34
 * @Version 1.0
 **/
public class Client {

    public static void main(String[] args) {
        //调用服务器地址
        WebClient webClient = WebClient.create("http://localhost:64266");
        String id = "1";
        User user = webClient.get().uri("/user/{id}", id).accept(MediaType.APPLICATION_JSON).retrieve().bodyToMono(User.class).block();
        System.out.println(user);

        Flux<User> userFlux = webClient.get().uri("/users").accept(MediaType.APPLICATION_JSON).retrieve().bodyToFlux(User.class);
        userFlux.map(stu -> stu.getName()).buffer().doOnNext(System.out::println).blockFirst();
    }

}


 828
828


 被折叠的 条评论
为什么被折叠?
被折叠的 条评论
为什么被折叠?
 到【灌水乐园】发言


