


 文章介绍了当使用VNC连接树莓派CM4时遇到低电压警告的问题,分析了可能的原因,包括供电不足。提供了一个用于检测电源稳定性的sh脚本,通过监控CPU温度、时钟速度、电压和节流状态来判断电源是否正常。此外,还说明了如何设置使脚本在SSH连接时自动运行,以便实时监控电源状况。
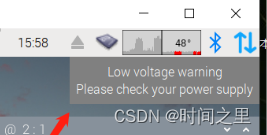
使用VNC连接树莓派时桌面任务栏一直提示low voltage warning,please check your power supply
【现象分析】:
对于使用集成raspberry 4B系列产品使用官方电源一般不会有报警,本报警主要为使用CM4核心板+自制载板时出现的异常现象,报警提示如下:
【原因分析】:
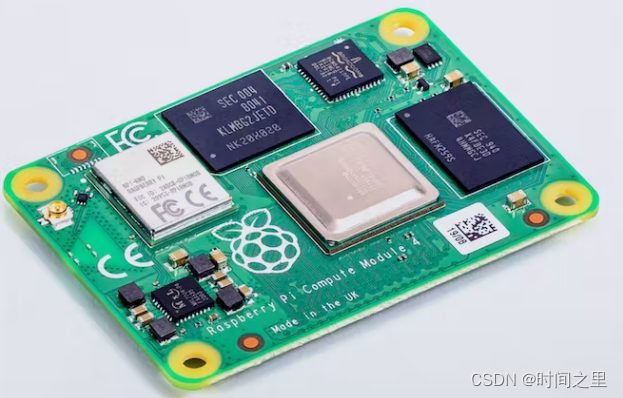
1.CM4核心板需要3.3v的供电,首先分析是电压供电不足导致的报警:
发生报警时,首先检查核心板3.3V的供电是否异常,负载过多会存在较大压降,
ioboard的具体原理参考:
核心板模块介绍:
载板模块介绍:
官网整个模块介绍:
2.电压检测脚本:
1.使用sh检测
#!/bin/bash

# Before running this script, make sure you have sysbench installed:
#           sudo apt-get install sysbench
#
# This script helps you check if your Raspberry pi is correctly powered.
# You can read more about Raspberry pi powering issues here: https://ownyourbits.com/2019/02/02/whats-wrong-with-the-raspberry-pi/


# If you're pi is correctly powered (stable power supply and quality cable), after running the script, you should get something like:
#
# 45.6'C 1400 / 600 MHz 1.3813V -
# 55.3'C 1400 / 1400 MHz 1.3813V -
# 58.0'C 1400 / 1400 MHz 1.3813V -
# 60.2'C 1400 / 1400 MHz 1.3813V -
# 60.2'C 1400 / 1400 MHz 1.3813V -
# 61.1'C 1400 / 1400 MHz 1.3813V -
# 61.1'C 1400 / 1400 MHz 1.3813V -
# 60.8'C 1400 / 1400 MHz 1.3813V -

# If your power supply can't provide a stable 5V 2.5A or if the cable is not good enough, you should get something like:
#
# 39.7'C 1400 / 1400 MHz 1.3875V - Throttling has occurred, Under-voltage has occurred,
# 48.3'C 1400 / 1400 MHz 1.3875V - Throttling has occurred, Under-voltage has occurred,
# 52.1'C 1400 / 1400 MHz 1.3875V - Throttling has occurred, Under-voltage has occurred,
# 54.8'C 1400 / 1400 MHz 1.3875V - Throttling has occurred, Under-voltage has occurred,
# 55.8'C 1400 / 1400 MHz 1.3875V - Throttling has occurred, Under-voltage has occurred,
# 56.4'C 1400 / 1400 MHz 1.3875V - Throttling has occurred, Under-voltage has occurred,
# 57.5'C 1400 / 1400 MHz 1.3875V - Throttling has occurred, Under-voltage has occurred,
# 58.0'C 1400 / 1400 MHz 1.3875V - Throttling has occurred, Under-voltage has occurred,
# 59.6'C 1400 / 1400 MHz 1.3875V - Throttling has occurred, Under-voltage has occurred,

function throttleCodeMask {
  perl -e "printf \"%s\", $1 & $2 ? \"$3\" : \"$4\""
}

# Make the throttled code readable
#
# See the `get_throttled` method documentation on: https://www.raspberrypi.org/documentation/raspbian/applications/vcgencmd.md
#

function throttledToText {
  throttledCode=$1
  throttleCodeMask $throttledCode 0x80000 "Soft temperature limit has occurred, " ""
  throttleCodeMask $throttledCode 0x40000 "Throttling has occurred, " ""
  throttleCodeMask $throttledCode 0x20000 "Arm frequency capping has occurred, " ""
  throttleCodeMask $throttledCode 0x10000 "Under-voltage has occurred, " ""
  throttleCodeMask $throttledCode 0x8 "Soft temperature limit active, " ""
  throttleCodeMask $throttledCode 0x4 "Currently throttled, " ""
  throttleCodeMask $throttledCode 0x2 "Arm frequency capped, " ""
  throttleCodeMask $throttledCode 0x1 "Under-voltage detected, " ""
}

# Main script, kill sysbench when interrupted
trap 'kill -HUP 0' EXIT
sysbench --test=cpu --cpu-max-prime=10000000 --num-threads=4 run > /dev/null &
maxfreq=$(( $(awk '{printf ("%0.0f",$1/1000); }' < /sys/devices/system/cpu/cpu0/cpufreq/scaling_max_freq) -15 ))

# Read sys info, print and loop
while true; do
  temp=$(vcgencmd measure_temp | cut -f2 -d=)
  real_clock_speed=$(vcgencmd measure_clock arm | awk -F"=" '{printf ("%0.0f", $2 / 1000000); }' )
  sys_clock_speed=$(awk '{printf ("%0.0f",$1/1000); }' </sys/devices/system/cpu/cpu0/cpufreq/scaling_cur_freq)
  voltage=$(vcgencmd measure_volts | cut -f2 -d= | sed 's/000//')
  throttled_text=$(throttledToText $(vcgencmd get_throttled | cut -f2 -d=))
  echo "$temp $sys_clock_speed / $real_clock_speed MHz $voltage - $throttled_text"
  sleep 5
done
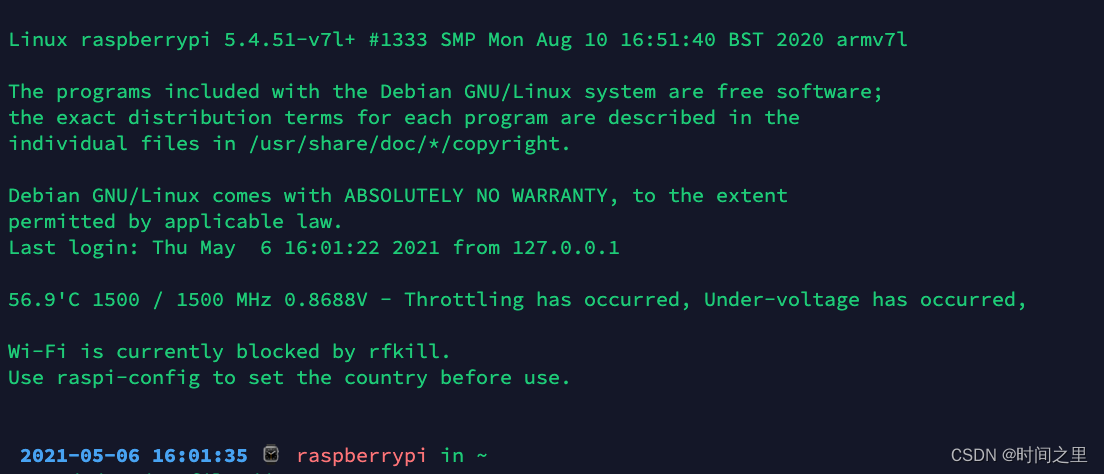
2.添加到ssh连接时自动展示:
在/etc/profile.d/新增temp-volt.sh脚本文件,具体代码如下
#换行
echo ''
#运行命令查看cpu温度
#echo `vcgencmd measure_temp`
#执行脚本文件
source  ~/raspberry-power-supply-check.sh
raspberry-power-supply-check.sh脚本内容:
#!/bin/bash
function throttleCodeMask {
  perl -e "printf \"%s\", $1 & $2 ? \"$3\" : \"$4\""
}
function throttledToText {
  throttledCode=$1
  throttleCodeMask $throttledCode 0x80000 "Soft temperature limit has occurred, " ""
  throttleCodeMask $throttledCode 0x40000 "Throttling has occurred, " ""
  throttleCodeMask $throttledCode 0x20000 "Arm frequency capping has occurred, " ""
  throttleCodeMask $throttledCode 0x10000 "Under-voltage has occurred, " ""
  throttleCodeMask $throttledCode 0x8 "Soft temperature limit active, " ""
  throttleCodeMask $throttledCode 0x4 "Currently throttled, " ""
  throttleCodeMask $throttledCode 0x2 "Arm frequency capped, " ""
  throttleCodeMask $throttledCode 0x1 "Under-voltage detected, " ""
}
temp=$(vcgencmd measure_temp | cut -f2 -d=)
real_clock_speed=$(vcgencmd measure_clock arm | awk -F"=" '{printf ("%0.0f", $2 / 1000000); }' )
sys_clock_speed=$(awk '{printf ("%0.0f",$1/1000); }' </sys/devices/system/cpu/cpu0/cpufreq/scaling_cur_freq)
voltage=$(vcgencmd measure_volts | cut -f2 -d= | sed 's/000//')
throttled_text=$(throttledToText $(vcgencmd get_throttled | cut -f2 -d=))
echo "$temp $sys_clock_speed / $real_clock_speed MHz $voltage - $throttled_text"
结果展示:
参考链接:


 7157
7157

 被折叠的 条评论
为什么被折叠?
被折叠的 条评论
为什么被折叠?
 到【灌水乐园】发言


