


本文从0开始,手把手教你制作一个微信小程序(图文详情),欢迎大家关注!!!
成果展示
点击预定

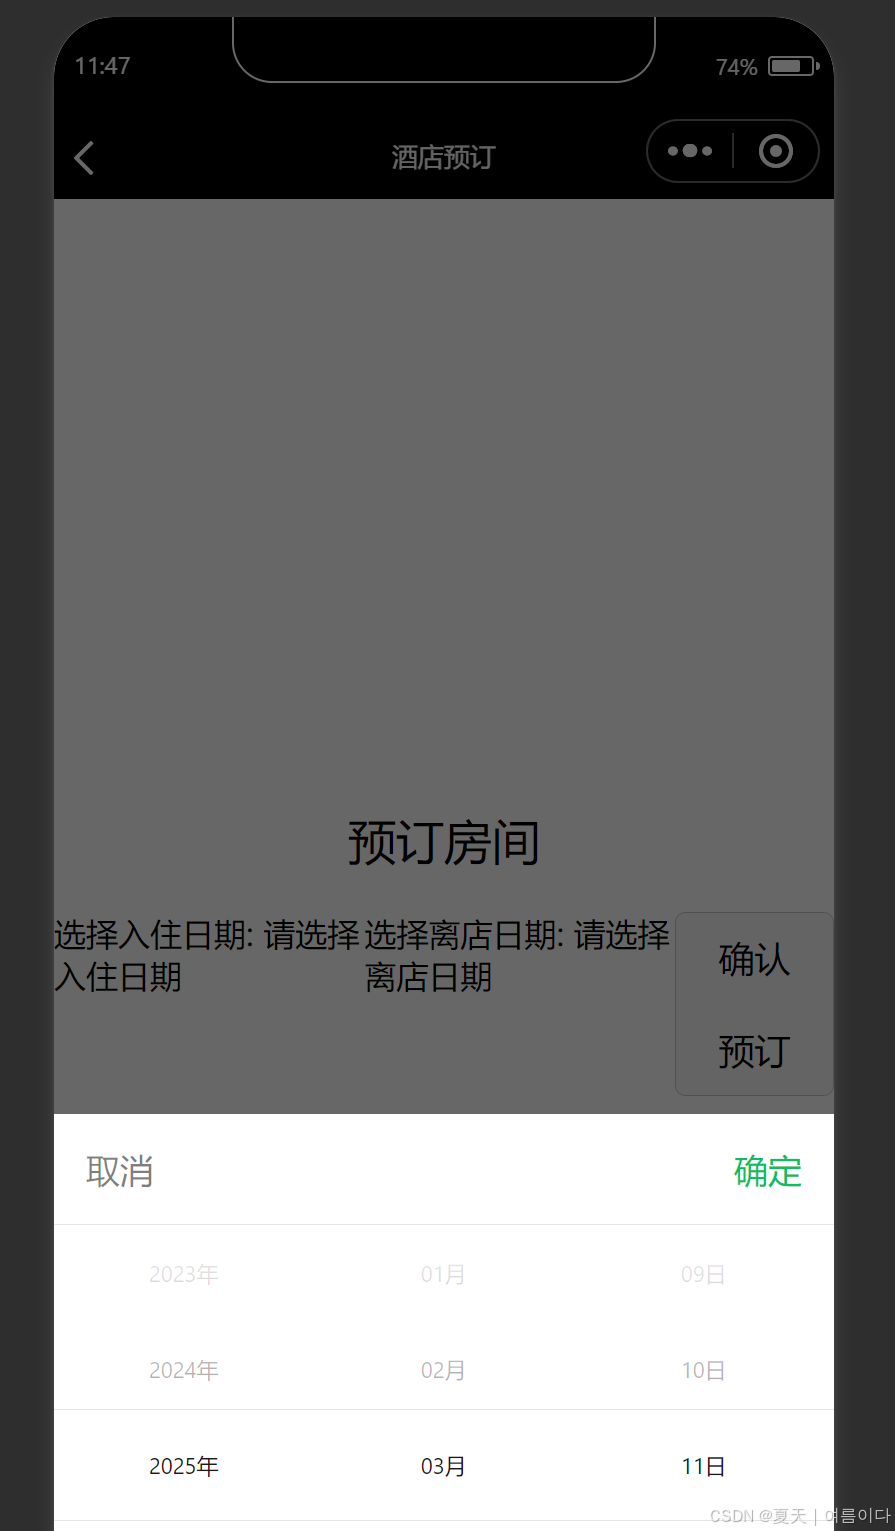
选择入住和离店时间
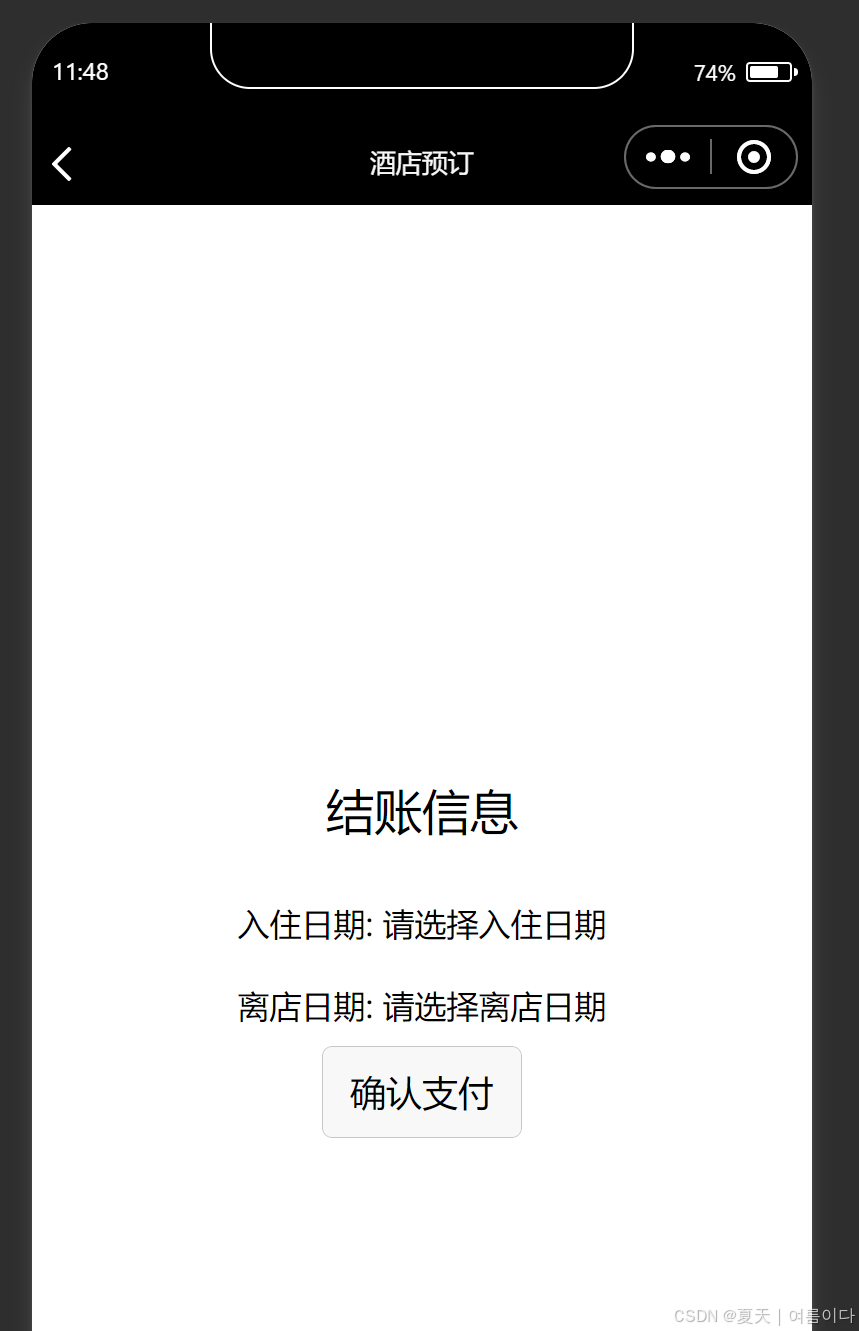
点击 确定预定
1. 环境准备
(1) 注册微信小程序账号
-
访问 微信公众平台。
-
注册一个小程序账号(如果没有账号)。
-
登录后,在“开发” -> “开发设置”中获取小程序的 AppID。
(2) 安装微信开发者工具
-
下载并安装 微信开发者工具。
-
打开开发者工具,使用微信扫码登录。
-
创建一个新的小程序项目:
-
项目名称:例如
HotelBooking。 -
目录:选择一个空文件夹。
-
AppID:填写你刚刚获取的 AppID。
-
模板:选择“小程序”(不使用云开发)。
-
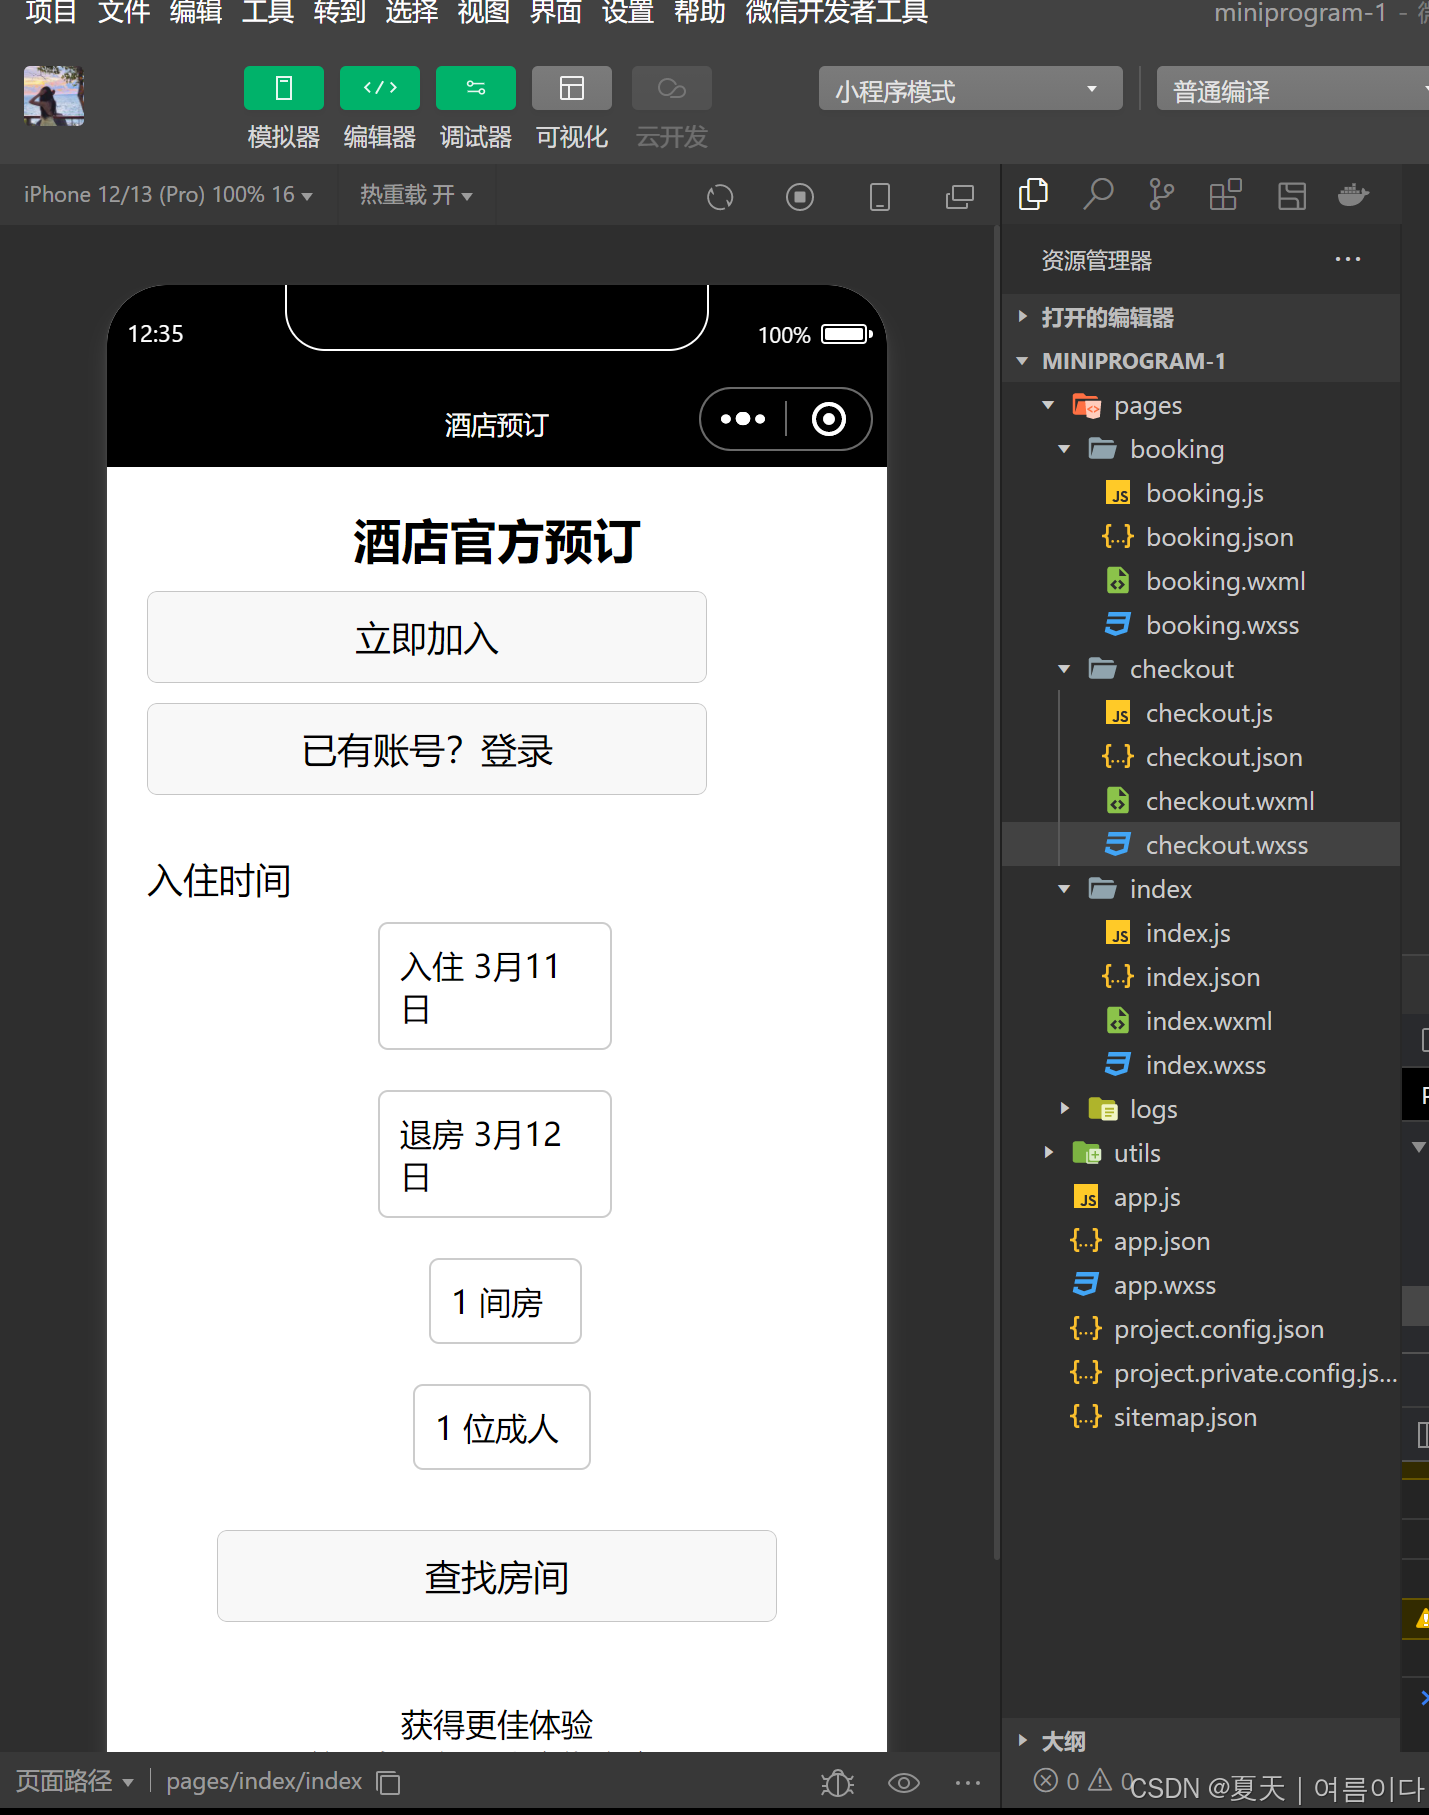
2. 项目结构
创建以下文件和文件夹:
/miniprogram
  ├── pages
  │   ├── index
  │   │   ├── index.js
  │   │   ├── index.wxml
  │   │   ├── index.wxss
  │   │   └── index.json
  │   ├── booking
  │   │   ├── booking.js
  │   │   ├── booking.wxml
  │   │   ├── booking.wxss
  │   │   └── booking.json
  │   └── checkout
  │       ├── checkout.js
  │       ├── checkout.wxml
  │       ├── checkout.wxss
  │       └── checkout.json
  ├── app.js
  ├── app.json
  ├── app.wxss
  └── project.config.json
3. 编写代码
(1) 全局配置 (app.json)
{
  "pages": [
    "pages/index/index",
    "pages/booking/booking",
    "pages/checkout/checkout"
  ],
  "window": {
    "navigationBarTitleText": "酒店预订"
  }
}
(2) 首页 (index 页面)
index.wxml
<view class="container">
  <view class="header">
    <text>欢迎来到酒店预订系统</text>
  </view>
  <view class="content">
    <button bindtap="goToBooking">开始预订</button>
  </view>
</view>
index.js
Page({
  goToBooking: function () {
    wx.navigateTo({
      url: '/pages/booking/booking'
    });
  }
});
index.wxss
.container {
  display: flex;
  flex-direction: column;
  align-items: center;
  justify-content: center;
  height: 100vh;
}

.header {
  font-size: 24px;
  margin-bottom: 20px;
}

.content {
  display: flex;
  justify-content: center;
}
(3) 预订页面 (booking 页面)
booking.wxml
<view class="container">
  <view class="header">
    <text>预订房间</text>
  </view>
  <view class="content">
    <picker mode="date" start="2023-01-01" end="2025-12-31" bindchange="bindDateChange">
      <view class="picker">选择入住日期: {{checkInDate}}</view>
    </picker>
    <picker mode="date" start="2023-01-01" end="2025-12-31" bindchange="bindDateChange">
      <view class="picker">选择离店日期: {{checkOutDate}}</view>
    </picker>
    <button bindtap="goToCheckout">确认预订</button>
  </view>
</view>
booking.js
Page({
  data: {
    checkInDate: '请选择入住日期',
    checkOutDate: '请选择离店日期'
  },

  bindDateChange: function (e) {
    const type = e.currentTarget.dataset.type;
    const value = e.detail.value;
    if (type === 'checkIn') {
      this.setData({
        checkInDate: value
      });
    } else if (type === 'checkOut') {
      this.setData({
        checkOutDate: value
      });
    }
  },

  goToCheckout: function () {
    wx.navigateTo({
      url: '/pages/checkout/checkout?checkInDate=' + this.data.checkInDate + '&checkOutDate=' + this.data.checkOutDate
    });
  }
});
booking.wxss
.container {
  display: flex;
  flex-direction: column;
  align-items: center;
  justify-content: center;
  height: 100vh;
}

.header {
  font-size: 24px;
  margin-bottom: 20px;
}

.content {
  display: flex;
  flex-direction: column;
  align-items: center;
}

.picker {
  margin: 10px 0;
}
(4) 结账页面 (checkout页面)
checkout.wxml
<view class="container">
  <view class="header">
    <text>结账信息</text>
  </view>
  <view class="content">
    <text>入住日期: {{checkInDate}}</text>
    <text>离店日期: {{checkOutDate}}</text>
    <button bindtap="confirmBooking">确认支付</button>
  </view>
</view>checkout.js
Page({
  data: {
    checkInDate: '',
    checkOutDate: ''
  },

  onLoad: function (options) {
    this.setData({
      checkInDate: options.checkInDate,
      checkOutDate: options.checkOutDate
    });
  },

  confirmBooking: function () {
    wx.showToast({
      title: '预订成功',
      icon: 'success',
      duration: 2000
    });
  }
});checkout.wxss
.container {
  display: flex;
  flex-direction: column;
  align-items: center;
  justify-content: center;
  height: 100vh;
}

.header {
  font-size: 24px;
  margin-bottom: 20px;
}

.content {
  display: flex;
  flex-direction: column;
  align-items: center;
}

.content text {
  margin: 10px 0;
}
4. 调试与运行
-
打开微信开发者工具,加载项目。
-
在模拟器中查看页面效果。
-
使用调试工具检查控制台是否有报错。
-
测试页面跳转、数据加载和交互功能。
5. 发布小程序
-
在微信开发者工具中,点击“上传”按钮,填写版本号和备注。
-
登录微信公众平台,进入“版本管理”页面,提交审核。
-
审核通过后,发布小程序。
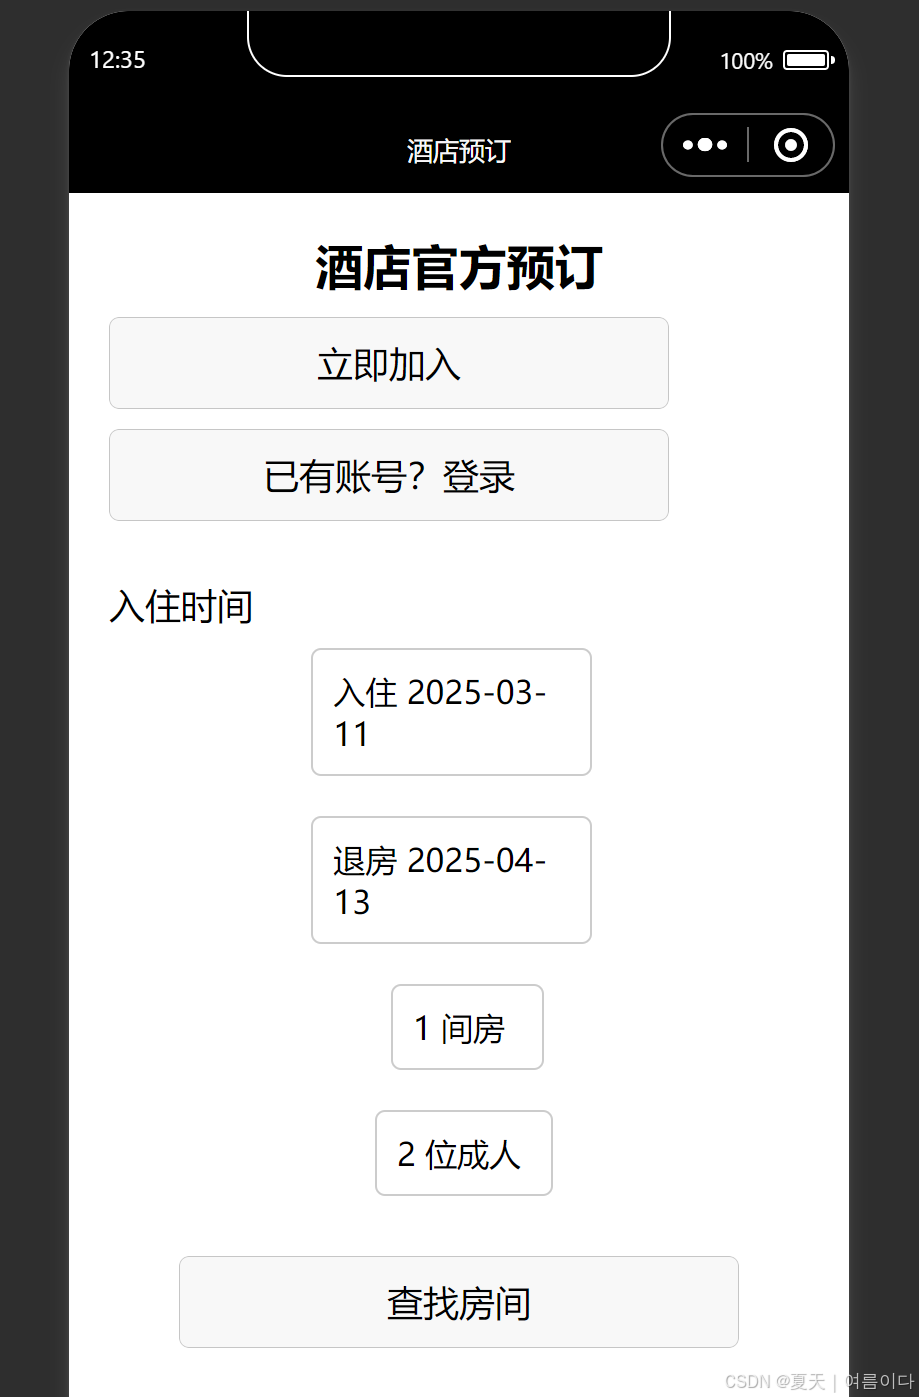
更换部分模板
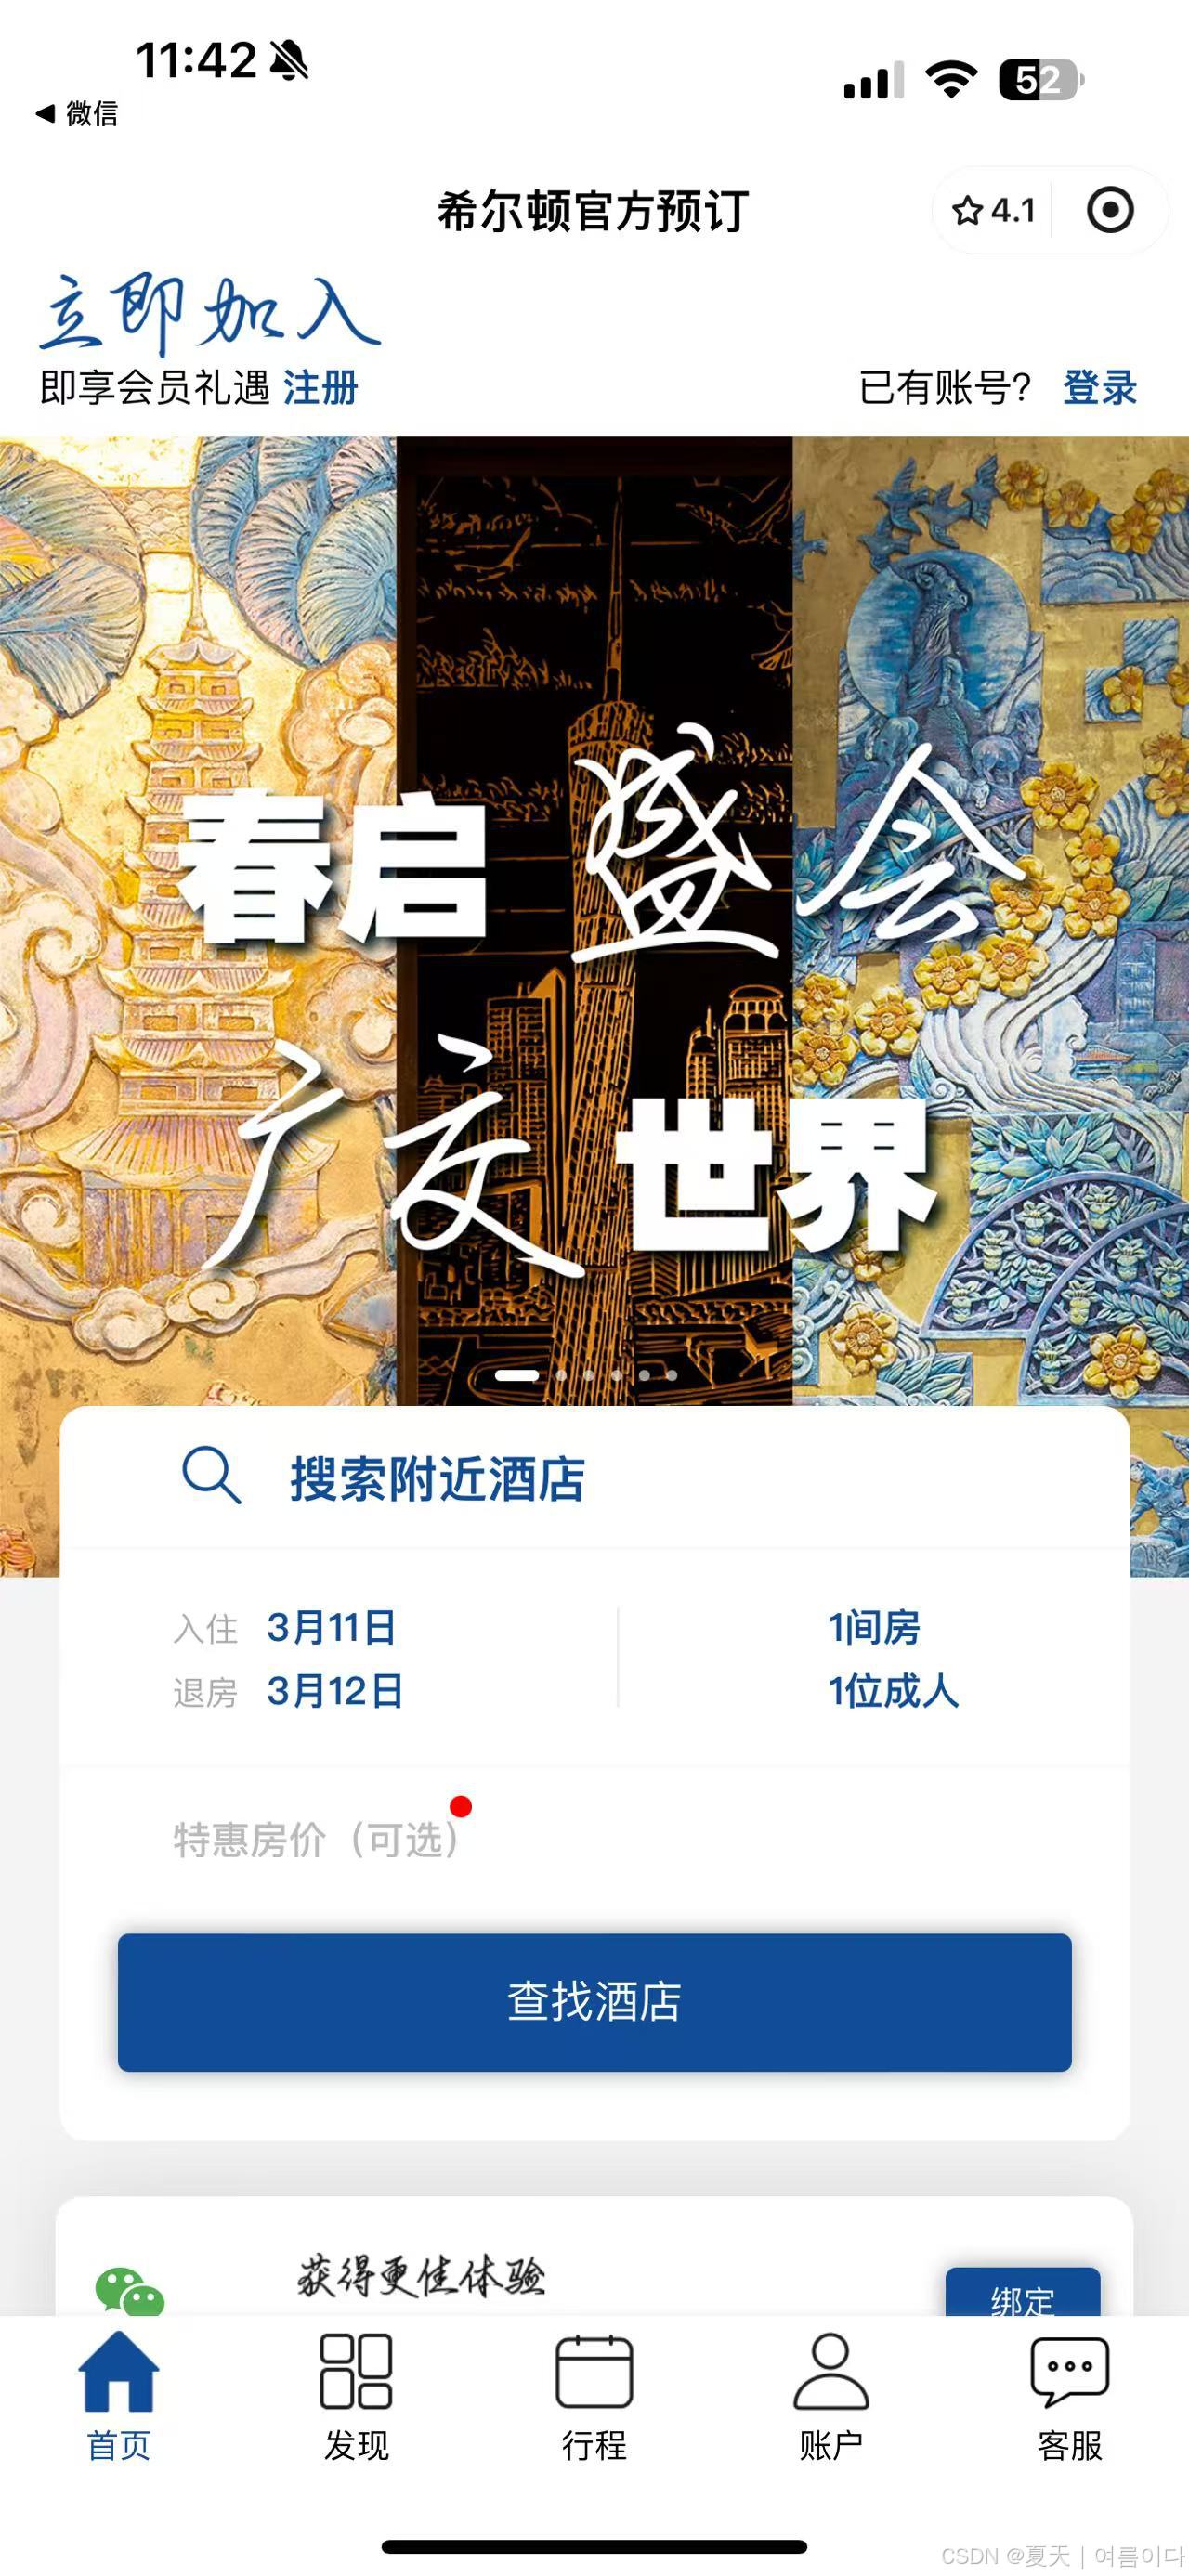
微信小程序的 UI 设计,使其更接近希尔顿官方预订的样式。以下是修改后的代码:
<view class="container">
  <view class="header">
    <text class="title">MY酒店官方预订</text>
    <button class="register-btn">立即加入</button>
    <button class="login-btn">已有账号?登录</button>
  </view>
  <view class="content">
    <text class="promo-text">春启 欲会 七果</text>
    <view class="search-box">
      <picker mode="date" start="2023-01-01" end="2025-12-31" bindchange="bindCheckInDateChange">
        <view class="picker">入住 {{checkInDate}}</view>
      </picker>
      <picker mode="date" start="2023-01-01" end="2025-12-31" bindchange="bindCheckOutDateChange">
        <view class="picker">退房 {{checkOutDate}}</view>
      </picker>
      <picker mode="selector" range="{{roomOptions}}" bindchange="bindRoomChange">
        <view class="picker">{{roomCount}} 间房</view>
      </picker>
      <picker mode="selector" range="{{guestOptions}}" bindchange="bindGuestChange">
        <view class="picker">{{guestCount}} 位成人</view>
      </picker>
      <button class="search-btn" bindtap="goToBooking">查找酒店</button>
    </view>
  </view>
  <view class="footer">
    <text class="footer-text">获得更佳体验</text>
    <view class="footer-links">
      <text>首页</text>
      <text>发现</text>
      <text>行程</text>
      <text>账户</text>
      <text>绑定</text>
      <text>客服</text>
    </view>
  </view>
</view>
index.js
Page({
  data: {
    checkInDate: '3月11日',
    checkOutDate: '3月12日',
    roomCount: '1',
    guestCount: '1',
    roomOptions: ['1', '2', '3', '4'],
    guestOptions: ['1', '2', '3', '4']
  },

  bindCheckInDateChange: function (e) {
    this.setData({
      checkInDate: e.detail.value
    });
  },

  bindCheckOutDateChange: function (e) {
    this.setData({
      checkOutDate: e.detail.value
    });
  },

  bindRoomChange: function (e) {
    this.setData({
      roomCount: this.data.roomOptions[e.detail.value]
    });
  },

  bindGuestChange: function (e) {
    this.setData({
      guestCount: this.data.guestOptions[e.detail.value]
    });
  },

  goToBooking: function () {
    wx.navigateTo({
      url: '/pages/booking/booking?checkInDate=' + this.data.checkInDate + '&checkOutDate=' + this.data.checkOutDate + '&roomCount=' + this.data.roomCount + '&guestCount=' + this.data.guestCount
    });
  }
});
index.wxss
.container {
display: flex;
flex-direction: column;
align-items: center;
padding: 20px;
}
.header {
width: 100%;
text-align: center;
margin-bottom: 20px;
}
.title {
font-size: 24px;
font-weight: bold;
}
.register-btn, .login-btn {
margin: 10px 0;
width: 80%;
}
.content {
width: 100%;
}
.promo-text {
font-size: 18px;
text-align: center;
margin-bottom: 20px;
}
.search-box {
display: flex;
flex-direction: column;
align-items: center;
}
.picker {
margin: 10px 0;
padding: 10px;
border: 1px solid #ccc;
border-radius: 5px;
width: 80%;
}
.search-btn {
margin-top: 20px;
width: 80%;
}
.footer {
margin-top: 40px;
text-align: center;
}
.footer-text {
font-size: 16px;
margin-bottom: 10px;
}
.footer-links {
display: flex;
justify-content: space-around;
width: 100%;
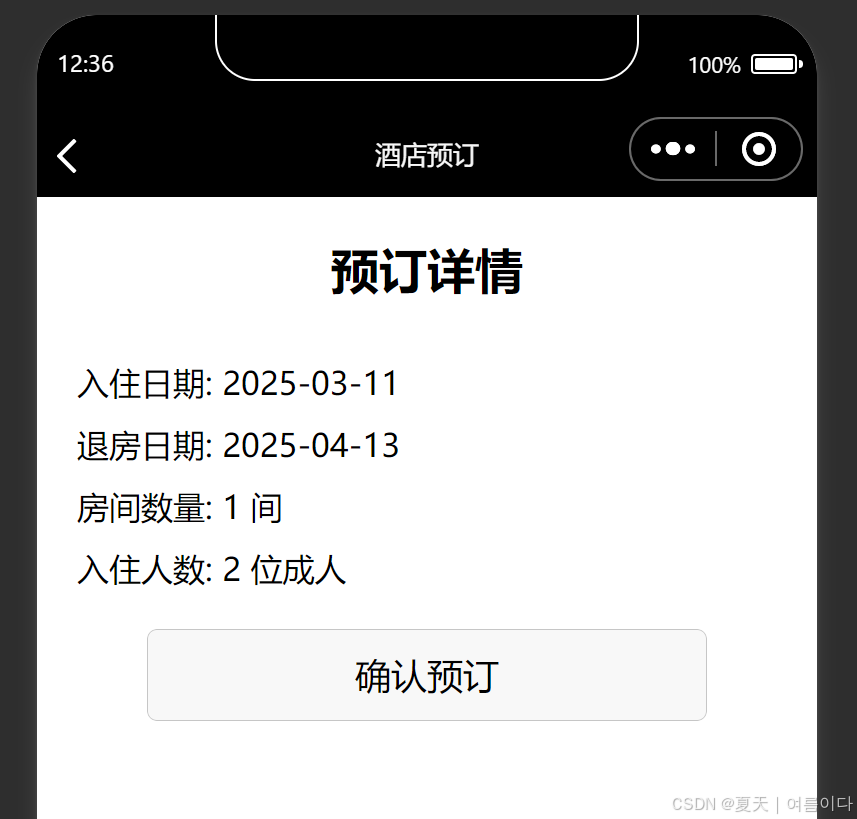
}2. 预订页面 (booking 页面)
booking.wxml
<view class="container">
  <view class="header">
    <text class="title">预订详情</text>
  </view>
  <view class="content">
    <text>入住日期: {{checkInDate}}</text>
    <text>退房日期: {{checkOutDate}}</text>
    <text>房间数量: {{roomCount}} 间</text>
    <text>入住人数: {{guestCount}} 位成人</text>
    <button class="confirm-btn" bindtap="goToCheckout">确认预订</button>
  </view>
</view>
运行 HTML

booking.js
javascript

复制

Page({
  data: {
    checkInDate: '',
    checkOutDate: '',
    roomCount: '',
    guestCount: ''
  },

  onLoad: function (options) {
    this.setData({
      checkInDate: options.checkInDate,
      checkOutDate: options.checkOutDate,
      roomCount: options.roomCount,
      guestCount: options.guestCount
    });
  },

  goToCheckout: function () {
    wx.navigateTo({
      url: '/pages/checkout/checkout?checkInDate=' + this.data.checkInDate + '&checkOutDate=' + this.data.checkOutDate + '&roomCount=' + this.data.roomCount + '&guestCount=' + this.data.guestCount
    });
  }
});
booking.wxss
.container {
display: flex;
flex-direction: column;
align-items: center;
padding: 20px;
}
.header {
width: 100%;
text-align: center;
margin-bottom: 20px;
}
.title {
font-size: 24px;
font-weight: bold;
}
.content {
width: 100%;
}
.content text {
display: block;
margin: 10px 0;
}
.confirm-btn {
margin-top: 20px;
width: 80%;
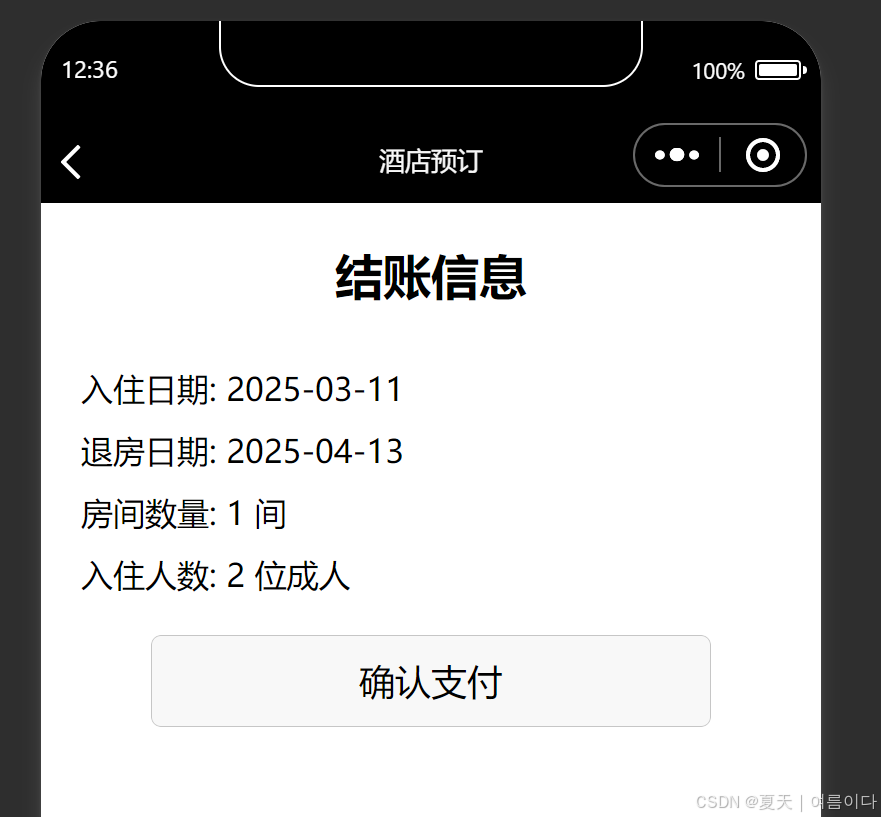
}3. 结账页面 (checkout 页面)
checkout.wxml
<view class="container">
  <view class="header">
    <text class="title">结账信息</text>
  </view>
  <view class="content">
    <text>入住日期: {{checkInDate}}</text>
    <text>退房日期: {{checkOutDate}}</text>
    <text>房间数量: {{roomCount}} 间</text>
    <text>入住人数: {{guestCount}} 位成人</text>
    <button class="pay-btn" bindtap="confirmBooking">确认支付</button>
  </view>
</view>
checkout.js
Page({
data: {
checkInDate: '',
checkOutDate: '',
roomCount: '',
guestCount: ''
},
onLoad: function (options) {
this.setData({
checkInDate: options.checkInDate,
checkOutDate: options.checkOutDate,
roomCount: options.roomCount,
guestCount: options.guestCount
});
},
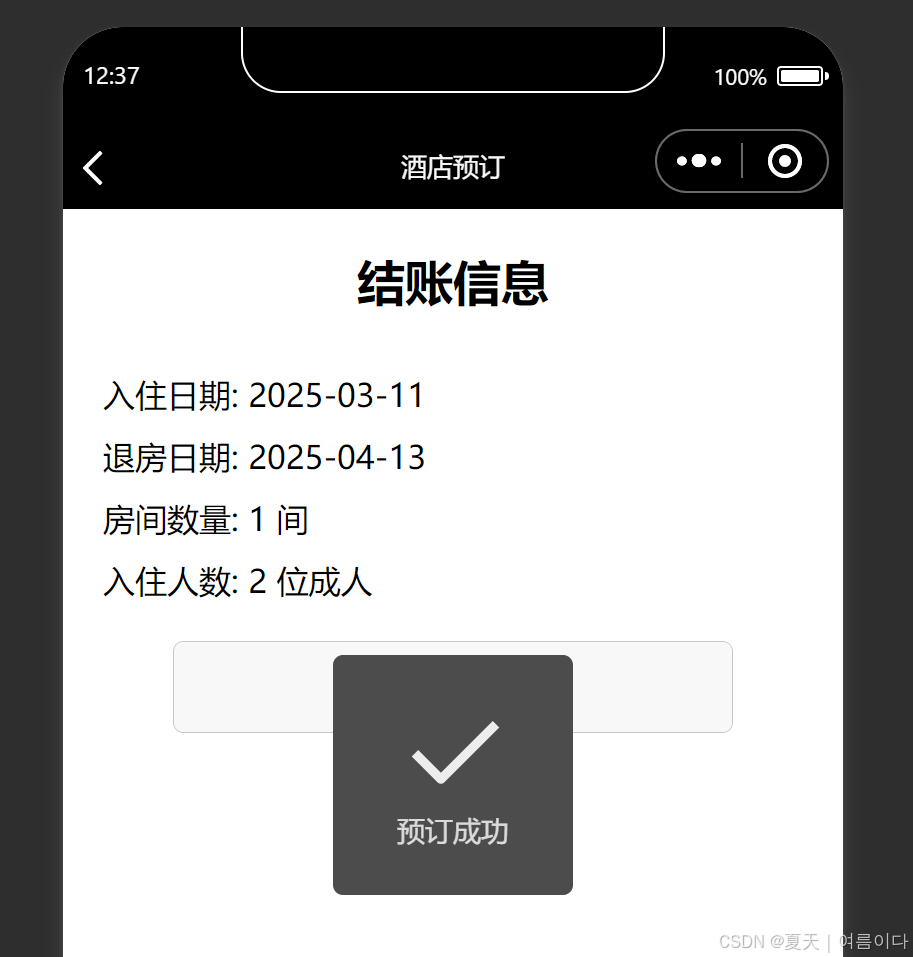
confirmBooking: function () {
wx.showToast({
title: '预订成功',
icon: 'success',
duration: 2000
});
}
});checkout.wxss
.container {
  display: flex;
  flex-direction: column;
  align-items: center;
  padding: 20px;
}

.header {
  width: 100%;
  text-align: center;
  margin-bottom: 20px;
}

.title {
  font-size: 24px;
  font-weight: bold;
}

.content {
  width: 100%;
}

.content text {
  display: block;
  margin: 10px 0;
}

.pay-btn {
  margin-top: 20px;
  width: 80%;
}
4. 运行效果
-
首页显示希尔顿官方预订的样式,包含日期选择、房间和人数选择。
-
点击“查找酒店”后跳转到预订页面,显示预订详情。
-
在结账页面确认支付后,显示成功提示。
以上代码是基于最基础框架的修改,并不是实现全部功能,可方便进行代码理解
成果展示2
过程中遇到的错误
1.依旧显示模拟器启动失败,Error:app.json :在根项目录未找到app.json
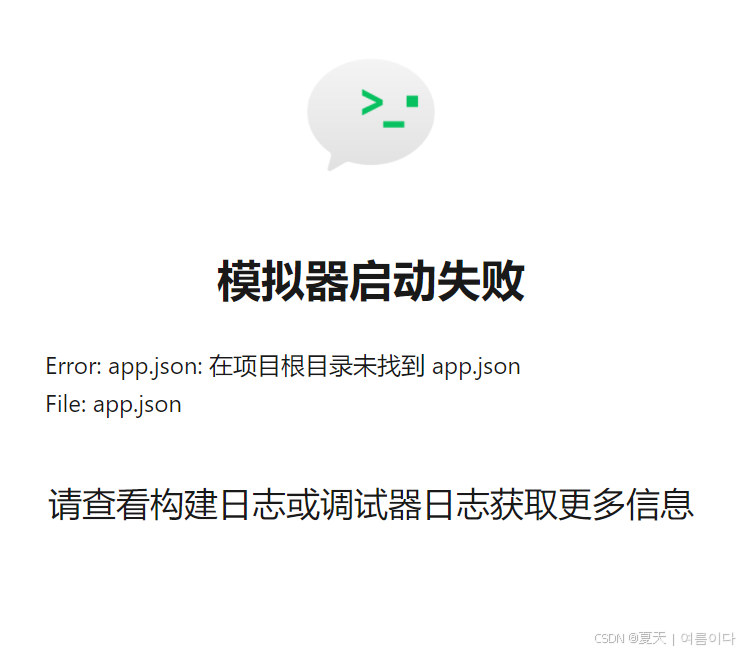
错误描述:明明在根目录下有app.json,却提示没有
模板引用错误,用了TS模板,代码无法引用,不能删除相关代码。
2.出现错误,不显示js图像
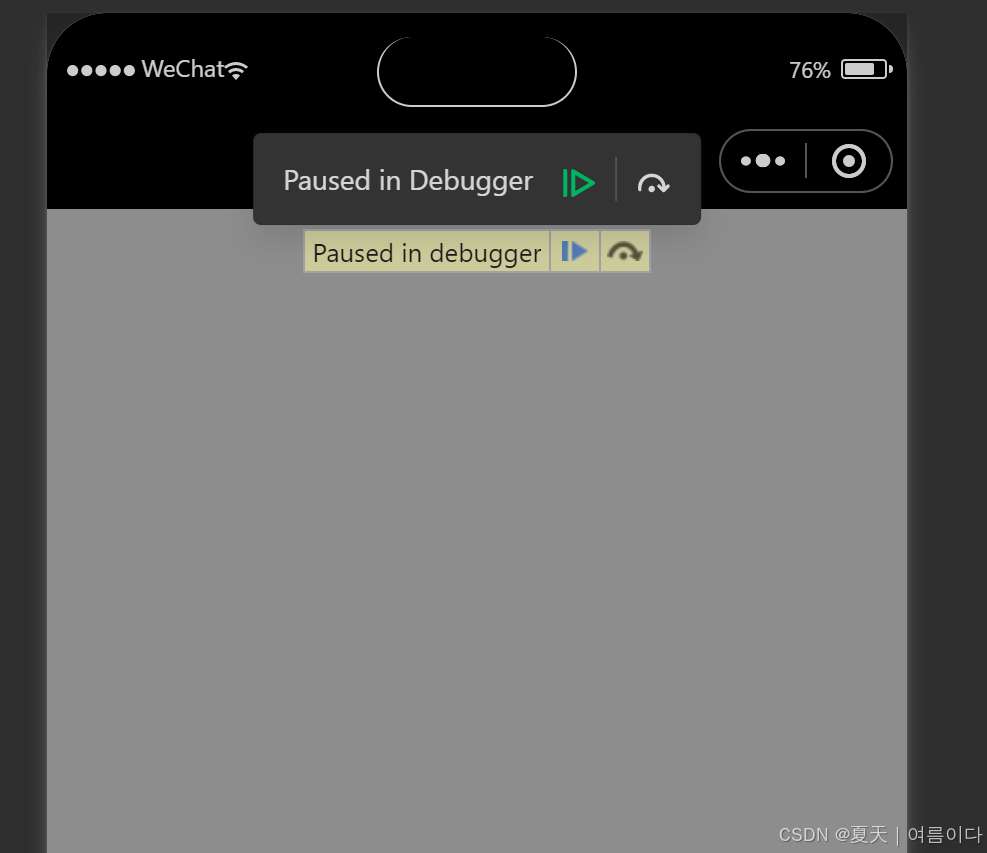
点击绿色箭头,直到提示明显错误
查看wxml文件是否正确!


 1693
1693

 被折叠的 条评论
为什么被折叠?
被折叠的 条评论
为什么被折叠?
 到【灌水乐园】发言


