


这是一篇关于讲解如何安装部署ClickHouse集群的参考文章,希望通过此,大家都能了解ClickHouse,都能学会安装配置ClickHouse以及它的使用。
什么是ClickHouse?
ClickHouse是Yandex于2016年开源的列式存储数据库(DBMS),主要用于在线分析处理查询(OLAP),能够使用SQL查询实时生成分析数据报告。
集群安装
1.准备工作
准备3台Linux操作系统的虚拟机用于部署集群,上传ClickHouse集群相关安装包至每台服务器上的指定目录,这边以/data/soft目录为例。

1.1 修改文件打开限制
在/etc/security/limits.conf、/etc/security/limits.d/20-nproc.conf这2个文件调整和追加如下内容:
命令:vim /etc/security/limits.conf
# End of file

#* hard nofile 65536
#* soft nofile 65536
* soft nofile 655365
* hard nofile 655365
* soft nproc 128000
* hard nproc 128000
*表示所有用户都设置
命令:vim /etc/security/limits.d/20-nproc.conf
修改为:
*          soft    nproc     128000
root       soft    nproc     unlimited
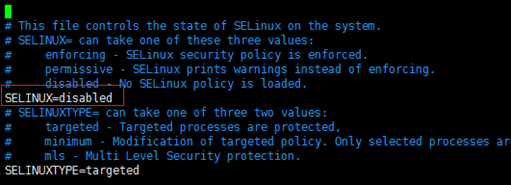
1.2 禁用SELinux
命令:vim /etc/selinux/config
1.3 关闭防火墙
检查是否安装防火墙
命令:rpm -qa|grep iptables
查看防火墙状态
命令:systemctl status firewalld.service
关闭防火墙
命令:
systemctl disable firewalld.service
systemctl stop firewalld.service
2.单机安装
参考网址
官网:https://clickhouse.yandex/
下载地址:http://repo.red-soft.biz/repos/clickhouse/stable/el6/
中文参考: https://clickhouse.tech/docs/zh/
2.1 上传安装文件至/data/soft
clickhouse-client-20.8.11.17-1.el7.x86_64.rpm
clickhouse-server-20.8.11.17-1.el7.x86_64.rpm
clickhouse-common-static-20.8.11.17-1.el7.x86_64.rpm
clickhouse-server-common-20.8.11.17-1.el7.x86_64.rpm
2.2 安装rpm
命令:rpm -ivh clickhouse-server-common-20.8.11.17-1.el7.x86_64.rpm
命令:rpm -ivh clickhouse-common-static-20.8.11.17-1.el7.x86_64.rpm
命令:rpm -ivh clickhouse-server-20.8.11.17-1.el7.x86_64.rpm
命令:rpm -ivh clickhouse-client-20.8.11.17-1.el7.x86_64.rpm
2.3 Clickhouse目录结构
1./etc/clickhouse-server : 服务端的配置文件目录,包括全局配置config.xml 和用户配置users.xml,其中如需要外网访问则需要打开config.xml中更改配置
其中需要放开<listen_host>::</listen_host>的注释即可
2.
3. /var/log/clickhouse-server/clickhouse-server.log : 默认保存日志的目录,通常会修改,将数据保存到大容量磁盘路径中
注:;<tmp_path></tmp_path>;<user_files_path></user_files_path> 等存储目录都可以自行修改
2.4 Clickhouse用户管理
Clickhouse用户管理在/etc/clickhouse-server/users.xml配置
在中添加对应用户信息即可
可以定义属性并在用户上关联:
比如定义只读用户可以先在profiles添加
<readonly>
<readonly>1</readonly>
</readonly>
<max_memory_usage>86000000000</max_memory_usage> <max_partitions_per_insert_block>200</max_partitions_per_insert_block>
3.集群安装
3.1 分片与副本
在实际应用中,为了缓解单机压力和数据安全,项目上都会采用集成安装,集成安装模式即采用多分片多副本模式。副本(replica) 是指两个相同数据的表或表一部分,作用是为了数据备份与安全分片(shard) 是指不同的服务器存储同一张表的不同部分,作用是为了水平切分表,缓解单一服务的压力。
3.2 多实例部署
按2.单机安装,分别在三台服务器安装clickhouse
注:只有三台机器,多一个实例相当于多一台机器,下面以单机器多实例部署为例。Clickhouse集成管理采用zookeeper servers管理,本文采用hadoop自带zookeeper servers,没有zookeeper servers服务请自行安装。
每台机器增加一个实例
将/etc/clickhouse-server/config.xml文件拷贝一份改名
命令:cp /etc/clickhouse-server/config.xml /etc/clickhouse-server/config_replica.xml
编辑/etc/clickhouse-server/ config_replica.xml更改以下内容将两个服务区分开来(加粗为源文件值)
<log>/var/log/clickhouse-server/clickhouse-server-replica.log</log>
**<!--/var/log/clickhouse-server/clickhouse-server.log-->**
<errorlog>/var/log/clickhouse-server/clickhouse-server-replica.err.log</errorlog>
**<!--/var/log/clickhouse-server/clickhouse-server.err.log-->**
<http_port>8124</http_port>  **<!--8123-->**
<tcp_port>9012</tcp_port>   **<!--9000-->**
<mysql_port>9005</mysql_port>  **<!--9004-->**
<interserver_http_port>9010</interserver_http_port> **<!--9009-->**
<path>/data/clickhouse-replica/</path>  **<!--/data/clickhouse/-->**
<tmp_path>/data/clickhouse-replica/tmp/</tmp_path>  <!--/data/clickhouse/tmp/-->
<user_files_path>/data/clickhouse-replica/user_files/</user_files_path>
**<!--/data/clickhouse /user_files/-->**
<access_control_path>/data/clickhouse-replica/access/</access_control_path>
**<!--/data/clickhouse/access/-->**
<include_from>/etc/clickhouse-server/metrika_replica.xml</include_from>
**<!--/etc/clickhouse-server/metrika.xml-->**
3.3 创建对应目录并更改所属用户组
命令:
mkdir -p /data/ clickhouse-replica
chown -R clickhouse:clickhouse /data/clickhouse-replica
3.4 增加实例对应的服务启动脚本
命令:
cp /etc/init.d/clickhouse-server /etc/init.d/clickhouse-server-replica
vim /etc/init.d/clickhouse-server-replica
调整内容如下:
调整后内容:
CLICKHOUSE_CONFIG=
C
L
I
C
K
H
O
U
S
E
C
O
N
F
D
I
R
/
c
o
n
f
i
g
r
e
p
l
i
c
a
.
x
m
l
C
L
I
C
K
H
O
U
S
E
P
I
D
F
I
L
E
=
"
CLICKHOUSE_CONFDIR/config_replica.xml CLICKHOUSE_PIDFILE="
CLICKHOUSECONFDIR/configreplica.xmlCLICKHOUSEPIDFILE="CLICKHOUSE_PIDDIR/$PROGRAM-replica.pid"
调整前内容:
CLICKHOUSE_CONFIG=
C
L
I
C
K
H
O
U
S
E
C
O
N
F
D
I
R
/
c
o
n
f
i
g
.
x
m
l
C
L
I
C
K
H
O
U
S
E
P
I
D
F
I
L
E
=
"
CLICKHOUSE_CONFDIR/config.xml CLICKHOUSE_PIDFILE="
CLICKHOUSECONFDIR/config.xmlCLICKHOUSEPIDFILE="CLICKHOUSE_PIDDIR/$PROGRAM.pid"
3.4 Clickhouse集群配置
配置6个metrika*.xml (三个metrika.xml,三个metrika_replica.xml)并上传至/etc/clickhouse-server/
以下为metrika*.xml 共同部分
<yandex>
<clickhouse_remote_servers>
    <xxxx>  <!—集群名字,可自定义-->
	    <shard>
            <internal_replication>true</internal_replication>
            <replica>
                <host>xxx.xxx.xxx.100</host>
                <port>9000</port>
            </replica>

			<replica>
                <host>xxx.xxx.xxx.101</host>
                <port>9012</port>
            </replica>
        </shard>
        <shard>
		    <weight>1</weight>
            <internal_replication>true</internal_replication>
            <replica>
                <host>xxx.xxx.xxx.101</host>
                <port>9000</port>
            </replica>

			<replica>
                <host>xxx.xxx.xxx.102</host>
                <port>9012</port>
            </replica>
        </shard>
        <shard>
            <replica>
                <internal_replication>true</internal_replication>
                <host>xxx.xxx.xxx.102</host>
                <port>9000</port>
            </replica>
			<replica>
                <internal_replication>true</internal_replication>
                <host>xxx.xxx.xxx.100</host>
                <port>9012</port>
            </replica>
        </shard>

    </xxxx>
</clickhouse_remote_servers>

<!-- zookeeper-servers 采用HADOOP插件中的zookeeper-->
<zookeeper-servers>
  <node index="1">
    <host>xxx.xxx.xxx.xxx</host>
    <port>2181</port>
  </node>

  <node index="2">
    <host>xxx.xxx.xxx.xxx</host>
    <port>2181</port>
  </node>
  <node index="3">
    <host>xxx.xxx.xxx.xxx</host>
    <port>2181</port>
  </node>
</zookeeper-servers>
<!—差异部分,请按下文提示自行修改-->
<macros>
        <layer>01</layer>
        <shard>01</shard>
        <replica>cluster01-01-1</replica>
    </macros>

<networks>
   <ip>::/0</ip>
</networks>


<clickhouse_compression>
<case>
  <min_part_size>10000000000</min_part_size>

  <min_part_size_ratio>0.01</min_part_size_ratio>
  <method>lz4</method>
</case>
</clickhouse_compression>

</yandex>
以下为不同部分
xxx.xxx.xxx.100实例1(端口:9000)对应metrika.xml调整:
01 <!—第一个集成–>
01<!—第一个分片–>
cluster01-01-1 <!—自命名–>
xxx.xxx.xxx.100 实例2(端口:9012)对应metrika_replica.xml调整:
01 <!—第一个集成–>
03<!—第三个分片–>
cluster01-03-2 <!—自命名–>
xxx.xxx.xxx.101(端口:9000)对应metrika.xml调整:
01 <!—第一个集成–>
02<!—第二个分片–>
cluster01-02-1 <!—自命名–>
xxx.xxx.xxx.101实例2(端口:9012)对应metrika_replica.xml调整:
01 <!—第一个集成–>
01<!—第一个分片–>
cluster01-01-2 <!—自命名–>
xxx.xxx.xxx.102实例1(端口:9000)对应metrika.xml调整:
01 <!—第一个集成–>
03<!—第三个个分片–>
cluster01-03-1 <!—自命名–>
xxx.xxx.xxx.102实例2(端口:9012)对应metrika_replica.xml调整:
01 <!—第一个集成–>
02<!—第二个分片–>
cluster01-02-2 <!—自命名–>
注:其中layer是双级分片设置,这里是01;然后是shard表示分片编号;最后是replica是副本标识。
这里使用了cluster{layer}-{shard}-{replica}的表示方式,比如cluster01-02-1表示cluster01集群的02分片下的1号副本,这样既非常直观的表示又唯一确定副本。
至此三节点6实例已完成配置 通过以下脚本可以启动各实例
实例1服务启动命令:service clickhouse-server start
实例2服务启动命令:service clickhouse-server-replica start
4.chproxy安装
4.1 什么是chproxy?
从名字就能了解ch代表clickhouse,proxy为代理,即专为clickhouse使用的代理。在clickhouse集群中,每一台机器都是单独的实例,我们可以使用其中的一台作为查询机器。此时如何更好的完成负载均衡是我们所关注的,chproxy即是这么一个工具。选择一台服务器安装该程序即可。
4.1 安装包准备
mkdir -p /data/chproxy
上传安装文件 chproxy-linux-amd64-1.13.0.tar.gz
解压 tar -xzvf chproxy-linux-amd64-1.13.0.tar.gz
4.2 配置chproxy
创建config文件目录 mkdir config
创建config.yml文件并上传,配置中的用户名密码请自行设置并与clickhouse中的用户名密码相对应。
server:
  http:
      listen_addr: ":8125"  #对外暴露的端口
      allowed_networks: ["xx.xx.0.0/16","127.0.0.0/8","xx.xx.0.0/16"] #网络访问控制
      read_timeout: 5m
      write_timeout: 5m
      idle_timeout: 20m
users:
  - name: "root" #访问时需要写的用户名
    to_cluster: "distributed-write" #当前用户对应的集群
    to_user: "root"
    password: "xxx"
  - name: "queryonly"
    to_cluster: "distributed-read"
    to_user: "queryonly"
    password: "xxx"
clusters:
  - name: "distributed-write"
    replicas:
      - name: "replica1"
        nodes: ["xxx.xxx.xxx.100:8123", "xxx.xxx.xxx.101:8123", "xxx.xxx.xxx.102:8123"]
      - name: "replica2"
        nodes: ["xxx.xxx.xxx.100:8124", "xxx.xxx.xxx.101:8124", "xxx.xxx.xxx.102:8124"]
    users:
      - name: "root"
        password: "xxx"
  - name: "distributed-read"
    replicas:
      - name: "replica1"
        nodes: ["xxx.xxx.xxx.100:8123", "xxx.xxx.xxx.101:8123", "xxx.xxx.xxx.102:8123"]
      - name: "replica2"
        nodes: ["xxx.xxx.xxx.100:8124", "xxx.xxx.xxx.101:8124", "xxx.xxx.xxx.102:8124"]
    users:
      - name: "queryonly"
        password: "xxx"
caches:
  - name: "shortterm"
    dir: "/data/chproxy/cache/shortterm"
    max_size: 300Mb
    expire: 100s
创建日志目录 mkdir logs
启动命令:nohup ./chproxy-linux-amd64 -config=./config/config.yml >> ./logs/chproxy.out 2>&1 &
ps -ef | grep chproxy 查看进程是否运行
至此,安装全部完成,可以通过连接chproxy服务器8125端口连接。


 290
290


 被折叠的 条评论
为什么被折叠?
被折叠的 条评论
为什么被折叠?
 到【灌水乐园】发言


