


文章目录
前言
springboot对网络的要求比较高,今天遇到403问题。本文提供多种解决方案,亲测都可以使用:
- 方案一和方案二适合网络通畅,但是无法创建的情况。
- 方案三和方案四适合网络不通畅,无法访问spring官网的情况。
方案一 替换网络
使用个人热点,成功创建。

注意:在创建时Package name,保留com.包名即可
方案二 官网创建工程
2.1 进入springboot官网
springboot官网链接
在页面下方,点击Spring Initializr。

2.2 点击Spring Initializr
 点击add 可以添加需要的pom依赖

本次为测试代码,在搜索框搜索Web,使用web工程

选择web后

点击Generate创建工程

2.3 下载spring boot工程

2.4 在文件夹中解压

2.5 在idea中导入
(1)找到project setting 的modules;
(2)在点击左上角的+会出现select file;
(3)找到刚才解压缩的文件的位置。

点击ok后,选择maven,点击finish

等待一会儿,进行导入,上一个是测试

此时工程已经创建好了,可以使用了。下文为测试内容,可以不看。
2.6 测试
2.6.1 更换pom版本
本地的maven大部分都为2.5.4,替换为该版本

更改pom记得刷新一下工程,不让回报找不到annotation
2.6.2 testController
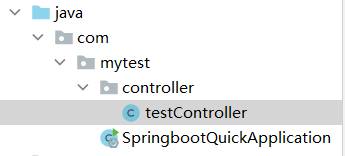
使用restful风格快速测试
package com.mytest.controller;

import org.springframework.web.bind.annotation.GetMapping;
import org.springframework.web.bind.annotation.RequestMapping;
import org.springframework.web.bind.annotation.RestController;

@RestController
@RequestMapping("/test")
public class testController {
    @GetMapping
    public String test(){
        System.out.println("springboot...running...");
        return "springboot...running...";
    }
}
2.6.3 启动spring boot
找到SpringbootQuickApplication

2.6.4 输入测试网址
http://localhost:8080/test
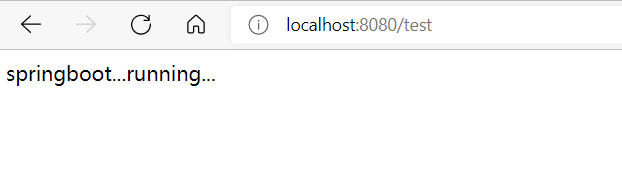
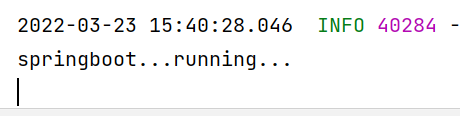
控制台和网页都打印成功。
方案三 阿里云创建工程
使用:https://start.aliyun.com

测试代码在方案二中写过,流程都是一样的。
方案四 手动maven工程创建
4.1 创建maven


4.2 更改pom
添加parent 和 dependencies
<?xml version="1.0" encoding="UTF-8"?>
<project xmlns="http://maven.apache.org/POM/4.0.0"
         xmlns:xsi="http://www.w3.org/2001/XMLSchema-instance"
         xsi:schemaLocation="http://maven.apache.org/POM/4.0.0 http://maven.apache.org/xsd/maven-4.0.0.xsd">
    <modelVersion>4.0.0</modelVersion>

    <parent>
        <groupId>org.springframework.boot</groupId>
        <artifactId>spring-boot-starter-parent</artifactId>
        <version>2.5.4</version>
        <relativePath/> <!-- lookup parent from repository -->
    </parent>

    <groupId>com.mytest</groupId>
    <artifactId>springboot_quick04</artifactId>
    <version>1.0-SNAPSHOT</version>

    <properties>
        <maven.compiler.source>8</maven.compiler.source>
        <maven.compiler.target>8</maven.compiler.target>
    </properties>

    <dependencies>
        <dependency>
            <groupId>org.springframework.boot</groupId>
            <artifactId>spring-boot-starter-web</artifactId>
        </dependency>
    </dependencies>
</project>
4.3 创建applicattion
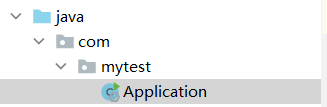
package com.mytest;

import org.springframework.boot.SpringApplication;
import org.springframework.boot.autoconfigure.SpringBootApplication;

@SpringBootApplication
public class Application {
    public static void main(String[] args) {
        SpringApplication.run(Application.class);
    }
}
4.4 测试
此时spirngboot已经创建完毕,测试代码,请见本文 2.6.2 testController。


 9335
9335


 被折叠的 条评论
为什么被折叠?
被折叠的 条评论
为什么被折叠?
 到【灌水乐园】发言


