


win10+vscode+mingw配置c++环境
一、VScode下载及安装
VS Code本质上只是一个编辑器,和记事本一个性质,所以要想运行C/C++代码,需要安装MinGW-w64。
VScode官网下载链接:https://code.visualstudio.com/Download
1.安装路径自行选择
2.安装完成进入VScode后按照步骤install中文插件完成汉化(也可以直接使用英文版)
二、mingw下载及安装
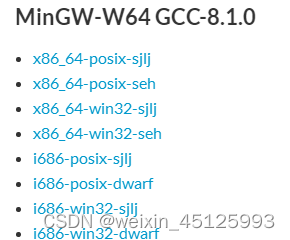
1.访问mingw官网,注意不要直接点击Download L atest Version(有可能因为网络问题导致下载失败),向下拉,找到如下所示的一个文件,点进去下载到你的电脑。
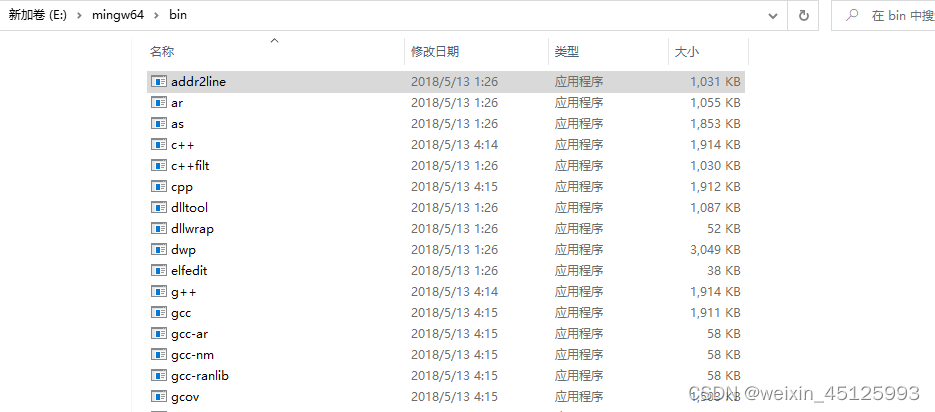
2.在MinGW64的安装路径下依次打开E:\mingw64\bin,找到gcc.exe,右键属性复制路径;
根据自己的需要选择下载版本即可,之前我使用的是4.8.3版本,编译时报出Invalid argument(非法参数),无法编译“*.cpp”文件,使用mingw8.1.0版本成功编译
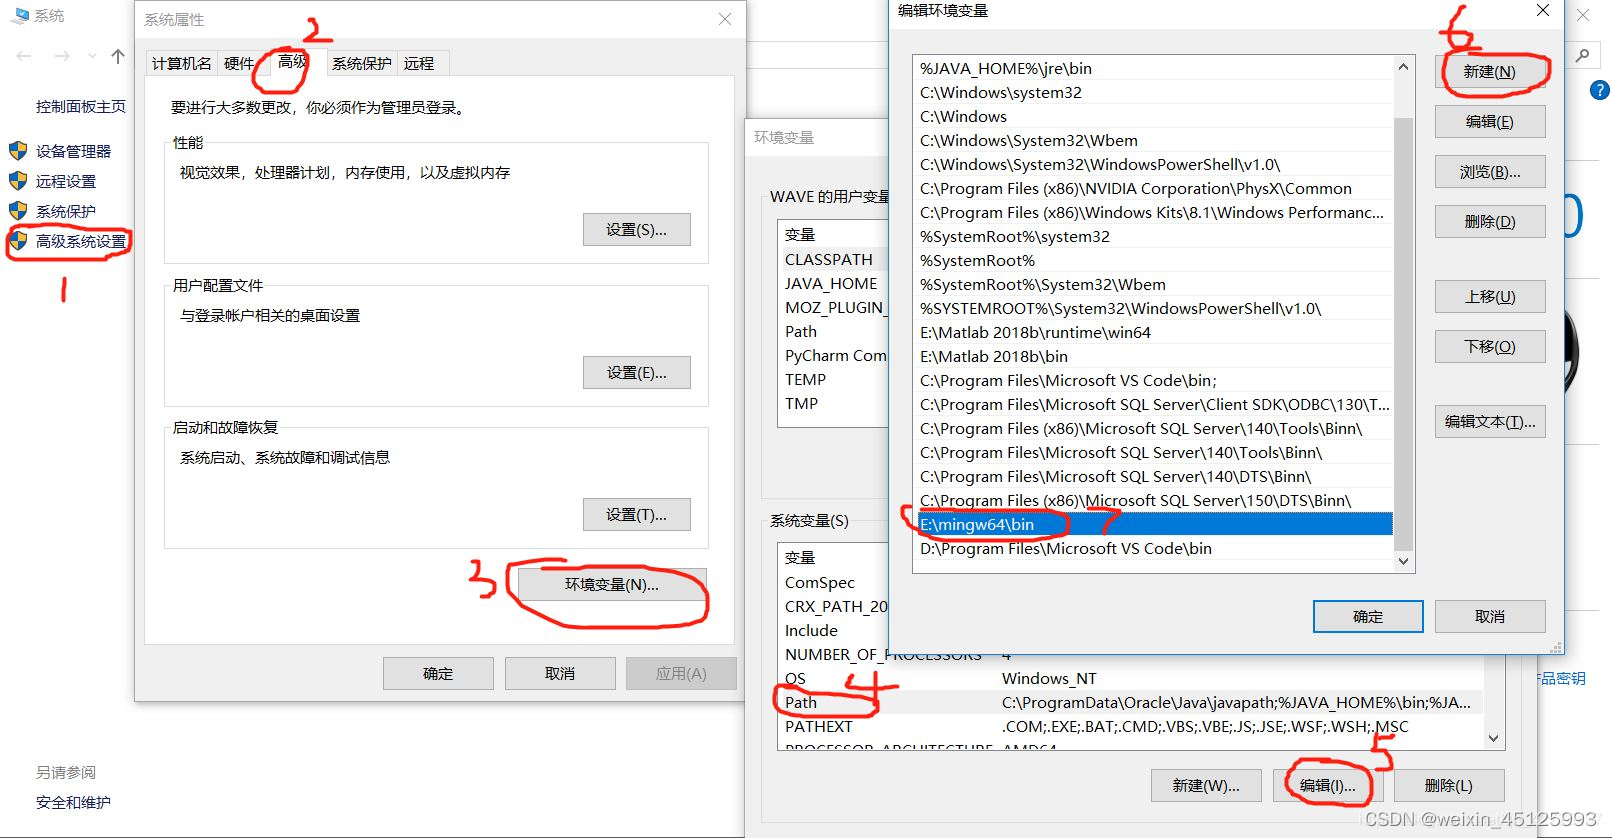
3.Win系统下,右键我的电脑,单击属性,然后按照图示顺序依次操作,将mingw64目录下的bin文件添加至系统变量;
配置完毕后,快捷键win+r,输入cmd。在窗口依次输入gcc -v,若显示如下图,则表示配置成功;

单.cpp文件使用coder runner插件
.h和.cpp文件分开编写配置
偷懒一下哈哈哈,借用知乎一位小伙伴的文章:https://zhuanlan.zhihu.com/p/87864677
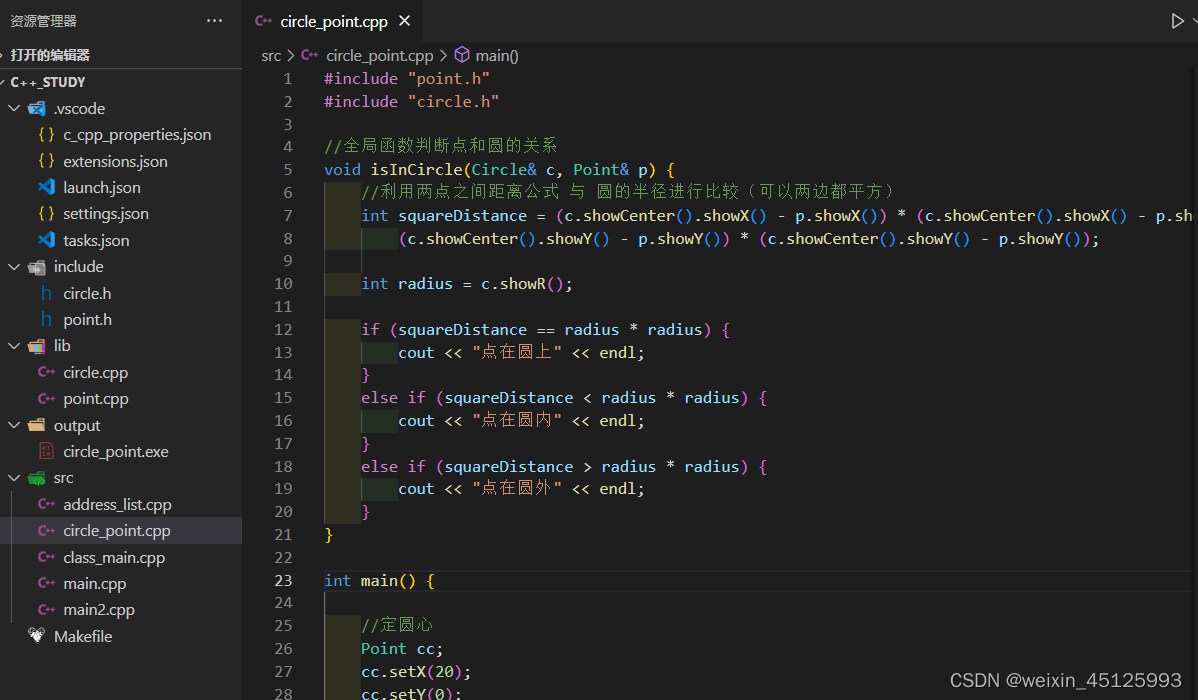
我的配置如下:include放置**.h**头文件,lib放置依赖的.cpp文件,src放置带main函数的源.cpp文件(main函数源文件只能有一个)
c_cpp_properties.json对外部库定义的东西进行自动补全
{
    "configurations": [
        {
            "name": "Win32",
            "includePath": [
                "${workspaceFolder}/**",
                "${workspaceFolder}/include/**"  #“includePath” 将include文件夹添加进去即可,注意格式!
            ],
            "defines": [
                "_DEBUG",
                "UNICODE",
                "_UNICODE"
            ],
            "cStandard": "c11",
            "cppStandard": "c++11",
            "intelliSenseMode": "gcc-x64",
            "compilerPath": "E:\\mingw64\\bin\\g++.exe"
        }
    ],
    "version": 4
}
launch.json用来进行调试
{
    // 使用 IntelliSense 了解相关属性。
    // 悬停以查看现有属性的描述。
    // 欲了解更多信息,请访问: https://go.microsoft.com/fwlink/?linkid=830387
    "version": "0.2.0",
    "configurations": [


        {
            "name": "g++.exe - 生成和调试活动文件",
            "type": "cppdbg",
            "request": "launch",
            "program": "${workspaceFolder}\\output\\${fileBasenameNoExtension}.exe",
            // "program": "${workspaceFolder}/src/circle_point.exe",
            "args": [],
            "stopAtEntry": false,
            "cwd": "${workspaceFolder}",
            "environment": [],
            "externalConsole": false,
            "MIMode": "gdb",
            "miDebuggerPath": "E:\\mingw64\\bin\\gdb.exe",
            "setupCommands": [
                {
                    "description": "为 gdb 启用整齐打印",
                    "text": "-enable-pretty-printing",
                    "ignoreFailures": true
                }
            ],
            "preLaunchTask": "C/C++: g++.exe 生成活动文件"
        }
    ]
}
task.json配置构建(编译)任务
{
    "tasks": [
        {
            "type": "cppbuild",
            "label": "C/C++: g++.exe 生成活动文件",
            "command": "E:\\mingw64\\bin\\g++.exe",
            "args": [
                // "-fdiagnostics-color=always",
                "-g",
                "${workspaceFolder}\\src\\*.cpp",
                "${workspaceFolder}\\lib\\*.cpp",
                "-I","${workspaceFolder}\\include", //"-I"指定链接库
                "-o",
                "${workspaceFolder}\\output\\${fileBasenameNoExtension}.exe",
                "-static-libgcc",     // 静态链接libgcc,一般都会加上
                "-fexec-charset=GBK", // 生成的程序使用GBK编码,不加这一条会导致Win下输出中文乱码
            ],
            "options": {
                "cwd": "${workspaceFolder}"
            },
            "problemMatcher": [
                "$gcc"
            ],
            "group": {
                "kind": "build",
                "isDefault": true
            },
            "detail": "调试器生成的任务。"
        }
    ],
    "version": "2.0.0"
}
利用cmake配置调试
windows系统配置:
1、在windows系统上安装cmake,并在vscode上安装cmake插件
2、在.vscode目录下配置launch.json和task.json文件
launch.json
{
    // 使用 IntelliSense 了解相关属性。
    // 悬停以查看现有属性的描述。
    // 欲了解更多信息,请访问: https://go.microsoft.com/fwlink/?linkid=830387
    "version": "0.2.0",
    "configurations": [


        {
            "name": "g++.exe - 生成和调试活动文件",
            "type": "cppdbg",
            "request": "launch",
            // "program": "${workspaceFolder}\\output\\${fileBasenameNoExtension}.exe",
            "program": "${workspaceFolder}\\build\\my_cmake_swap.exe",
            "args": [],
            "stopAtEntry": false,
            "cwd": "${workspaceFolder}",
            "environment": [],
            "externalConsole": false,
            "MIMode": "gdb",
            "miDebuggerPath": "E:\\mingw64\\bin\\gdb.exe",
            "setupCommands": [
                {
                    "description": "为 gdb 启用整齐打印",
                    "text": "-enable-pretty-printing",
                    "ignoreFailures": true
                }
            ],
            "preLaunchTask": "Build"
        }
    ]
}
task.json
{
    "options": {
        "cwd": "${workspaceFolder}/build"
    },

    "tasks": [
        {
            "type": "shell",
            "label": "cmake",
            "command": "cmake",
            "args": [
                ".."
            ]
        },

        {
            "label": "make",
            "group": {
                "kind": "build",
                "isDefault": true
            },
            "command": "mingw32-make.exe",
            "args": [

            ]
        },

        {
            "label": "Build",
            "dependsOn":[
                "cmake",
                "make",
            ]

        }
    ],
    "version": "2.0.0"
}
linux系统配置:
launch.json
{
    // Use IntelliSense to learn about possible attributes.
    // Hover to view descriptions of existing attributes.
    // For more information, visit: https://go.microsoft.com/fwlink/?linkid=830387
    "version": "0.2.0",
    "configurations": [
        {
            "name": "test", //名称随便取
            "type": "cppdbg", //调试类型
            "request": "launch", //请求配置类型
            "program": "${workspaceFolder}/test03/build/my_cmake_exe", //可执行程序完整路径(包含程序名称),${workspaceFolder}表示远程连接的初始路径
            "args": [],//传递给程序的命令行参数
            "stopAtEntry": false,//可选参数,如果为true,调试程序应该在入口(main)处停止
            "cwd": "${workspaceFolder}", //可执行程序完整路径(不包含程序名称)
            "environment": [],//表示要预设的环境变量
            "externalConsole": false,//如果为true,则为调试对象启动控制台
            "MIMode": "gdb",//要连接到的控制台启动程序
            "setupCommands": [//为了安装基础调试程序而执行的一个或多个GDB/LLDB命令
                {
                    "description": "Enable pretty-printing for gdb",
                    "text": "-enable-pretty-printing",
                    "ignoreFailures": true
                }
            ],
            "preLaunchTask": "Build", //task 任务名称(与tasks.json中名称一致)
            "miDebuggerPath": "/usr/bin/gdb" //gdb完整路径
        }
    ]
}
task.json
{
    "version": "2.0.0",
    "options": {
        "cwd": "${workspaceFolder}/test03/build"
    },
    "tasks": [
        {
            "type": "shell",
            "label": "cmake",
            "command": "cmake",
            "args": [
                ".."
            ]
        },
        {
            "label": "make",
            "group": {
                "kind": "build",
                "isDefault": true
            },
            "command": "make",
            "args": [

            ]
        },
        {
            "label": "Build",
			"dependsOrder": "sequence", // 按列出的顺序执行任务依赖项
            "dependsOn":[
                "cmake",
                "make"
            ]
        }
    ]

}
总结
这三个配置文件可以各拷贝一份,新建工程时,直接放.vscode下面。软件在打开时会直接读取.json文件。
.vscode通常就是放配置文件的,除这三个常用的之外还有settings.json,用来配置编辑器等外观性质的东西。
VSCode下c++多文件夹项目编译调试还可以用makefile、cmake等工具实现,适用于大型项目文件时使用


 815
815


 被折叠的 条评论
为什么被折叠?
被折叠的 条评论
为什么被折叠?
 到【灌水乐园】发言


