


组件化开发思想
现实组件化开发思想
- 标准
- 分治
- 重用
- 组合
编程组件化开发思想
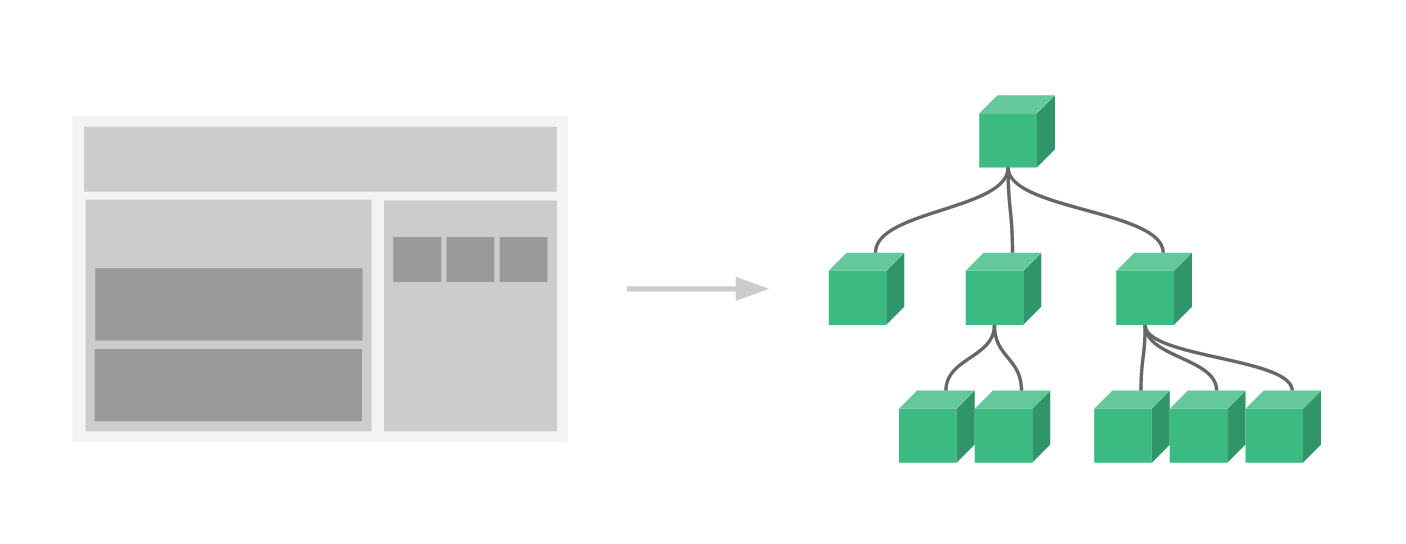
组件化规范:Web Components
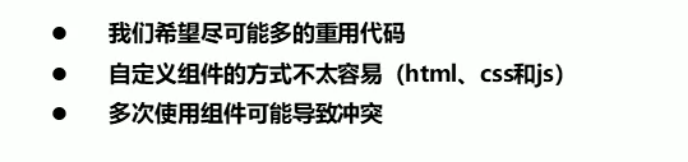
Web Components是通过创建封装好功能的定制元素来解决上述问题
Vue组件注册
定义组件
// 定义一个名为 button-counter 的新组件
Vue.component('button-counter', {
  data: function () {
    return {
      count: 0
    }
  },
  template: '<button v-on:click="count++">You clicked me {{ count }} times.</button>'
})
使用组件
<div id="components-demo">
  <button-counter></button-counter>
</div>
<!DOCTYPE html>
<html lang="en">

<head>
    <meta charset="UTF-8">
    <meta http-equiv="X-UA-Compatible" content="IE=edge">
    <meta name="viewport" content="width=device-width, initial-scale=1.0">
    <title>定义组件</title>
</head>
<script src="./vue.js"></script>

<body>
    <div id="app">
        <button-component></button-component>
    </div>
</body>
<script>
    // 定义组件
    Vue.component('button-component', {
        data: function() {
            return {
                count: 0
            }
        },
        template: "<button @click='handleClick'>You clicked me {{ count }} times.</button>",
        methods: {
            handleClick: function() {
                this.count += 2
            }
        }

    })
    let vm = new Vue({
        el: '#app'
    })
</script>

</html>
Vue组件注册注意项
- date必须是一个函数
- 组件模板内容必须是单个根元素
- 组件模板内容可以是模板字符串
<!DOCTYPE html>
<html lang="en">
<head>
<meta charset="UTF-8">
<meta http-equiv="X-UA-Compatible" content="IE=edge">
<meta name="viewport" content="width=device-width, initial-scale=1.0">
<title>定义组件的注意项</title>
</head>
<script src="./vue.js"></script>
<body>
<div id="app">
<button-component></button-component>
</div>
</body>
<script>
// 定义组件
Vue.component('button-component', {
data: function() {
// data的值必须是一个函数 以便让每个子组件拥有独立的数据库
return {
count: 0
}
},
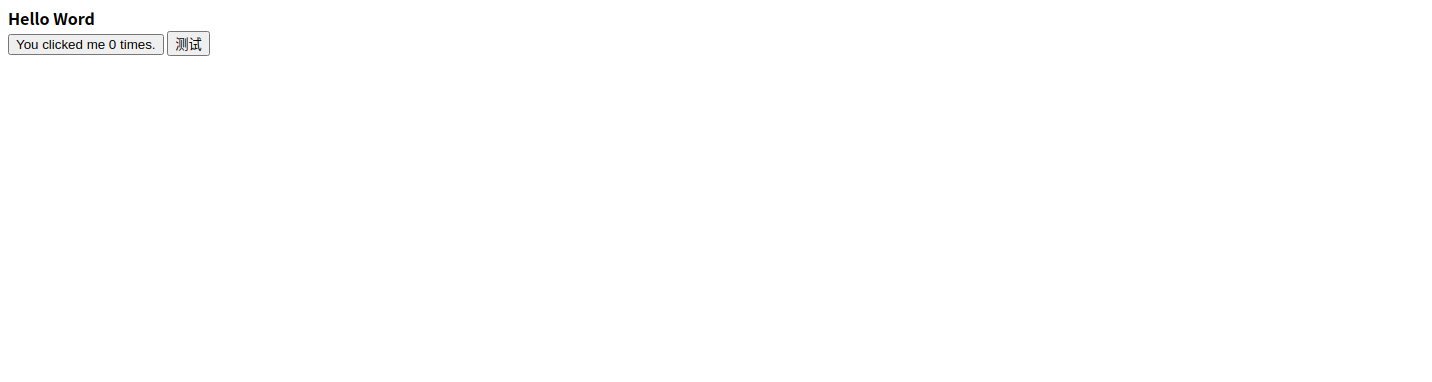
// 模板的内容必须是单个根元素且可以为模板字符串
template: `
<div>
<button @click='handleClick'>You clicked me {{ count }} times.</button>
<button>测试</button>
</div>
`,
methods: {
handleClick: function() {
this.count += 2
}
}
})
let vm = new Vue({
el: '#app'
})
</script>
</html>
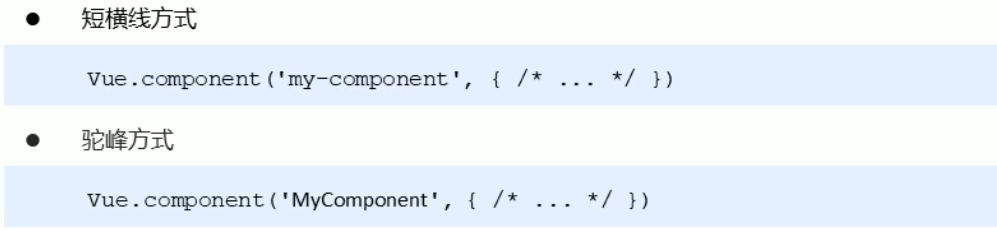
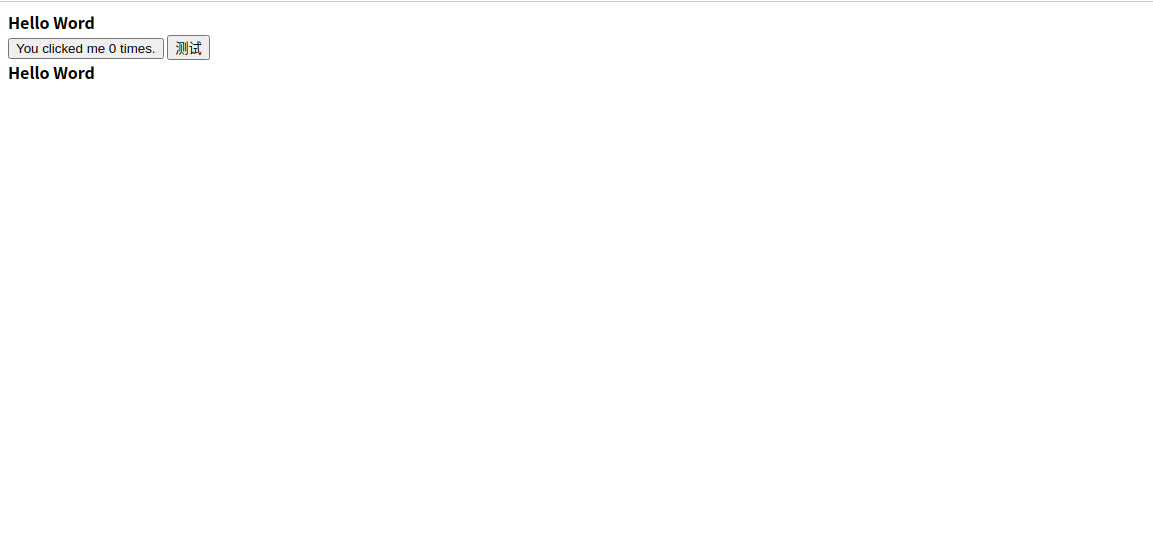
Vue组件命名方式
<!DOCTYPE html>
<html lang="en">

<head>
    <meta charset="UTF-8">
    <meta http-equiv="X-UA-Compatible" content="IE=edge">
    <meta name="viewport" content="width=device-width, initial-scale=1.0">
    <title>Vue组件的命名方式</title>
</head>
<script src="./vue.js"></script>

<body>
    <div id="app">
        <!-- 驼峰式命名在根组件必须要使用-相隔 -->
        <hello-word></hello-word>
        <button-component></button-component>
    </div>
</body>
<script>
    // 定义驼峰式命名
    Vue.component('helloWord', {
            data: function() {
                return {
                    msg: 'Hello Word'
                }
            },
            template: `
                    <div>
                        <strong>Hello Word</strong>
                    </div>
                     `
        })
        // 定义组件
    Vue.component('button-component', {
        data: function() {
            // data的值必须是一个函数 以便让每个子组件拥有独立的数据库
            return {
                count: 0
            }
        },
        // 模板的内容必须是单个根元素且可以为模板字符串
        template: `
                    <div>
                        <button @click='handleClick'>You clicked me {{ count }} times.</button>
                        <button>测试</button>
                        <helloWord><helloWord>
                    </div>
                  `,
        methods: {
            handleClick: function() {
                this.count += 2
            }
        }
    })
    let vm = new Vue({
        el: '#app'
    })
</script>

</html>
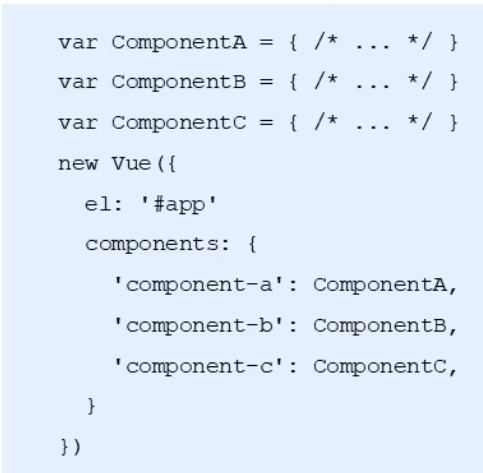
Vue局部组件注册方式
局部注册的组件 只能在根组件使用
<!DOCTYPE html>
<html lang="en">

<head>
    <meta charset="UTF-8">
    <meta http-equiv="X-UA-Compatible" content="IE=edge">
    <meta name="viewport" content="width=device-width, initial-scale=1.0">
    <title>Vue局部组件的注册方式</title>
</head>
<script src="./vue.js"></script>

<body>
    <div id="app">
        <!-- 驼峰式命名在根组件必须要使用-相隔 -->
        <hello-word></hello-word>
        <button-component></button-component>
    </div>
</body>
<script>
    // 定义局部组件
    var helloWord = {
            data: function() {
                return {
                    msg: 'Hello Word'
                }
            },
            template: `
                    <div>
                        <strong>Hello Word</strong>
                    </div>
                     `
        }
        // 定义全局组件
    Vue.component('button-component', {
        data: function() {
            // data的值必须是一个函数 以便让每个子组件拥有独立的数据库
            return {
                count: 0
            }
        },
        // 模板的内容必须是单个根元素且可以为模板字符串
        template: `
                    <div>
                        <button @click='handleClick'>You clicked me {{ count }} times.</button>
                        <button>测试</button>

                    </div>
                  `,
        methods: {
            handleClick: function() {
                this.count += 2
            }
        }

    })
    let vm = new Vue({
        el: '#app',
        // 定义局部组件
        components: {
            'hello-word': helloWord
        }
    })
</script>

</html>
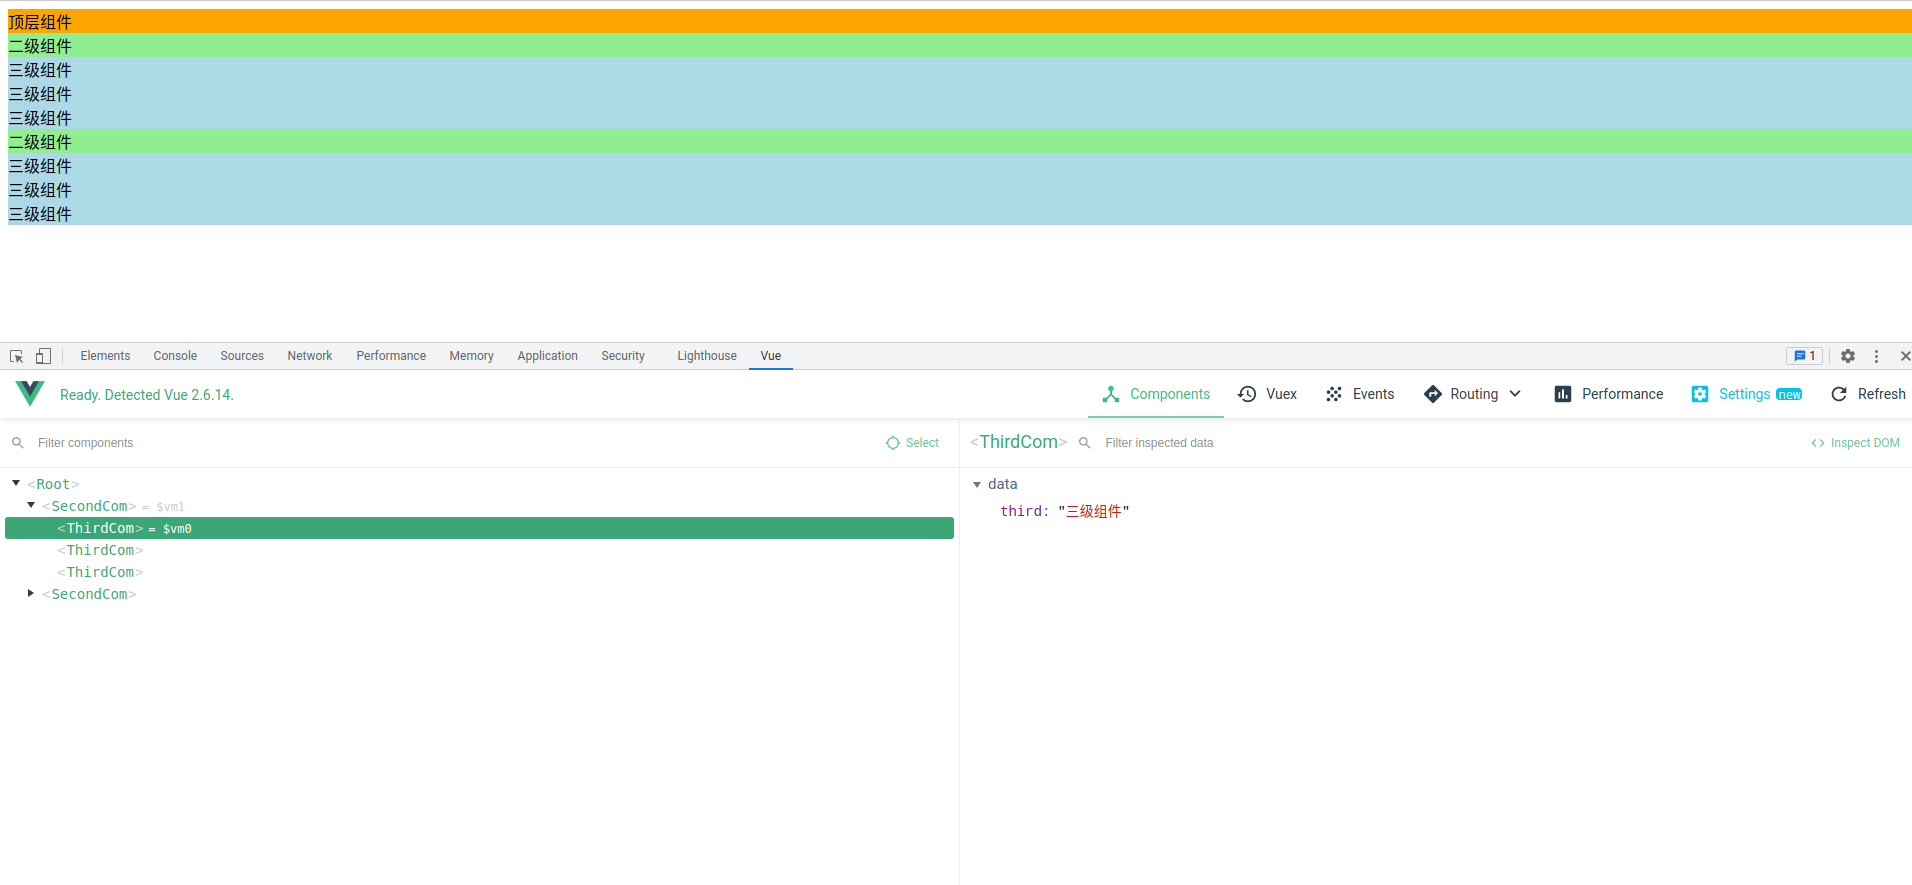
Vue调试工具安装
1.克隆仓库
2.安装依赖包
3.构建
4.打开chrome扩展页面
5.选中开发者模式
6.加载已解压的扩展 选择shell/chrome

<!DOCTYPE html>
<html lang="en">

<head>
    <meta charset="UTF-8">
    <title>Vue调试工具检测</title>
    <style type="text/css">
        .root {
            background-color: orange;
        }

        .second {
            background-color: lightgreen;
        }

        .third {
            background-color: lightblue;
        }
    </style>
</head>

<body>
    <div id="app" class="root">
        <div>{{root}}</div>
        <second-com></second-com>
        <second-com></second-com>
    </div>
    <script type="text/javascript" src="./vue.js"></script>
    <script type="text/javascript">
        /*
                      Vue调试工具安装与基本使用
                    */
        Vue.component('second-com', {
            data: function() {
                return {
                    second: '二级组件'
                }
            },
            template: `<div class='second'>
        <div>{{second}}</div>
        <third-com></third-com>
        <third-com></third-com>
        <third-com></third-com>
      </div>`
        });
        Vue.component('third-com', {
            data: function() {
                return {
                    third: '三级组件'
                }
            },
            template: '<div class="third"><div>{{third}}</div></div>'
        });

        var vm = new Vue({
            el: '#app',
            data: {
                root: '顶层组件'
            }
        });
    </script>
</body>

</html>
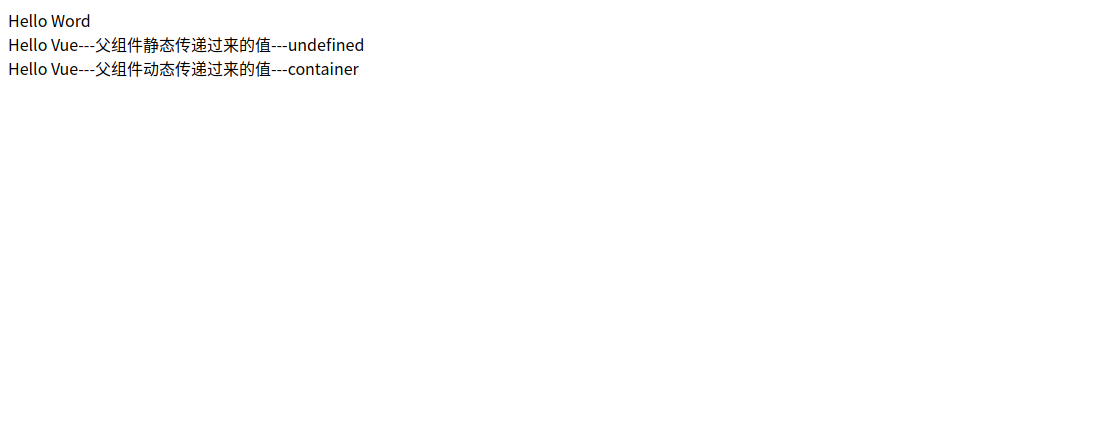
Vue组件传值
Vue父组件向子组件传值
子组件通过props接收传递过来的值
Vue.component(‘menu-item', {
props: ['title'],
template: '<div>{{ title }}</div>'
})
父组件通过属性绑定向子组件传递值
<menu-item title="来自静态父组件的数据"></menu-item>
<menu-item :title="title"></menu-item>
<!DOCTYPE html>
<html lang="en">

<head>
    <meta charset="UTF-8">
    <meta http-equiv="X-UA-Compatible" content="IE=edge">
    <meta name="viewport" content="width=device-width, initial-scale=1.0">
    <title>Vue父组件向子组件传值的过程</title>
</head>


<body>
    <div id="app">
        <div>{{pmsg}}</div>
        <item-component title='父组件静态传递过来的值'></item-component>
        <item-component :title='ptitle' content='container'></item-component>
    </div>
</body>
<script src="./vue.js"></script>
<script>
    // Vue全局组件定义
    Vue.component('item-component', {
        props: ['title', 'content'],
        data: function() {
            return {
                msg: 'Hello Vue'
            }
        },
        template: `
                <div>{{msg + "---" +title+"---"+content}}</div>

                  `
    })
    let vm = new Vue({
        el: "#app",
        data: {
            pmsg: 'Hello Word',
            ptitle: '父组件动态传递过来的值'
        }
    })
</script>

</html>
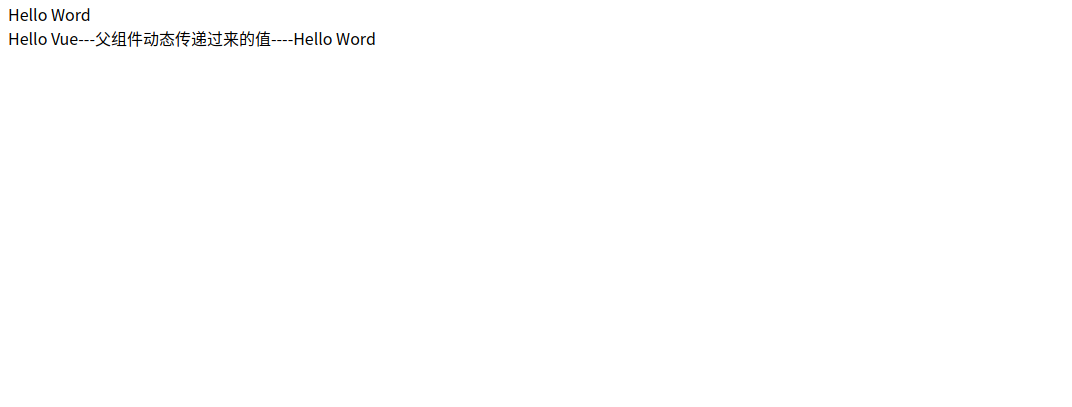
props属性名规则
- 在props中使用驼峰形式,模板中需要使用短横线的形式
- 字符串形式的模板中没有这个限制
<!DOCTYPE html>
<html lang="en">

<head>
    <meta charset="UTF-8">
    <meta http-equiv="X-UA-Compatible" content="IE=edge">
    <meta name="viewport" content="width=device-width, initial-scale=1.0">
    <title>props属性名规则</title>
</head>


<body>
    <div id="app">
        <div>{{pmsg}}</div>

        <item-component :test-title='ptitle' content='container'></item-component>
    </div>
</body>
<script src="./vue.js"></script>
<script>
    // Vue全局组件定义
    Vue.component('item-component', {
        props: ["testTitle"],
        data: function() {
            return {
                msg: 'Hello Vue'
            }
        },
        template: `
                <div>{{msg + "---" +testTitle+'----'}}<main-item mainItem='Hello Word'><main-item></div>

                  `
    })


    // Vue全局组件定义
    Vue.component('main-item', {
        props: ["mainItem"],

        template: `
                    <span>{{mainItem}}</span>
                  `
    })
    let vm = new Vue({
        el: "#app",
        data: {
            pmsg: 'Hello Word',
            ptitle: '父组件动态传递过来的值'
        }
    })
</script>

</html>
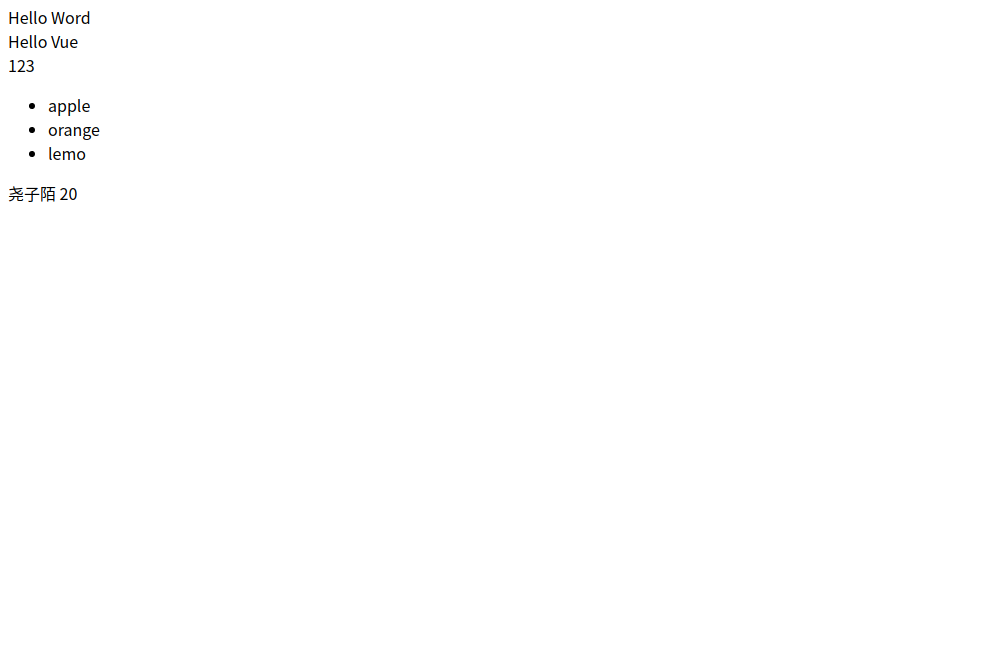
props属性值类型
- 字符串 String
- 数值 Number
- 布尔值 Boolean
- 数组 Array
- 对象 Object
<!DOCTYPE html>
<html lang="en">

<head>
    <meta charset="UTF-8">
    <meta http-equiv="X-UA-Compatible" content="IE=edge">
    <meta name="viewport" content="width=device-width, initial-scale=1.0">
    <title>props属性值类型</title>
</head>
<script src="./vue.js"></script>

<body>
    <div id="app">
        <div>{{message}}</div>
        <menu-item hand='Hello Vue' :pmuber='123' :parr='parr' :pobj='pobj'></menu-item>
    </div>
</body>
<script>
    // 定义全局组件
    Vue.component('menu-item', {
        props: ['hand', 'pmuber', 'parr', 'pobj'],
        data: function() {
            return {
                msg: "Hello Word"
            }
        },
        template: `
                <div>
                    <div>{{hand}}</div>
                    <div>{{pmuber}}</div>
                <ul>
                    <li :key='index' v-for="(item,index) in parr">{{item}}</li>
                </ul>
                <span>{{pobj.name}}</span>
                <span>{{pobj.age}}</span>
                </div>

        `
    })
    let vm = new Vue({
        el: "#app",
        data: {
            message: 'Hello Word',
            parr: ['apple', 'orange', 'lemo'],
            pobj: {
                name: '尧子陌',
                age: '20'
            }
        }
    })
</script>

</html>
Vue子组件向父组件传值
原则:单向数据流
子组件通过自定义事件向父组件传递参数

父组件通过监听子组件的事件

<!DOCTYPE html>
<html lang="en">

<head>
    <meta charset="UTF-8">
    <meta http-equiv="X-UA-Compatible" content="IE=edge">
    <meta name="viewport" content="width=device-width, initial-scale=1.0">
    <title>Vue子组件向父组件传值</title>
</head>


<body>
    <div id="app">
        <div :style='{fontSize: fontSize + "px"}'>{{message}}</div>
        <menu-item @change-big='handle'></menu-item>
    </div>
</body>
<script src="./vue.js"></script>
<script>
    // 定义全局组件
    Vue.component('menu-item', {
        template: `
                <div>
                    <button @click='$emit("change-big")'>增大字体</button>
                </div>
                `
    })
    let vm = new Vue({
        el: '#app',
        data: {
            message: 'Hello Word',
            fontSize: 20,
        },
        methods: {
            handle: function() {
                this.fontSize += 2;
            }
        }
    })
</script>

</html>

Vue子组件向父组件传值之携带参数
子组件通过自定义事件向父组件传递参数

父组件通过监听子组件的事件

`<!DOCTYPE html>
<html lang="en">

<head>
    <meta charset="UTF-8">
    <meta http-equiv="X-UA-Compatible" content="IE=edge">
    <meta name="viewport" content="width=device-width, initial-scale=1.0">
    <title>Vue子组件向父组件传值</title>
</head>


<body>
    <div id="app">
        <div :style='{fontSize: fontSize + "px"}'>{{message}}</div>
        <menu-item @change-big='handle'></menu-item>
    </div>
</body>
<script src="./vue.js"></script>
<script>
    // 定义全局组件
    Vue.component('menu-item', {
        template: `
                <div>
                    <button @click='$emit("change-big")'>增大字体</button>
                </div>
                `
    })
    let vm = new Vue({
        el: '#app',
        data: {
            message: 'Hello Word',
            fontSize: 20,
        },
        methods: {
            handle: function() {
                this.fontSize += 2;
            }
        }
    })
</script>

</html>
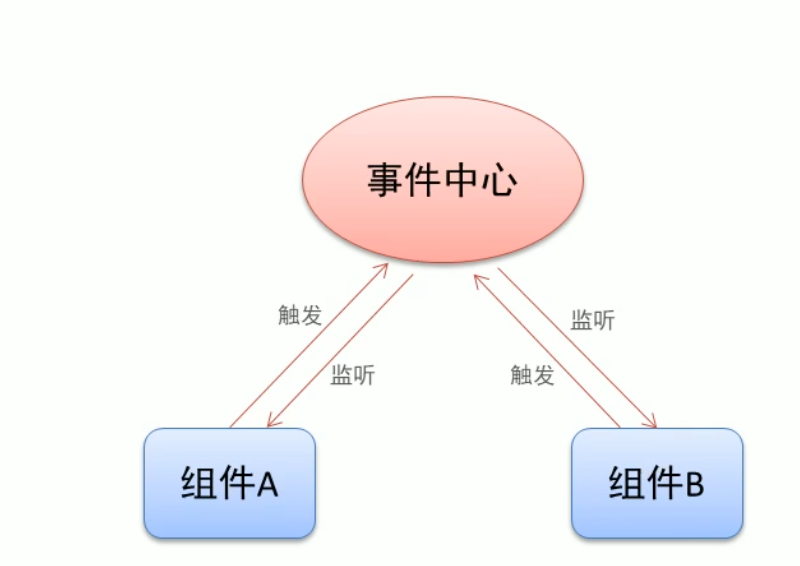
Vue非父子间传值
单独的事件中心管理 管理组件间的通信

监听事件与销毁事件
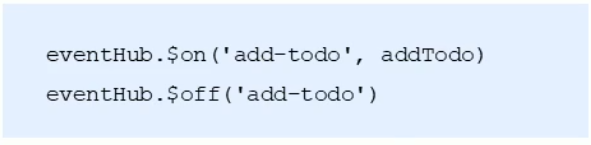
触发事件

<!DOCTYPE html>
<html lang="en">

<head>
    <meta charset="UTF-8">
    <meta http-equiv="X-UA-Compatible" content="IE=edge">
    <meta name="viewport" content="width=device-width, initial-scale=1.0">
    <title>Vue兄弟组件传值</title>
</head>

<body>

    <div id="app">
        <h1>Vue兄弟组件传值</h1>
        <button @click='handleClick'>销毁</button>
        <test-tom></test-tom>
        <test-jerry></test-jerry>
    </div>
</body>
<script src="./vue.js"></script>
<script>
    // 定义单独的事件管理中心
    var hub = new Vue();
    Vue.component('test-tom', {
        data: function() {
            return {
                num: 0
            }
        },
        template: `
                    <div>
                        <span>Tom:{{num}}</span>
                        <button @click='handle'>按钮</button>
                    </div>
                    `,
        methods: {
            handle: function() {

                // 触发兄弟组件的事件
                hub.$emit('jreey-event', 2)
            }
        },
        mounted: function() {
            //监听事件
            hub.$on('tom-event', (val) => {
                this.num += val
            })
        }
    })
    Vue.component('test-jerry', {
            data: function() {

                return {
                    num: 0
                }
            },
            template: `
                    <div>
                        <span>Jerry:{{num}}</span>
                        <button @click='handle'>按钮</button>
                    </div>
                    `,
            methods: {
                handle: function() {
                    // 触发兄弟组件的事件
                    hub.$emit('tom-event', 4)
                }
            },
            mounted: function() {
                //监听事件
                hub.$on('jreey-event', (val) => {
                    this.num += val
                })
            }
        })
        // 定义根实例
    let vm = new Vue({
        el: "#app",
        methods: {

            handleClick: function() {
                hub.$off('tom-event');
                hub.$off('jreey-event');
            }
        }

    })
</script>

</html>
Vue组件插槽的作用
父组件向子组件传递内容
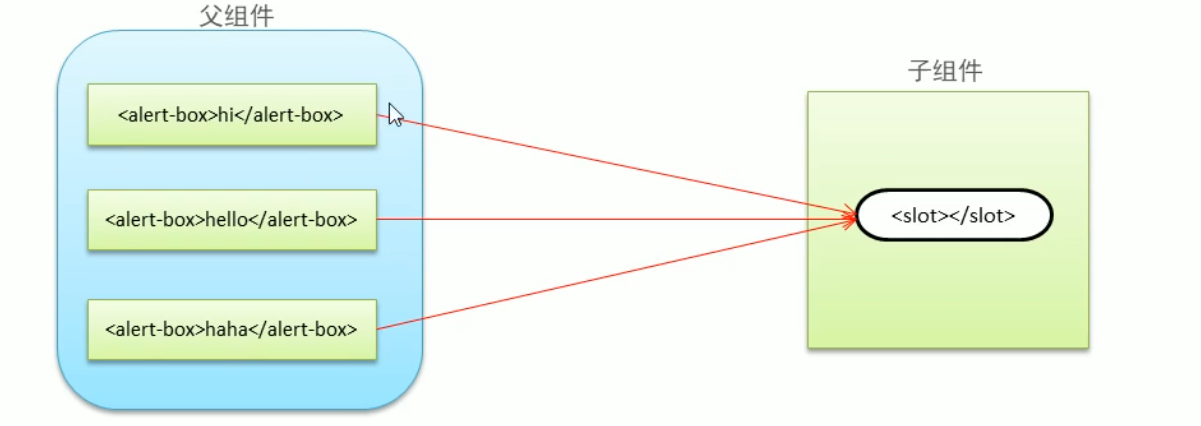
插槽位置
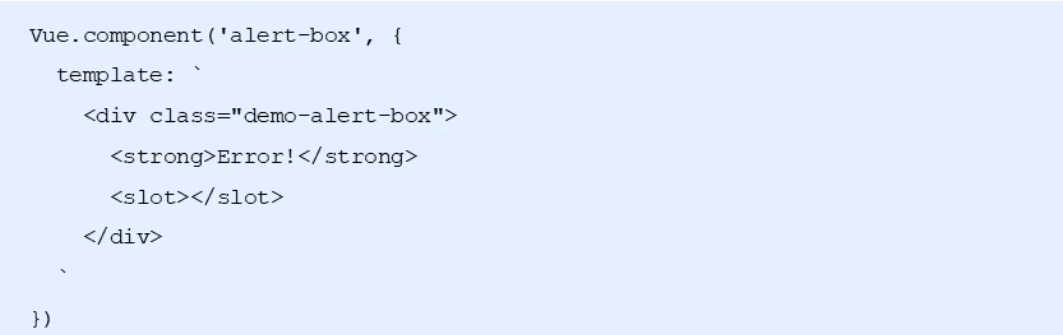
插槽内容

<!DOCTYPE html>
<html lang="en">

<head>
    <meta charset="UTF-8">
    <meta http-equiv="X-UA-Compatible" content="IE=edge">
    <meta name="viewport" content="width=device-width, initial-scale=1.0">
    <title>Vue组件插槽</title>
</head>

<body>
    <div id="app">
        <menu-item>Hello Word</menu-item>
        <menu-item>Hello Vue</menu-item>
        <menu-item></menu-item>
    </div>
</body>
<script src="./vue.js"></script>
<script>
    Vue.component('menuItem', {
        template: `
                <div>
                    <strong>Slot</strong>
                    <slot>Default</slot>
                </div>
                `
    })
    let vm = new Vue({
        el: "#app",

    })
</script>

</html>

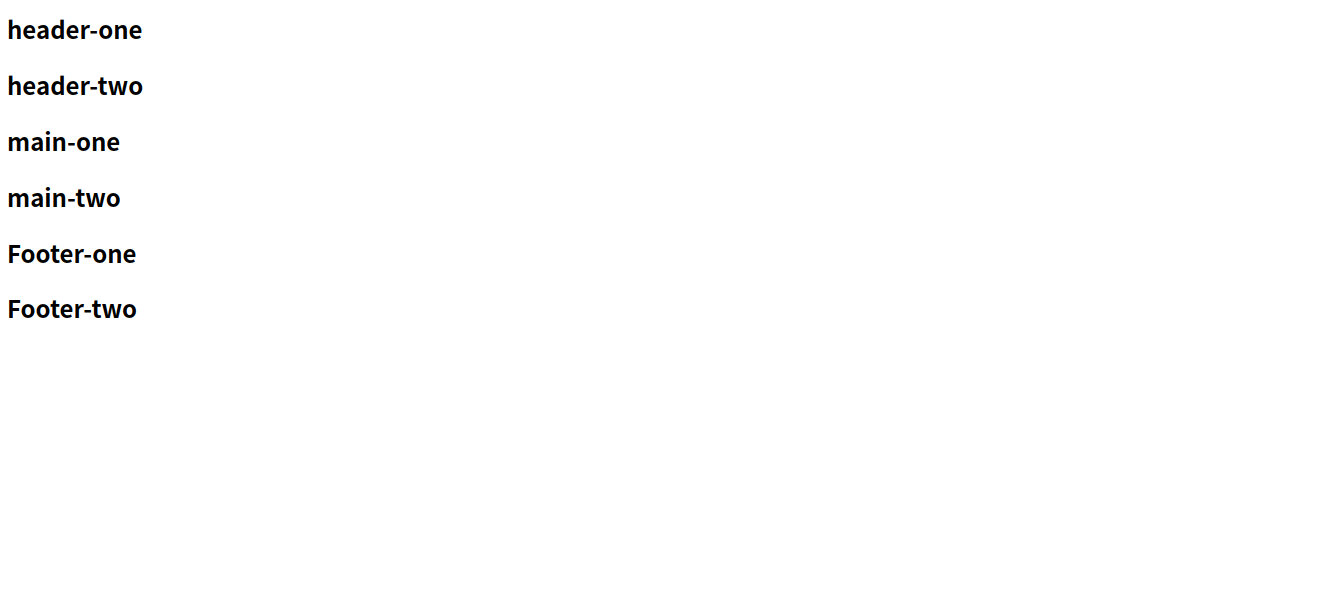
Vue具名插槽
插槽定义
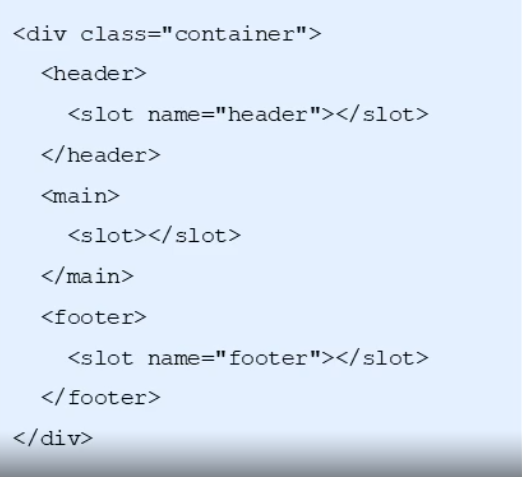
插槽内容

<!DOCTYPE html>
<html lang="en">

<head>
    <meta charset="UTF-8">
    <meta http-equiv="X-UA-Compatible" content="IE=edge">
    <meta name="viewport" content="width=device-width, initial-scale=1.0">
    <title>Vue具名插槽</title>
</head>

<body>
    <div id="app">
        <template name='header'>
            <h2>header-one</h2>
            <h2>header-two</h2>
        </template>

        <template>
            <h2>main-one</h2>
            <h2>main-two</h2>
        </template>

        <template name='footer'>
            <h2>Footer-one</h2>
            <h2>Footer-two</h2>
        </template>
    </div>
</body>
<script src="./vue.js"></script>
<script>
    // 定义全局组件
    Vue.component('menu-item', {
        template: `
                <div>
                    <header>
                        <slot name='header'></slot>
                    </header>
                    <main>
                        <slot></slot>
                    </main>
                    <footer>
                        <slot name='footer'></slot>
                    </footer>
                </div>
                `
    })
    let vm = new Vue({
        el: "#app",

    })
</script>

</html>
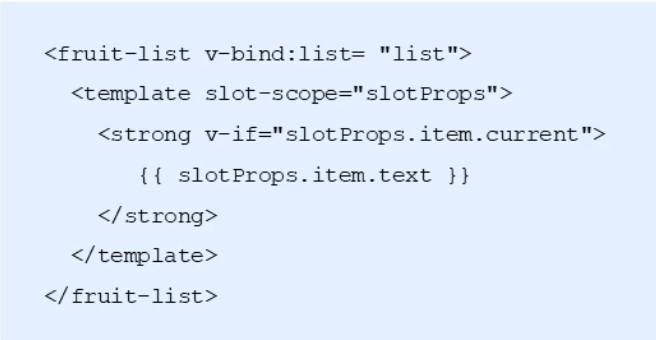
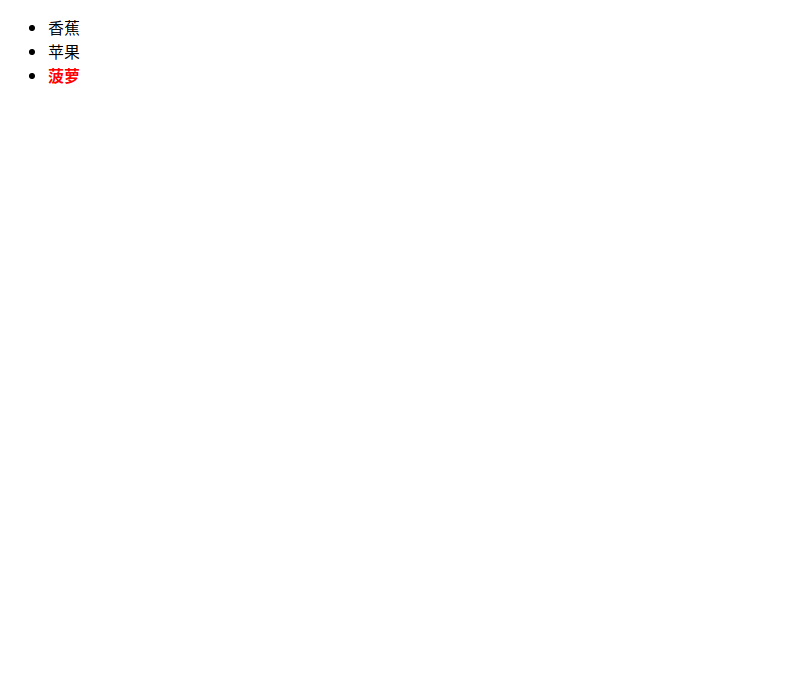
Vue作用域插槽
应用场景:父组件对子组件的内容进行加工处理
通过slot-scope属性对子组件传递过来的值内容加工
插槽定义
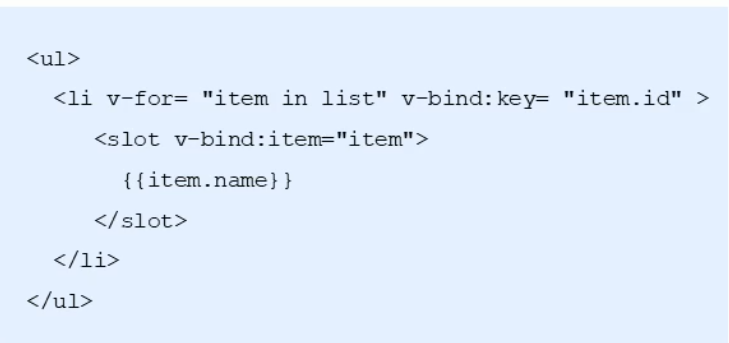
插槽内容
<!DOCTYPE html>
<html lang="en">

<head>
    <meta charset="UTF-8">
    <meta http-equiv="X-UA-Compatible" content="IE=edge">
    <meta name="viewport" content="width=device-width, initial-scale=1.0">
    <title>Vue作用域插槽</title>
    <style>
        .current {
            color: red;
        }
    </style>
</head>

<body>
    <div id="app">
        <menu-item v-bind:fruit='fruit'>
            <tempalte slot-scope='slotProps'>
                <strong v-if='slotProps.info.id==3' class="current">{{slotProps.info.name}}</strong>
                <span v-else>{{slotProps.info.name}} </span>
            </tempalte>
        </menu-item>
    </div>
</body>
<script src="./vue.js"></script>
<script>
    Vue.component('menu-item', {
        props: ['fruit'],
        template: `
                <div>
                    <ul>
                        <li v-bind:key='item.id' v-for='(item,index) in fruit'>
                            <slot :info='item'>{{item.name}}</slot>
                        </li>
                    </ul>
                </div>
                `
    })
    let vm = new Vue({
        el: "#app",
        data: {
            fruit: [{
                    id: 1,
                    name: '香蕉'
                }, {
                    id: 2,
                    name: '苹果'
                }, {
                    id: 3,
                    name: '菠萝'
                },

            ]
        }
    })
</script>

</html>
Vue组件之购物车
根据业务功能进行组件化划分
- 标题组件(展示文本)
- 列表组件(列表展示 商品数量变更 商品删除 )
- 结算组件(计算商品总额)
功能实现步骤
- 实现整体布局和样式效果
- 划分独立的功能组件
- 组合所有的子组件形成整体结构
- 逐个实现各个组件功能
- 标题组件
- 列表组件
- 结算组件
<!DOCTYPE html>
<html lang="en">

<head>
    <meta charset="UTF-8">
    <meta http-equiv="X-UA-Compatible" content="IE=edge">
    <meta name="viewport" content="width=device-width, initial-scale=1.0">
    <title>购物车</title>
    <style>
        .container .cart {
            width: 300px;
            margin: auto;
        }

        .container .title {
            background-color: lightblue;
            height: 40px;
            line-height: 40px;
            text-align: center;
            /*color: #fff;*/
        }

        .container .total {
            background-color: #FFCE46;
            height: 50px;
            line-height: 50px;
            text-align: right;
        }

        .container .total button {
            margin: 0 10px;
            background-color: #DC4C40;
            height: 35px;
            width: 80px;
            border: 0;
        }

        .container .total span {
            color: red;
            font-weight: bold;
        }

        .container .item {
            height: 55px;
            line-height: 55px;
            position: relative;
            border-top: 1px solid #ADD8E6;
        }

        .container .item img {
            width: 45px;
            height: 45px;
            margin: 5px;
        }

        .container .item .name {
            position: absolute;
            width: 90px;
            top: 0;
            left: 55px;
            font-size: 16px;
        }

        .container .item .change {
            width: 100px;
            position: absolute;
            top: 0;
            right: 50px;
        }

        .container .item .change a {
            font-size: 20px;
            width: 30px;
            text-decoration: none;
            background-color: lightgray;
            vertical-align: middle;
        }

        .container .item .change .num {
            width: 40px;
            height: 25px;
        }

        .container .item .del {
            position: absolute;
            top: 0;
            right: 0px;
            width: 40px;
            text-align: center;
            font-size: 40px;
            cursor: pointer;
            color: red;
        }

        .container .item .del:hover {
            background-color: orange;
        }
    </style>
</head>

<body>
    <div id="app">
        <div class="container">
            <my-cart></my-cart>
        </div>
    </div>
</body>
<script src="../vue.js"></script>
<script>
    var CartTitle = {
        props: ['uname'],
        template: `
        <div class="title">{{uname}}的商品</div>
      `
    }
    var CartList = {
        props: ['list'],
        template: `
        <div>
          <div :key='item.id' v-for='item in list' class="item">
            <img :src="item.img"/>
            <div class="name">{{item.name}}</div>
            <div class="change">
              <a href="" @click.prevent='sub(item.id)'>-</a>
              <input type="text" class="num" :value='item.num' @blur='changeNum(item.id,$event)' />
              <a href="" @click.prevent='add(item.id)'>+</a>
            </div>
            <div class="del" @click='del(item.id)'>×</div>
          </div>
        </div>
      `,
        methods: {
            changeNum: function(id, event) {
                this.$emit('change-num', {
                    id: id,
                    type: 'change',
                    num: event.target.value
                })
            },
            sub: function(id) {

                this.$emit('change-num', {
                    id: id,
                    type: 'sub'

                })
            },

            add: function(id) {
                this.$emit('change-num', {
                    id: id,
                    type: 'add'
                })
            },
            del: function(id) {

                this.$emit('cart-del', id)

            }
        }
    }
    var CartTotal = {
        props: ['list'],
        template: `
        <div class="total">
          <span>总价:{{total}}</span>
          <button>结算</button>
        </div>
      `,
        computed: {
            total: function() {
                //计算商品的总结
                var t = 0;
                this.list.forEach(item => {
                    t += item.price * item.num
                });
                return t;
            }
        }
    }
    Vue.component('my-cart', {
        data: function() {
            return {
                uname: '尧子陌',
                list: [{
                    id: 1,
                    name: 'TCL彩电',
                    price: 1000,
                    num: 1,
                    img: 'img/a.jpg'
                }, {
                    id: 2,
                    name: '机顶盒',
                    price: 1000,
                    num: 1,
                    img: 'img/b.jpg'
                }, {
                    id: 3,
                    name: '海尔冰箱',
                    price: 1000,
                    num: 1,
                    img: 'img/c.jpg'
                }, {
                    id: 4,
                    name: '小米手机',
                    price: 1000,
                    num: 1,
                    img: 'img/d.jpg'
                }, {
                    id: 5,
                    name: 'PPTV电视',
                    price: 1000,
                    num: 2,
                    img: 'img/e.jpg'
                }]
            }
        },
        template: `
                <div class='cart'>
                    <cart-title :uname='uname'></cart-title>
                    <cart-list :list='list'  @cart-del='delCart($event)' @change-num='changeNum($event)' ></cart-list>
                    <cart-total :list='list'></cart-total>
                </div>
                `,
        components: {
            'cart-title': CartTitle,
            'cart-list': CartList,
            'cart-total': CartTotal
        },
        methods: {
            changeNum: function(val) {
                // 分为三种情况,输入法变更,加号变更,减号变更
                if (val.type == 'change') {
                    this.list.some(item => {
                        if (item.id == val.id) {
                            item.num = val.num;
                            // 终止遍历
                            return true;
                        }
                    });
                } else if (val.type == 'sub') {
                    //减少操作
                    this.list.some(item => {
                        if (item.id == val.id) {
                            console.log(item.num);
                            item.num -= 1;
                            // 终止操作
                            return true;
                        };

                    })
                } else if (val.type == 'add') {
                    // 加一操作
                    this.list.some(item => {
                        if (item.id == val.id) {
                            item.num += 1;
                            // 终止操作
                            return true;

                        }
                    })
                }
                // 根据子组件传递过来的数据,跟新list中对应的数据

            },
            delCart: function(id) {
                var index = this.list.forEach(item => {
                    return item.id == id;
                });
                this.list.splice(index, 1)
            }
        }
    })

    let vm = new Vue({
        el: "#app",
        data: {

        },

    })
</script>

</html>


 6万+
6万+


 被折叠的 条评论
为什么被折叠?
被折叠的 条评论
为什么被折叠?
 到【灌水乐园】发言


