


构建一个简单的CNN卷积神经网络——手写体数字识别(通过摄像头测试)
前言
从简单学起,,,
1.构建一个卷积层
Conv2d
import torch

input=torch.randn(1,5,100,100)
juanji=torch.nn.Conv2d(5,10,kernel_size=3)
output=juanji(input)
print(input.shape)
print(output.shape)
print(juanji.weight.shape)#卷积层权重的形状
torch.Size([1, 5, 100, 100])
torch.Size([1, 10, 98, 98])
torch.Size([10, 5, 3, 3])
MaxPool2d
import torch
input=[3,4,6,5,2,4,6,8,1,6,7,8,9,7,4,6]
input=torch.Tensor(input).view(1,1,4,4)
maxpooling_layer=torch.nn.MaxPool2d(kernel_size=2)#相当于步长为2
output=maxpooling_layer(input)
print(input)
print(output)
2.在类里面使用函数堆积一个卷积层
# 导入用到的包
import math
from collections import OrderedDict
import torch.nn as nn

#   主干网络 类
class DarkNet(nn.Module):
    # 初始化  最先执行
    def __init__(self):
        super(DarkNet, self).__init__()
        #调用这个函数  跟类的实例化一样
        self.layer1 = self._make_layer([32, 64])

    # --------------------------------------------------------------------- #
    #   定义的函数层  给主干网络类实例化时调用
    # --------------------------------------------------------------------- #
    def _make_layer(self, planes):
        layers = []  # 创建一个空的网络层数组
        # 下采样,步长为2,卷积核大小为3
        # 在网络层数组里添加 3*3卷积层 详解看上面
        # 下行代码参数的解释   32*3*3卷积
        # 参数:in 输入通道数  out 输出通道数  卷积核大小 、步长 、填充  无偏置
        layers.append(("ds_conv", nn.Conv2d(inplanes, planes, kernel_size=3, stride=2, padding=1, bias=False)))
        # 在网络层数组后面添加 标准化
        # 参数:out
        layers.append(("ds_bn", nn.BatchNorm2d(planes)))
        # 在网络层数组后面添加 LeakyReLU激活函数
        # 0.1为x为负数时的需要的一个系数,控制负斜率的角度
        layers.append(("ds_relu", nn.LeakyReLU(0.1)))
        # OrderedDict 中是按照 添加顺序存储的有序字典 ;
        # Sequential 会将这些模块组成一个流水线,输入将依次通过这些模块得到一个输出。
        # 最后返回这个残差层
        return nn.Sequential(OrderedDict(layers))
    # 主干网络的前向传播  初始化后执行
    def forward(self, x):
        x = self.layer1(x)
        return x

# 定义 darknet53 函数 实例化DarkNet 类 传入参数
def darknet53():
    model = DarkNet()
    return model  # 返回模型
3.构建一个简单的卷积网络
先跑完训练部分,再跑测试部分。
手写体识别——CNN训练部分
import torch
from torch.utils.data import DataLoader
from torchvision import datasets
from torchvision import transforms
import torch.nn.functional as F
import matplotlib.pyplot as plt
import numpy as np
import os  # 添加代码①
os.environ["KMP_DUPLICATE_LIB_OK"] = "TRUE"  # 添加代码②

batch_size = 256    #设置batch大小

transform = transforms.Compose([
    transforms.ToTensor(),                        #转换为张量
    transforms.Normalize((0.1307,), (0.3081,))    #设定标准化值
])
#训练集
train_dataset = datasets.MNIST( root='../data/mnist',train=True,transform=transform,download=True)
#测试集
test_dataset = datasets.MNIST(root='../data/mnist',train=False,transform=transform,download=True)
#训练集加载器
train_loader = DataLoader(dataset=train_dataset,batch_size=batch_size,shuffle=True)
#测试集加载器
test_loader = DataLoader(dataset=test_dataset, batch_size=batch_size, shuffle=False)

# 设计模型   CNN
class CNN(torch.nn.Module):
    def __init__(self):
        super(CNN, self).__init__()
        self.conv1 = torch.nn.Conv2d(1, 10, kernel_size=(5,5))      #卷积层1
        self.conv2 = torch.nn.Conv2d(10, 20, kernel_size=(5,5))     #卷积层2
        self.pooling = torch.nn.MaxPool2d(2)                        #池化层
        self.fc1 = torch.nn.Linear(320, 256)                #全连接层1
        self.fc2 = torch.nn.Linear(256, 128)                #全连接层2
        self.fc3 = torch.nn.Linear(128, 10)                 #全连接层3

    def forward(self, x):
        # x.shape = 256*1*28*28
        batch_size = x.size(0)   # 256
        # 1*28*28 -> 10*24*24 -> 10*12*12
        x = F.relu(self.pooling(self.conv1(x)))    #卷积层1->池化层->激活函数Relu
        # 10*12*12-> 20*8*8 ->20*4*4
        x = F.relu(self.pooling(self.conv2(x)))    #卷积层2->池化层->激活函数Relu
        # 20*4*4 -> 320
        x = x.view(batch_size, -1)        #改变张量的维度
        # 320 -> 256
        x = self.fc1(x)            #全连接层1
        # 256 -> 128
        x = self.fc2(x)            #全连接层2
        # 128 ->10
        x = self.fc3(x)            #全连接层3
        return x

model = CNN()    #实例化()模型为model

device=torch.device("cuda:0"if torch.cuda.is_available()else"cpu")#使用GPU进行计算
model.to(device)#把model模型传入GPU

# 构造损失函数和优化函数
# 损失
criterion = torch.nn.CrossEntropyLoss()
# 优化
optimizer = torch.optim.SGD(model.parameters(), lr=0.1, momentum=0.5)

def train(epoch):
    running_loss = 0.0        #每一轮训练重新记录损失值
    for batch_idx, data in enumerate(train_loader, 0):    #提取训练集中每一个样本
        inputs, target = data
        inputs, target = inputs.to(device), target.to(device)  # 这里的数据(原数据)也要迁移到GPU
        # outputs输出为0-9的概率  256*10
        outputs = model(inputs)              #代入模型
        loss = criterion(outputs, target)    #计算损失值
        loss.backward()                      #反向传播计算得到每个参数的梯度值
        optimizer.step()                     #梯度下降参数更新
        optimizer.zero_grad()                #将梯度归零
        running_loss += loss.item()          #损失值累加

        if batch_idx % 300 == 299:           #每300个样本输出一下结果
            print('[%d,%5d] loss: %.3f' % (epoch + 1, batch_idx + 1, running_loss / 300))
            running_loss = 0.0          # (训练轮次,  该轮的样本次,  平均损失值)
    return running_loss

def test():
    correct = 0
    total = 0
    with torch.no_grad():            #执行计算,但不希望在反向传播中被记录
        for data in test_loader:     #提取测试集中每一个样本
            images, labels = data
            images, labels = images.to(device), labels.to(device)# 这里的数据(原数据)也要迁移到GPU
            # outputs输出为0-9的概率  256*10
            outputs = model(images)  #带入模型
            # torch.max()这个函数返回的是两个值,第一个值是具体的value(我们用下划线_表示)
            # 第二个值是value所在的index(也就是predicted)
            _, pred = torch.max(outputs.data, dim=1)    #获得结果中的最大值
            total += labels.size(0)                     #测试数++
            correct += (pred == labels).sum().item()    #将预测结果pred与标签labels对比,相同则正确数++
        print('%d %%' % (100 * correct / total))    #输出正确率


if __name__ == '__main__':
    # 这两个数组主要是为了画图
    lossy = []        #定义存放纵轴数据(损失值)的列表
    epochx = []       #定义存放横轴数据(训练轮数)的列表

    for epoch in range(1):    #训练10轮
        epochx.append(epoch)   #将本轮轮次存入epochy列表
        lossy.append(train(epoch))  #执行训练,将返回值loss存入lossy列表
        test()                 #每轮训练完都测试一下正确率
    path = "D:/code/text/model1.pth"
    #torch.save(model,path)
    torch.save(model.state_dict(),path)   # 保存模型
    model = torch.load("D:/code/text/model1.pth")  # 加载模型

    #可视化一下训练过程
    plt.plot(epochx, lossy)
    plt.grid()
    plt.show()
手写体识别——摄像头测试部分
import cv2
import os
import torch
#1.调用摄像头,拿出每一帧
#cap =cv2.VideoCapture(0,cv2.CAP_DSHOW)
cap = cv2.VideoCapture(0) #定义视频来源为摄像头
while 1:
ret, frame = cap.read() # 摄像头读取,ret为是否读取成功,frame为视频的每一帧图像
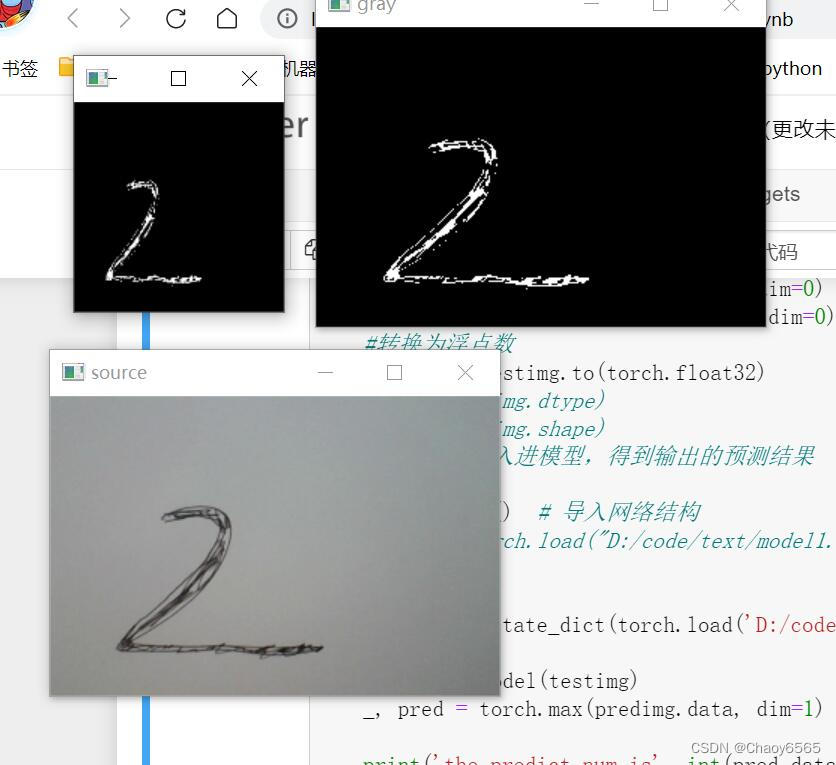
#展示原图像
frame = cv2.resize(frame, (300, 200))
cv2.imshow("source", frame)
#展示灰度,二值化后图像
frame = cv2.cvtColor(frame, cv2.COLOR_RGB2GRAY) #灰度化
res, frame = cv2.threshold(frame, 90, 255, cv2.THRESH_BINARY_INV) #反向二值化
cv2.imshow("gray", frame)
#展示输入模型的图像(方形)
frame = cv2.resize(frame, (140, 140))
cv2.imshow("28*28", frame)
cv2.waitKey(100) #延时,控制帧率
frame = cv2.resize(frame, (28, 28)) #转换成28*28大小
frame= torch.from_numpy(frame) # 转tensor
#两次升维,使其能送入模型
testimg = torch.unsqueeze(frame , dim=0)
testimg = torch.unsqueeze(testimg, dim=0)
#转换为浮点数
testimg = testimg.to(torch.float32)
# 2.将每一帧输入进模型,得到输出的预测结果
# 加载模型
#model = torch.load("D:/code/text/model1.pth") # 报错
# 解决pytorch加载模型报错TypeError: ‘collections.OrderedDict‘ object is not callable
# 错误原因:之前保存网络时用的方法是torch.save(model, 'Nei.pkl'),这样保存下来的Net.pkl是一个状态字典,而不是模型本身,
# 也就是说Net.pkl中保存的只是网络的参数,而没有网络结构。
model = CNN() # 导入网络结构
model.load_state_dict(torch.load('D:/code/text/model1.pth')) # 导入网络的参数
predimg = model(testimg) #进行预测
_, pred = torch.max(predimg.data, dim=1) #获得最大值
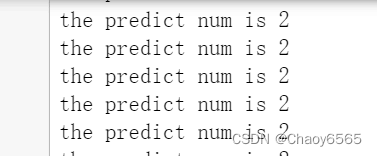
print('the predict num is', int(pred.data[0])) #输出结果
输出结果:
代码注释很详细,这里就不进行讲解了。
总结
未完待续,,,


 1190
1190


 被折叠的 条评论
为什么被折叠?
被折叠的 条评论
为什么被折叠?
 到【灌水乐园】发言


