


docker镜像安装
对网络要求较高,网络不好的可以先想象怎么解决网络问题。不然就会卡死、卡死、还是卡死。
build之前的可选操作
- conda设置代理,这样在安装pytorch时会快一点,但是这样是写入文件里,后面使用镜像时如果代理不可用就不太友好了。可以考虑在不需要代理时往~/.condarc文件中写入空字符。
# 如果你的代理服务在宿主机,请不要把ip写成127.0.0.1。
echo -e 'proxy_servers:\n    http: http://192.168.0.124:7890\n    https: http://192.168.0.124:7890' >> ~/.condarc
- github clone加速:链接前加上:https://ghproxy.com/
git clone https://ghproxy.com/https://github.com/open-mmlab/mmdeploy
build
docker build docker/GPU/ \
-t mmdeploy:master-gpu_20230219 \
--build-arg  VERSION=1.0.0rc0 \
--build-arg  USE_SRC_INSIDE=true
预编译包安装
好像没有成功。跑步了docker输出的engine没有成功也就没有继续尝试了。
源码安装
先按照官方文档安装gcc 7。
# 如果 Ubuntu 版本 < 18.04,需要加入仓库
sudo add-apt-repository ppa:ubuntu-toolchain-r/test
sudo apt-get update
sudo apt-get install gcc-7
sudo apt-get install g++-7
安装时提示:不是符号链接
/sbin/ldconfig.real: /usr/local/cuda-11.1/targets/x86_64-linux/lib/libcudnn_cnn_infer.so.8 不是符号链接
这样的提示有好几条,参考下面这条命令,一一修改。
sudo ln -sf /usr/local/cuda-11.1/targets/x86_64-linux/lib/libcudnn_cnn_train.so.8.6.0 /usr/local/cuda-11.1/targets/x86_64-linux/lib/libcudnn_cnn_train.so.8
一开始我电脑上gcc -v有输出“gcc version 9.4.0”,我以为就可以了,我就没有安装,结果报错:
-- CMAKE_INSTALL_PREFIX: /home/liu/E/python/d2l/pytorch/csgo/my_code/build_mmdep/mmdeploy/build/install
-- The C compiler identification is GNU 9.4.0
-- The CXX compiler identification is unknown
-- Check for working C compiler: /usr/bin/cc
-- Check for working C compiler: /usr/bin/cc -- works
-- Detecting C compiler ABI info
-- Detecting C compiler ABI info - done
-- Detecting C compile features
-- Detecting C compile features - done
CMake Error at CMakeLists.txt:8 (project):
  The CMAKE_CXX_COMPILER:

    g++-7

  is not a full path and was not found in the PATH.

  Tell CMake where to find the compiler by setting either the environment
    variable "CXX" or the CMake cache entry CMAKE_CXX_COMPILER to the full path
      to the compiler, or to the compiler name if it is in the PATH.


-- Configuring incomplete, errors occurred!
See also "/home/liu/E/python/d2l/pytorch/csgo/my_code/build_mmdep/mmdeploy/build/CMakeFiles/CMakeOutput.log".
See also "/home/liu/E/python/d2l/pytorch/csgo/my_code/build_mmdep/mmdeploy/build/CMakeFiles/CMakeError.log".
于是我根据网上提示,在CMakeLists.txt文件开始添加如下内容
set(CMAKE_C_COMPILER "/usr/bin/gcc")
set(CMAKE_CXX_COMPILER "/usr/bin/g++")
结果出现死循环,一直重复打印以下内容。
-- CMAKE_INSTALL_PREFIX: /home/liu/E/python/d2l/pytorch/csgo/my_code/build_mmdep/mmdeploy/build/install
-- The C compiler identification is GNU 9.4.0
-- The CXX compiler identification is GNU 9.4.0
-- Check for working C compiler: /usr/bin/cc
-- Check for working C compiler: /usr/bin/cc -- works
-- Detecting C compiler ABI info
-- Detecting C compiler ABI info - done
-- Detecting C compile features
-- Detecting C compile features - done
-- Check for working CXX compiler: /usr/bin/g++
-- Check for working CXX compiler: /usr/bin/g++ -- works
-- Detecting CXX compiler ABI info
-- Detecting CXX compiler ABI info - done
-- Detecting CXX compile features
-- Detecting CXX compile features - done
-- Configuring done
You have changed variables that require your cache to be deleted.
Configure will be re-run and you may have to reset some variables.
The following variables have changed:
CMAKE_CXX_COMPILER= g++-7
安装 MMDeploy SDK 依赖
安装libopencv-dev时我遇到了依赖冲突,所以我这里使用了aptitude。
sudo apt-get install aptitude
sudo aptitude install libopencv-dev
git clone https://github.com/openppl-public/ppl.cv.git
cd ppl.cv
export PPLCV_DIR=$(pwd)
git checkout tags/v0.7.0 -b v0.7.0
./build.sh cuda
onnxruntime、cuda11.1、cudnn8.2.1安装
onnxruntime:请参考官方文档。
电脑上已有11.7
cuda下载链接
我这里下载的是:https://developer.download.nvidia.com/compute/cuda/11.1.0/local_installers/cuda_11.1.0_455.23.05_linux.run
cudnn下载链接
我这里下载的是:https://developer.nvidia.com/compute/machine-learning/cudnn/secure/8.2.1.32/11.3_06072021/cudnn-11.3-linux-x64-v8.2.1.32.tgz
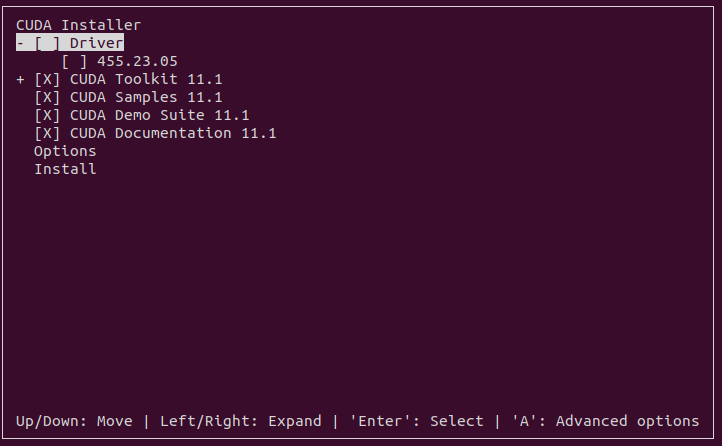
cuda安装:
# 如果你没有root权限也可以安装,不过不能安装在默认目录。
sudo sh cuda_11.1.0_455.23.05_linux.run
没有root权限,安装在指定目录:Option --> 回车 --> Library install path --> 回车,剩下的你懂的。
cudnn安装
就是把压缩包中的内容拷贝到刚刚安装的cuda里,再修改一下文件的权限。
sudo cp ./include/cudnn*.h /usr/local/cuda-11.1/include/
sudo cp ./lib64/libcudnn* /usr/local/cuda-11.1/lib64
sudo chmod a+r /usr/local/cuda-11.1/include/cudnn*.h /usr/local/cuda-11.1/lib64/libcudnn*
查看cuda和cudnn版本
cuda
$ nvcc -V

nvcc: NVIDIA (R) Cuda compiler driver
Copyright (c) 2005-2022 NVIDIA Corporation
Built on Wed_Jun__8_16:49:14_PDT_2022
Cuda compilation tools, release 11.7, V11.7.99
Build cuda_11.7.r11.7/compiler.31442593_0

# 我这里应为之前已经安装了11.7,且安装11.1时没有更改软链接所以和安装前的版本一致。
# 可以跳转到“/usr/local”目录查看已安装cuda有哪些

$ cd /usr/local/ && ls -l | grep cuda

lrwxrwxrwx  1 root root   21 11月 19 11:35 cuda -> /usr/local/cuda-11.7/
drwxr-xr-x 15 root root 4096 3月   8 21:29 cuda-11.1
drwxr-xr-x 17 root root 4096 11月 19 11:38 cuda-11.7
cudnn
# 早期
cat /usr/local/cuda/include/cudnn.h | grep CUDNN_MAJOR -A 2
# 后来
cat /usr/local/cuda/include/cudnn_version.h | grep CUDNN_MAJOR -A 2
tensorrt安装
tensorrt下载链接
我这里下载的是:https://developer.download.nvidia.cn/compute/machine-learning/tensorrt/secure/8.2.3.0/tars/TensorRT-8.2.3.0.Linux.x86_64-gnu.cuda-11.4.cudnn8.2.tar.gz
- 解压,并将TensorRT-8.2.3.0/lib 添加到 LD_LIBRARY_PATH。
- 进入 TensorRT-8.2.3.0/python 根据自己的python版本安装对应的whl包。
环境变量检查
也许你早已按照自己的方式装好cuda、tensorrt等,但是你设置的环境变量可能与官方文档不完全一样。
可参考如下命令检查你的环境变量。
env | grep ONNXRUNTIME_DIR
MMDeploy各种编译
ONNXRuntime 自定义算子
cd ${MMDEPLOY_DIR}
mkdir -p build && cd build
cmake -DCMAKE_CXX_COMPILER=g++-7 -DMMDEPLOY_TARGET_BACKENDS=ort -DONNXRUNTIME_DIR=${ONNXRUNTIME_DIR} ..
make -j$(nproc) && make install
TensorRT 自定义算子
cd ${MMDEPLOY_DIR}
mkdir -p build && cd build
cmake -DCMAKE_CXX_COMPILER=g++-7 -DMMDEPLOY_TARGET_BACKENDS=trt -DTENSORRT_DIR=${TENSORRT_DIR} -DCUDNN_DIR=${CUDNN_DIR} ..
make -j$(nproc) && make install
安装 Model Converter
cd ${MMDEPLOY_DIR}
pip install -e .
报错
Looking in indexes: https://pypi.tuna.tsinghua.edu.cn/simple
Obtaining file:///home/liu/E/python/d2l/pytorch/csgo/my_code/build_mmdep/mmdeploy
  Preparing metadata (setup.py) ... error
  error: subprocess-exited-with-error

  × python setup.py egg_info did not run successfully.
  │ exit code: 1
  ╰─> [23 lines of output]
      Traceback (most recent call last):
        File "/home/liu/miniconda3/envs/csgo/lib/python3.8/site-packages/torch/__init__.py", line 172, in _load_global_deps
          ctypes.CDLL(lib_path, mode=ctypes.RTLD_GLOBAL)
        File "/home/liu/miniconda3/envs/csgo/lib/python3.8/ctypes/__init__.py", line 369, in __init__
          self._handle = _dlopen(self._name, mode)
      OSError: /home/liu/miniconda3/envs/csgo/lib/python3.8/site-packages/torch/lib/../../nvidia/cublas/lib/libcublas.so.11: undefined symbol: cublasLtHSHMatmulAlgoInit, version libcublasLt.so.11

      During handling of the above exception, another exception occurred:

      Traceback (most recent call last):
        File "<string>", line 2, in <module>
        File "<pip-setuptools-caller>", line 34, in <module>
        File "/home/liu/E/python/d2l/pytorch/csgo/my_code/build_mmdep/mmdeploy/setup.py", line 7, in <module>
          from torch.utils.cpp_extension import BuildExtension
        File "/home/liu/miniconda3/envs/csgo/lib/python3.8/site-packages/torch/__init__.py", line 217, in <module>
          _load_global_deps()
        File "/home/liu/miniconda3/envs/csgo/lib/python3.8/site-packages/torch/__init__.py", line 178, in _load_global_deps
          _preload_cuda_deps()
        File "/home/liu/miniconda3/envs/csgo/lib/python3.8/site-packages/torch/__init__.py", line 158, in _preload_cuda_deps
          ctypes.CDLL(cublas_path)
        File "/home/liu/miniconda3/envs/csgo/lib/python3.8/ctypes/__init__.py", line 369, in __init__
          self._handle = _dlopen(self._name, mode)
      OSError: /home/liu/miniconda3/envs/csgo/lib/python3.8/site-packages/nvidia/cublas/lib/libcublas.so.11: undefined symbol: cublasLtHSHMatmulAlgoInit, version libcublasLt.so.11
      [end of output]

  note: This error originates from a subprocess, and is likely not a problem with pip.
error: metadata-generation-failed

× Encountered error while generating package metadata.
╰─> See above for output.

note: This is an issue with the package mentioned above, not pip.
hint: See above for details.
编译 SDK 和 Demos
这里除了需要提前安装cuda和tensorrt外还需要提前安装pplcv。
cuda + TensorRT
cd ${MMDEPLOY_DIR}
mkdir -p build && cd build
cmake .. \
	-DCMAKE_BUILD_TYPE=Debug \			# 设置debug。
    -DCMAKE_CXX_COMPILER=g++-7 \
    -DMMDEPLOY_BUILD_SDK=ON \
    -DMMDEPLOY_BUILD_EXAMPLES=ON \
    -DMMDEPLOY_BUILD_SDK_PYTHON_API=ON \
    -DMMDEPLOY_TARGET_DEVICES="cuda;cpu" \
    -DMMDEPLOY_TARGET_BACKENDS=trt \
    -Dpplcv_DIR=${PPLCV_DIR}/cuda-build/install/lib/cmake/ppl \
    -DTENSORRT_DIR=${TENSORRT_DIR} \
    -DCUDNN_DIR=${CUDNN_DIR}

make -j$(nproc) && make install
解决方法
参考:报错: error: subprocess-exited-with-error
pip uninstall setuptools
mmdeploy提供的脚本安装
这里以tensorrt推理后端为例
需要像源码安装那样,先安装好tensorrt、cuda、cudnn。
再执行脚本,脚本在执行时需要键盘操作,选择一些东西。
cd ${mmdeploy}
bash ./tools/scripts/build_linux_nvidia.sh all
使用过程遇到的其他问题
ModuleNotFoundError: No module named ‘_distutils_hack’
Error processing line 1 of /home/liu/miniconda3/envs/csgo/lib/python3.8/site-packages/distutils-precedence.pth:

  Traceback (most recent call last):
    File "/home/liu/miniconda3/envs/csgo/lib/python3.8/site.py", line 169, in addpackage
      exec(line)
    File "<string>", line 1, in <module>
  ModuleNotFoundError: No module named '_distutils_hack'

Remainder of file ignored
修改报错信息中提到的:“distutils-precedence.pth”文件
# 修改前
import os; var = 'SETUPTOOLS_USE_DISTUTILS'; enabled = os.environ.get(var, 'local') == 'local'; enabled and __import__('_distutils_hack').add_shim();
# 修改后。(就是换行一下)
import os;
var = 'SETUPTOOLS_USE_DISTUTILS'; enabled = os.environ.get(var, 'local') == 'local'; enabled and __import__('_distutils_hack').add_shim();
nvidia/cublas/lib/libcublas.so.11: undefined symbol: cublasLtHSHMatmulAlgoInit, version libcublasLt.so.11
添加环境变量
export LD_LIBRARY_PATH=/home/liu/miniconda3/envs/csgo/lib/python3.8/site-packages/nvidia/cublas/lib:$LD_LIBRARY_PATH


 515
515

 被折叠的 条评论
为什么被折叠?
被折叠的 条评论
为什么被折叠?
 到【灌水乐园】发言


