


一、配置zabbix源
ll /etc/yum.repos.d/
http://repo.zabbix.com/zabbix/4.0/rhel/7/x86_64/ 官方zabbix路径
01 wget http://repo.zabbix.com/zabbix/4.0/rhel/7/x86_64/zabbix-release-4.0-1.el7.noarch.rpm
上面的地址是官网拔下来的,版本根据需求自选
然后安装包
02 rpm -ivh zabbix-release-4.0-1.el7.noarch.rpm
此时,ll /etc/yum.repos.d/就有了
-rw-r--r-- 1 root root 410 10月 2 2018 zabbix.repo
修改源文件中的地址,将官方地址改为清华园地址
[root@zabb ~]# cat /etc/yum.repos.d/zabbix.repo
[zabbix]
name=Zabbix Official Repository - $basearch
baseurl=https://mirror.tuna.tsinghua.edu.cn/zabbix/zabbix/4.0/rhel/7/$basearch/
enabled=1
gpgcheck=1
gpgkey=file:///etc/pki/rpm-gpg/RPM-GPG-KEY-ZABBIX-A14FE591

[zabbix-non-supported]
name=Zabbix Official Repository non-supported - $basearch
baseurl=https://mirror.tuna.tsinghua.edu.cn/zabbix/non-supported/rhel/7/$basearch/
enabled=1
gpgkey=file:///etc/pki/rpm-gpg/RPM-GPG-KEY-ZABBIX
gpgcheck=1
二、下载zabbix所需包(server端和web端)
[root@zabb ~]#yum install zabbix-server-mysql
[root@zabb ~]#yum install zabbix-web-mysql
[root@zabb ~]#yum install zabbix-server-mysql zabbix-web-mysql
[root@zabb ~]# rpm -qa |grep zabbix
zabbix-web-4.0.16-1.el7.noarch
zabbix-server-mysql-4.0.16-1.el7.x86_64
zabbix-web-mysql-4.0.16-1.el7.noarch
zabbix-release-4.0-1.el7.noarch
三、创建数据库
[root@zabb ~]# yum install mariadb-server
[root@zabb ~]# systemctl start mariadb.service
[root@zabb ~]# systemctl enable mariadb.service
数据库安全初始化 (回车—y–y--y–y--y)
[root@zabb ~]# mysql_secure_installation

NOTE: RUNNING ALL PARTS OF THIS SCRIPT IS RECOMMENDED FOR ALL MariaDB
      SERVERS IN PRODUCTION USE!  PLEASE READ EACH STEP CAREFULLY!

In order to log into MariaDB to secure it, we'll need the current
password for the root user.  If you've just installed MariaDB, and
you haven't set the root password yet, the password will be blank,
so you should just press enter here.

Enter current password for root (enter for none): ----**当前密码空**回车
OK, successfully used password, moving on...

Setting the root password ensures that nobody can log into the MariaDB
root user without the proper authorisation.

Set root password? [Y/n] n                        --------**不设置root密码**
 ... skipping.

By default, a MariaDB installation has an anonymous user, allowing anyone
to log into MariaDB without having to have a user account created for
them.  This is intended only for testing, and to make the installation
go a bit smoother.  You should remove them before moving into a
production environment.

Remove anonymous users? [Y/n] y    --------**用户移除**
 ... Success!

Normally, root should only be allowed to connect from 'localhost'.  This
ensures that someone cannot guess at the root password from the network.

Disallow root login remotely? [Y/n] y    --------**远程登录禁止**
 ... Success!

By default, MariaDB comes with a database named 'test' that anyone can
access.  This is also intended only for testing, and should be removed
before moving into a production environment.

Remove test database and access to it? [Y/n] y     -------**test库删掉**
 - Dropping test database...
 ... Success!
 - Removing privileges on test database...
 ... Success!

Reloading the privilege tables will ensure that all changes made so far
will take effect immediately.

Reload privilege tables now? [Y/n] y    -----**重改权限表yes**
 ... Success!

Cleaning up...

All done!  If you've completed all of the above steps, your MariaDB
installation should now be secure.

Thanks for using MariaDB!
进入数据库,创库 设置权限
[root@zabb ~]# mysql

MariaDB [(none)]> create database zabbix character set utf8 collate utf8_bin;
Query OK, 1 row affected (0.00 sec)
MariaDB [(none)]> grant all privileges on zabbix.* to zabbix@localhost identified by '123456';
Query OK, 0 rows affected (0.00 sec)
MariaDB [(none)]> show databases;
+--------------------+
| Database           |
+--------------------+
| information_schema |
| mysql              |
| performance_schema |
| zabbix             |
+--------------------+
4 rows in set (0.00 sec)
四、导入数据并查看
zcat /usr/share/doc/zabbix-server-mysql*/create.sql.gz | mysql -uzabbix -p zabbix
Enter password:
[root@zabb ~]# mysql -uroot zabbix -e 'show tables;'
+----------------------------+
| Tables_in_zabbix           |
+----------------------------+
| acknowledges               |
| actions                    |
| alerts                     |
| application_discovery      |
| application_prototype      |
五、更改zabbix配置文件
vim /etc/zabbix/zabbix_server.conf
DBHost=localhost
DBPassword=123456
DBUser=zabbix
DBName=zabbix
六、启动服务
[root@zabb ~]# systemctl start zabbix-server
[root@zabb ~]# systemctl enable zabbix-server
[root@zabb ~]# netstat -lntp
tcp 0 0 0.0.0.0:3306 0.0.0.0:* LISTEN 8098/mysqld
tcp6 0 0 :::10051 ::😗 LISTEN 9500/zabbix_se
起不来或者数据库没数据启动不了服务
前端配置
更改时区
[root@zabb ~]# vim /etc/httpd/conf.d/zabbix.conf
php_value date.timezone Asia/Shanghai
启动服务
[root@zabb ~]# systemctl restart httpd
[root@zabb ~]# systemctl enable httpd
访问

一路下一步,密码123456,创建了监控名称“监控中心”,最终数据存放在Configuration file “/etc/zabbix/web/zabbix.conf.php” created.
存储数据的账号密码等等,后期要把数据迁移到别的地方的时候要修改这个文件
七、登录
账号默认Admin,,密码默认zabbix
https://www.zabbix.com/cn/download?zabbix=4.0&os_distribution=centos&os_version=7&db=mysql&ws=apache
zabbix-agent和zabbix-server在同一台主机上
rpm -ivh https://mirror.tuna.tsinghua.edu.cn/zabbix/zabbix/4.0/rhel/7/x86_64/zabbix-agent-4.0.11-1.el7.x86_64.rpm
[root@zabb ~]# systemctl start zabbix-agent
[root@zabb ~]# systemctl enable zabbix-agent
配置主机

如果agent和server不是同一台机器
在另一台机器上装agent,提高复用率
- 一、rpm安装
- 二、修改配置文件vim /etc/zabbix/zabbix_agentd.conf
将本机改为zabbix服务器
- 三、启动+开机自启
变绿就好
手动添加主机(和zabbix-server不在同一台主机的主机)
wget https://mirror.tuna.tsinghua.edu.cn/zabbix/zabbix/4.0/rhel/7/x86_64/zabbix-agent-4.0.11-1.el7.x86_64.rpm
[root@lb01 ~]# rpm -ivh zabbix-agent-4.0.11-1.el7.x86_64.rpm
修改配置文件,因为本机自己监控的、ip127.0.0.1就是自己,现在zabbix不在本机,在10.0.0.71
[root@lb01 ~]# vim /etc/zabbix/zabbix_agentd.conf
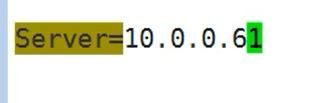
Server=10.0.0.71
[root@lb01 ~]# systemctl restart zabbix-agent.service
[root@lb01 ~]# systemctl enable zabbix-agent.service

下一步会跳转设置模板,连接指示器输入linux会跳出,先小添加,然后大添加
最后在zabbix服务器重新启动zabbix-server,再刷新即可看到zabbix变绿

自定义添加监控项–tps
[root@zabb ~]# iostat
Linux 3.10.0-957.el7.x86_64 (zabb) 	2020年02月01日 	_x86_64_	(1 CPU)

avg-cpu:  %user   %nice %system %iowait  %steal   %idle
           1.68    0.00    1.07    0.50    0.00   96.75

Device:            tps    kB_read/s    kB_wrtn/s    kB_read    kB_wrtn
sda               4.03        21.85        81.02     325573    1207385
scd0              0.00         0.07         0.00       1028          0
取tps每秒传输次数
命令行取值iostat|awk ‘$1 ~/sda/{print $2}’
修改配置文件
vim /etc//zabbix/zabbix_agentd.conf
UserParameter=sda_tps,iostat|awk ‘$1 ~/sda/{print $2}’
server端检测是否ok
rpm -ivh https://mirror.tuna.tsinghua.edu.cn/zabbix/zabbix/4.0/rhel/7/x86_64/zabbix-get-4.0.11-1.el7.x86_64
[root@zabb ~]# rpm -ivh zabbix-get-4.0.11-1.el7.x86_64.rpm
准备中… ################################# [100%]
正在升级/安装…
1:zabbix-get-4.0.11-1.el7 ################################# [100%]
[root@zabb ~]# zabbix_get -s 127.0.0.1 -k sda_tps
4.03
网页本机创建监控项,输入主机群组主机,名称(中文即可),键值(k值sda_tps),信息类型(选择浮点数)------添加
找监控项 首页—检测—最新数据—输入主机—名称过滤—应用就有相应值

自定义添加监控项–httpd并发
命令行取值
netstat -antp|grep ':80'|grep -c 'ESTABLISHED'
修改配置文件
vim /etc/zabbix/zabbix_agentd.conf
UserParameter=estab_count,netstat -antp|grep ':80'|grep -c 'ESTABLISHED'
重启测试
systemctl restart zabbix-agent.service
  197  which netstat
  198  ll /usr/bin/netstat
  199  chmod u+s /usr/bin/netstat
 201  zabbix_get -s 127.0.0.1 -k estab_count
  202  systemctl restart zabbix-server.service
网页添加监控项


10.0.0.5主机想要和10.0.0.71一样的监控项
找到配置文件,有一个include包含项,即在/etc/zabbix/zabbix_agentd.d/目录下创建.conf的文件即可
grep -Ev '^$|#' /etc/zabbix/zabbix_agentd.conf

PidFile=/var/run/zabbix/zabbix_agentd.pid
LogFile=/var/log/zabbix/zabbix_agentd.log
LogFileSize=0
Server=10.0.0.71
ServerActive=127.0.0.1
Hostname=Zabbix server
Include=/etc/zabbix/zabbix_agentd.d/*.conf
将zabbix-server端(10.0.0.71)的配置文件主体拷贝至agent端的/etc/zabbix/zabbix_agentd.d/user.conf里面
cd /etc/zabbix/zabbix_agentd.d/
vim user.conf
UserParameter=sda_tps,iostat|awk '$1 ~/sda/{print $2}'
UserParameter=estab_count,netstat -antp|grep ':80'|grep -c 'ESTABLISHED'
agent端重启zabbix-agent
server端重启zabbix-server
然后在zabbix网页把10.0.0.71的监控项复制到10.0.0.5主机


注意事项:该有的命令得有,权限问题
自定义触发器(配置指标,达到什么样的值干什么)
用户登录数
[root@zabb ~]# zabbix_get -s 127.0.0.1 -k system.users.num
2

查看添加好的触发器,在下面


[root@zabb ~]# zabbix_get -s 127.0.0.1 -k system.users.num
5

配置触发后接受信息—邮件报警
- 定义发件人
- 管理—报警媒介

定义收件人

启用动作
配置触发后接受信息—微信报警
注册企业微信(加入企业微信-------微工作台关注)
测试发消息----报警脚本(改三行)
- 修改企业id     corpid
- 修改报警机器人应用密码   appsecret
- 应用id   agentid
python 安装pip
yum install python2-pip
which pip
pip install requests     安装requests模块
python -V 退出
可以下载加速源
python weixin.py   执行py脚本
执行脚本+发送微信
python weixin.py 微信号 '收微信了'
接下来关注微信消息就是了
微信报警
- A
[root@zabb ~]# grep -Ev '^$|#' /etc/zabbix/zabbix_server.conf
LogFile=/var/log/zabbix/zabbix_server.log
LogFileSize=0
PidFile=/var/run/zabbix/zabbix_server.pid
SocketDir=/var/run/zabbix
DBHost=localhost
DBName=zabbix
DBUser=zabbix
DBPassword=123456
SNMPTrapperFile=/var/log/snmptrap/snmptrap.log
Timeout=4
AlertScriptsPath=/usr/lib/zabbix/alertscripts   **报警脚本路径**
ExternalScripts=/usr/lib/zabbix/externalscripts
LogSlowQueries=3000
将weixin.py脚本移至/usr/lib/zabbix/alertscripts
cd /usr/lib/zabbix/alertscripts
mv /root/weixin.py .
加上执行权限chmod +x weixin.py
- B
配置发件人
管理—报警媒介–类型—脚本名称—传入脚本中的三条信息

- C
配置收件人(个人资料)


 1万+
1万+


 被折叠的 条评论
为什么被折叠?
被折叠的 条评论
为什么被折叠?
 到【灌水乐园】发言


