


之前做一个AI项目,处理训练集时写了一些python处理图像的脚本。项目告一段落,整理一下。
使用到的数据集是Kaggle官方猫狗分类数据集,这里不联系模型训练,所以只是介绍一下文件的树形结构。
(也有自己标注的文件,另外不要问我这样处理有什么意义,没有意义)
+dataset
	-images
	-labels
给图像画框
labels文件【可以不看
使用到的数据集已经给出了框的尺寸信息。
如下所示:
#类别 标注框中心X比例 标注框中心y比例 标注框比例 标注框比例
16 0.519 0.490691 0.742 0.768617
第一个数字与尺寸无关,忽略。
后面四个数字和图像的长宽可以求出x、y坐标的起始点和终止点。

(怎么算也不用多说了。小学数学题。
接口介绍
使用到CV2库中的函数
size=cv2.imread(fname).shape
获取图像大小,返回数组,h = size[0] w = size[1]。
cv2.rectangle(image, start_point, end_point, color, thickness)
这个函数的作用是在图像上绘制一个简单的矩形。
参数:
image: 它是要在其上绘制矩形的图像。
start_point:它是矩形的起始坐标。坐标表示为两个值的元组,即(X坐标值,Y坐标值)。
end_point:它是矩形的结束坐标。坐标表示为两个值的元组,即(X坐标值ÿ坐标值)。
color:它是要绘制的矩形的边界线的颜色。对于BGR,我们通过一个元组。例如:(255,0,0)为蓝色。
thickness:它是矩形边框线的粗细像素。厚度-1像素将以指定的颜色填充矩形形状。
返回值: 它返回一个图像。
需要按照cv2模块 >pip install cv2
简单程序
import cv2
# 读入图片
img = cv2.imread("./image/000001.jpg")
# 按照给出的坐标和参数画框
# (不会改变源图的大小)
cv2.rectangle(img, (300, 200), (720, 400), (0,255,0), 2)
# 写到另外的图片文件中即可
cv2.imwrite('./000_new.jpg', img)
cmd 运行
python addPlot.py
(大致效果)
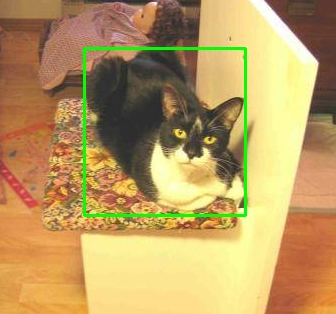
addPlot.py
此脚本只根据labels处理一张图片,实际上循环处理了一千张
import cv2

fname = './00000.jpg'
newname = ''
img = cv2.imread(fname)
# 读取图片获得大小
size=cv2.imread(fname).shape
print(size)
h = size[0]
w = size[1]
# Class id center_x center_y w h
# 读取.txt
with open('./00000.txt',"r") as f:
    lst=f.readlines()

    for ls in lst:
        numbers_str = ls.split()
        numbers_float = [float(x) for x in numbers_str]
        #类别 标注框中心X比例 标注框中心y比例 标注框比例 标注框比例
        a = numbers_float[0]
        b = numbers_float[1]
        c = numbers_float[2]
        d = numbers_float[3]
        e = numbers_float[4]
        wi = b * w  # 求
        hi = c * h
        wh = d * w
        hh = e * h
        print((wi, hi, wh, hh))
        x1 = int(wi - wh / 2)
        y1 = int(hi - hh / 2)
        x2 = int(wi + wh / 2)
        y2 = int(hi + hh / 2)
        print((x1, y1, x2, y2))
        cv2.rectangle(img, (x1,y1), (x2,y2), (0,255,0), 2)

cv2.imwrite('./000_new.jpg', img)
剪切图像
已经能够画框了,剪切出个图片不是轻而易举。
接口介绍
PIL是Python Imaging Library,它为python解释器提供了图像编辑功能。PIL.Image.crop()方法用于裁剪任何图像的矩形部分。
PIL.Image.crop(box = None)
参数:
box: 定义左,上,右和下像素坐标的4元组。即 x1, y1, x2, y2
返回类型: 图像(将矩形区域返回为(左,上,右,下)元组)。
返回: Image对象。
需要按照pillow模块 >pip install pillow
简单程序
图像裁剪 这篇写的很清晰
from PIL import Image
im = Image.open("./0000.jpg")
# 图片的宽度和高度
img_size = im.size
print("图片宽度和高度分别是{}".format(img_size))

# 设置剪切图片的大小
x1 = 100
y1 = 100
y1 = 250
y2 = 250

# 使用边界框坐标裁剪图像
# (不会改变源图片大小)
im1 = im.crop((x1, y1, x2, y2))

# 展示图片
# im1.show()
# 保存图片
region.save("./000.jpg")
(大致效果)
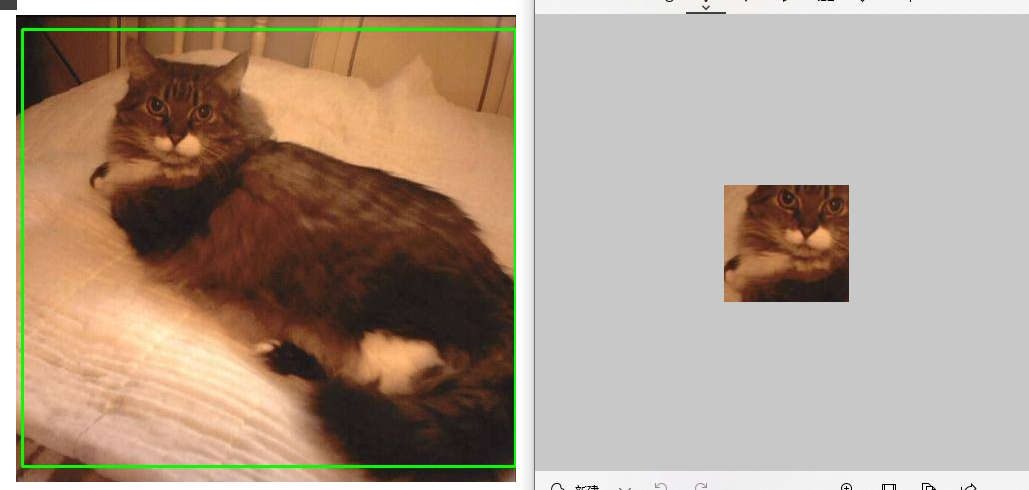
处理数据集所有图像
代码很乱,可以不看
crop.py
from PIL import Image

from PIL.Image import new
import cv2 as cv
import os

#创建文件
#file_path:文件路径
#msg:即要写入的内容
def create__file(file_path,msg):
    f=open(file_path,"a")
    f.writelines(msg)
    f.close

imgpath="./JPEGImages/"
labels="./labels/"
newimg = "./image/"

txt=list(os.walk(labels))[0][2]

# print(txt)

newtxt = [i for i in txt]
img=[i for i in txt]


for i,j in enumerate(img):
    newtxt[i]=j[:-4]+".txt"
    img[i]=j[:-4]+".jpg"
    # print(txt[i])


for i,j in enumerate(txt):
    # i 是数字  j 是.txt
    print(i)
    print(j)

    # 打开图片
    filename=img[i]
    img1 = cv.imread(imgpath+filename)
    im = Image.open(imgpath+filename)
    size= img1.shape

    print(size)
    h = size[0]
    w = size[1]

    with open(labels + j ,"r") as f:
        lst=f.readlines()

        for ls in lst:
            numbers_str = ls.split()
            numbers_float = [float(x) for x in numbers_str]
            #类别 标注框中心X坐标 标注框中心y坐标 标注框宽度 标注框高度
            a = numbers_float[0]
            b = numbers_float[1]
            c = numbers_float[2]
            d = numbers_float[3]
            e = numbers_float[4]
            wi = b * w
            hi = c * h
            wh = d * w
            hh = e * h
            print((wi, hi, wh, hh))
            x1 = int(wi - wh / 2)
            y1 = int(hi - hh / 2)
            x2 = int(wi + wh / 2)
            y2 = int(hi + hh / 2)
            print((x1, y1, x2, y2))
            region = im.crop((x1, y1, int(x1+wh), int(y1+hh)))

            region.save(newimg + img[i])
        # 画图出来
        # cv.imwrite(, img1)
处理文件
文件处理,暴躁的只贴代码
json文件转txt
将json 转化为txt文件
核心就是使用了
ata = json.load(open(json_path, 'r', encoding='utf-8'))
载入json后会自动解析
json2txt.py
import json
import os

def convert(img_size, box):
    dw = 1. / (img_size[0])
    dh = 1. / (img_size[1])
    print(dw)
    x = (box[0] + box[2]) / 2.0 - 1
    y = (box[1] + box[3]) / 2.0 - 1
    w = box[2] - box[0]
    h = box[3] - box[1]
    x = x * dw
    w = w * dw
    y = y * dh
    h = h * dh
    return (('%.7g' % x), ('%.7g' % y), ('%.7g' % w), ('%.7g' % h))


def decode_json(json_floder_path, json_name):
    txt_name = './txt/' + json_name[0:-5] + '.txt'
    txt_file = open(txt_name, 'w')

    json_path = os.path.join(json_floder_path, json_name)
    data = json.load(open(json_path, 'r', encoding='utf-8'))

    img_w = data['imageWidth']
    img_h = data['imageHeight']

    for i in data['shapes']:

        if (i['shape_type'] == 'rectangle'):
            x1 = int(i['points'][0][0])
            y1 = int(i['points'][0][1])
            x2 = int(i['points'][1][0])
            y2 = int(i['points'][1][1])
            print(y1)
            bb = (x1, y1, x2, y2)
            bbox = convert((img_w, img_h), bb)
            txt_file.write( i['label'] + " " + " ".join([str(a) for a in bbox]) + '\n')


if __name__ == "__main__":

    json_floder_path = './cats_label/'
    json_names = os.listdir(json_floder_path)
    for json_name in json_names:
        decode_json(json_floder_path, json_name)
生成list文件
将有规律的文件名生成list.txt
2list.py
import os

# 根路径
root_path = '/home/ma-user/work/darknet/dataset/JPEGImages/'

# 在当前目录下打开train.txt(若没有则自动创建一个)
with open('train.txt','a',encoding='utf-8') as f:
# range更改对应数字次数,左闭右开(start,end,step)
    for i in range(0,1001,1):
        f.write(os.path.join(root_path,'cat.' + str(i)) +'.jpg'+'\n')

    f.close()
写的有点混乱了,不好意思 有时间再修修
参考:
https://vimsky.com/examples/usage/python-opencv-cv2-rectangle-method.html
https://vimsky.com/examples/usage/python-pil-image-crop-method.html


 785
785


 被折叠的 条评论
为什么被折叠?
被折叠的 条评论
为什么被折叠?
 到【灌水乐园】发言


