


1. 使用printf的方法
1.1 重定向
在使用printf之前添加重定向代码:
#ifdef __GNUC__
  /* With GCC/RAISONANCE, small printf (option LD Linker-Libraries-Small printf
     set to Yes) calls __io_putchar() */
  #define PUTCHAR_PROTOTYPE int __io_putchar(int ch)
#else
  #define PUTCHAR_PROTOTYPE int fputc(int ch, FILE *f)
#endif /* __GNUC__ */
/**
  * @brief  Retargets the C library printf function to the USART.
  * @param  None
  * @retval None
  */
PUTCHAR_PROTOTYPE
{
  /* Place your implementation of fputc here */
  /* e.g. write a character to the EVAL_COM1 and Loop until the end of transmission */
  HAL_UART_Transmit(&huart1, (uint8_t *)&ch, 1, 0xFFFF);

  return ch;
}
Clion可以使用上面这个方法。如果是keil的话,要去配置Use microLIB。
不使用 mircroLIB 的话,直接对 fputs 重定向:
添加头文件 `#include “stdio.h”
然后添加以下代码:
struct __FILE
{
        int handle;
};
FILE __stdout;
int fputc(int ch, FILE *f)
{
 HAL_UART_Transmit(&huart1, (uint8_t *)&ch, 1, 0xFFFF);//更具实际情况更改驱动
         return (ch);
}
1.2 重写_write
#if defined(__GNUC__)
int _write(int fd, char * ptr, int len)
{
  HAL_UART_Transmit(&huart1, (uint8_t *) ptr, len, HAL_MAX_DELAY);
  return len;
}
#endif
VScode中可以使用上面这个方法。
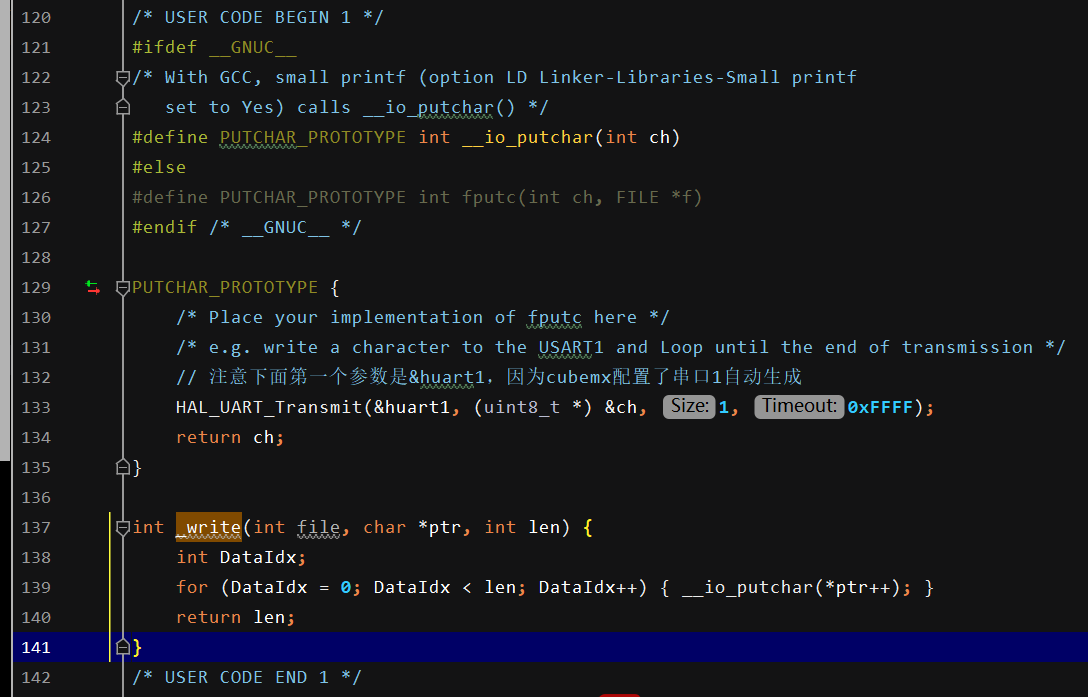
将上面两种方法都写到一起,就可以兼容。如果使用的是keil,则直接复制任意一段代码添加到文件首部即可。
#ifdef __GNUC__
/* With GCC, small printf (option LD Linker-Libraries-Small printf
   set to Yes) calls __io_putchar() */
#define PUTCHAR_PROTOTYPE int __io_putchar(int ch)
#else
#define PUTCHAR_PROTOTYPE int fputc(int ch, FILE *f)
#endif /* __GNUC__ */

PUTCHAR_PROTOTYPE {
    /* Place your implementation of fputc here */
    /* e.g. write a character to the USART1 and Loop until the end of transmission */
    // 注意下面第一个参数是&huart1,因为cubemx配置了串口1自动生成
    HAL_UART_Transmit(&huart1, (uint8_t *) &ch, 1, 0xFFFF);
    return ch;
}

int _write(int file, char *ptr, int len) {
    int DataIdx;
    for (DataIdx = 0; DataIdx < len; DataIdx++) { __io_putchar(*ptr++); }
    return len;
}
我是直接在usart.c的文件头直接加上上面的预编译。用的是Clion开发stm32。
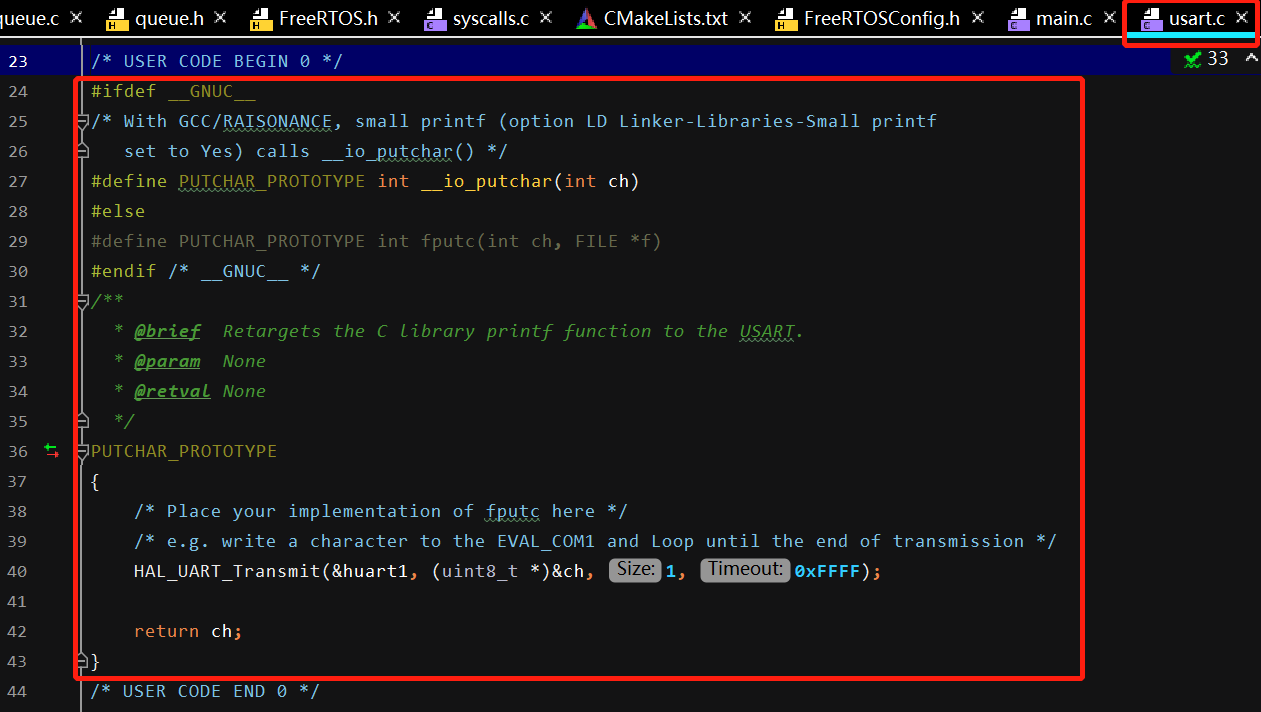
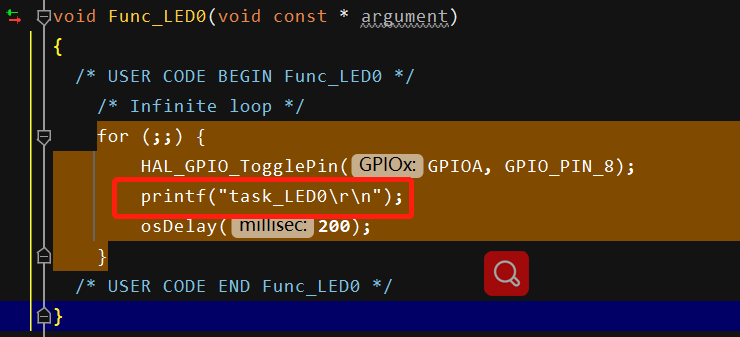
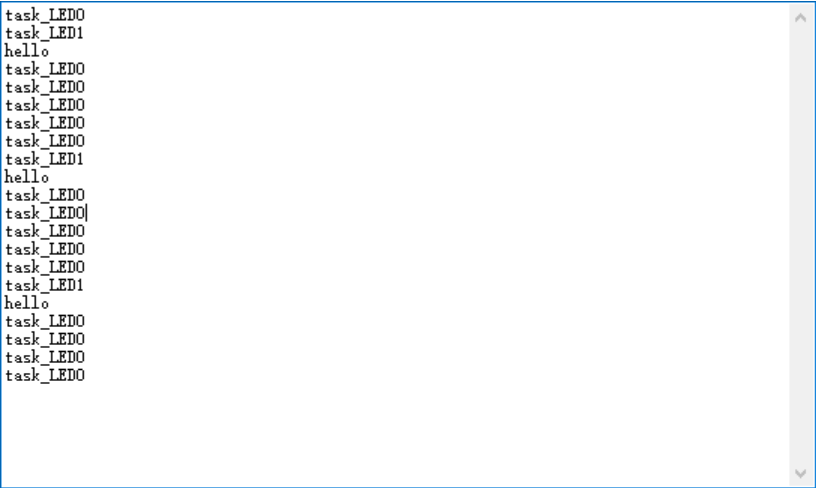
我用RTOS验证,在2个任务里面打印字符串。使用效果如下:
1.3 Shawn Hymel的方法(稚辉君在Clion上使用)
新建一个retarget.h文件内容如下:
#ifndef _RETARGET_H__
#define _RETARGET_H__

#include "stm32f1xx_hal.h"
#include <sys/stat.h>
#include <stdio.h>

void RetargetInit(UART_HandleTypeDef *huart);

int _isatty(int fd);

int _write(int fd, char *ptr, int len);

int _close(int fd);

int _lseek(int fd, int ptr, int dir);

int _read(int fd, char *ptr, int len);

int _fstat(int fd, struct stat *st);

#endif //#ifndef _RETARGET_H__
再新建一个retarget.c文件内容如下:
#include <_ansi.h>
#include <_syslist.h>
#include <errno.h>
#include <sys/time.h>
#include <sys/times.h>
#include <retarget.h>
#include <stdint.h>

#if !defined(OS_USE_SEMIHOSTING)

#define STDIN_FILENO  0
#define STDOUT_FILENO 1
#define STDERR_FILENO 2

UART_HandleTypeDef *gHuart;

void RetargetInit(UART_HandleTypeDef *huart)
{
    gHuart = huart;

    /* Disable I/O buffering for STDOUT stream, so that
     * chars are sent out as soon as they are printed. */
    setvbuf(stdout, NULL, _IONBF, 0);
}

int _isatty(int fd)
{
    if (fd >= STDIN_FILENO && fd <= STDERR_FILENO)
        return 1;

    errno = EBADF;
    return 0;
}

int _write(int fd, char *ptr, int len)
{
    HAL_StatusTypeDef hstatus;

    if (fd == STDOUT_FILENO || fd == STDERR_FILENO)
    {
        hstatus = HAL_UART_Transmit(gHuart, (uint8_t *) ptr, len, HAL_MAX_DELAY);
        if (hstatus == HAL_OK)
            return len;
        else
            return EIO;
    }
    errno = EBADF;
    return -1;
}

int _close(int fd)
{
    if (fd >= STDIN_FILENO && fd <= STDERR_FILENO)
        return 0;

    errno = EBADF;
    return -1;
}

int _lseek(int fd, int ptr, int dir)
{
    (void) fd;
    (void) ptr;
    (void) dir;

    errno = EBADF;
    return -1;
}

int _read(int fd, char *ptr, int len)
{
    HAL_StatusTypeDef hstatus;

    if (fd == STDIN_FILENO)
    {
        hstatus = HAL_UART_Receive(gHuart, (uint8_t *) ptr, 1, HAL_MAX_DELAY);
        if (hstatus == HAL_OK)
            return 1;
        else
            return EIO;
    }
    errno = EBADF;
    return -1;
}

int _fstat(int fd, struct stat *st)
{
    if (fd >= STDIN_FILENO && fd <= STDERR_FILENO)
    {
        st->st_mode = S_IFCHR;
        return 0;
    }

    errno = EBADF;
    return 0;
}

#endif //#if !defined(OS_USE_SEMIHOSTING)
添加这两个文件到工程,更新CMake,编译之后会发现,有几个系统函数重复定义了,被重复定义的函数位于Src目录的syscalls.c文件中,我们把里面重复的几个函数删掉即可。
在main函数的初始化代码中添加对头文件的引用并注册重定向的串口号:
#include "retarget.h"

RetargetInit(&huart1);
然后就可以愉快地使用printf和scanf啦:
char buf[100];

printf("\r\nYour name: ");
scanf("%s", buf);
printf("\r\nHello, %s!\r\n", buf);
1.4 稚辉君的方法
直接修改CMakeList.txt,加入下述编译选项
set(COMMON_FLAGS "-specs=nosys.specs -specs=nano.specs -u _printf_float -u _scanf_float")
我没尝试过
2. Clion的动态模板
动态模板的作用:实现自动补全。
添加动态模板:
打开clion的设置setting,找到编辑器选项editor, 选择实时模板live template
选择C/C++栏目,点击右边的"+",选择1.动态模板
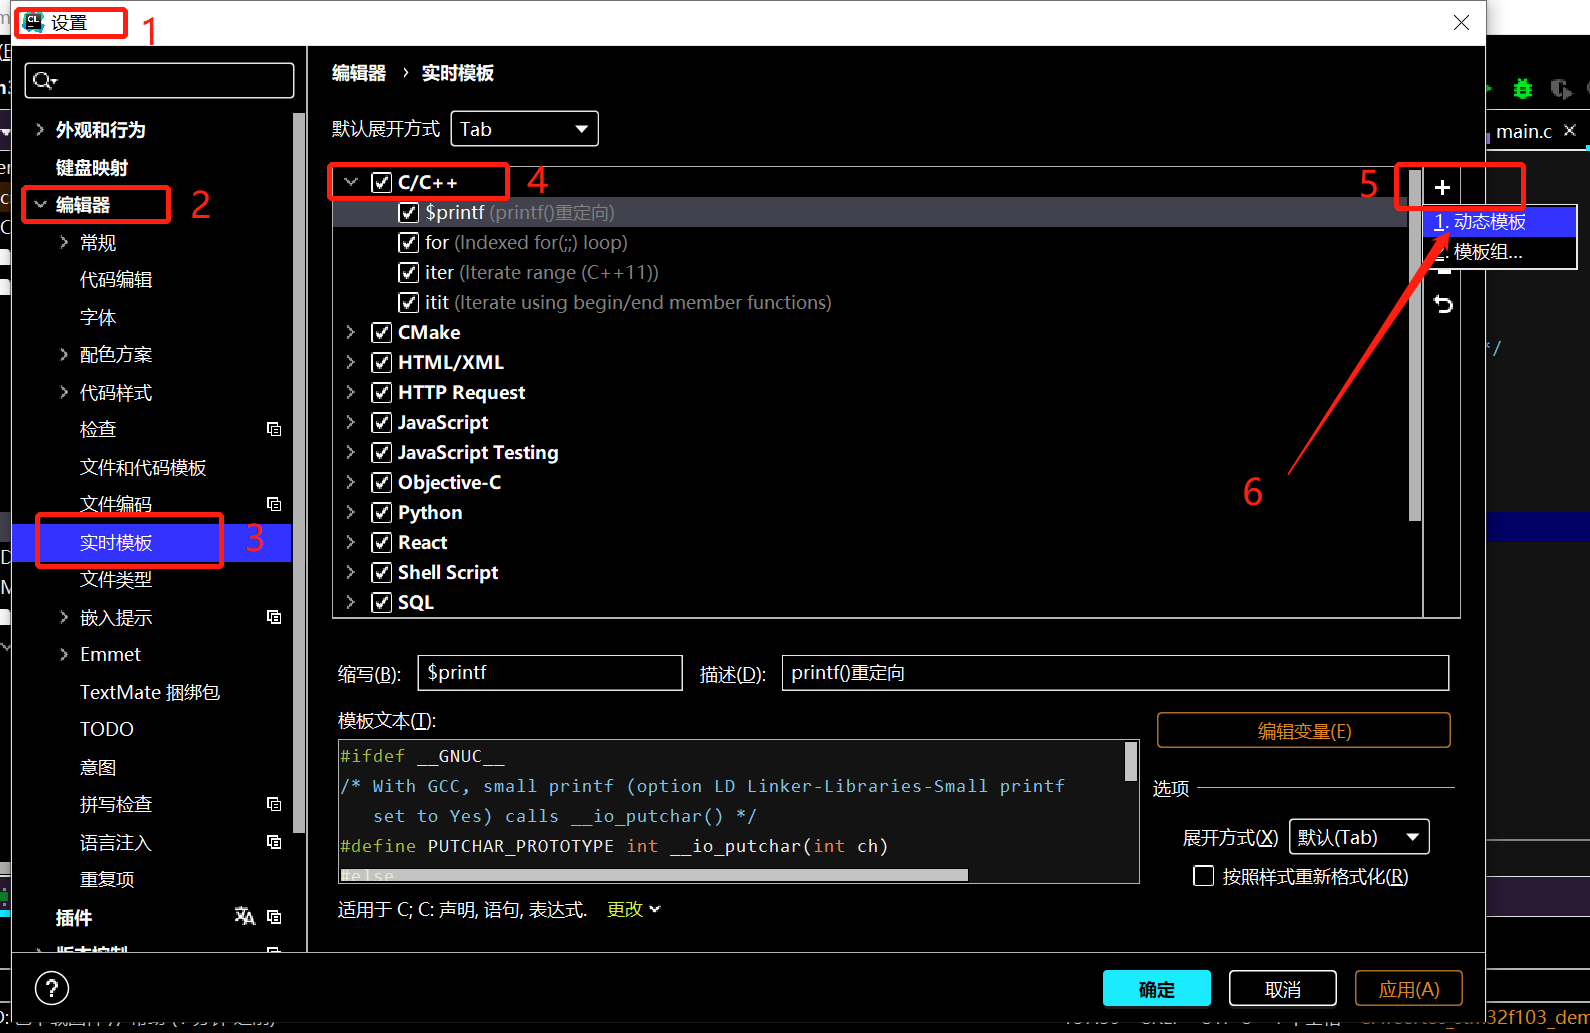
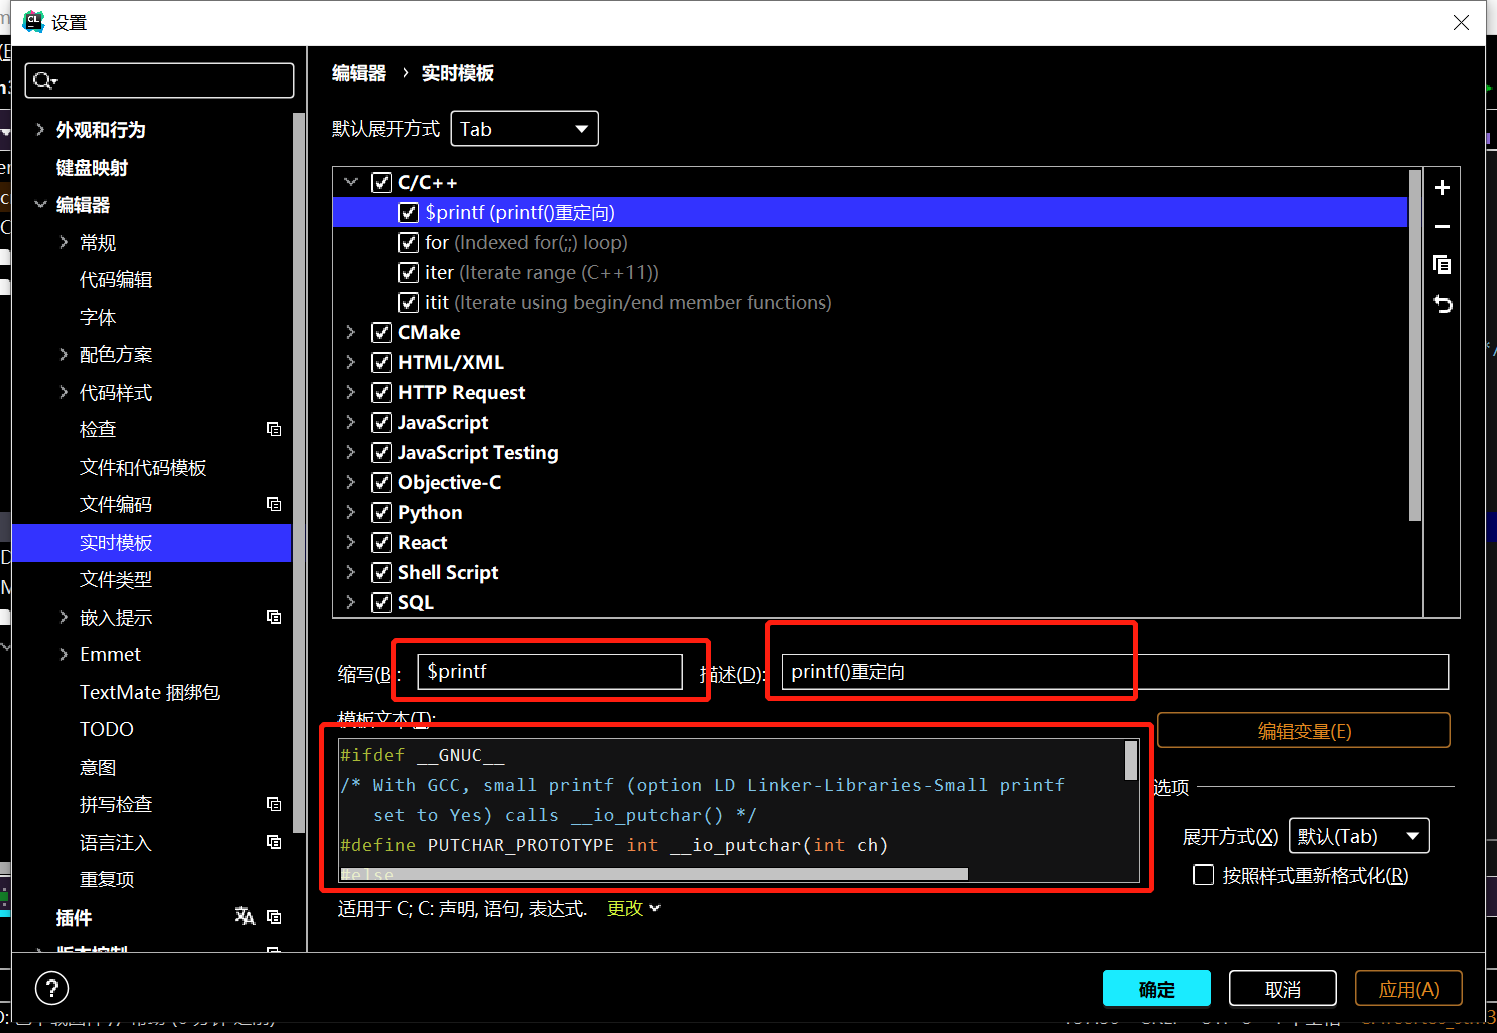
然后输入缩写,添加描述,再将补全的文本输进去
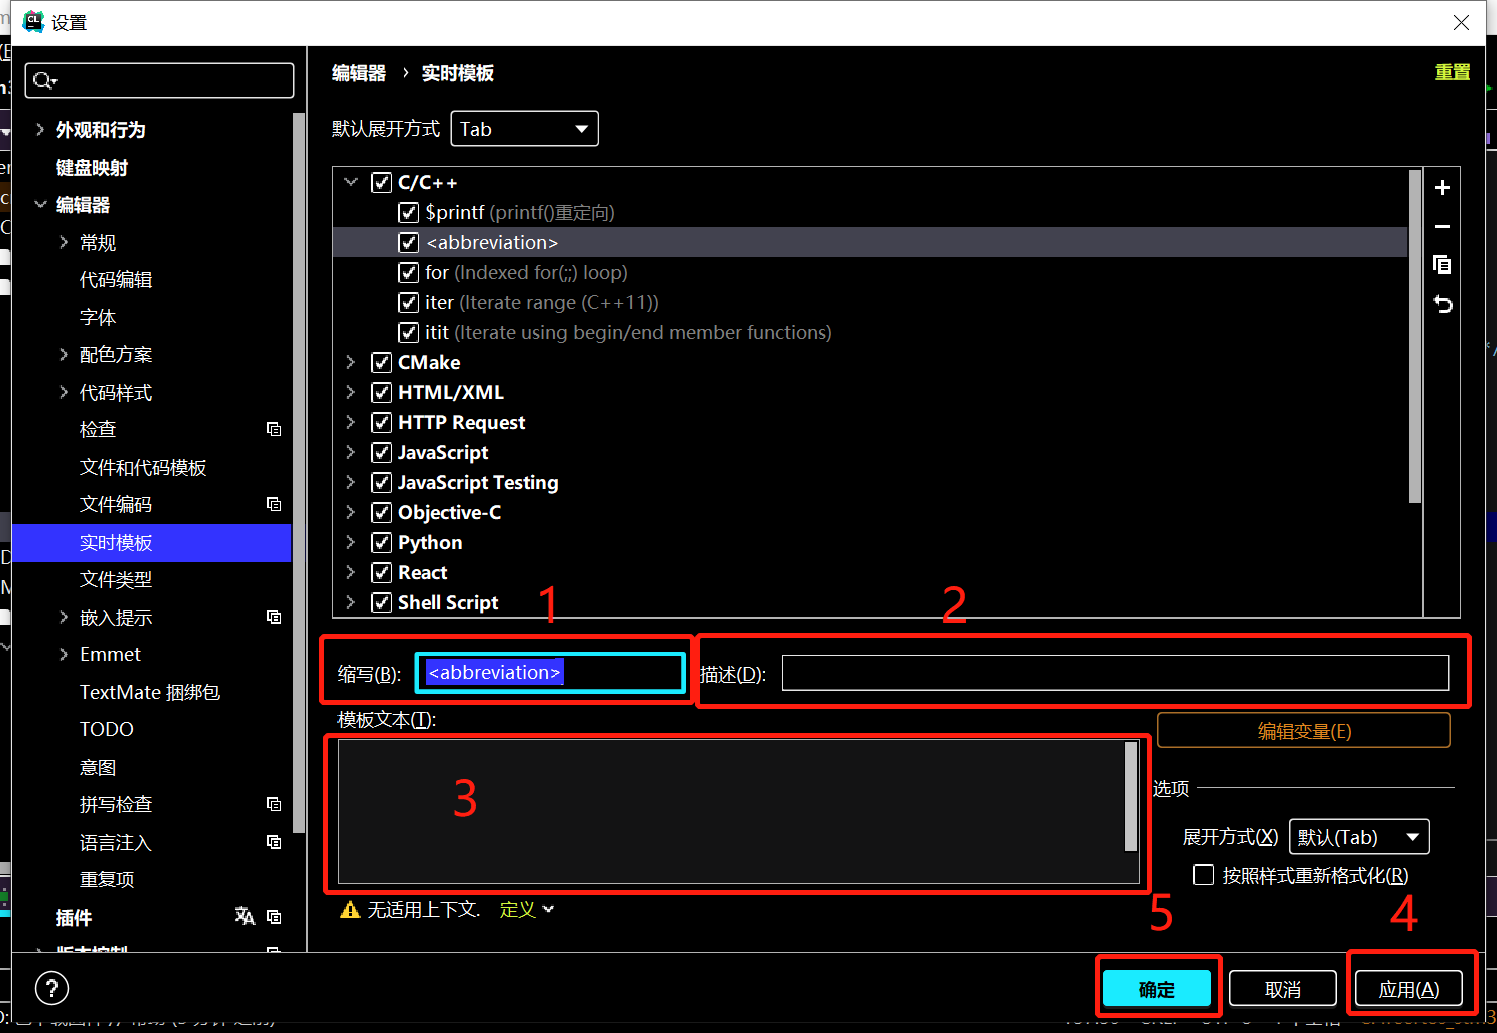
点击应用后确认。
这里以重定向代码为例:
在编辑器输入$printf会弹出动态模板,直接点击Tab补全模板。
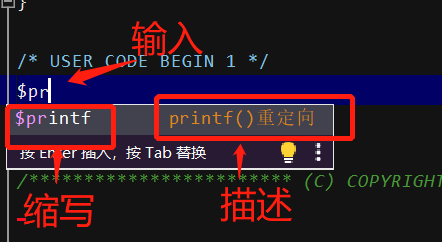
按下tab后


 3482
3482


 被折叠的 条评论
为什么被折叠?
被折叠的 条评论
为什么被折叠?
 到【灌水乐园】发言


