


AI for System 如火如荼,借用吴恩达的一句话,“AI is the new electricity”,不管是工业界还是学术界,对AI都抱有很大的期待。
结合目前我的博士申请方向和申请情况,澳门大学国重做的是联邦学习和其在自动驾驶上的应用(偏理论),墨尔本大学做的就是自动驾驶中的AI(偏工程),蒙纳士大学做的是基于AI实现对自动驾驶汽车的自动化测试…,因此系统学习下Python及其开源工具很有必要。
科研 = 数学 + 编程 + 文字表达,一个好的编程基础很重要。
参考书为《PyTorch深度学习》,ISBN: 9787115508980,可配套食用。
一、环境
PyCharm Community 2022.1
Anaconda虚拟环境 Python 3.7
二、PyTorch的数据类型
PyTorch是Facebook开源的机器学习/深度学习Python库,和谷歌开源的TensorFlow成鼎足之势。国内比较有名的是华为的MindSpore(昇思),但目前其开源环境仍不容乐观。
PyTorch提供了两种类型的数据抽象,称为张量(Tensor) 和 变量(Variable)。Tensor类似于numpy中的数组(Array),可以在GPU上使用,并改善性能。常用张量有:0维张量(标量),1维张量(向量),2维张量(矩阵),3维张量,切片张量,GPU张量等。
numpy, Numerical Python, Python的一个扩展库,很好地支持维度数组和矩阵运算,是最常用的Python扩展库之一。
- 标量:主要有两种,FloatTensor和LongTensor。
- 向量:就是一个元素序列的数组,如:
temp = torch.FloatTensor([23, 24, 27.2])。 - 矩阵:就是线性代数中矩阵的概念,这里要补充一个将numpy数组转为PyTorch张量的函数from_numpy(),例
tensor_test = torch.from_numpy(test.data),test就是一个numpy数组,通过.data取出数据。 - GPU张量:PyTorch提供了一个名为cuda() 的函数,将张量从CPU复制到GPU上,从而加速神经网络的训练过程。例如
# 将张量迁移到 GPU 上
a = a.cuda()
b = b.cuda()
a.matmul(b) # 做矩阵乘法
变量(Variable)在torch.autograd包下,autograd就是自动求梯度(gradient)的意思。
Variable类包含data、grad和creator三个属性,变量可以通过调用backward() 函数来计算梯度。
三、使用PyTorch实现线性回归模型
书上的代码需要一定改进,本文代码给出了较为详细的英文注释。
线性回归较为简单,可以自行查阅资料理解。以下Python代码读懂,线性回归思想也就了然了。最终目的就是拟合一个 y = w*x + b 的函数。
import numpy as np
import torch
from torch.autograd import Variable
import matplotlib.pyplot as plt

def get_data():  # Create data for neural network
    train_x = np.asarray(
        [3.3, 4.4, 5.5, 6.71, 6.93, 4.168, 9.779, 6.182, 7.59, 2.167, 7.042, 10.791, 5.313, 7.997, 5.654, 9.27, 3.1])
    train_y = np.asarray(
        [1.7, 2.76, 2.09, 3.19, 1.694, 1.573, 3.366, 2.596, 2.53, 1.221, 2.827, 3.456, 1.65, 2.904, 2.42, 2.94, 1.3])
    # declare the data type
    datatype = torch.FloatTensor
    # from_numpy() convert an array to a tensor
    # view() has the similar function as reshape() of numpy
    x = Variable(torch.from_numpy(train_x).type(datatype), requires_grad=False).view(17, 1)
    y = Variable(torch.from_numpy(train_y).type(datatype), requires_grad=False)
    return x, y


def get_weights():  # Create learning parameters
    w = Variable(torch.randn(1), requires_grad=True)
    b = Variable(torch.randn(1), requires_grad=True)
    return w, b


def simple_network(x):  # Network function realization
    y_pred = torch.matmul(x, w) + b
    return y_pred


def loss_fn(y, y_pred):  # get loss
    loss = (y_pred - y).pow(2).sum()
    for param in [w, b]:
        if not param.grad is None: param.grad.data.zero_()
    loss.backward()
    return loss.item()


def optimize(learning_rate):  # Network optimization
    w.data -= learning_rate * w.grad.data
    b.data -= learning_rate * b.grad.data


x,y = get_data() # x-training data; y-target variable
w,b = get_weights() # w,b - learning paras

for i in range(1000):
    y_pred = simple_network(x) # process wx+b function
    loss = loss_fn(y, y_pred) # calculate y and y_pred 's sum of difference
    if i % 50 == 0:
        print(loss)
    optimize(0.001) # lr is generally set as 0.001

y_pred = w * x + b
plt.scatter(x.data.numpy(), y.data.numpy())
plt.plot(x.data.numpy(), y_pred.data.numpy())
plt.show()
代码设置了每50次打印一下loss值,一共进行20轮。
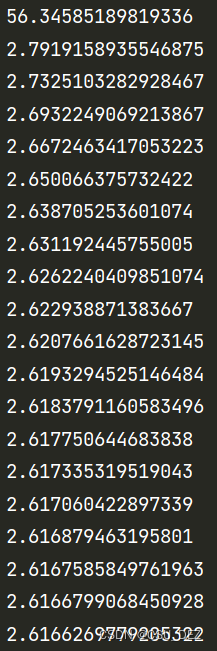
可以看到loss值快速收敛并趋于稳定。
绘图结果如下:


 342
342


 被折叠的 条评论
为什么被折叠?
被折叠的 条评论
为什么被折叠?
 到【灌水乐园】发言


