


文章目录
一、Nacos官方文档
Nacos整体介绍可看Nacos官方文档
二、实现步骤
下面,重点讲解如何通过修改源码实现瀚高数据库适配
2.1 2.1.1版本源码下载
2.2 引入瀚高数据库驱动包
根据适配版本选择对应驱动包
2.2.1 nacos-all pom.xml
<highgo-connector-java.version>6.2.2</highgo-connector-java.version>
     <dependency>
        <groupId>com.highgo</groupId>
       	<artifactId>HgdbJdbc</artifactId>
        <version>${highgo-connector-java.version}</version>
     </dependency>
2.2.2 nacos-config pom.xml
	 <dependency>
        <groupId>com.highgo</groupId>
       	<artifactId>HgdbJdbc</artifactId>
     </dependency>
2.3 nacos-config模块修改
修改类config/src/main/java/com/alibaba/nacos/config/server/service/datasource/ExternalDataSourceProperties.java
修改后的代码如下:
/*
 * Copyright 1999-2018 Alibaba Group Holding Ltd.
 *
 * Licensed under the Apache License, Version 2.0 (the "License"); you may not use this file except in compliance with
 * the License. You may obtain a copy of the License at
 *
 * http://www.apache.org/licenses/LICENSE-2.0
 *
 * Unless required by applicable law or agreed to in writing, software distributed under the License is distributed on
 * an "AS IS" BASIS, WITHOUT WARRANTIES OR CONDITIONS OF ANY KIND, either express or implied. See the License for the
 * specific language governing permissions and limitations under the License.
 */

package com.alibaba.nacos.config.server.service.datasource;

import com.alibaba.nacos.common.utils.Preconditions;
import com.alibaba.nacos.common.utils.StringUtils;
import com.zaxxer.hikari.HikariDataSource;
import org.apache.commons.collections.CollectionUtils;
import org.springframework.boot.context.properties.bind.Bindable;
import org.springframework.boot.context.properties.bind.Binder;
import org.springframework.core.env.Environment;

import java.util.ArrayList;
import java.util.List;
import java.util.Objects;
import java.util.concurrent.TimeUnit;

import static com.alibaba.nacos.common.utils.CollectionUtils.getOrDefault;

/**
 * Properties of external DataSource.
 *
 * @author Nacos
 */
public class ExternalDataSourceProperties {

    private static final String JDBC_DRIVER_NAME = "com.mysql.cj.jdbc.Driver";

    private static final String TEST_QUERY = "SELECT 1";

    private Integer num;

    private List<String> url = new ArrayList<>();

    private List<String> user = new ArrayList<>();

    private List<String> password = new ArrayList<>();

    public void setNum(Integer num) {
        this.num = num;
    }

    public void setUrl(List<String> url) {
        this.url = url;
    }

    public void setUser(List<String> user) {
        this.user = user;
    }

    public void setPassword(List<String> password) {
        this.password = password;
    }

    private String jdbcDriverName;

    public String getJdbcDriverName() {
        return jdbcDriverName;
    }

    public void setJdbcDriverName(String jdbcDriverName) {
        this.jdbcDriverName = jdbcDriverName;
    }

    /**
     * Build serveral HikariDataSource.
     *
     * @param environment {@link Environment}
     * @param callback    Callback function when constructing data source
     * @return List of {@link HikariDataSource}
     */
    List<HikariDataSource> build(Environment environment, Callback<HikariDataSource> callback) {
        List<HikariDataSource> dataSources = new ArrayList<>();
        Binder.get(environment).bind("db", Bindable.ofInstance(this));
        Preconditions.checkArgument(Objects.nonNull(num), "db.num is null");
        Preconditions.checkArgument(CollectionUtils.isNotEmpty(user), "db.user or db.user.[index] is null");
        Preconditions.checkArgument(CollectionUtils.isNotEmpty(password), "db.password or db.password.[index] is null");
        for (int index = 0; index < num; index++) {
            int currentSize = index + 1;
            Preconditions.checkArgument(url.size() >= currentSize, "db.url.%s is null", index);
            DataSourcePoolProperties poolProperties = DataSourcePoolProperties.build(environment);
            poolProperties.setDriverClassName(JDBC_DRIVER_NAME);
            poolProperties.setJdbcUrl(url.get(index).trim());
            poolProperties.setUsername(getOrDefault(user, index, user.get(0)).trim());
            poolProperties.setPassword(getOrDefault(password, index, password.get(0)).trim());
            HikariDataSource ds = poolProperties.getDataSource();
            if (StringUtils. isNotEmpty(jdbcDriverName)) {
                // 设置模式名
                ds.setSchema("mediax_config");
                ds.setDriverClassName(jdbcDriverName);
            } else {
                ds.setDriverClassName(JDBC_DRIVER_NAME);
            }
            ds.setConnectionTestQuery(TEST_QUERY);
            ds.setIdleTimeout(TimeUnit.MINUTES.toMillis(10L));
            ds.setConnectionTimeout(TimeUnit.SECONDS.toMillis(3L));
            dataSources.add(ds);
            callback.accept(ds);
        }
        Preconditions.checkArgument(CollectionUtils.isNotEmpty(dataSources), "no datasource available");
        return dataSources;
    }

    interface Callback<D> {

        /**
         * Perform custom logic.
         *
         * @param datasource dataSource.
         */
        void accept(D datasource);
    }
}
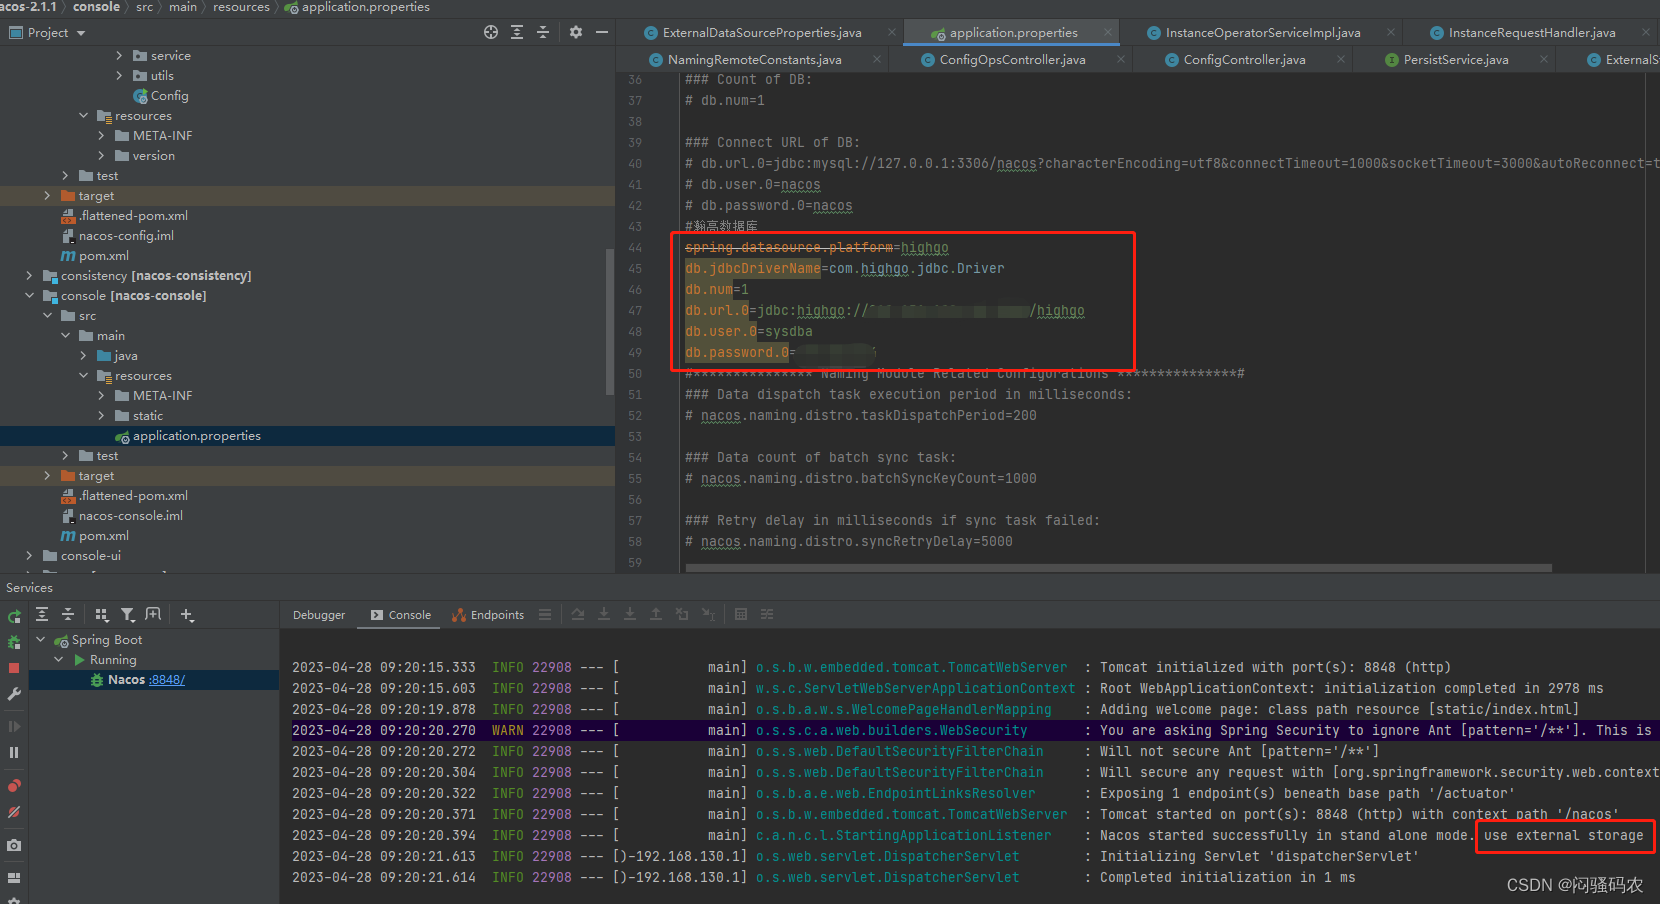
2.4 修改配置
nacos-console模块的application.properties
# 瀚高数据库
spring.datasource.platform=highgo
db.jdbcDriverName=com.highgo.jdbc.Driver
db.num=1
db.url.0=jdbc:highgo://127.0.0.1:5866/highgo
db.user.0=sysdba
db.password.0=123456
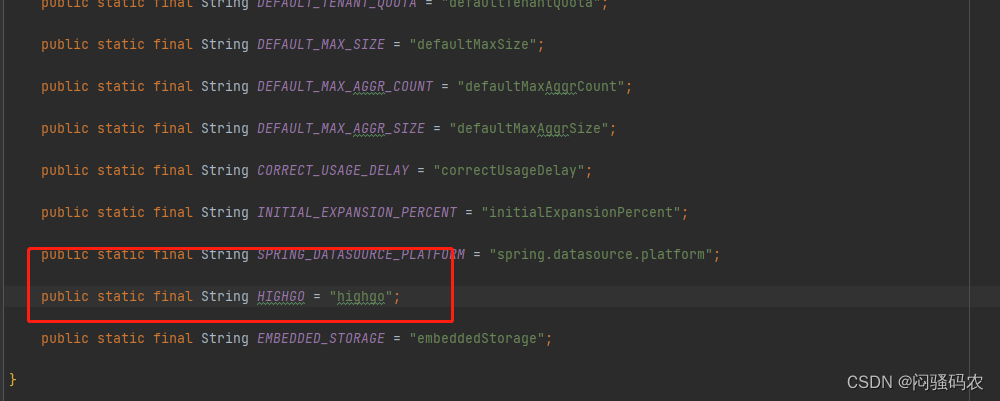
2.5 定义数据库类型
修改nacos-config模块下的PropertiesConstant
com/alibaba/nacos/config/server/constant/PropertiesConstant.java
public static final String HIGHGO = "highgo";
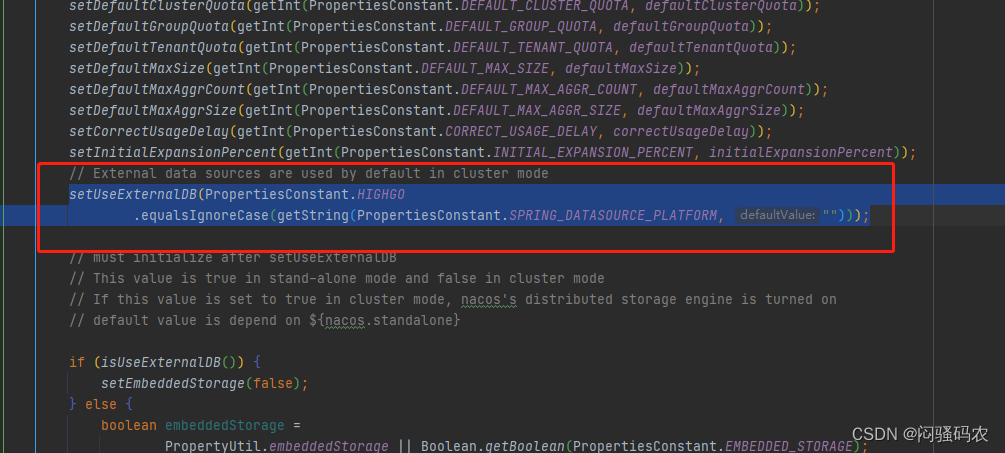
2.6 配置生效
修改nacos-config模块下的PropertyUtil中的loadSetting方法
com/alibaba/nacos/config/server/utils/PropertyUtil.java
setUseExternalDB(PropertiesConstant.HIGHGO
                    .equalsIgnoreCase(getString(PropertiesConstant.SPRING_DATASOURCE_PLATFORM, "")));
2.7 导入瀚高脚本
2.8 修改com.alibaba.nacos.config.server.service.repository.extrnal.ExternalStoragePersistServiceImpl下的方法addConfigInfoAtomic
@Override
    public long addConfigInfoAtomic(final long configId, final String srcIp, final String srcUser,
            final ConfigInfo configInfo, final Timestamp time, Map<String, Object> configAdvanceInfo) {
        final String appNameTmp =
                StringUtils.isBlank(configInfo.getAppName()) ? StringUtils.EMPTY : configInfo.getAppName();
        final String tenantTmp =
                StringUtils.isBlank(configInfo.getTenant()) ? StringUtils.EMPTY : configInfo.getTenant();

        final String desc = configAdvanceInfo == null ? null : (String) configAdvanceInfo.get("desc");
        final String use = configAdvanceInfo == null ? null : (String) configAdvanceInfo.get("use");
        final String effect = configAdvanceInfo == null ? null : (String) configAdvanceInfo.get("effect");
        final String type = configAdvanceInfo == null ? null : (String) configAdvanceInfo.get("type");
        final String schema = configAdvanceInfo == null ? null : (String) configAdvanceInfo.get("schema");
        final String encryptedDataKey =
                configInfo.getEncryptedDataKey() == null ? StringUtils.EMPTY : configInfo.getEncryptedDataKey();

        final String md5Tmp = MD5Utils.md5Hex(configInfo.getContent(), Constants.ENCODE);
        long id;
        KeyHolder keyHolder = new GeneratedKeyHolder();

        final String sql =
                "INSERT INTO config_info(data_id,group_id,tenant_id,app_name,content,md5,src_ip,src_user,gmt_create,"
                        + "gmt_modified,c_desc,c_use,effect,type,c_schema,encrypted_data_key) VALUES(?,?,?,?,?,?,?,?,?,?,?,?,?,?,?,?)";

        try {
            jt.update(connection -> {
                PreparedStatement ps = connection.prepareStatement(sql, Statement.RETURN_GENERATED_KEYS);
                ps.setString(1, configInfo.getDataId());
                ps.setString(2, configInfo.getGroup());
                ps.setString(3, tenantTmp);
                ps.setString(4, appNameTmp);
                ps.setString(5, configInfo.getContent());
                ps.setString(6, md5Tmp);
                ps.setString(7, srcIp);
                ps.setString(8, srcUser);
                ps.setTimestamp(9, time);
                ps.setTimestamp(10, time);
                ps.setString(11, desc);
                ps.setString(12, use);
                ps.setString(13, effect);
                ps.setString(14, type);
                ps.setString(15, schema);
                ps.setString(16, encryptedDataKey);
                return ps;
            }, keyHolder);
            if (Objects.requireNonNull(keyHolder.getKeys()).size() > 1) {
                id = (Long)keyHolder.getKeys().get("id");
            } else {
                id = Objects.requireNonNull(keyHolder.getKey()).longValue();
            }
            return id;

//            Number nu = keyHolder.getKey();
//            if (nu == null) {
//                throw new IllegalArgumentException("insert config_info fail");
//            }
//            return nu.longValue();
        } catch (CannotGetJdbcConnectionException e) {
            LogUtil.FATAL_LOG.error("[db-error] " + e.toString(), e);
            throw e;
        }
    }

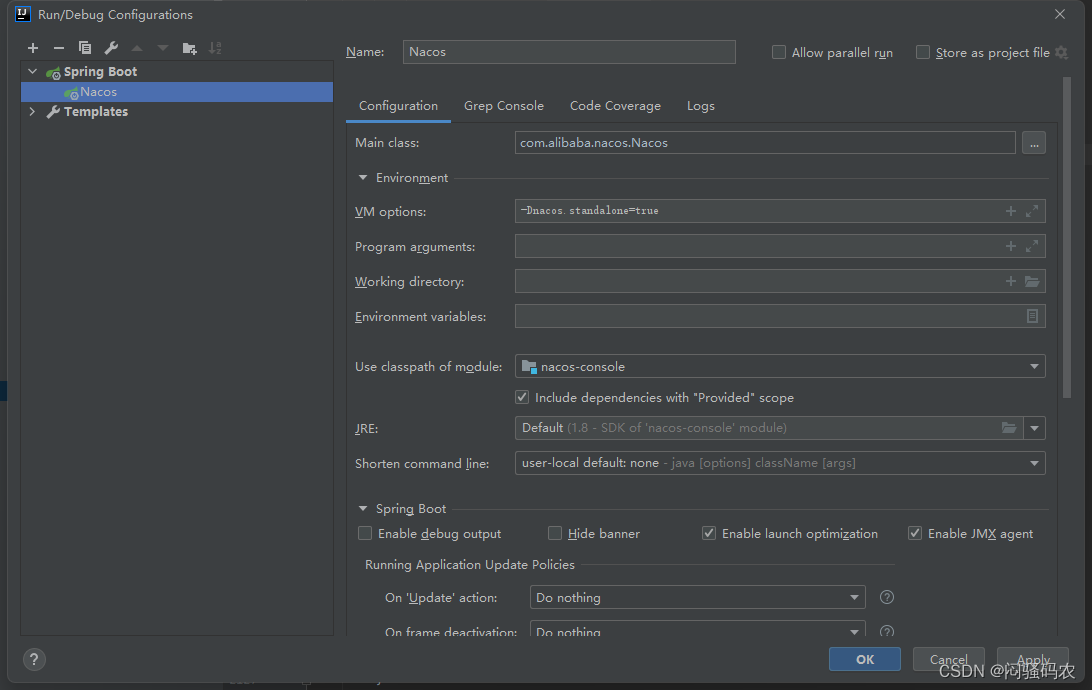
2.9 启动nacos
#启动的时候我们需要改下启动参数来表明我们是单机启动的
-Dnacos.standalone= true
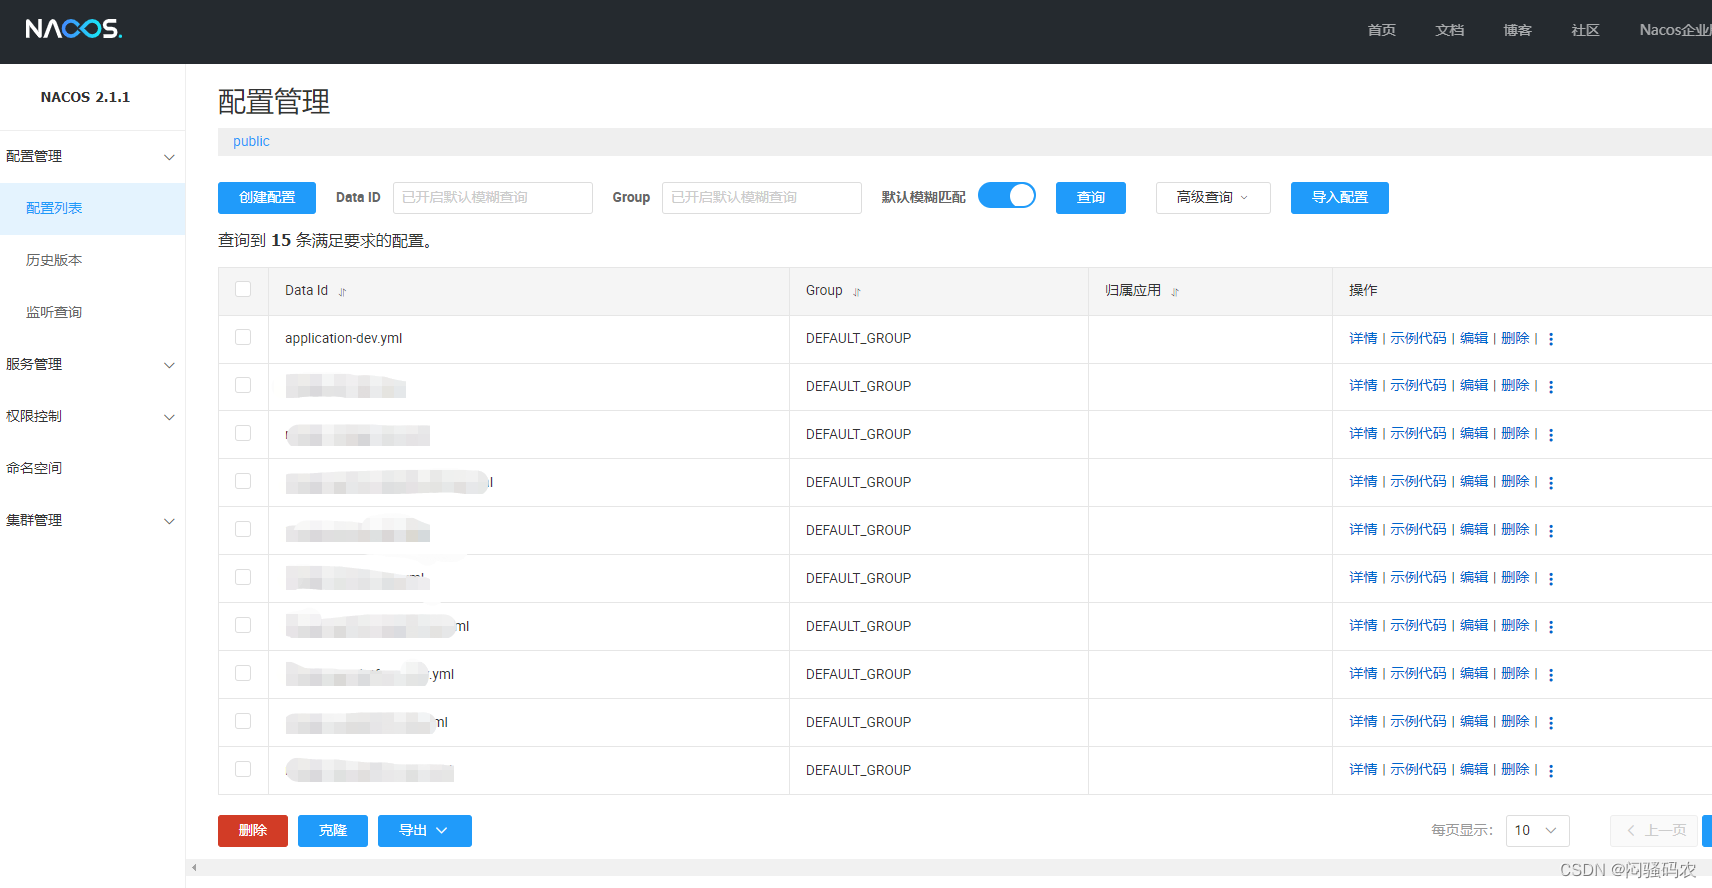
3.0 本地访问
http://localhost:8848/nacos/index.html
用户名nacos 密码nacos
3.1 重新打包
nacos编译命令:
mvn -Prelease-nacos -Dmaven.test.skip=true -Dpmd.skip=true -Dcheckstyle.skip=true clean install -U
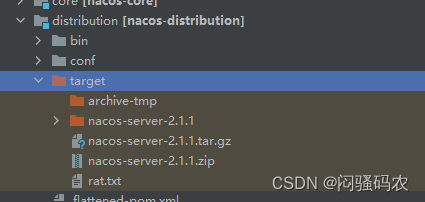
查看构建包
获得构建完成后的工程
构建后,在进入到源代码目录中的 文件夹:
distribution/target/nacos-server-$version 下的 nacos文件夹就是最终的输出物。


 1350
1350


 被折叠的 条评论
为什么被折叠?
被折叠的 条评论
为什么被折叠?
 到【灌水乐园】发言


