


代码可以看参考文:
一、UI设计
搞清楚QSplitter 和 Layouts ,也就是布局管理
06-layouts, tabs and buddies | Qt布局 选项卡切换 和伙伴关 | 双字幕 | 国外视频
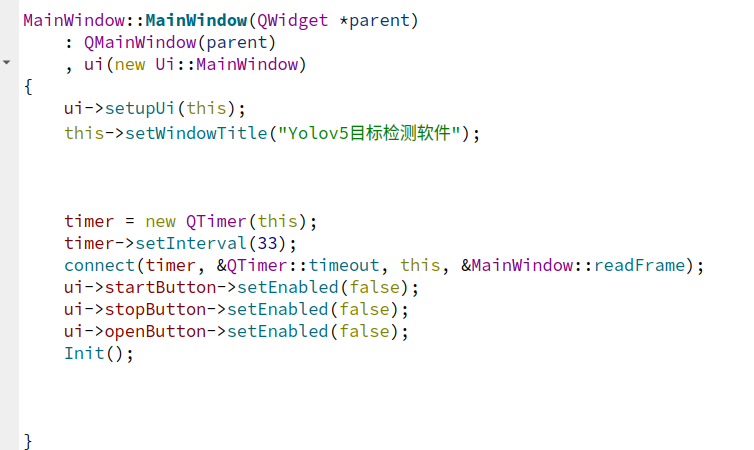
二、搞清除信号与槽函数的连接
1、用connect函数进行连接信号与槽函数
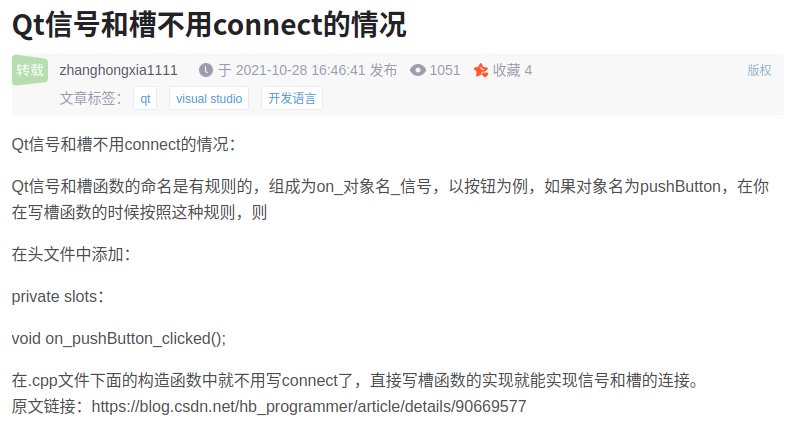
2、点击按钮转槽,不需要用connect函数连接点击信号与槽函数
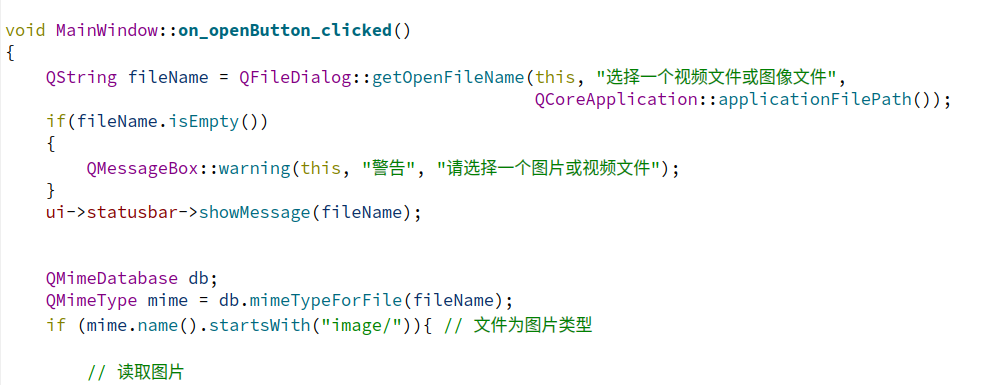
3、自己编写槽函数时候,按一定规则命名
4、效果展示
打开文件;加载模型
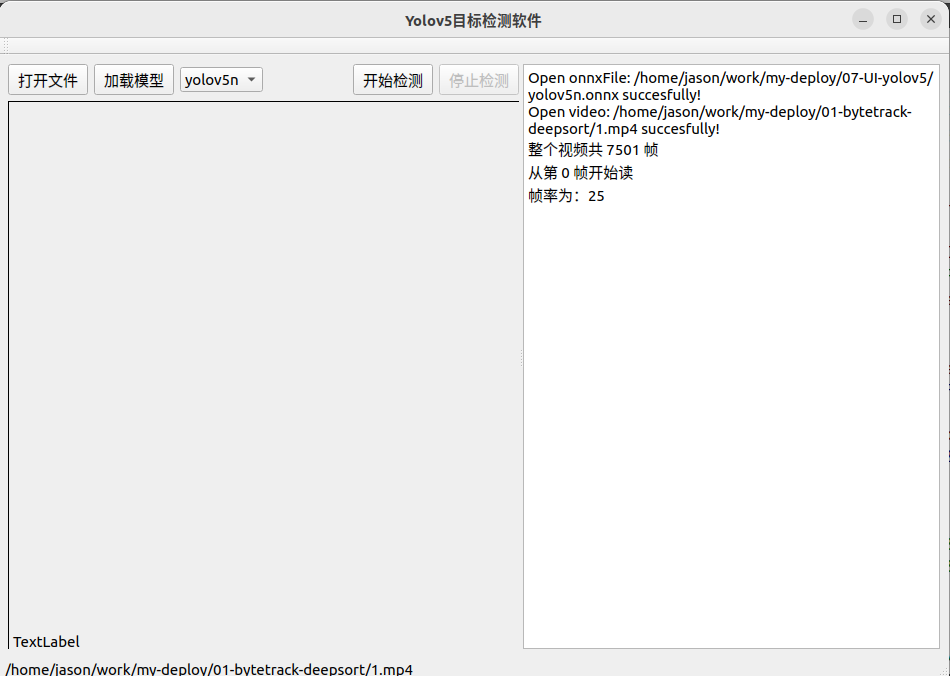
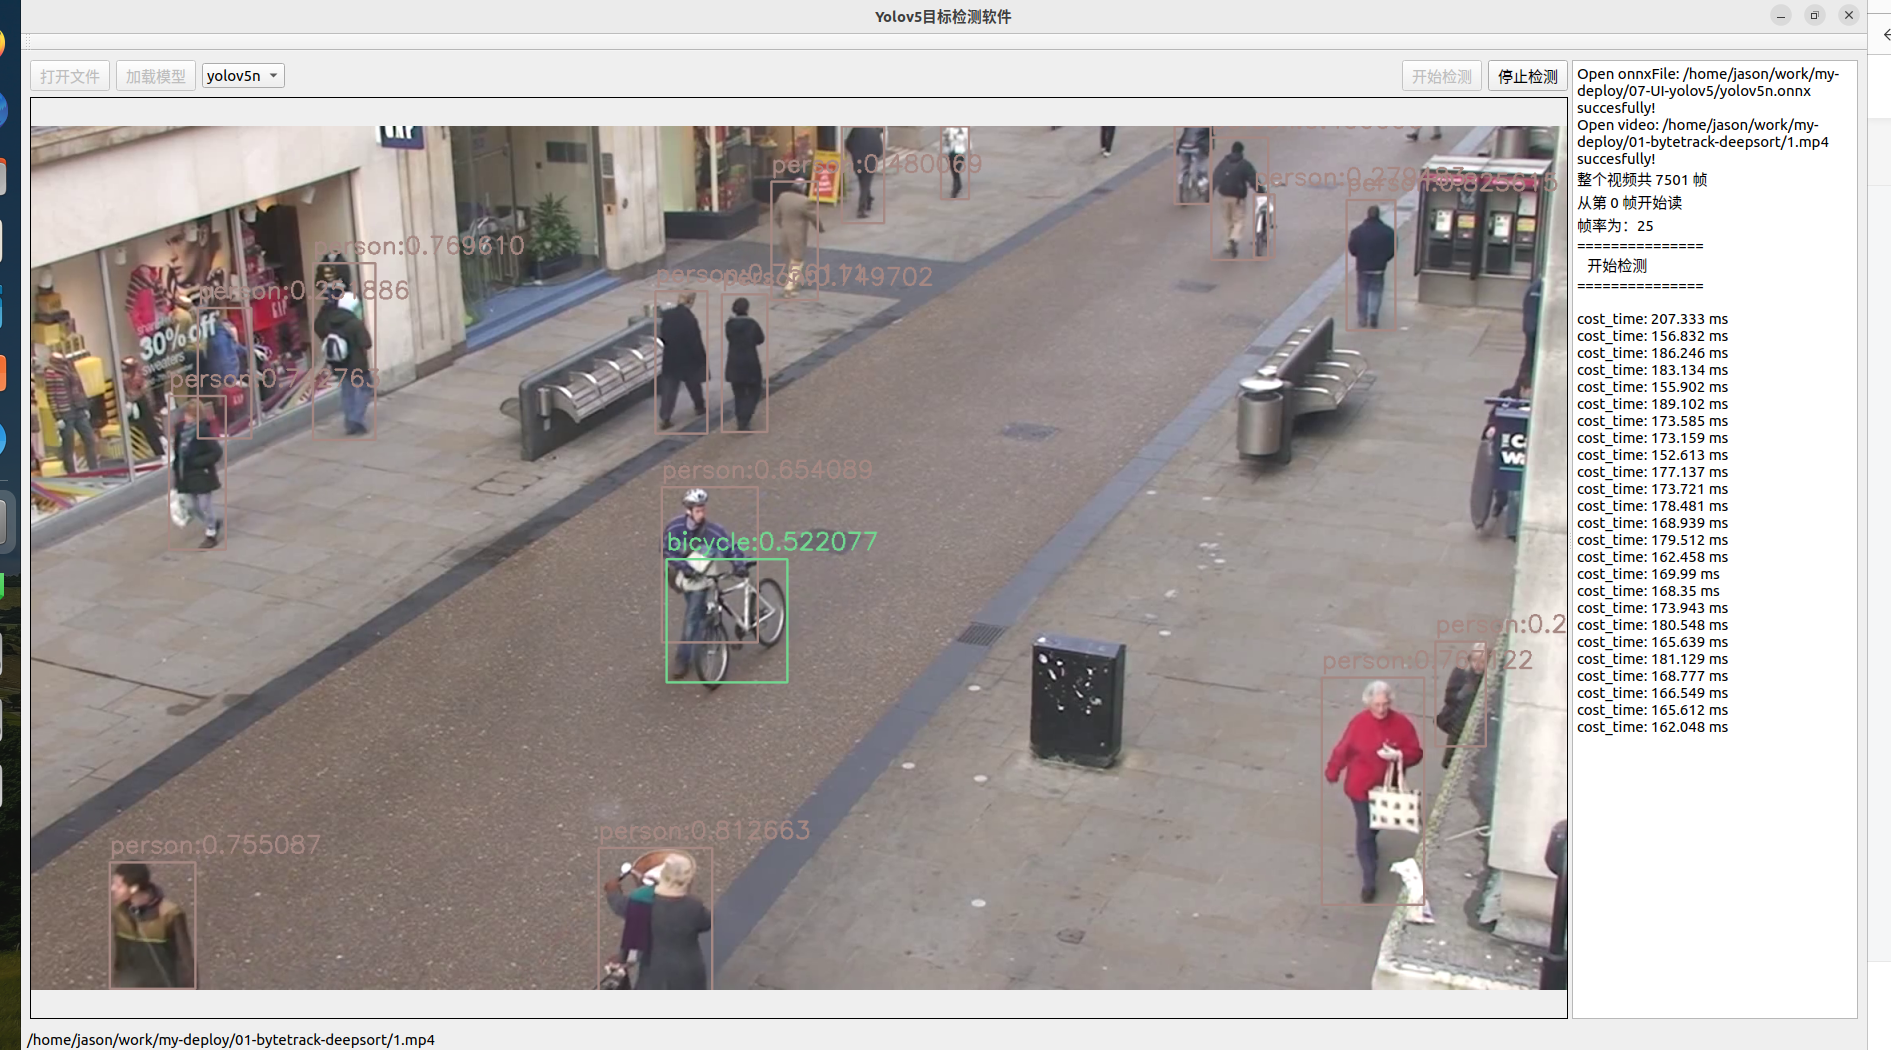
点击开始检测
代码可以看参考文:
06-layouts, tabs and buddies | Qt布局 选项卡切换 和伙伴关 | 双字幕 | 国外视频
打开文件;加载模型
点击开始检测


 被折叠的 条评论
为什么被折叠?
被折叠的 条评论
为什么被折叠?
 到【灌水乐园】发言


 5870
5870


