


[Pytorch]卷积运算conv2d
一.F.Conv2d
torch.nn.functional.Conv2d()的详细参数:
conv2d(input: Tensor, weight: Tensor, bias: Optional[Tensor]=None, stride: Union[_int, _size]=1, padding: str="valid", dilation: Union[_int, _size]=1, groups: _int=1)
即F.Conv2d的主要参数如下:
- input:输入特征图
- weight:卷积核
- bias:偏置参数
- stride:卷积步长
- padding:填充
- dilation:膨胀系数
- groups:分组卷积
利用F.Conv2d对图像中的暗线进行识别demo:
x = torch.tensor([
    [
        [1.0, 4, 1, 4, 5],
        [0, 5, 3, 2, 1],
        [21,25, 25, 23, 26],
        [5, 2, 5, 2, 5],
        [4, 9, 3, 0, 7]
    ],
    [
        [2, 2, 2, 7, 2],
        [0, 0, 6, 3, 0],
        [24, 25, 25, 23, 27],
        [0, 1, 1, 1, 5],
        [0, 2, 0, 2, 2]
    ],
    [
        [2, 2, 2, 1, 0],
        [7, 2, 4, 3, 1],
        [24, 23, 28, 23, 24],
        [0, 0, 2, 2, 5],
        [5, 2, 4, 5, 2]
    ]
])

weight = torch.tensor([
    [
        [0.0, 0, 0],
        [1, 1, 1],
        [0, 0, 0],
    ],
    [
        [0, 0, 0],
        [1, 1, 1],
        [0, 0, 0],
    ],
    [
        [0, 0, 0],
        [1, 1, 1],
        [0, 0, 0],
    ]
])
out = F.conv2d(x, weight=weight.unsqueeze(0), bias=None, stride=1, padding=0)


toPIL = transforms.ToPILImage()  # 这个函数可以将张量转为PIL图片,由小数转为0-255之间的像素值
img_PIL = toPIL(x)  # 张量tensor转换为图片
img_PIL.save('./original.png')  # 保存图片;img_PIL.show()可以直接显示图片
torchvision.transforms.ToPILImage()
img_PIL = toPIL(out)
img_PIL.save('./convoluted.png')
print(out)
二.nn.Conv2d
pytorch中的卷积运算接口可使用torch.nn中的Conv2d():
torch.nn.Conv2d( in_channels, out_channels, kernel_size, stride, padding)
pytorch官方的参数解释说明:
 Args:
        in_channels (int): Number of channels in the input image
        out_channels (int): Number of channels produced by the convolution
        kernel_size (int or tuple): Size of the convolving kernel
        stride (int or tuple, optional): Stride of the convolution. Default: 1
        padding (int, tuple or str, optional): Padding added to all four sides of
            the input. Default: 0
        padding_mode (str, optional): ``'zeros'``, ``'reflect'``,
            ``'replicate'`` or ``'circular'``. Default: ``'zeros'``
        dilation (int or tuple, optional): Spacing between kernel elements. Default: 1
        groups (int, optional): Number of blocked connections from input
            channels to output channels. Default: 1
        bias (bool, optional): If ``True``, adds a learnable bias to the
            output. Default: ``True``
其中:padding_mode, dilation, groups, bias为可选参数,不是必须给定。
import torch
import torchvision.transforms
from torch import nn
from torchvision import transforms
from torch.nn import functional as F
convolutional_layer = nn.Conv2d(3, 3, kernel_size=3, stride=1, padding=0)
x = torch.tensor([
[
[231.0, 120, 111, 34, 45],
[100, 85, 23, 200, 111],
[31, 45, 100, 103, 220],
[5, 5, 5, 5, 5],
[54, 89, 103, 150, 67]
],
[
[12, 58, 52, 87, 100],
[200, 140, 86, 23, 10],
[60, 75, 45, 30, 7],
[155, 155, 155, 155, 155],
[0, 122, 0, 0, 12]
],
[
[12, 12, 12, 11, 10],
[67, 12, 45, 23, 1],
[56, 12, 5, 10, 8],
[0, 0, 0, 0, 0],
[5, 12, 34, 56, 12]
]
])
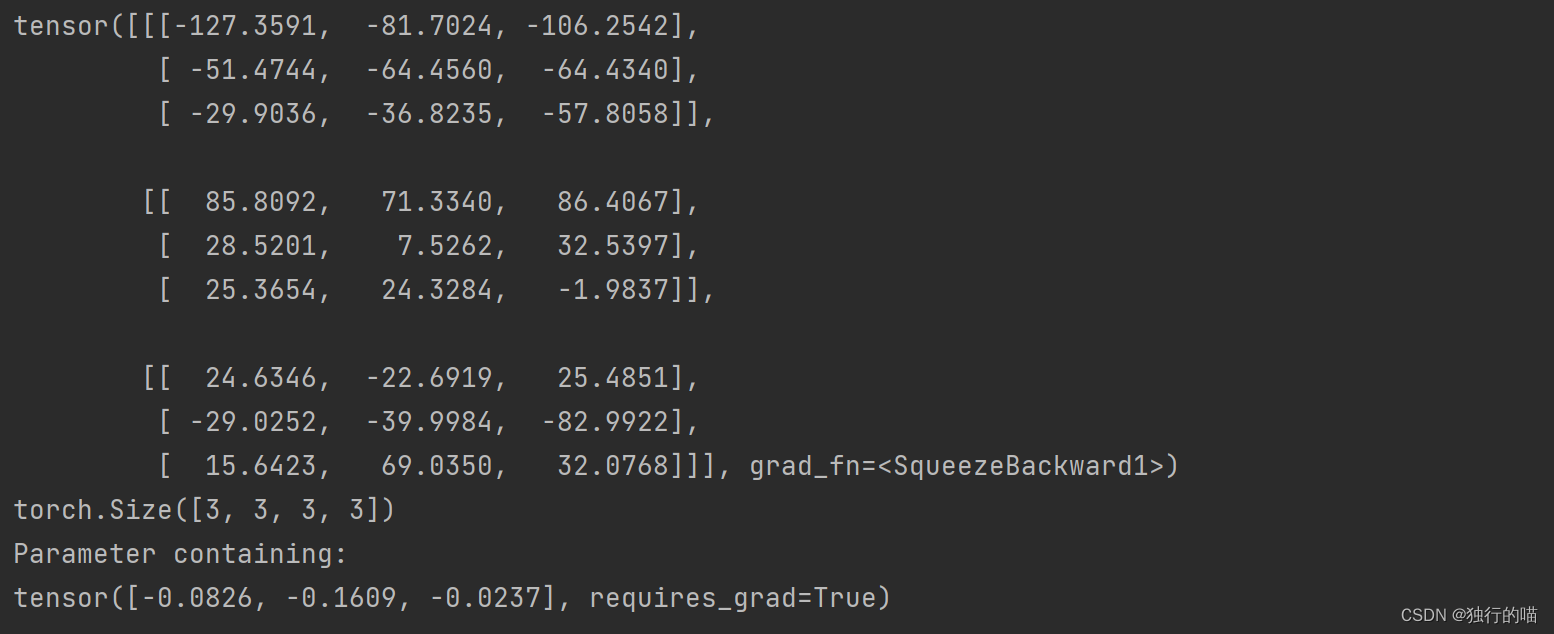
out = convolutional_layer(x)
print(out)
print(convolutional_layer.weight.shape)
print(convolutional_layer.bias)
通过将tensor转为图片模拟以下卷积运算的效果:
toPIL = transforms.ToPILImage()  # 这个函数可以将张量转为PIL图片,由小数转为0-255之间的像素值
img_PIL = toPIL(x)  # 张量tensor转换为图片
img_PIL.save('./original.png')  # 保存图片;img_PIL.show()可以直接显示图
img_PIL = toPIL(out)
img_PIL.save('./convoluted.png')
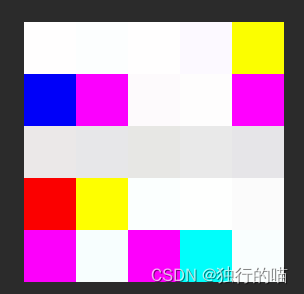
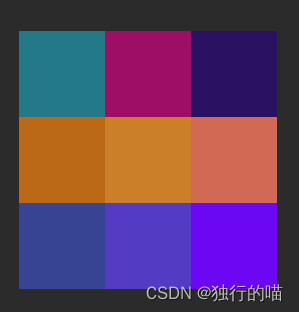
原特征图:
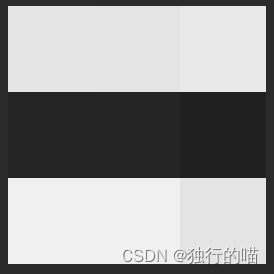
卷积运算后的输出特征图:
三.nn.Conv2d的运算过程
假如nn.Conv2d的定义如下:
convolutional_layer = torch.nn.Conv2d(2, 3, 3, 1, bias=None)
我们研究该函数是如何通过卷积运算将输入通道数2变成输入通道数3的:
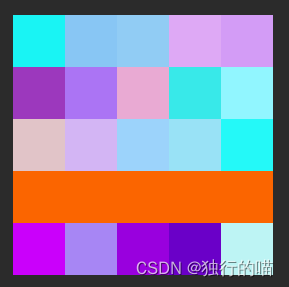
原特征图的输入通道数为2,图示橙色和蓝色两个通道:
nn.Conv2d随机初始化3组卷积核,3为输出通道数,其中每组卷积核中卷积核的数量为2(输入通道数),分为橙色的卷积核与蓝色的卷积核,与对应的特征图做卷积运算,每组分别得到两个卷积运算后的特征图,将每组得到的特征图进行对应位置数值的相加操作即可得到最后的nn.Conv2d运算结果。该卷积层的卷积核个数总共为3x2个即输出通道数x输入通道数个。
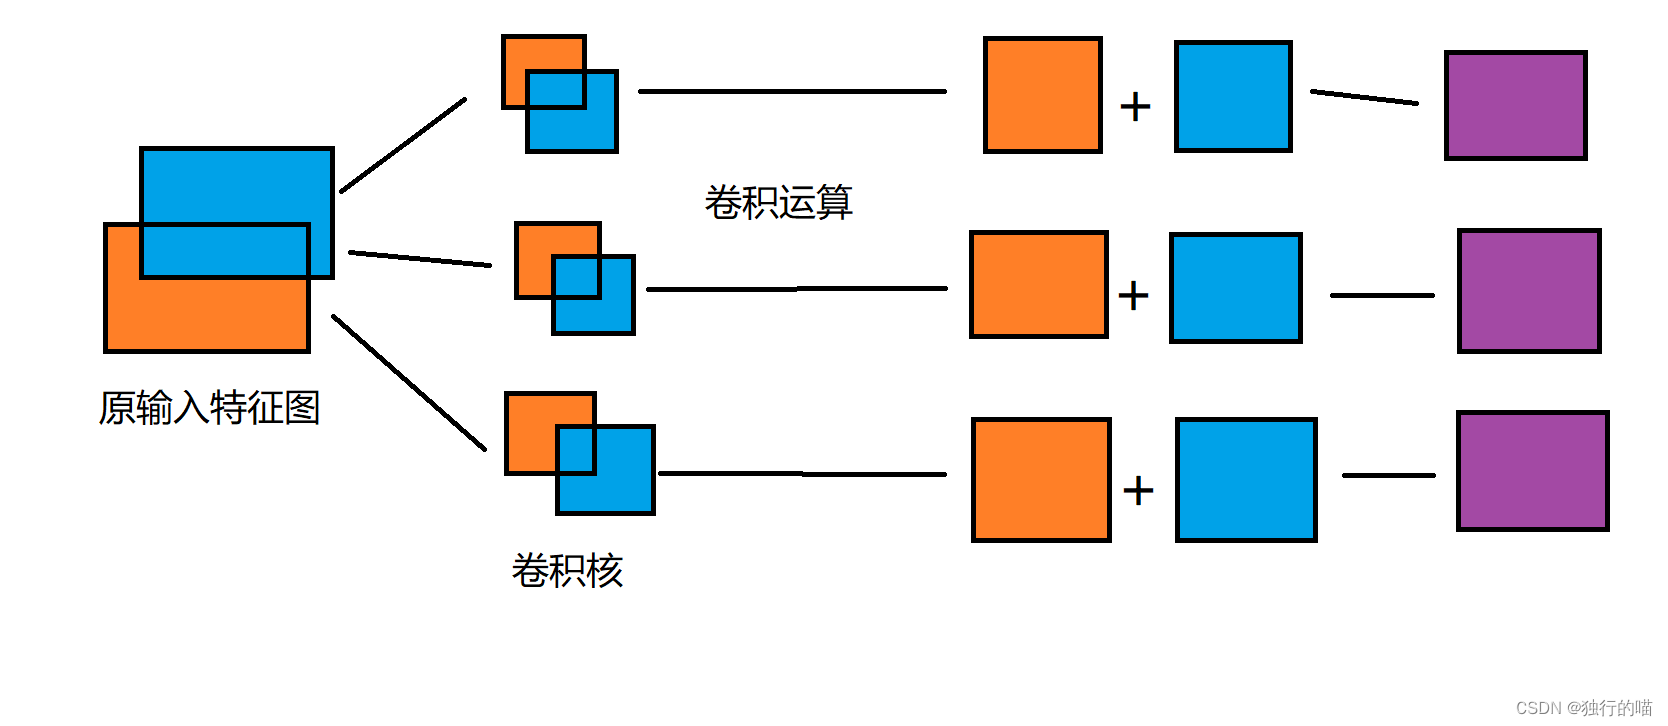
下面为了验证上述过程正确,我们使用两个F.conv2d来分别模拟蓝色卷积核和橙色卷积核与对应特征图卷积运算的过程。并将最终的结果相加和直接采用nn.conv2d的结果比较:
convolutional_layer = torch.nn.Conv2d(2, 3, 3, 1, bias=None)
input = torch.randn(1, 2, 4, 4)
output = convolutional_layer(input)
weight = convolutional_layer.weight
out_1 = F.conv2d(input[:, 0, :, :].unsqueeze(1), weight[:, 0, :, :].unsqueeze(1), bias=None, stride=1, padding=0)
out_2 = F.conv2d(input[:, 1, :, :].unsqueeze(1), weight[:, 1, :, :].unsqueeze(1), bias=None, stride=1, padding=0)
print(f'output:\n{output}')
print('-----------------------------------------------------------------')
print(f'out_1 + out_2:\n{out_1 + out_2}')
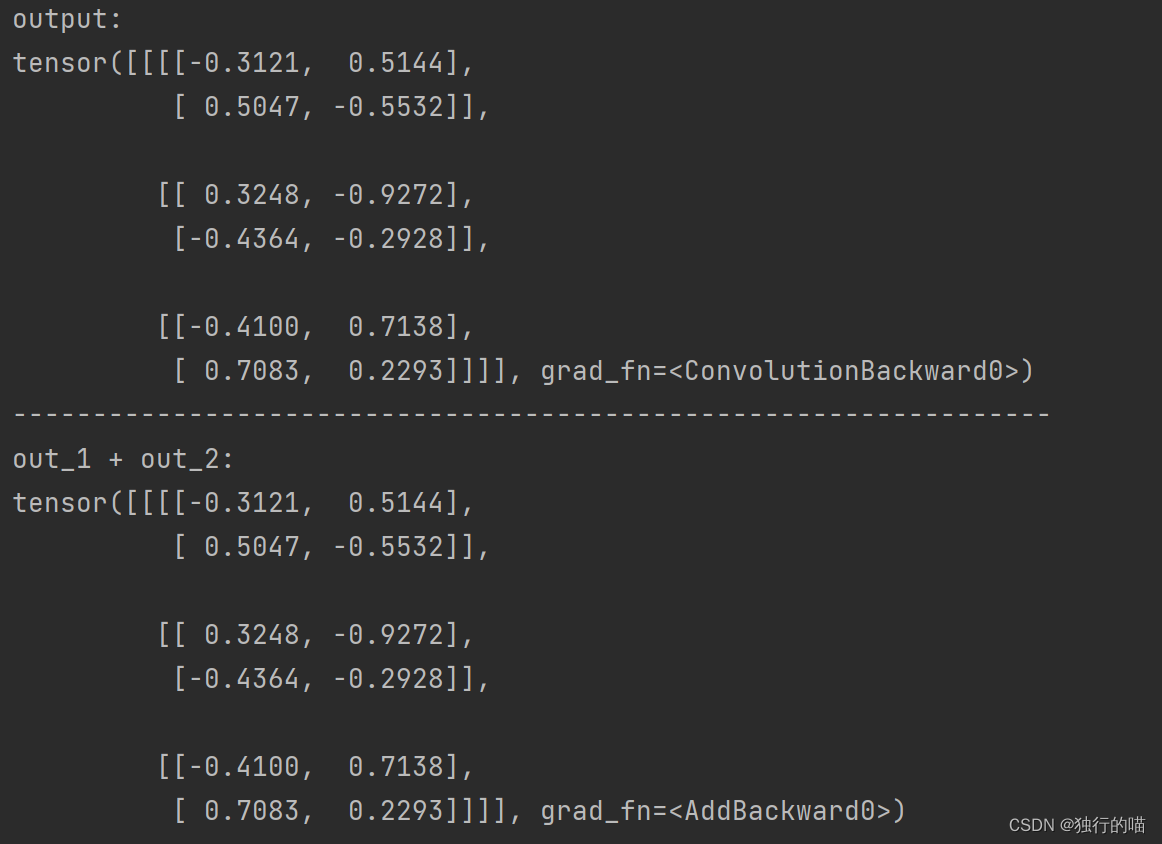
最终通过比较发现,卷积运算的结果一致,说明上述nn.conv2d的具体运算过程正确


 2万+
2万+


 被折叠的 条评论
为什么被折叠?
被折叠的 条评论
为什么被折叠?
 到【灌水乐园】发言


