


cobbler无人值守批量安装步骤
pxe kickstart自动装机原理:
PXE(prebootexecute environment,预启动执行环境)是由Intel公司开发的最新技术,工作于Client/Server的网络模式,支持工作站通过网络从远端服务器下载映像,并由此支持通过网络启动操作系统,在启动过程中,终端要求服务器分配IP地址,再用TFTP(trivialfile transfer protocol)或MTFTP(multicast trivial file transfer protocol)协议下载一个启动软件包到本机内存中执行,由这个启动软件包完成终端(客户?)基本软件设置,从而引导预先安装在服务器中的终端操作系统。PXE可以引导多种操作系统,如:Windows95/98/2000/windows2003/windows2008/winXP/win7/win8,linux等。


原理图
Cobbler介绍
Cobbler是一个Linux服务器安装的服务,可以通过网络启动(PXE)的方式来快速安装、重装物理服务器和虚拟机,同时还可以管理DHCP,DNS等。
Cobbler可以使用命令行方式管理,也提供了基于Web的界面管理工具(cobbler-web),还提供了API接口,可以方便二次开发使用。
Cobbler是较早前的kickstart的升级版,优点是比较容易配置,还自带web界面比较易于管理。
Cobbler内置了一个轻量级配置管理系统,但它也支持和其它配置管理系统集成,如Puppet,暂时不支持SaltStack。
Cobbler集成的服务
PXE服务支持
DHCP服务管理
DNS服务管理(可选bind,dnsmasq)
电源管理
Kickstart服务支持
YUM仓库管理
TFTP(PXE启动时需要)
Apache(提供kickstart的安装源,并提供定制化的kickstart配置)
准备工作
centos7
虚拟机网络模式选择NAT模式(此机器之后用作dhcp服务器)

永远关闭selinux
 永久关闭firewall,清楚防火墙规则
systemctl stop firewalld.service #停止firewall
systemctl disable firewalld.service #禁止firewall开机启动
firewall-cmd --state #查看默认防火墙状态(关闭后显示notrunning,开启后显示running)

iptables -L 列出所有规则
iptables -F 清除所有

reboot重启:

安装软件&下载镜像
#配置阿里云epel源
wget -O /etc/yum.repos.d/epel.repo http://mirrors.aliyun.com/repo/epel-7.repo

安装软件:
yum -y install cobbler cobbler-web dhcp tftp-serverpykickstart httpd xinetd debmirror

查看安装的文件,下面列出部分:

/etc/cobbler # 配置文件目录
/etc/cobbler/settings # cobbler主配置文件,这个文件是YAML格式,Cobbler是python写的程序。
/etc/cobbler/dhcp.template # DHCP服务的配置模板
/etc/cobbler/tftpd.template # tftp服务的配置模板
/etc/cobbler/rsync.template # rsync服务的配置模板
/etc/cobbler/iso # iso模板配置文件目录
/etc/cobbler/pxe # pxe模板文件目录
/etc/cobbler/power # 电源的配置文件目录
/etc/cobbler/users.conf # Web服务授权配置文件
/etc/cobbler/users.digest # 用于web访问的用户名密码配置文件
/etc/cobbler/dnsmasq.template # DNS服务的配置模板
/etc/cobbler/modules.conf # Cobbler模块配置文件
/var/lib/cobbler # Cobbler数据目录
/var/lib/cobbler/config # 配置文件
/var/lib/cobbler/kickstarts # 默认存放kickstart文件
/var/lib/cobbler/loaders # 存放的各种引导程序
/var/www/cobbler # 系统安装镜像目录
/var/www/cobbler/ks_mirror # 导入的系统镜像列表
/var/www/cobbler/images # 导入的系统镜像启动文件
/var/www/cobbler/repo_mirror # yum源存储目录
/var/log/cobbler # 日志目录
/var/log/cobbler/install.log # 客户端系统安装日志
/var/log/cobbler/cobbler.log # cobbler日志

下载CentOS-7-x86_64-DVD-1611.iso镜像:(我是将我的镜像上传上去的)

配置Cobbler
检查并修复cobbler配置


1 : The ‘server’ field in /etc/cobbler/settingsmust be set to something other than localhost, or kickstarting features willnot work. This should be a resolvablehostname or IP for the boot server as reachable by all machines that will useit.
2 : For PXE to be functional, the 'next_server’field in /etc/cobbler/settings must be set to something other than 127.0.0.1,and should match the IP of the boot server on the PXE network.
修改/etc/cobbler/settings中server和next_server的字段为本机IP,非回环地址
server: 10.0.0.41
next_server: 10.0.0.42
(next_server在278行,server在390行)


3 : change ‘disable’ to ‘no’ in/etc/xinetd.d/tftp
vim /etc/xinetd.d/tftp

4 : Some network boot-loaders are missingfrom /var/lib/cobbler/loaders, you may run ‘cobbler get-loaders’ to downloadthem, or, if you only want to handle x86/x86_64 netbooting, you may ensure thatyou have installed a recent version of the syslinux package installed and canignore this message entirely. Files inthis directory, should you want to support all architectures, should includepxelinux.0, menu.c32, elilo.efi, and yaboot. The ‘cobbler get-loaders’ commandis the easiest way to resolve these requirements.
cobbler get-loaders #下载引导程序

5 : enable and start rsyncd.service withsystemctl

Vi /etc/xinetd.d/rsync(注意:CentOS7中在/etc/xinetd.d/目录下没有rsync这个文件,需要创建并加入如下的参数,CentOS6中有rsync文件,只需修改即可)

service rsync
{
disable = no
flags = IPv6
socket_type = stream
wait = no
user = root
server = /usr/bin/rsync
server_args = --daemon
log_on_failure = USERID
}
6 : comment out ‘dists’ on/etc/debmirror.conf for proper debian support
7 : comment out ‘arches’ on/etc/debmirror.conf for proper debian support

进去之后注释掉下面这两行:
#@dists=“sid”;
#@arches=“i386”;

8 : The default password used by the sampletemplates for newly installed machines (default_password_crypted in/etc/cobbler/settings) is still set to ‘cobbler’ and should be changed, try:"openssl passwd -1 -salt ‘random-phrase-here’ ‘your-password-here’"to generate new one
更改默认密码openssl passwd -1 -salt ‘用户名’ ‘密码’
[root@localhost ~]# openssl passwd -1 -salt’alex’ ‘!#helpme7890…’
1
1
1alex$2twSRUAFWfyMoknusapse.
vi /etc/cobbler/settings

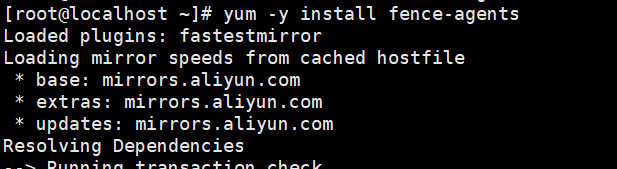
9 : fencing tools were not found, and arerequired to use the (optional) power management features. install cman orfence-agents to use them
yum install fence-agents
用Cobbler管理DHCP
vi /etc/cobbler/settings
manage_dhcp: 1

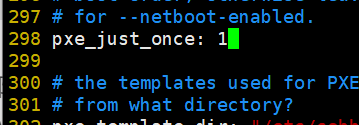
防止循环装系统,适用于服务器第一启动项是PXE启动
vi /etc/cobbler/settings
pxe_just_once: 1
重启再次检查没有任何问题出现!
配置DHCP
vi /etc/cobbler/dhcp.template
Syslinux安装&配置
yum install syslinux –y
cp /usr/share/syslinux/pxelinux.0/var/lib/tftpboot/
cp /mnt/CentOS-7-x86_64/isolinux//var/lib/tftpboot/
cp/mnt/CentOS-7-x86_64/isolinux/isolinux.cfg /var/lib/tftpboot/pxelinux.cfg/default
导入&挂载镜像
mount -o loop/root/ISO/CentOS-7-x86_64-DVD-1611.iso /mnt/CentOS-7-x86_64/
cobbler import --path=/mnt/CentOS-7-x86_64/–name=CentOS-7.3-x86_64 --arch=x86_64
#–path 镜像路径
#–name 为安装源定义一个名字
#–arch 指定安装源是32位、64位、ia64, 目前支持的选项有:x86│x86_64│ia64
#安装源的唯一标示就是根据name参数来定义,本例导入成功后,安装源的唯一标示就是:CentOS-7.3-x86_64,如果重复,系统会提示导入失败。
cp -a /mnt/CentOS-7-x86_64//var/www/html/CentOS-7.3-x86_64/ #镜像文件存放到apache默认目录下
#查看安装镜像文件信息
制作yum仓库
Yum install createrepo
createrepo -pdo/var/www/html/CentOS-7.3-x86_64/ /var/www/html/CentOS-7.3-x86_64/
createrepo -g ls/var/www/html/CentOS-7.3-x86_64/repodata/*-comps.xml/var/www/html/CentOS-7.3-x86_64/
waiting…


 664
664


 被折叠的 条评论
为什么被折叠?
被折叠的 条评论
为什么被折叠?
 到【灌水乐园】发言


