


一、Android Studio环境配置
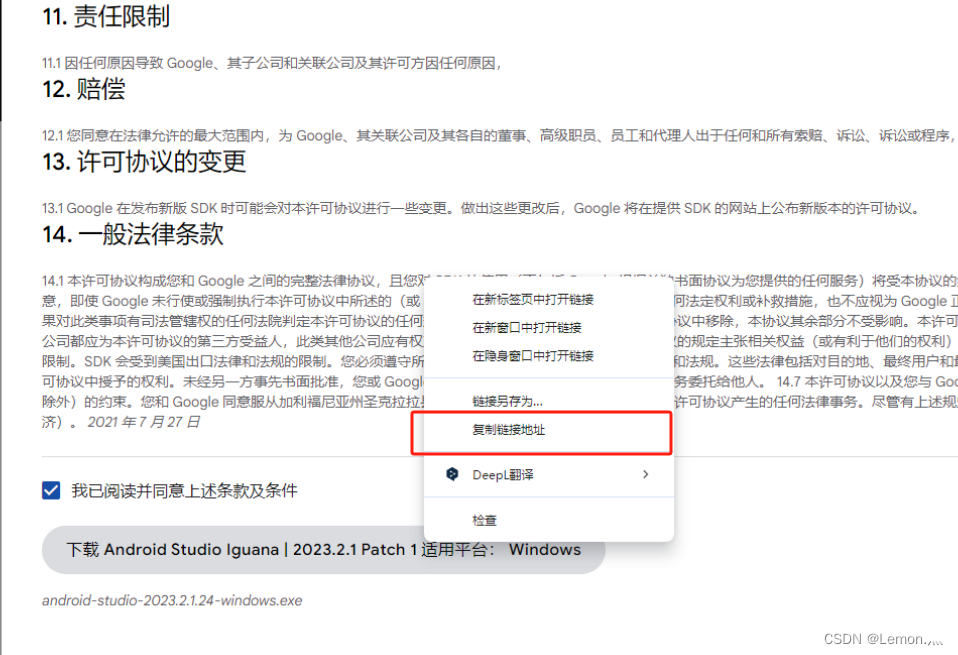
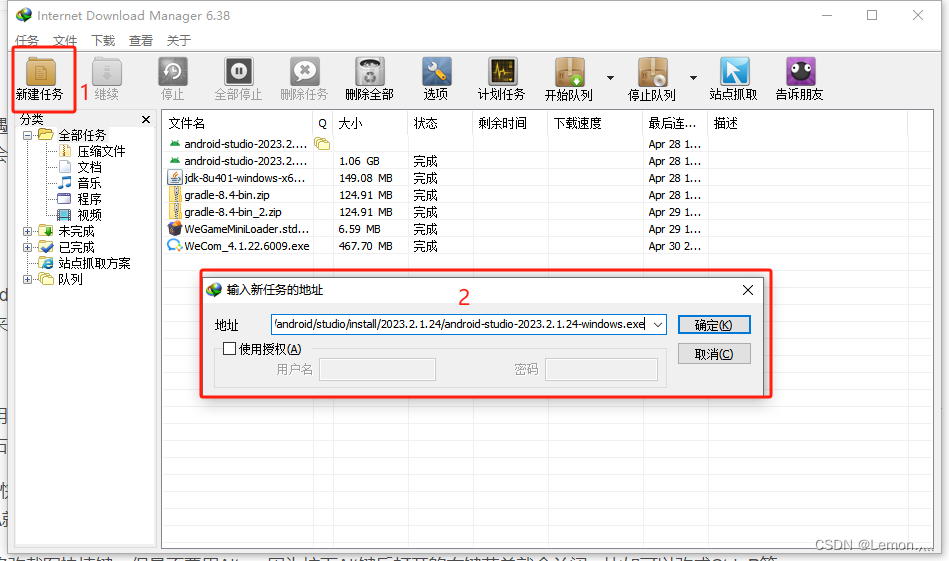
1.安装包下载问题解决
在Android Studio官网下载编译工具时,会出现无法下载的问题,可右键复制下载链接IDMan中进行下载。
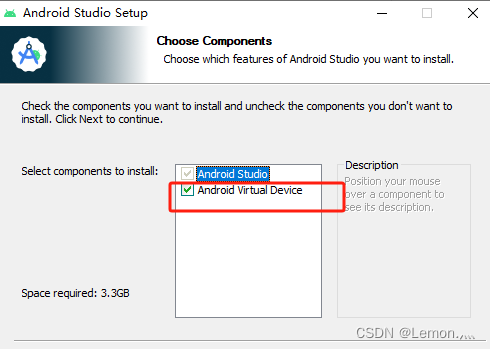
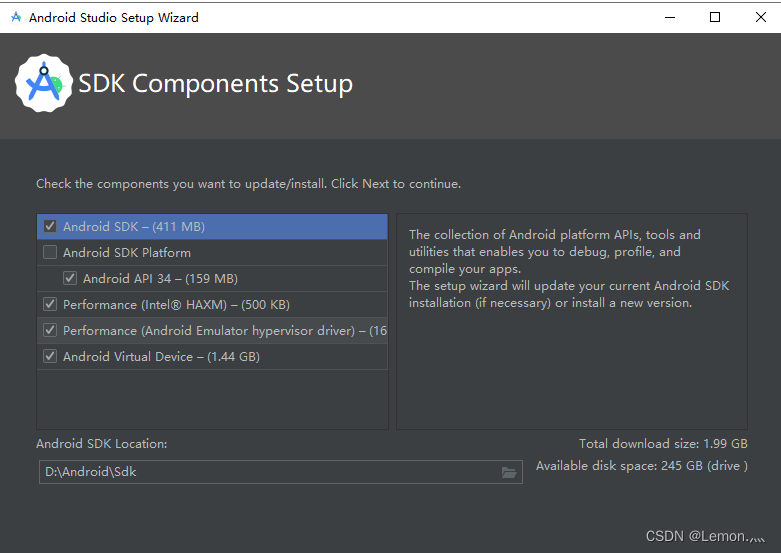
2.安装
安装过程中,需要将Android Virtual Device勾选,否则无法使用虚拟机。
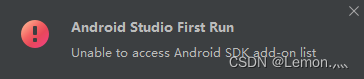
安装启动后,会提示没有SDK,设置代码,直接选择cancel键。
完后,会有专门的SKD组件的安装,但是会有unavailable不可安装的情况出现,可通过创建项目后配置gradle后便可以安装了。
二、项目创建
软件安装后可能出现打不开的情况,可选择以管理员身份启动即可解决问题。
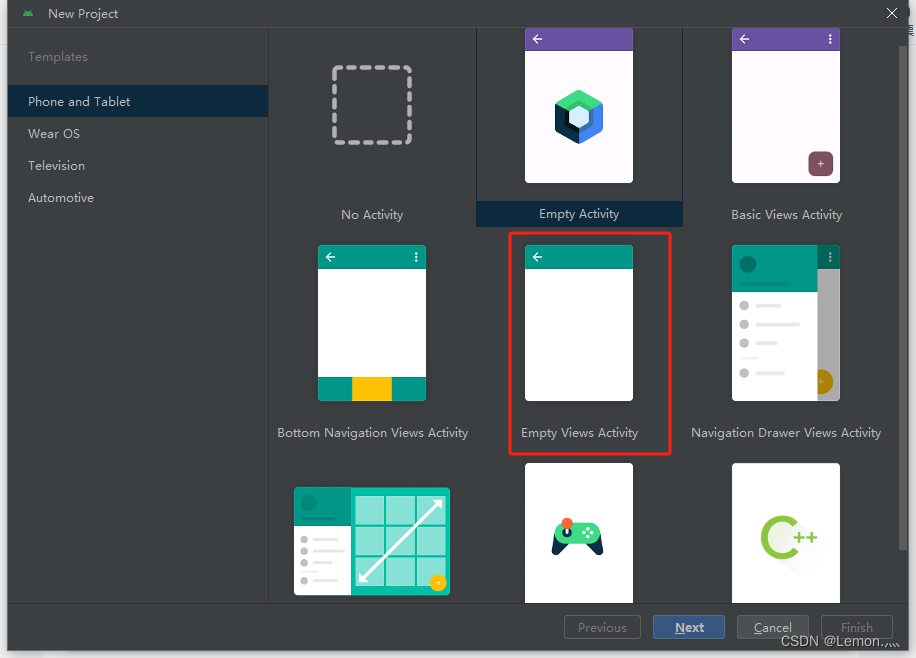
选择New Project

选择喜欢的界面样式即可。
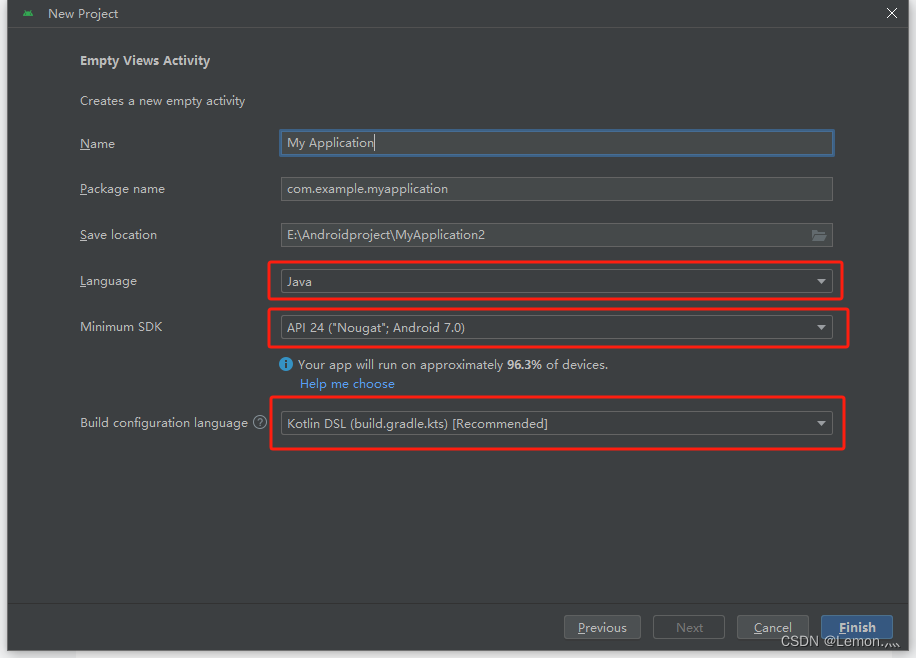
 使用语言、SDK根据自行需求进行选择就行。
Build configuration language建议选择Kotlin DSL(build.gradle.kts)[Recommended],否则会出现缺少gradle文件的情况。
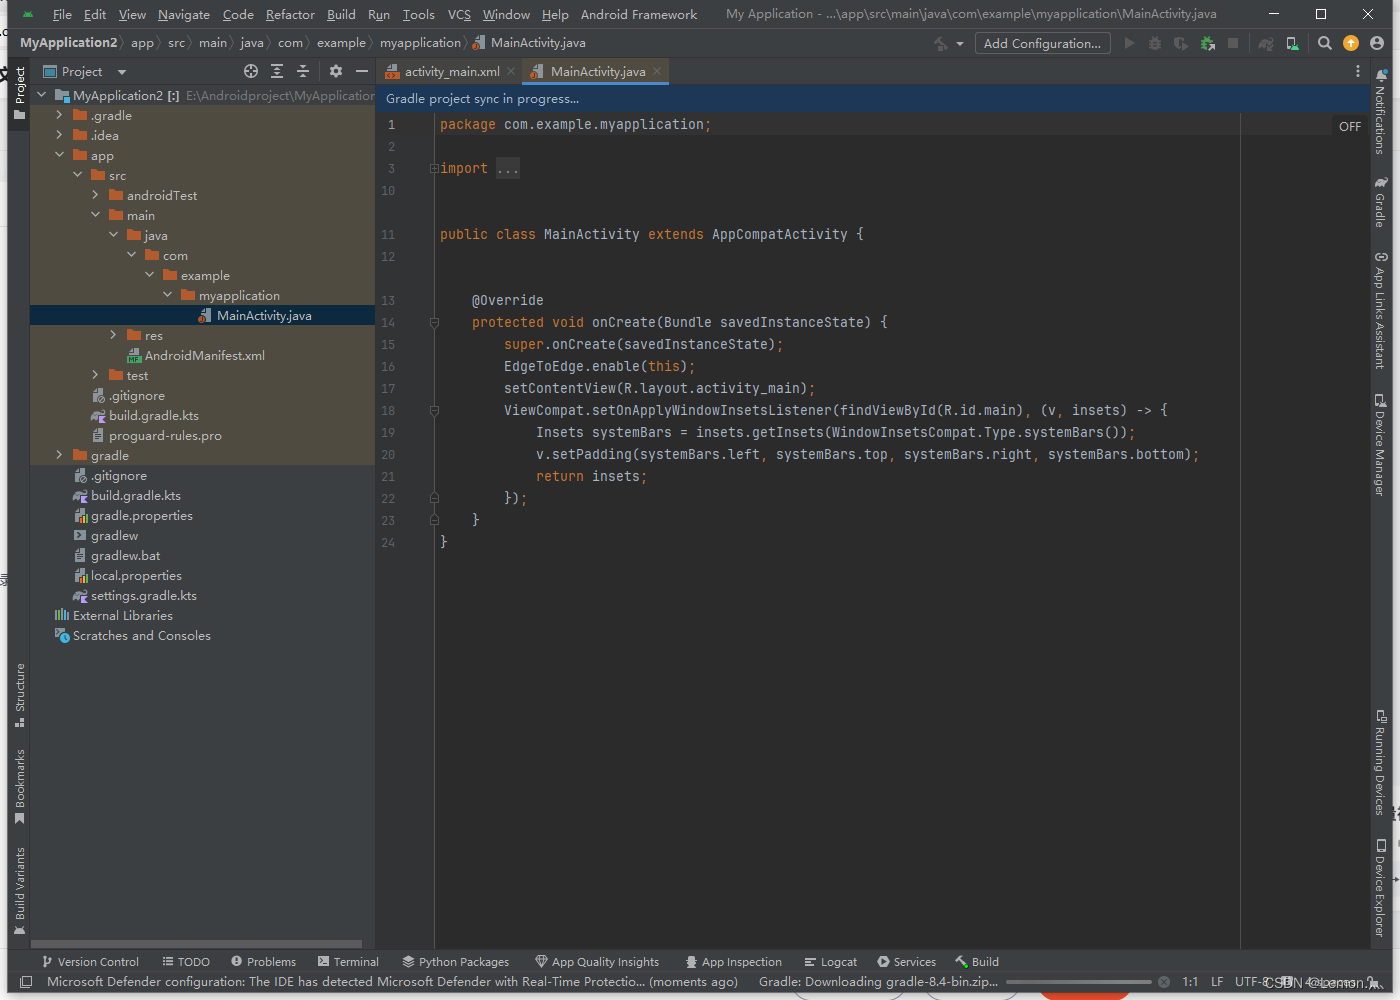
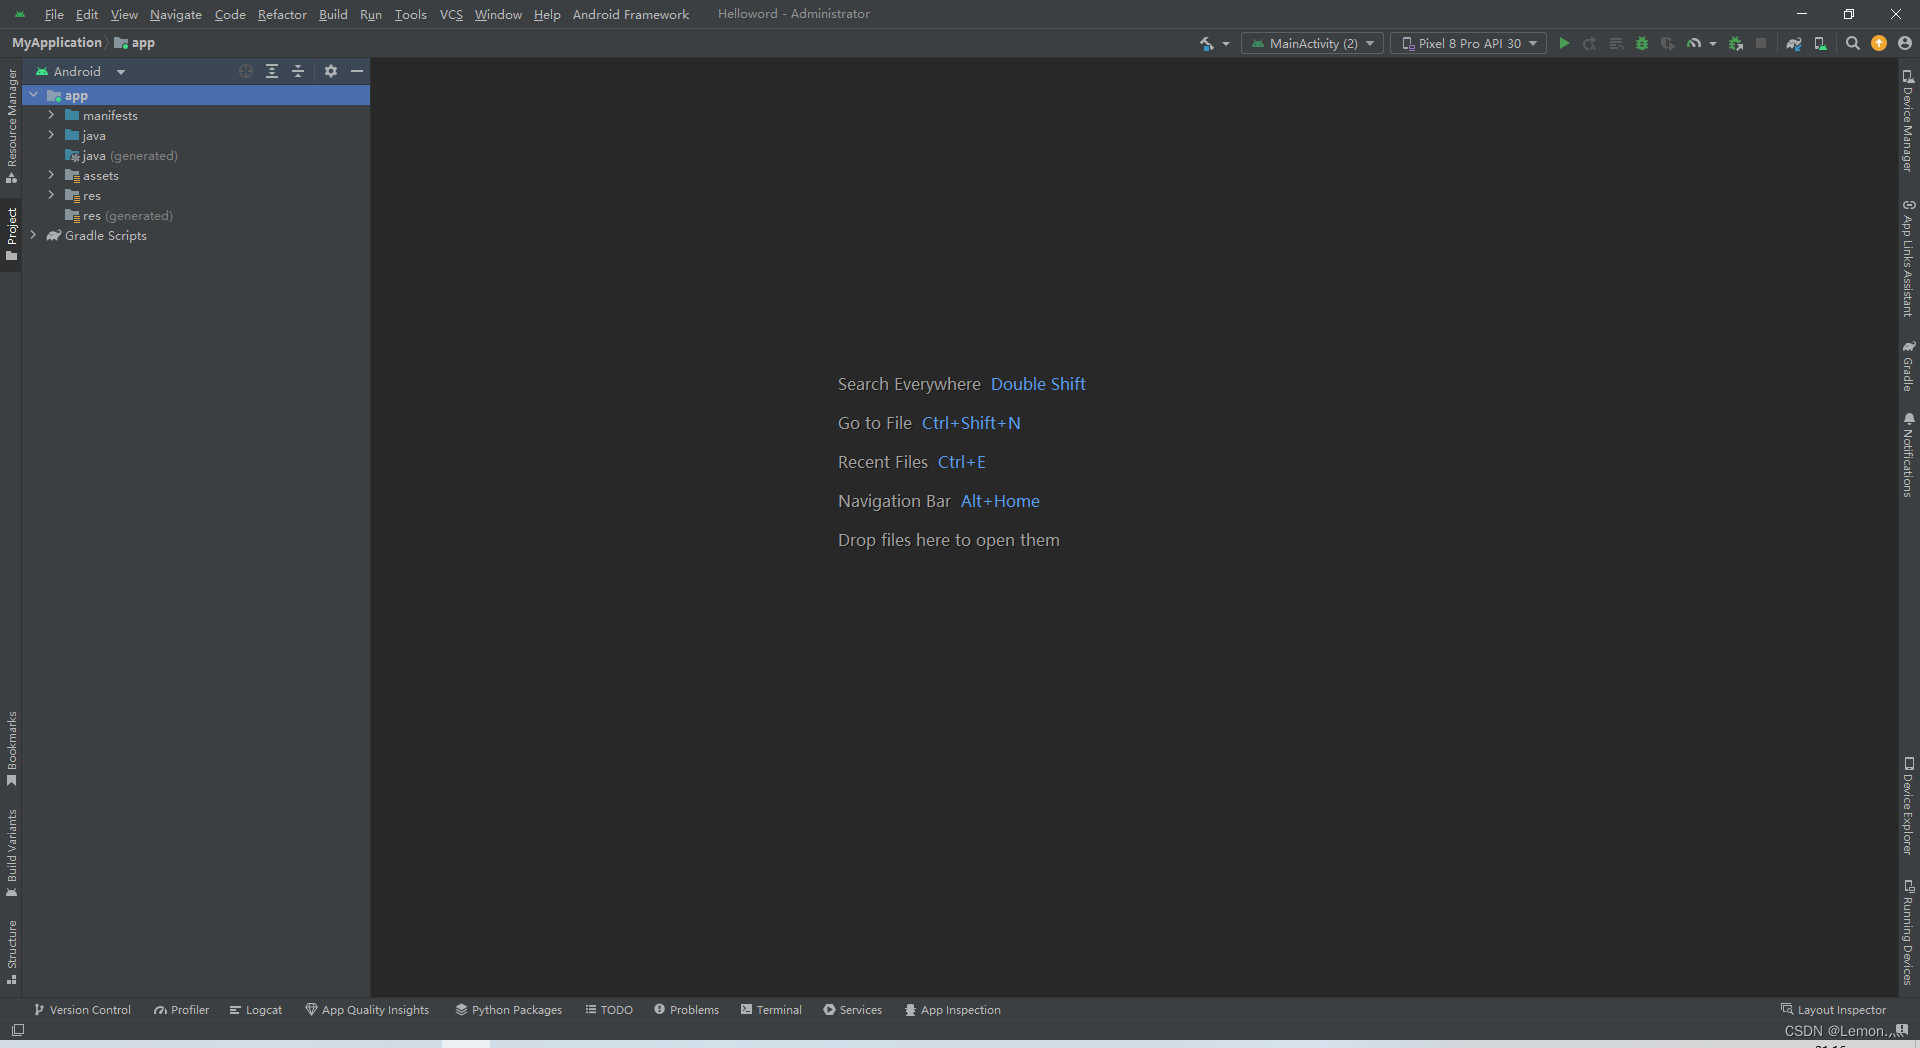
创建完后会出现如下项目目录,并不会直接出现app的文件夹,需要手动配置gradle。
按照如下目录gradle/wrapper/gradle-wrapper.properties修改distributionUrl为本地地址。(根据原先的地址下载对应的压缩包)
#Wed May 01 21:02:04 CST 2024
distributionBase=GRADLE_USER_HOME
distributionPath=wrapper/dists
distributionUrl=https\://services.gradle.org/distributions/gradle-8.4-bin.zip
zipStoreBase=GRADLE_USER_HOME
zipStorePath=wrapper/dists

更变为
#Wed May 01 21:02:04 CST 2024
distributionBase=GRADLE_USER_HOME
distributionPath=wrapper/dists
# 对应的gradle-8.4-bin.zip本地地址即可
distributionUrl=file:///D://Android//gradle-8.4-bin.zip
zipStoreBase=GRADLE_USER_HOME
zipStorePath=wrapper/dists
在settings.gradle.kts更换阿里源(直接复制粘贴即可)
pluginManagement {
    repositories {
        maven { url=uri ("https://www.jitpack.io")}
        maven { url=uri ("https://maven.aliyun.com/repository/releases")}
        maven { url=uri ("https://maven.aliyun.com/repository/google")}
        maven { url=uri ("https://maven.aliyun.com/repository/central")}
        maven { url=uri ("https://maven.aliyun.com/repository/gradle-plugin")}
        maven { url=uri ("https://maven.aliyun.com/repository/public")}

        google()
        mavenCentral()
        gradlePluginPortal()
    }
}
dependencyResolutionManagement {
    repositoriesMode.set(RepositoriesMode.FAIL_ON_PROJECT_REPOS)
    repositories {
        maven { url=uri ("https://www.jitpack.io")}
        maven { url=uri ("https://maven.aliyun.com/repository/releases")}
        maven { url=uri ("https://maven.aliyun.com/repository/google")}
        maven { url=uri ("https://maven.aliyun.com/repository/central")}
        maven { url=uri ("https://maven.aliyun.com/repository/gradle-plugin")}
        maven { url=uri ("https://maven.aliyun.com/repository/public")}


        google()
        mavenCentral()
    }
}

rootProject.name = "Helloword"
include(":app")
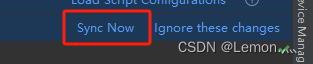
在build.gradle.kts中点击sync now即可自动配置,稍等即可便可变成app文件夹的形式。
选择Project,变成全部文件的形式。
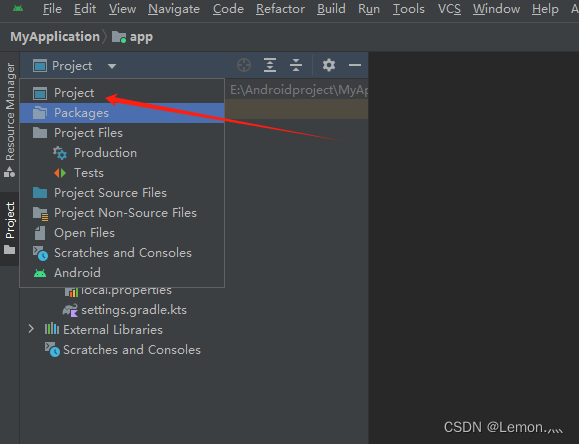
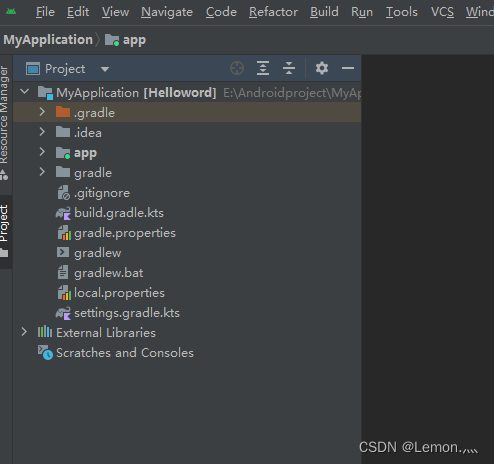
初始新建项目即刻完成。
三、训练模型权重转化
需将训练好的.pth文件转化为.pt文件
"""
该程序使用的是resnet32网络,用到其他网络可自行更改
保存的权重字典目录如下所示。
      ckpt = {
            'weight': model.state_dict(),
            'epoch': epoch,
            'cfg': opt.model,
            'index': name
        }
"""
from models.resnet_cifar import resnet32  # 确保引用你的正确模型架构
import torch
import torch.nn as nn
# 假设你的ResNet定义在resnet.py文件中
model = resnet32()
num_ftrs = model.fc.in_features
model.fc = nn.Linear(num_ftrs, 100)  # 修改这里的100为你的类别数

# 加载权重
checkpoint = torch.load('modelleader_best.pth', map_location=torch.device('cpu'))
model.load_state_dict(checkpoint['weight'], strict=False)  # 使用strict=False可以忽略不匹配的键

model.eval()
# 将模型转换为TorchScript
example_input = torch.rand(1, 3, 32, 32)  # 修改这里以匹配你的模型输入尺寸
traced_script_module = torch.jit.trace(model, example_input)
traced_script_module.save("model.pt")
四、Pytorch项目搭建工作
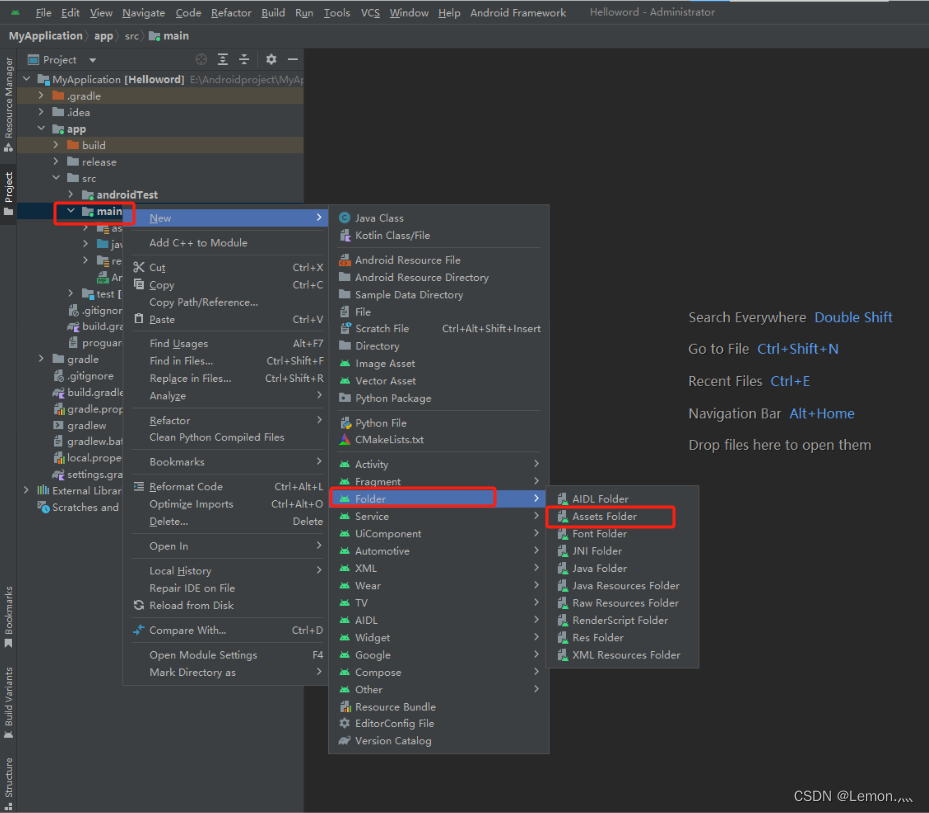
在如下目录下创建assets文件,将转化好的模型放在里面即可,切记不可直接创建文件夹,会出现找不到模型问题。
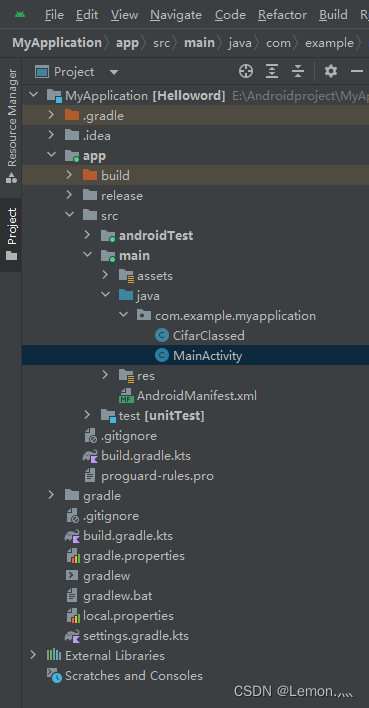
在com/example/myapplication下创建了两个类cifarClassed,MainActivity。
MainActivity类
package com.example.myapplication;
import android.content.Context;
import android.content.Intent;
import android.content.pm.PackageManager;
import android.graphics.Bitmap;
import android.graphics.BitmapFactory;
import android.os.Bundle;
import android.provider.MediaStore;
import android.util.Log;
import android.view.View;
import android.widget.Button;
import android.widget.ImageView;
import android.widget.TextView;
import androidx.annotation.NonNull;
import androidx.appcompat.app.AppCompatActivity;
import androidx.core.app.ActivityCompat;
import androidx.core.content.ContextCompat;
import androidx.core.content.FileProvider;
import org.pytorch.IValue;
import org.pytorch.Module;
import org.pytorch.Tensor;
import org.pytorch.torchvision.TensorImageUtils;
import java.io.File;
import java.io.FileOutputStream;
import java.io.IOException;
import java.io.InputStream;
import java.io.OutputStream;
public class MainActivity extends AppCompatActivity {
private static final int PERMISSION_REQUEST_CODE = 101;
private static final int REQUEST_IMAGE_CAPTURE = 1;
private static final int REQUEST_IMAGE_SELECT = 2;
private ImageView imageView;
private TextView textView;
private Module module;
@Override
protected void onCreate(Bundle savedInstanceState) {
super.onCreate(savedInstanceState);
setContentView(R.layout.activity_main);
// 检查相机权限
if (ContextCompat.checkSelfPermission(this, android.Manifest.permission.CAMERA) != PackageManager.PERMISSION_GRANTED) {
ActivityCompat.requestPermissions(this, new String[]{android.Manifest.permission.CAMERA}, PERMISSION_REQUEST_CODE);
}
imageView = findViewById(R.id.image);
textView = findViewById(R.id.text);
ImageView logoImageView = findViewById(R.id.logo);
logoImageView.setImageResource(R.drawable.logo);
Button takePhotoButton = findViewById(R.id.button_take_photo);
Button selectImageButton = findViewById(R.id.button_select_image);
takePhotoButton.setOnClickListener(v -> dispatchTakePictureIntent());
selectImageButton.setOnClickListener(v -> dispatchGalleryIntent());
try {
module = Module.load(assetFilePath(this, "model.pt"));
} catch (IOException e) {
Log.e("PytorchHelloWorld", "Error reading assets", e);
finish();
}
}
@Override
public void onRequestPermissionsResult(int requestCode, @NonNull String[] permissions, @NonNull int[] grantResults) {
super.onRequestPermissionsResult(requestCode, permissions, grantResults);
if (requestCode == PERMISSION_REQUEST_CODE) {
if (grantResults.length > 0 && grantResults[0] == PackageManager.PERMISSION_GRANTED) {
// 权限被授予
Log.d("Permissions", "Camera permission granted");
} else {
// 权限被拒绝
Log.d("Permissions", "Camera permission denied");
}
}
}
private void dispatchTakePictureIntent() {
Intent takePictureIntent = new Intent(MediaStore.ACTION_IMAGE_CAPTURE);
if (takePictureIntent.resolveActivity(getPackageManager()) != null) {
startActivityForResult(takePictureIntent, REQUEST_IMAGE_CAPTURE);
}
}
private void dispatchGalleryIntent() {
Intent intent = new Intent(Intent.ACTION_PICK, MediaStore.Images.Media.EXTERNAL_CONTENT_URI);
startActivityForResult(intent, REQUEST_IMAGE_SELECT);
}
@Override
protected void onActivityResult(int requestCode, int resultCode, Intent data) {
super.onActivityResult(requestCode, resultCode, data);
if (resultCode == RESULT_OK && (requestCode == REQUEST_IMAGE_CAPTURE || requestCode == REQUEST_IMAGE_SELECT)) {
Bitmap imageBitmap = null;
if (requestCode == REQUEST_IMAGE_CAPTURE) {
Bundle extras = data.getExtras();
imageBitmap = (Bitmap) extras.get("data");
} else if (requestCode == REQUEST_IMAGE_SELECT) {
try {
imageBitmap = MediaStore.Images.Media.getBitmap(this.getContentResolver(), data.getData());
} catch (IOException e) {
e.printStackTrace();
}
}
imageView.setImageBitmap(imageBitmap);
classifyImage(imageBitmap);
}
}
// private void classifyImage(Bitmap bitmap) {
// Tensor inputTensor = TensorImageUtils.bitmapToFloat32Tensor(bitmap,
// TensorImageUtils.TORCHVISION_NORM_MEAN_RGB, TensorImageUtils.TORCHVISION_NORM_STD_RGB);
// Tensor outputTensor = module.forward(IValue.from(inputTensor)).toTensor();
// float[] scores = outputTensor.getDataAsFloatArray();
// float maxScore = -Float.MAX_VALUE;
// int maxScoreIdx = -1;
// for (int i = 0; i < scores.length; i++) {
// if (scores[i] > maxScore) {
// maxScore = scores[i];
// maxScoreIdx = i;
// }
// }
// textView.setText("推理结果:" + CifarClassed.IMAGENET_CLASSES[maxScoreIdx]);
// textView.setVisibility(View.VISIBLE); // 设置 TextView 可见
// }
// private void classifyImage(Bitmap bitmap) {
// // 调整图像大小为 32x32 像素
// Bitmap resizedBitmap = resizeBitmap(bitmap, 32, 32);
//
// // 将调整大小后的图像转换为 PyTorch Tensor
// Tensor inputTensor = TensorImageUtils.bitmapToFloat32Tensor(resizedBitmap,
// new float[]{0.485f, 0.456f, 0.406f}, // 均值 Mean
// new float[]{0.229f, 0.224f, 0.225f}); // 标准差 Std
//
// // 推理
// Tensor outputTensor = module.forward(IValue.from(inputTensor)).toTensor();
// float[] scores = outputTensor.getDataAsFloatArray();
// float maxScore = -Float.MAX_VALUE;
// int maxScoreIdx = -1;
// for (int i = 0; i < scores.length; i++) {
// if (scores[i] > maxScore) {
// maxScore = scores[i];
// maxScoreIdx = i;
// }
// }
// textView.setText("推理结果:" + CifarClassed.IMAGENET_CLASSES[maxScoreIdx]);
// textView.setVisibility(View.VISIBLE); // 设置 TextView 可见
// }
//
private float[] softmax(float[] scores) {
float max = Float.NEGATIVE_INFINITY;
for (float score : scores) {
if (score > max) max = score;
}
float sum = 0.0f;
float[] exps = new float[scores.length];
for (int i = 0; i < scores.length; i++) {
exps[i] = (float) Math.exp(scores[i] - max); // 减去最大值防止指数爆炸
sum += exps[i];
}
for (int i = 0; i < exps.length; i++) {
exps[i] /= sum; // 归一化
}
return exps;
}
// 图像分类方法
private void classifyImage(Bitmap bitmap) {
// 调整图像大小为 32x32 像素
Bitmap resizedBitmap = resizeBitmap(bitmap, 32, 32);
// 将调整大小后的图像转换为 PyTorch Tensor
Tensor inputTensor = TensorImageUtils.bitmapToFloat32Tensor(resizedBitmap,
new float[]{0.485f, 0.456f, 0.406f}, // 使用训练时相同的均值 Mean
new float[]{0.229f, 0.224f, 0.225f}); // 使用训练时相同的标准差 Std
// 推理
Tensor outputTensor = module.forward(IValue.from(inputTensor)).toTensor();
float[] scores = outputTensor.getDataAsFloatArray();
// 应用自定义的 Softmax 函数获取概率分布
float[] probabilities = softmax(scores);
float maxScore = -Float.MAX_VALUE;
int maxScoreIdx = -1;
for (int i = 0; i < probabilities.length; i++) {
if (probabilities[i] > maxScore) {
maxScore = probabilities[i];
maxScoreIdx = i;
}
}
// 更新 UI 必须在主线程中完成
final int maxIndex = maxScoreIdx;
final float finalMaxScore = maxScore;
runOnUiThread(new Runnable() {
@Override
public void run() {
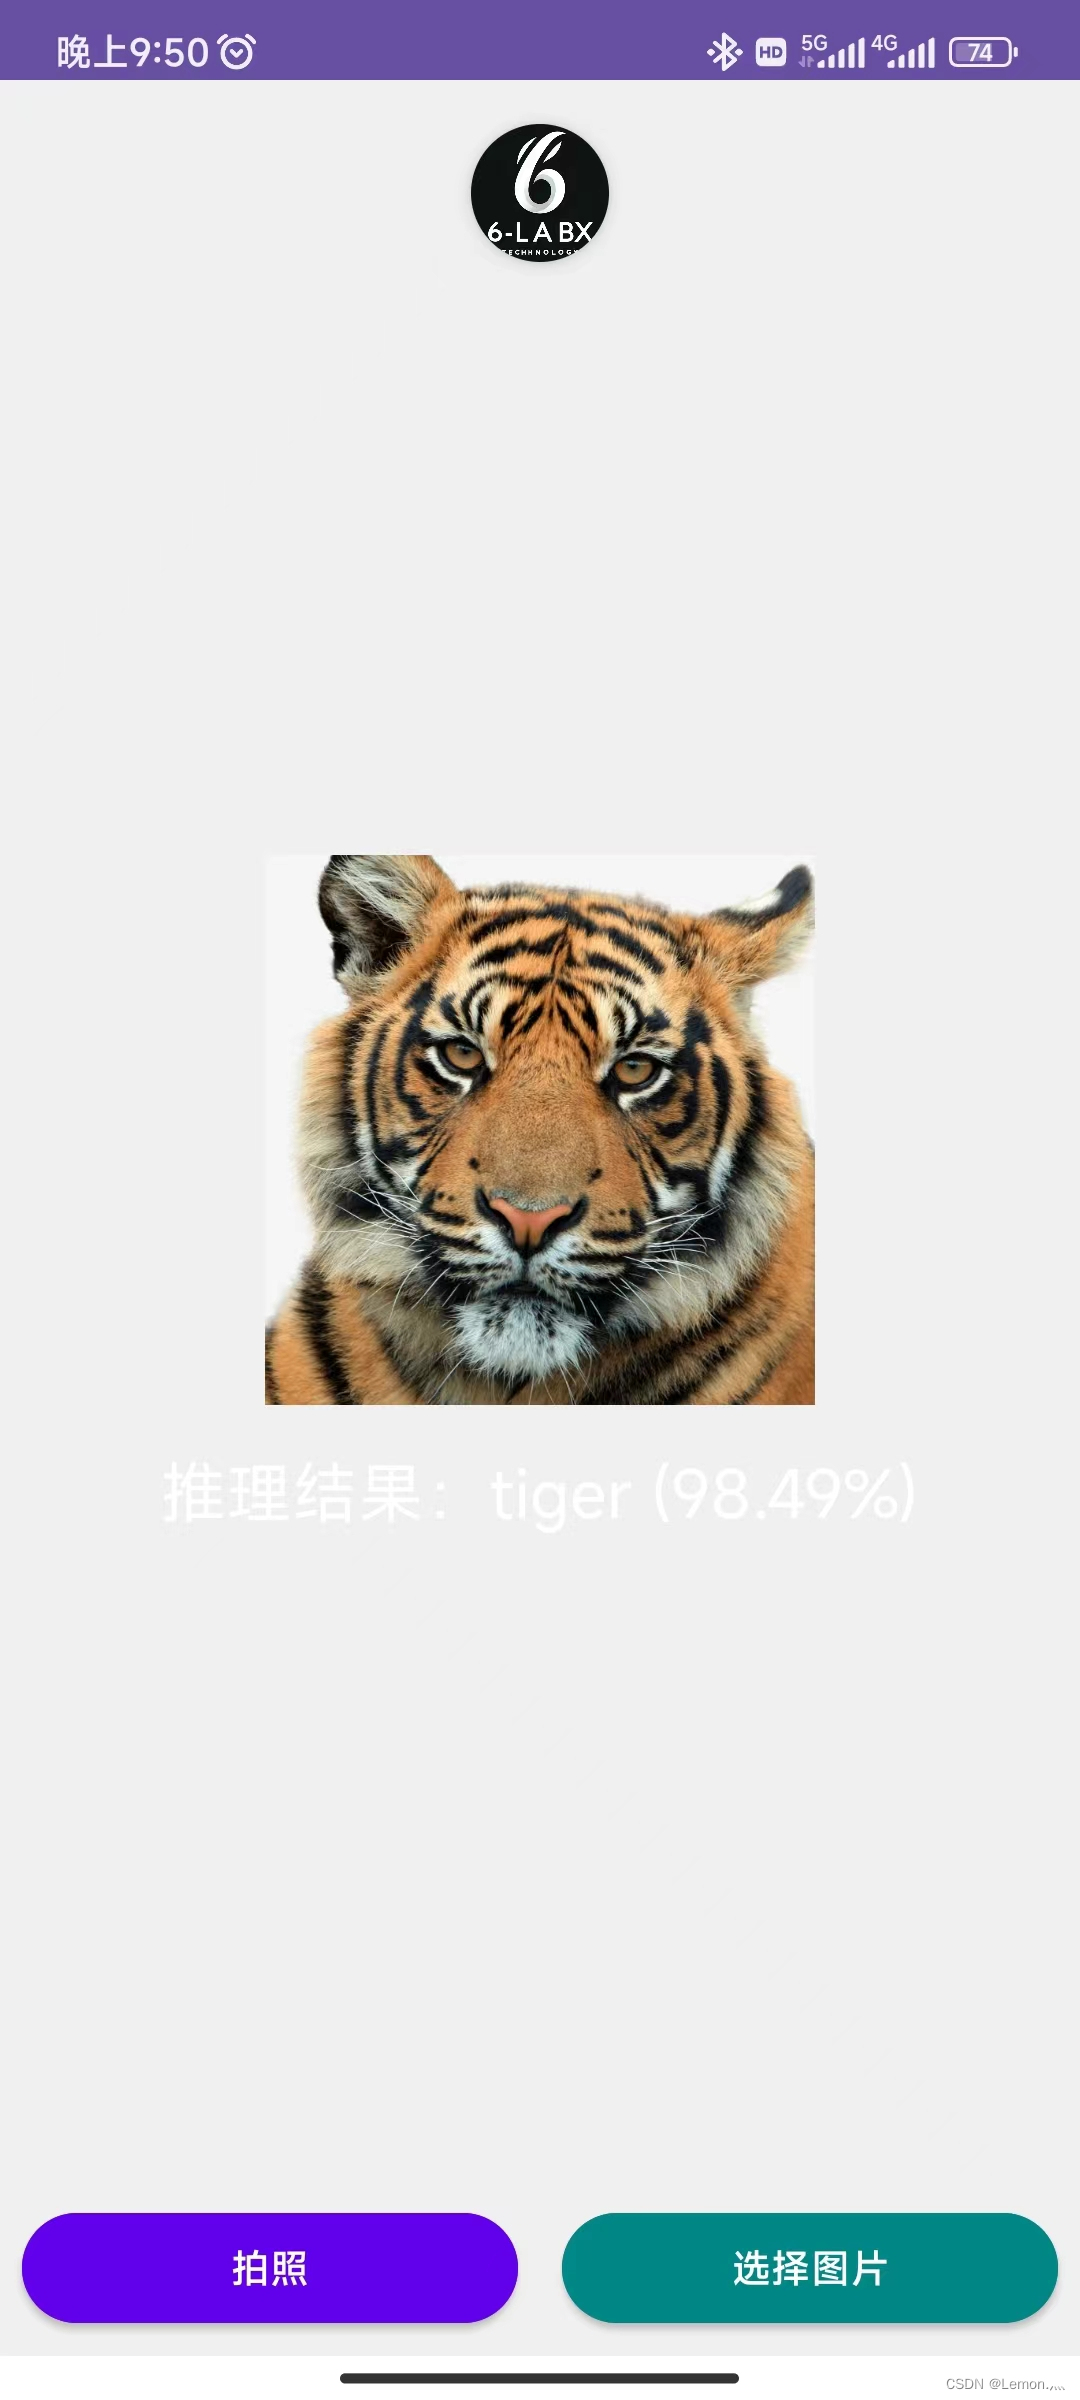
textView.setText("推理结果:" + CifarClassed.IMAGENET_CLASSES[maxIndex] + " (" + String.format("%.2f%%", finalMaxScore * 100) + ")");
textView.setVisibility(View.VISIBLE); // 设置 TextView 可见
}
});
}
///
//
// 方法来调整 Bitmap 的大小
private Bitmap resizeBitmap(Bitmap originalBitmap, int targetWidth, int targetHeight) {
return Bitmap.createScaledBitmap(originalBitmap, targetWidth, targetHeight, false);
}
public static String assetFilePath(Context context, String assetName) throws IOException {
File file = new File(context.getFilesDir(), assetName);
if (file.exists() && file.length() > 0) {
return file.getAbsolutePath();
}
try (InputStream is = context.getAssets().open(assetName)) {
try (OutputStream os = new FileOutputStream(file)) {
byte[] buffer = new byte[4 * 1024];
int read;
while ((read = is.read(buffer)) != -1) {
os.write(buffer, 0, read);
}
os.flush();
}
return file.getAbsolutePath();
}
}
}
CifarClassed类
package com.example.myapplication;


public class CifarClassed {
    public static String[] IMAGENET_CLASSES = new String[]{
            "apple", "aquarium_fish", "baby", "bear", "beaver", "bed", "bee", "beetle",
            "bicycle", "bottle", "bowl", "boy", "bridge", "bus", "butterfly", "camel",
            "can", "castle", "caterpillar", "cattle", "chair", "chimpanzee", "clock",
            "cloud", "cockroach", "couch", "crab", "crocodile", "cup", "dinosaur",
            "dolphin", "elephant", "flatfish", "forest", "fox", "girl", "hamster", "house",
            "kangaroo", "keyboard", "lamp", "lawn_mower", "leopard", "lion", "lizard",
            "lobster", "man", "maple_tree", "motorcycle", "mountain", "mouse", "mushroom",
            "oak_tree", "orange", "orchid", "otter", "palm_tree", "pear", "pickup_truck",
            "pine_tree", "plain", "plate", "poppy", "porcupine", "possum", "rabbit", "raccoon",
            "ray", "road", "rocket", "rose", "sea", "seal", "shark", "shrew", "skunk",
            "skyscraper", "snail", "snake", "spider", "squirrel", "streetcar", "sunflower",
            "sweet_pepper", "table", "tank", "telephone", "television", "tiger", "tractor",
            "train", "trout", "tulip", "turtle", "wardrobe", "whale", "willow_tree", "wolf",
            "woman", "worm"
    };
}
页面布局存放在MyApplication\app\src\main\res\layout\activity_main.xml文件中。
<FrameLayout xmlns:android="http://schemas.android.com/apk/res/android"
    xmlns:tools="http://schemas.android.com/tools"
    android:layout_width="match_parent"
    android:layout_height="match_parent"
    tools:context=".MainActivity"
    android:background="#F0F0F0">

    <LinearLayout
        android:layout_width="match_parent"
        android:layout_height="wrap_content"
        android:layout_gravity="center_vertical"
        android:orientation="vertical"
        android:gravity="center">

        <ImageView
            android:id="@+id/image"
            android:layout_width="200dp"
            android:layout_height="200dp"
            android:scaleType="centerCrop"
            android:elevation="2dp" />

        <!-- 推理结果显示在图片与按钮之间的空白区域 -->
        <TextView
            android:id="@+id/text"
            android:layout_width="wrap_content"
            android:layout_height="wrap_content"
            android:textSize="24sp"
            android:textColor="#FFF"
            android:gravity="center"
            android:layout_marginTop="16dp"
            android:layout_marginBottom="16dp"
            android:visibility="gone" /> <!-- 初始状态隐藏 -->
    </LinearLayout>

    <!-- 按钮位于屏幕底部 -->
    <LinearLayout
        android:layout_width="match_parent"
        android:layout_height="wrap_content"
        android:orientation="horizontal"
        android:layout_gravity="bottom"
        android:elevation="4dp">

        <Button
            android:id="@+id/button_take_photo"
            android:layout_width="0dp"
            android:layout_height="wrap_content"
            android:layout_weight="1"
            android:text="拍照"
            android:backgroundTint="#FF6200EE"
            android:textColor="#FFFFFF"
            android:layout_margin="8dp"
            android:elevation="2dp"
            android:stateListAnimator="@null"/>

        <Button
            android:id="@+id/button_select_image"
            android:layout_width="0dp"
            android:layout_height="wrap_content"
            android:layout_weight="1"
            android:text="选择图片"
            android:backgroundTint="#FF018786"
            android:textColor="#FFFFFF"
            android:layout_margin="8dp"
            android:elevation="2dp"
            android:stateListAnimator="@null"/>
    </LinearLayout>

    <!-- 调整商标为小圆形并放置在顶部中间 -->
    <!-- 调整商标为小圆形并放置在顶部中间使用 CircleImageView -->
    <de.hdodenhof.circleimageview.CircleImageView
        android:id="@+id/logo"
        android:src="@drawable/logo"
        android:layout_width="50dp"
        android:layout_height="50dp"
        android:layout_gravity="top|center_horizontal"
        android:layout_marginTop="16dp"
        android:elevation="5dp"/>
</FrameLayout>
在MyApplication\app\src\main\res\drawable\circle_shape.xml(自行创建)
<?xml version="1.0" encoding="utf-8"?>
<shape xmlns:android="http://schemas.android.com/apk/res/android"
    android:shape="oval">
    <solid android:color="#FFFFFF"/>  <!-- 修改颜色以匹配你的需求 -->
    <size
        android:width="50dp"
        android:height="50dp"/>  <!-- 定义圆的尺寸,确保它与 ImageView 的尺寸相匹配 -->
</shape>
在MyApplication\app\src\main\res\drawable\rounded_background(自行创建)
<?xml version="1.0" encoding="utf-8"?>
<shape xmlns:android="http://schemas.android.com/apk/res/android">
    <solid android:color="#FFFFFF"/>  <!-- 背景色,半透明黑 -->
    <corners android:radius="10dp"/>  <!-- 圆角的大小 -->
</shape>
在MyApplication\app\src\main\AndroidManifest.xml添加相机与读取照片的权限。
<?xml version="1.0" encoding="utf-8"?>
<manifest xmlns:android="http://schemas.android.com/apk/res/android"
    xmlns:tools="http://schemas.android.com/tools">
    <uses-feature android:name="android.hardware.camera" android:required="true"/>
    <uses-permission android:name="android.permission.WRITE_EXTERNAL_STORAGE"/>
    <uses-permission android:name="android.permission.CAMERA" />


    <application
        android:allowBackup="true"
        android:dataExtractionRules="@xml/data_extraction_rules"
        android:fullBackupContent="@xml/backup_rules"
        android:icon="@mipmap/ic_launcher"
        android:label="@string/app_name"
        android:roundIcon="@mipmap/ic_launcher_round"
        android:supportsRtl="true"
        android:theme="@style/Theme.MyApplication"
        tools:targetApi="31">
        <activity
            android:name=".MainActivity"
            android:exported="true">
            <intent-filter>
                <action android:name="android.intent.action.MAIN" />
                <category android:name="android.intent.category.LAUNCHER" />
            </intent-filter>
        </activity>
    </application>

</manifest>
app级别build.gradle.kts(MyApplication\app\build.gradle.kts)配置如下。
plugins {
    alias(libs.plugins.androidApplication)
}

android {
    namespace = "com.example.myapplication"
    compileSdk = 34
    sourceSets {
        getByName("main") {
            jniLibs.srcDir("libs")
        }
    }

    packaging {
        resources.excludes.add("META-INF/*")
    }


    defaultConfig {
        applicationId = "com.example.myapplication"
        minSdk = 24
        targetSdk = 34
        versionCode = 1
        versionName = "1.0"
        testInstrumentationRunner = "androidx.test.runner.AndroidJUnitRunner"
    }

    buildTypes {
        release {
            isMinifyEnabled = false
            proguardFiles(getDefaultProguardFile("proguard-android-optimize.txt"), "proguard-rules.pro")
        }
    }

    compileOptions {
        sourceCompatibility = JavaVersion.VERSION_1_8
        targetCompatibility = JavaVersion.VERSION_1_8
    }
}


dependencies {
    // 使用 alias 来指定库,确保 libs.aliases.gradle 中已经定义了这些别名
    implementation(libs.appcompat)
    implementation(libs.material)
    implementation(libs.activity)
    implementation(libs.constraintlayout)
    testImplementation(libs.junit)
    androidTestImplementation(libs.ext.junit)
    androidTestImplementation(libs.espresso.core)
    implementation("org.pytorch:pytorch_android:1.12.1")
    implementation("org.pytorch:pytorch_android_torchvision:1.12.1")
    implementation("com.google.android.exoplayer:exoplayer:2.14.1")
    implementation("androidx.localbroadcastmanager:localbroadcastmanager:1.0.0")
    implementation("androidx.activity:activity:1.2.0")
    implementation("androidx.fragment:fragment:1.3.0")
    implementation("de.hdodenhof:circleimageview:3.1.0")


}
这段可解决如下bug。
    packaging {
        resources.excludes.add("META-INF/*")
    }
Caused by: com.android.builder.merge.DuplicateRelativeFileException: 2 files found with path ‘META-INF/androidx.core_core.version’.手动添加非常麻烦,因为不止一个文件冲突!!!
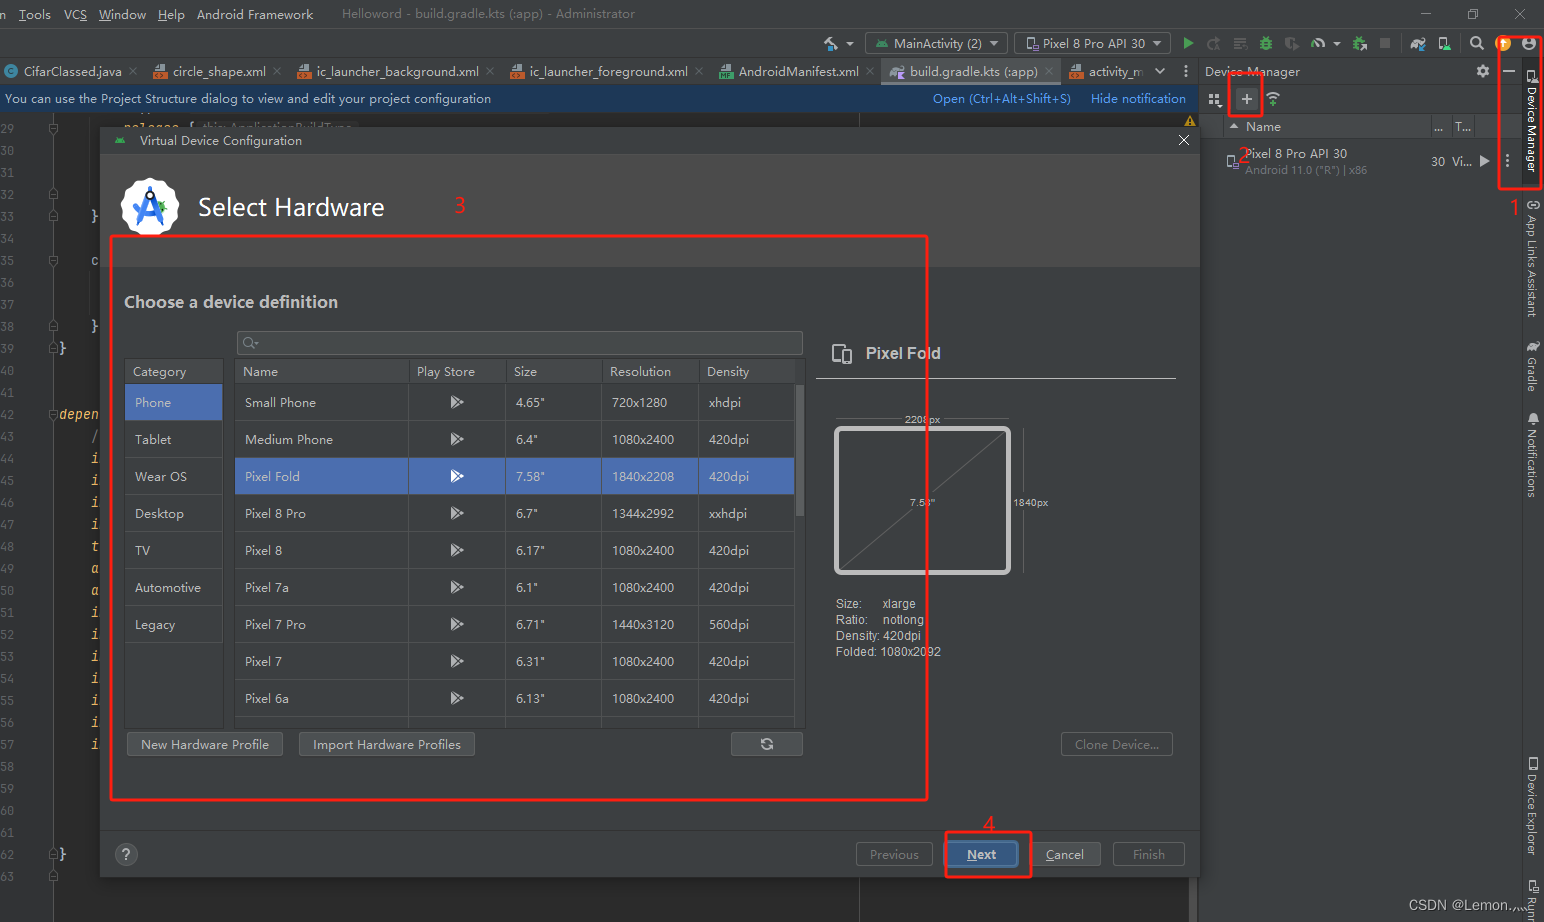
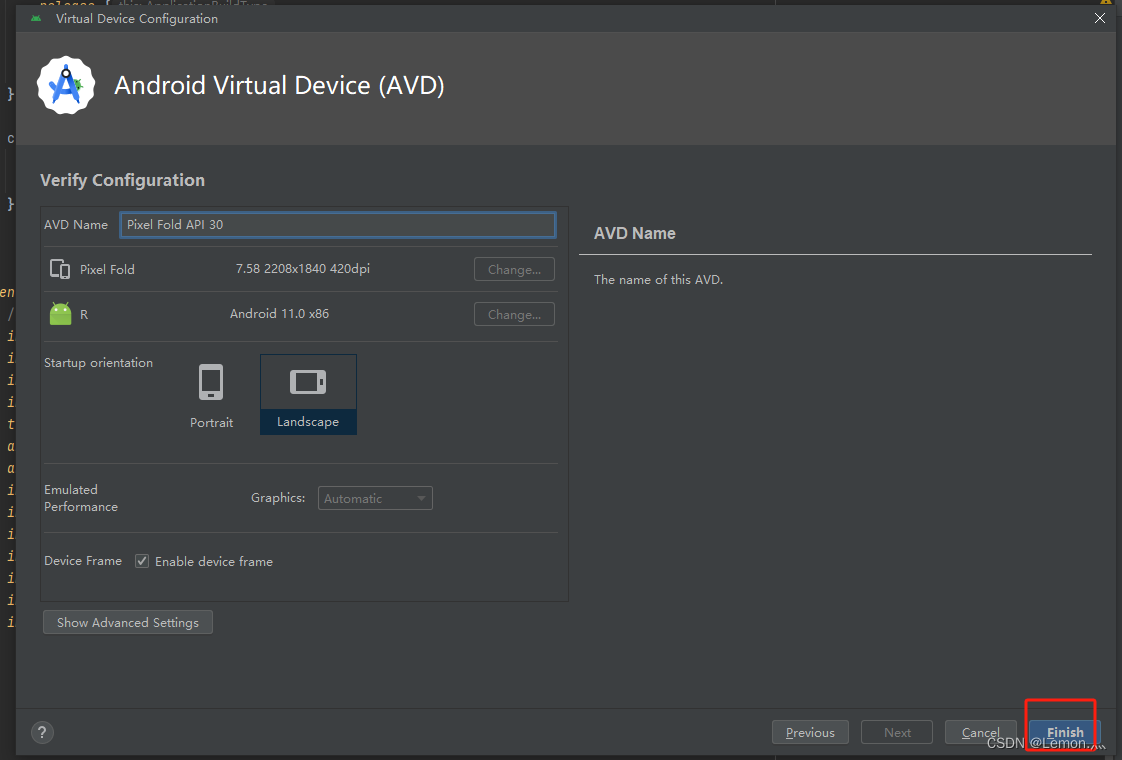
完成以上步骤再按下Sync Now完成依赖的配置工作,需在编译器中自行选择虚拟设备。

完成后即可在MainActivity.java文件启动项目。
五、APK安装包导出
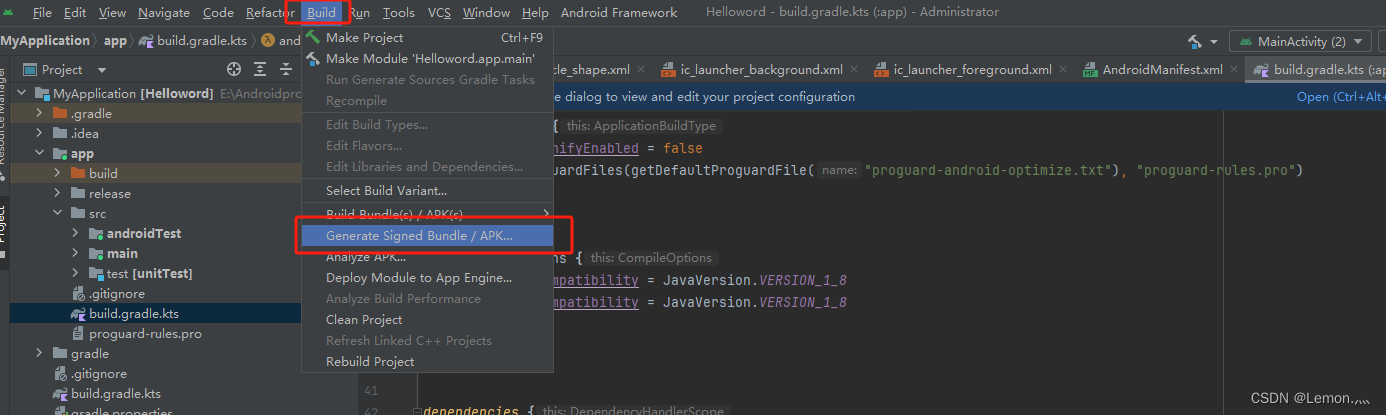
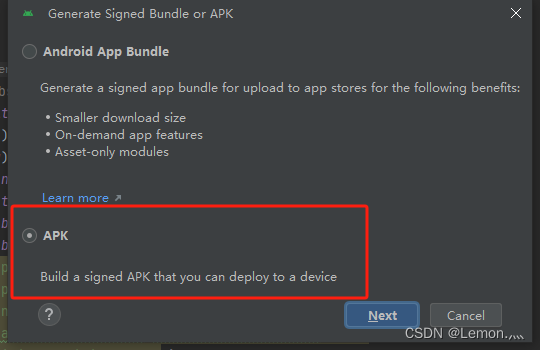
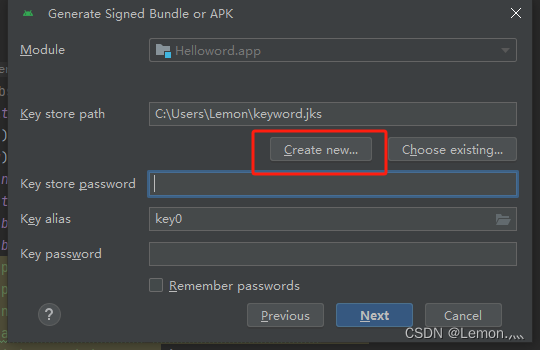
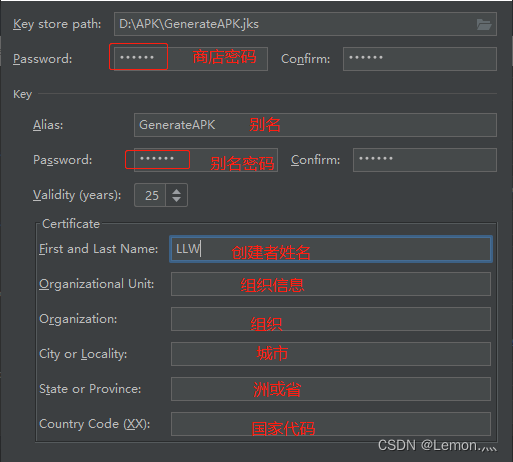
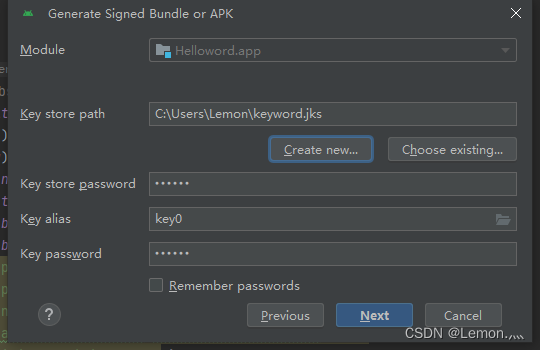

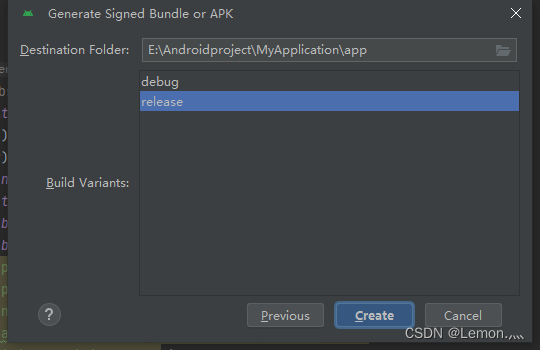
点击create创建即可,便可得到apk文件。
六、效果图


 1526
1526

 被折叠的 条评论
为什么被折叠?
被折叠的 条评论
为什么被折叠?
 到【灌水乐园】发言


