


github源码:
https://blog.csdn.net/weixin_46686890/article/details/140379776?spm=1001.2014.3001.5502
yolov9_trt.py:
https://github.com/LinhanDai/yolov9-tensorrt/blob/master/yolov9_trt.py
TensorRT inference:
https://github.com/WongKinYiu/yolov9/issues/143#issuecomment-1975049660
yolov9环境搭建
conda create -n yolov9 python=3.8 -y
conda activate yolov9
conda install pytorch==2.0.1 torchvision==0.15.2 torchaudio==2.0.2 pytorch-cuda=11.7 -c pytorch -c nvidia
安装需要的包:
pip install -r requirements.txt -i https://pypi.tuna.tsinghua.edu.cn/simple
pip install albumentations>=1.0.3 -i https://pypi.tuna.tsinghua.edu.cn/simple
pip install tensorrt-yolo==3.0.1 -i https://pypi.tuna.tsinghua.edu.cn/simple
pip install openvino -i  https://pypi.tuna.tsinghua.edu.cn/simple
pip install onnxruntime -i  https://pypi.tuna.tsinghua.edu.cn/simple
pip install tensorrt -i  https://pypi.tuna.tsinghua.edu.cn/simple
pip install onnx_graphsurgeon -i  https://pypi.tuna.tsinghua.edu.cn/simple
数据集制作
coco的json格式转yolo的txt格式
json_to_txt.py
import os
import json

def convert(size, box):
    dw = 1. / size[0]
    dh = 1. / size[1]
    x = (box[0] + box[1]) / 2.0
    y = (box[2] + box[3]) / 2.0
    w = box[1] - box[0]
    h = box[3] - box[2]
    x = round(x * dw, 6)
    w = round(w * dw, 6)
    y = round(y * dh, 6)
    h = round(h * dh, 6)
    return (x, y, w, h)

def labelme2yolo(json_path, out_path):
    with open(json_path, 'r') as f:
        data = json.load(f)

    image_width = data['imageWidth']
    image_height = data['imageHeight']

    out_file = open(out_path, 'w')

    # label_map = {"text": 0, "class": 1, "title": 2, "paragraph": 3, "number": 4, "side": 5}
    # label_map = {"text": 0}
    label_map = {"word": 0}

    for shape in data['shapes']:
        label = shape['label']
        points = shape['points']

        x1, y1 = points[0]


        x2, y2 = points[1]

        bbox = convert((image_width, image_height), (x1, x2, y1, y2))

        if label in label_map:
            class_id = label_map[label]
        else:
            print(f"Warning: Unknown label '{label}' in file {json_path}")
            continue

        out_file.write(f"{class_id} {bbox[0]} {bbox[1]} {bbox[2]} {bbox[3]}\n")

    out_file.close()

def process_folder(json_folder, out_folder):
    if not os.path.exists(out_folder):
        os.makedirs(out_folder)

    for filename in os.listdir(json_folder):
        if filename.endswith(".json"):
            json_path = os.path.join(json_folder, filename)
            out_filename = os.path.splitext(filename)[0] + '.txt'
            out_path = os.path.join(out_folder, out_filename)

            labelme2yolo(json_path, out_path)
            print(f"Processed {filename} and saved to {out_path}")

# 使用方法:
json_folder = r'C:\Users\Administrator\Desktop\word\json'
out_folder = r'C:\Users\Administrator\Desktop\word\txt'

process_folder(json_folder, out_folder)
数据集划分—训练集、测试集、验证集按照8:1:1分类
yolo_train8_val1_test1.py
import os
import random
import shutil

# 源文件夹路径
source_img_dir = r'C:\Users\Administrator\Desktop\word\img'
source_txt_dir = r'C:\Users\Administrator\Desktop\word\txt'

# 目标文件夹路径
target_dataset_dir = r'C:\Users\Administrator\Desktop\word\dataset'
target_images_dir = os.path.join(target_dataset_dir, 'images')
target_labels_dir = os.path.join(target_dataset_dir, 'labels')

# 创建目标文件夹
os.makedirs(target_images_dir, exist_ok=True)
os.makedirs(target_labels_dir, exist_ok=True)

# 创建子文件夹
subdirs = ['train', 'val', 'test']
for subdir in subdirs:
    os.makedirs(os.path.join(target_images_dir, subdir), exist_ok=True)
    os.makedirs(os.path.join(target_labels_dir, subdir), exist_ok=True)

# 获取所有图片和标签文件名
img_files = os.listdir(source_img_dir)
txt_files = os.listdir(source_txt_dir)

# 确保图片和标签文件一一对应
assert len(img_files) == len(txt_files), "Number of images and labels do not match"

# 随机打乱文件列表
random.seed(42)  # 设置随机种子,使得每次运行结果相同
random.shuffle(img_files)

# 分配比例
split_train = int(len(img_files) * 0.8)
split_val = int(len(img_files) * 0.9)

# 复制文件到相应的文件夹
for idx, img_file in enumerate(img_files):
    txt_file = img_file.replace('.jpg', '.txt')  # 假设图片扩展名为.jpg,标签扩展名为.txt
    src_img = os.path.join(source_img_dir, img_file)
    src_txt = os.path.join(source_txt_dir, txt_file)

    if idx < split_train:
        dest_dir = 'train'
    elif idx < split_val:
        dest_dir = 'val'
    else:
        dest_dir = 'test'

    dest_img = os.path.join(target_images_dir, dest_dir, img_file)
    dest_txt = os.path.join(target_labels_dir, dest_dir, txt_file)

    shutil.copy(src_img, dest_img)
    shutil.copy(src_txt, dest_txt)

print("Files have been successfully split into train, val, and test sets.")
python train_tual.py

测试
detect.py:
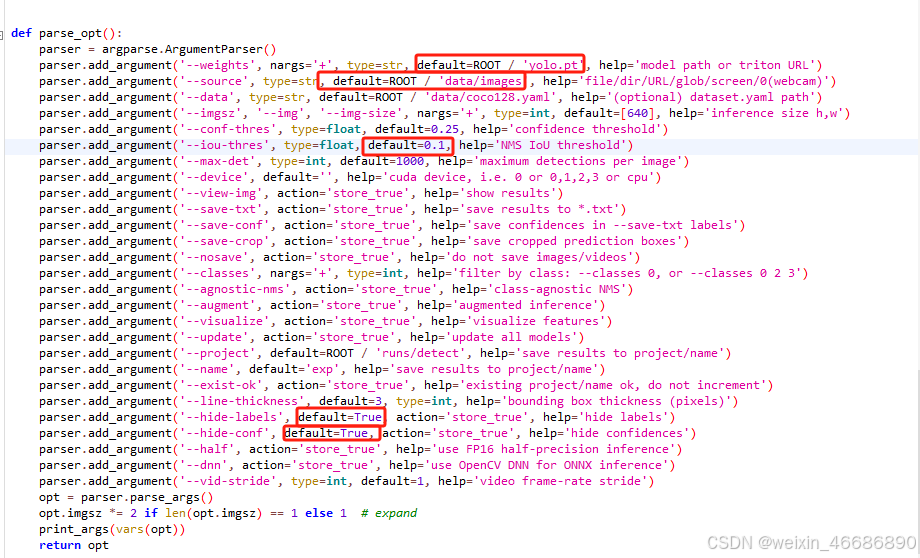
python detect.py --source '/home/yolov9/img' --img 640 --device 0 --weights '/home/yolov9/runs/train/exp/weights/best.pt'YOLOv9模型转ONNX:
trtyolo export -v yolov9 -w /home/yolov9/runs/train/exp/weights/best.pt --imgsz 640 -o /home/yolov9/runs/train/exp/weights/YOLOv9-Openvino和ONNXRuntime推理【CPU】
https://blog.csdn.net/weixin_45679938/article/details/136307157
ONNX转TensorRT Engine:
cd /home/line_seg/TensorRT-8.6.1.6/bin
./trtexec --onnx=/home/yolov9/best.onnx --saveEngine=/home/yolov9/runs/train/exp/weights/best.engine --fp16
Tensorrt推理代码
YOLOV9的Tensorrt推理代码,python版本-CSDN博客
没推理成功:AttributeError: 'NoneType' object has no attribute 'create_execution_context'


 1597
1597

 被折叠的 条评论
为什么被折叠?
被折叠的 条评论
为什么被折叠?
 到【灌水乐园】发言


