


 这篇博客介绍了在Android环境中动态添加ListView的步骤,包括创建ListView布局文件、子布局文件、实体类、适配器以及主程序操作。通过示例代码和详细说明,帮助读者掌握动态更新ListView的方法。
最近在写通过Android获取云平台中的设备列表,需要动态更新ListView。因此写下了这篇笔记。在这里你将会学习如何动态添加ListView!下面是我借鉴的博主的内容
参考链接:https://blog.csdn.net/lcp0633/article/details/127651720
前言
- 这里我的环境是:Android Studio Dolphin | 2021.3.1
- 我们需要准备:ListView、子布局在res/Layout目录下创建一个ListView子布局、数据的实体类、和最重要的适配器,最后就是主程序的操作代码
- 效果图:

一、创建一个ListView布局文件
小知识:如何设置ListView的item之间的距离?
android:divider="@null"
android:fadingEdge="none"
android:headerDividersEnabled="false"
android:footerDividersEnabled="false"
<!-- 用来控制List View之间的间距-->>
android:dividerHeight="10dp"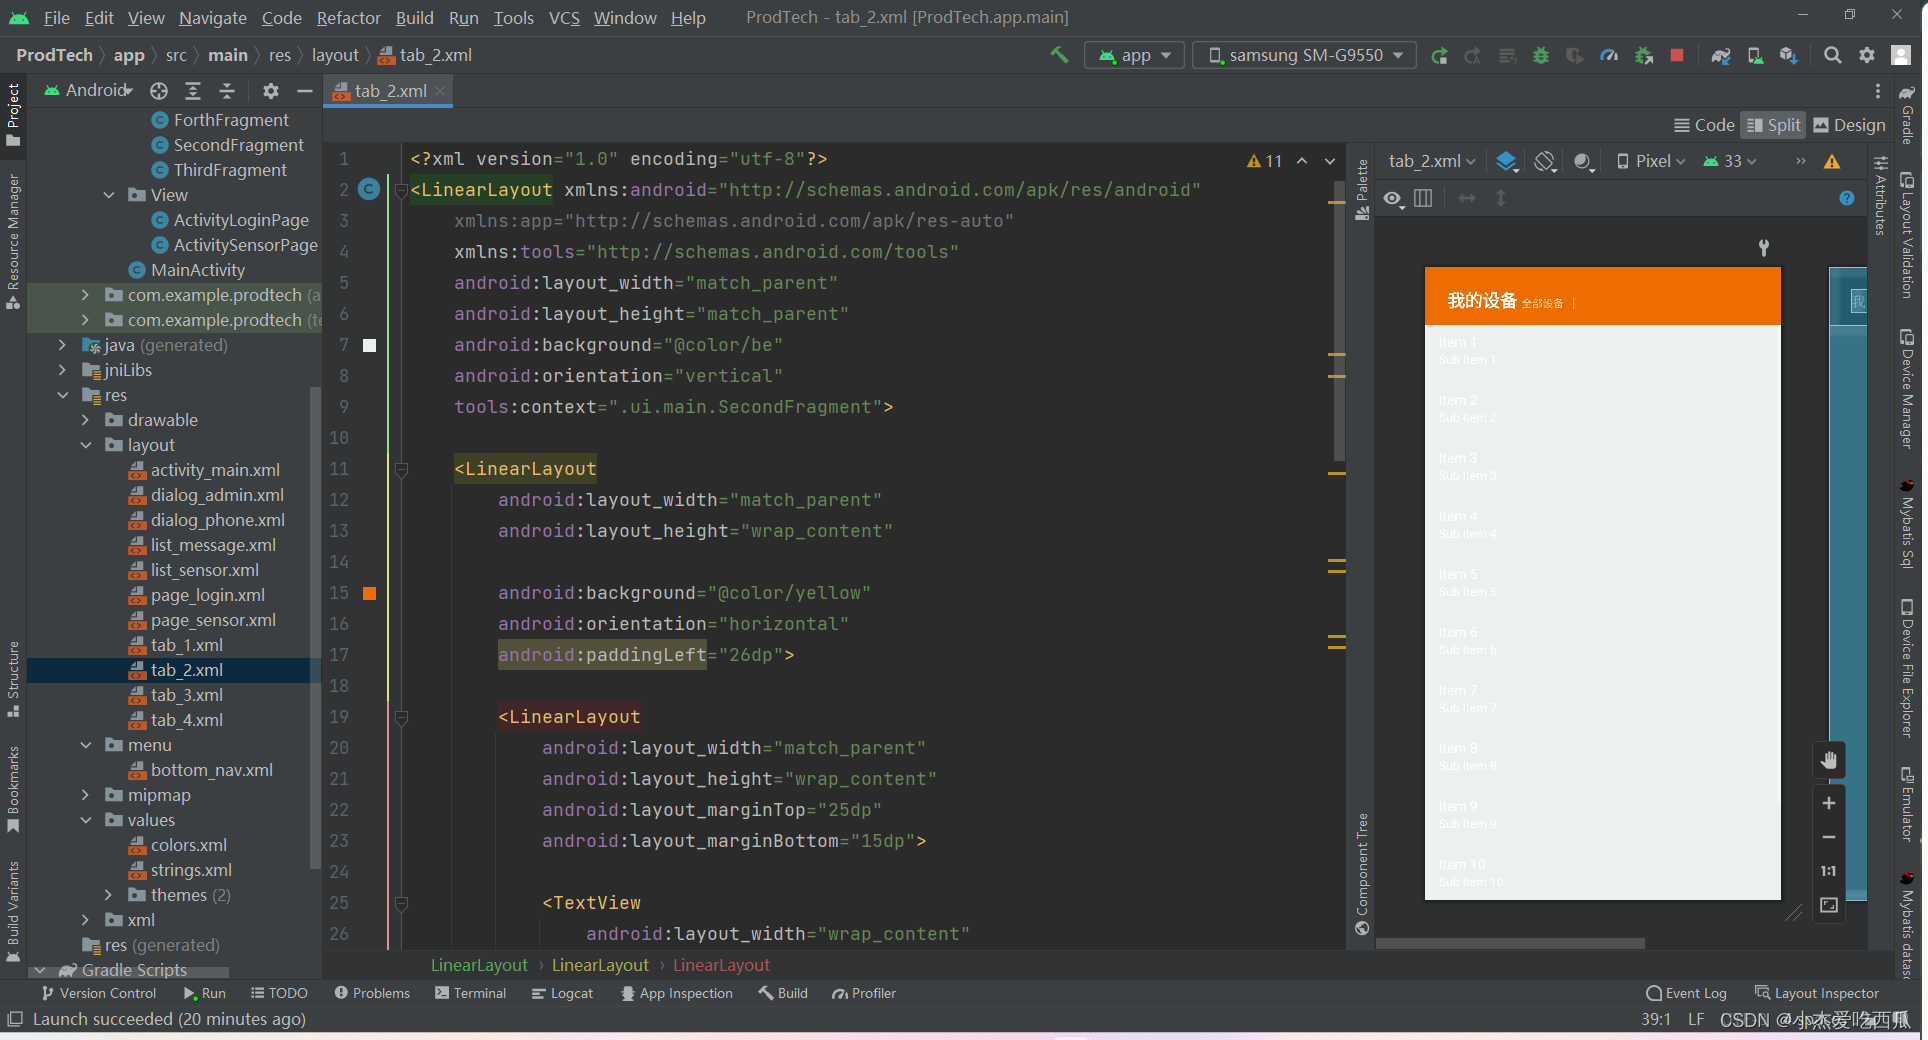
<?xml version="1.0" encoding="utf-8"?>
<LinearLayout xmlns:android="http://schemas.android.com/apk/res/android"
    xmlns:app="http://schemas.android.com/apk/res-auto"
    xmlns:tools="http://schemas.android.com/tools"
    android:layout_width="match_parent"
    android:layout_height="match_parent"
    android:orientation="vertical"
    tools:context=".ui.main.SecondFragment">

    <LinearLayout
        android:layout_width="match_parent"
        android:layout_height="match_parent"
        android:orientation="vertical">

        <ListView
            android:id="@+id/list_view"
            android:layout_width="match_parent"
            android:layout_height="wrap_content"
            android:divider="@null"
            android:dividerHeight="3dp"
            android:fadingEdge="none"
 最低0.47元/天 解锁文章


 1万+
1万+

 被折叠的 条评论
为什么被折叠?
被折叠的 条评论
为什么被折叠?
 到【灌水乐园】发言


