


如果没了解过 axios 建议先看 axios 的基本用法再看此文章会更好!
首先安装 axios
npm i axios -S
安装不成功可以在后面加上 --force
安装完成后在组件使用 axios
<template>
  <div>
    <button @click="getInfo">发起 GET 请求</button>
  </div>
</template>

<script>
import axios from 'axios'

export default {
  methods: {
    async getInfo() {
      const { data: res } = await axios.get('http://www.liulongbin.top:3006/api/get')
      console.log(res)
    }
  }
}
</script>
在另一个组件发起post请求
<template>
  <div>
    <button @click="postInfo">发起 GET 请求</button>
  </div>
</template>

<script>
import axios from 'axios'

export default {
  methods: {
    async postInfo() {
      const { data: res } = await axios.post('http://www.liulongbin.top:3006/api/post', {name: 'zs', age: 20 })
      console.log(res)
    }
  }
}
</script>
如果其他组件也要使用axios发请求,就会发现这样非常的繁琐,每次都要导入axios和写完整的地址
将 axios 挂载到原型
每一个.vue组件都相当于一个 Vue 的实例,可以理解为每一个.vue组件 都是new Vue这个构造函数得到的
所以可以在 main.js 里面进行这样的配置:
import Vue from 'vue'
import App from './App.vue'
import axios from 'axios'

Vue.config.productionTip = false

//在原型上挂载一个axios的自定义属性
Vue.prototype.axios = axios

new Vue({
  render: h => h(App)
}).$mount('#app')
所以在组件时候可以这样使用:
<template>
  <div>
    <button @click="getInfo">发起 GET 请求</button>
  </div>
</template>

<script>
// import axios from 'axios'

export default {
  methods: {
    async getInfo() {
      const { data: res } = await this.axios.get('http://www.liulongbin.top:3006/api/get')
      console.log(res)
    }
  }
}
</script>
this.axios 表示通过组件实例访问到它原型的 axios 这个属性
解决请求根路径
import Vue from 'vue'
import App from './App.vue'
import axios from 'axios'

Vue.config.productionTip = false

// 全局配置 axios 的请求根路径
axios.defaults.baseURL = 'http://www.liulongbin.top:3006'
// 把 axios 挂载到 Vue.prototype 上,供每个 .vue 组件的实例直接使用
// Vue.prototype.axios = axios 其实我们一般都不叫axios,而是叫$http,因为Vue的内置成员都是以$开头的
Vue.prototype.$http = axios

// 今后,在每个 .vue 组件中要发起请求,直接调用 this.$http.xxx
// 但是,把 axios 挂载到 Vue 原型上,有一个缺点:不利于 API 接口的复用!!!

new Vue({
  render: h => h(App)
}).$mount('#app')
所以组件使用 axios 简化成如下示例代码:
<template>
  <div>
    <button @click="getInfo">发起 GET 请求</button>
  </div>
</template>

<script>
// import axios from 'axios'

export default {
  methods: {
    async getInfo() {
      const { data: res } = await this.$http.get('/api/get')
      console.log(res)
    }
  }
}
</script>
了解直接将 axios 挂载到原型上的缺点
缺点是无法实现 api 接口的复用,就是接口不止一个的时候,无法实现复用
// 这里已经写死了,不止一个接口时,显然就不行了
// 全局配置 axios 的请求根路径
axios.defaults.baseURL = 'http://www.liulongbin.top:3006'
所以我们不用这样的方式来配置,但要知道有这样的配置方式
推荐方法
思路就是把每一个不同的接口进行分开,以实现接口的复用,如:
在 src 的 utils(工具)文件夹里
接口1,放在 request1.js
接口2:放在 request2.js

开始实操:在utils 文件夹创建
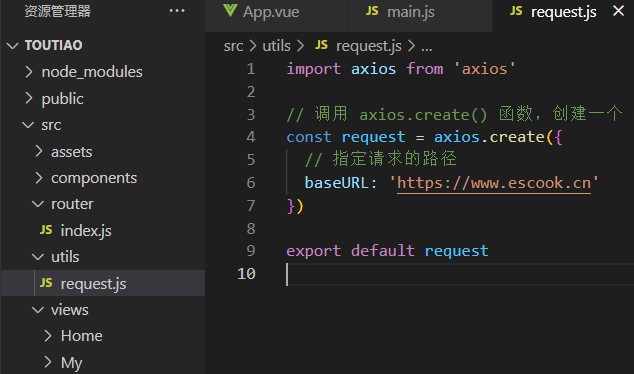
import axios from 'axios'

// 调用 axios.create() 函数,创建一个 axios 的实例对象,用 request 来接收
const request = axios.create({
  // 指定请求的路径
  baseURL: 'https://www.escook.cn'
})

export default request
在组件中使用(了解可跳)
<template>
  <div>
    <button @click="getArticleList">发请求</button>
  </div>
</template>

<script>
// 导入 request.js
import request from '@/utils/request.js'

export default {
   data() {
    return {
      page: 1, // er页码值。从 1 开始
      limit: 10 // 每页展示的数据条数。
    }
  },
  methods: {
    async getArticleList () {
      // 获取文章列表数据 /articles 为请求url地址
      const { data: res } = await request.get('/articles', {
      	// 请求参数
      	params: {
		  _page: this.page,
		  _limit: this.limit
		}
      })
      console.log(res)
    }
  }
}
</script>
问题又来了,那其他组件 调用 request.js 不得重复写 await 后面的 Promise 对象,没有达到复用性?
故在 src 目录下创建 api 文件夹,把相关请求写成可复用的 api
// 文章相关的 API 接口都封装到这个模块中
import request from '@/utils/request'

// 向外按需导出一个 API 函数
export const getArticleListAPI = function(_page, _limit) {
  return request.get('/articles', {
    // 请求参数
    params: {
      _page,
      _limit
    }
  })
}
组件改成
<template>
  <div>
    <button @click="getArticleList">发请求</button>
  </div>
</template>

<script>
// 按需导入 API 接口
import { getArticleListAPI } from '@/api/articleAPI'

export default {
   data() {
    return {
      page: 1, // er页码值。从 1 开始
      limit: 10 // 每页展示的数据条数。
    }
  },
  methods: {
    async getArt() {
      const { data: res } = await getArticleListAPI(this.page, this.limit)
      console.log(res)
    }
  }
}
</script>
把相关的 API 接口都封装到这一个 API 中,这样不就简洁了吗


 774
774


 被折叠的 条评论
为什么被折叠?
被折叠的 条评论
为什么被折叠?
 到【灌水乐园】发言


