


前言
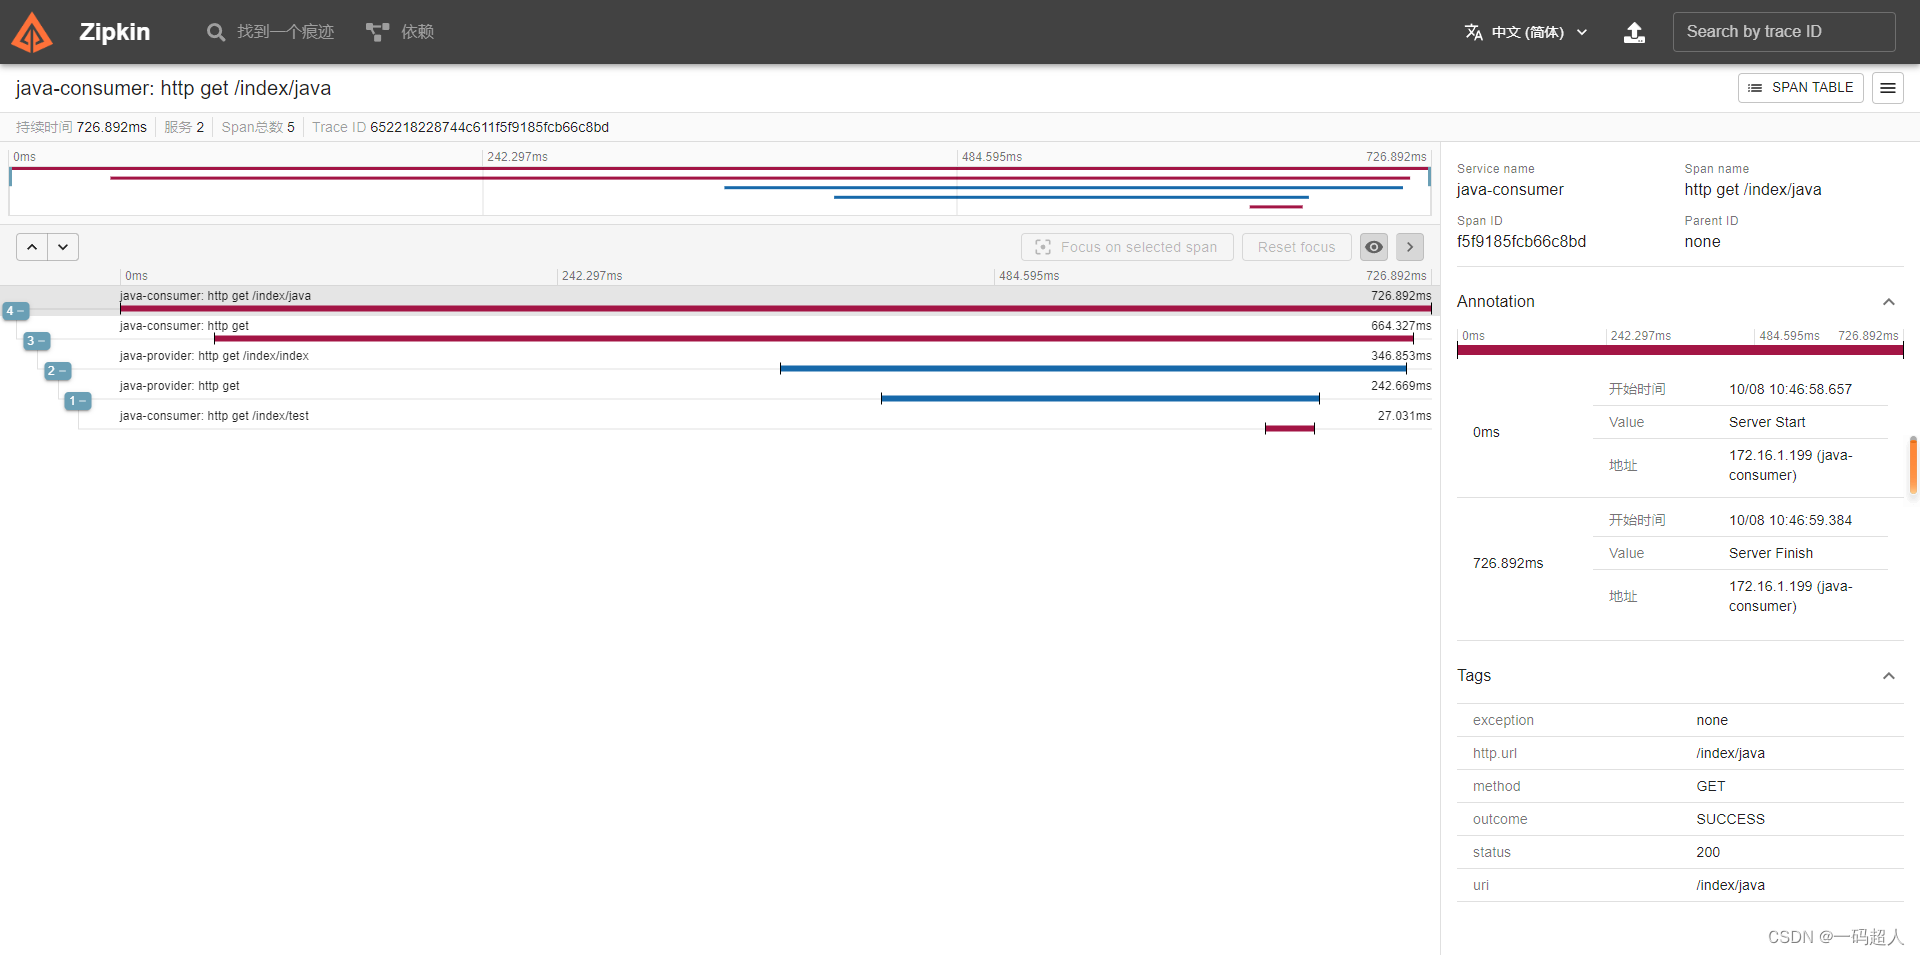
最近在使用springboot3搭建cloud微服务在链式追踪做了下选型 ,因服务者有多种语言,skywalking的php探针很难使用,所以打算使用zipkin埋点来做链路追踪!不过尴尬的是boot3剔除了sleuth的支持!所以无法使用spring-cloud-starter-sleuth依赖了,直接无效。百度、csdn并没有一个哥们提供一下迁移示例,没办法只能自己看官方文档来做迁移文章了,希望能帮助各位老铁了,点个关注不迷路!顶起来!
迁移官方文档:Spring Cloud Sleuth Features
废话不多说直接上代码!
问题版本,3.0以下可以正常使用sleuth+zipkin,不用看本文,本文只解决3.0及以上版本。
所需依赖
        <dependency>
            <groupId>io.micrometer</groupId>
            <artifactId>micrometer-tracing-bridge-brave</artifactId>
        </dependency>
        <dependency>
            <groupId>io.zipkin.reporter2</groupId>
            <artifactId>zipkin-reporter-brave</artifactId>
        </dependency>
        <dependency>
            <groupId>io.micrometer</groupId>
            <artifactId>micrometer-observation</artifactId>
        </dependency>
        <dependency>
            <groupId>org.springframework.boot</groupId>
            <artifactId>spring-boot-starter-actuator</artifactId>
        </dependency>
        <dependency>
            <groupId>org.springframework.cloud</groupId>
            <artifactId>spring-cloud-starter-zipkin</artifactId>
            <version>2.2.8.RELEASE</version>
        </dependency>
        <dependency>
            <groupId>io.github.openfeign</groupId>
            <artifactId>feign-micrometer</artifactId>
            <version>12.5</version>
        </dependency>
        <dependency>
            <groupId>org.springframework.cloud</groupId>
            <artifactId>spring-cloud-starter-openfeign</artifactId>
        </dependency>
注意!spring-boot-starter-actuator这个很重要!官方文档有阐述说明!
package com.example.consumer;

import org.springframework.boot.SpringApplication;
import org.springframework.boot.autoconfigure.SpringBootApplication;
import org.springframework.cloud.client.discovery.EnableDiscoveryClient;
import org.springframework.cloud.openfeign.EnableFeignClients;

@SpringBootApplication
@EnableDiscoveryClient
//声明feign客户端
@EnableFeignClients
public class ConsumerApplication {

    public static void main(String[] args) {
        SpringApplication.run(ConsumerApplication.class, args);
    }


}
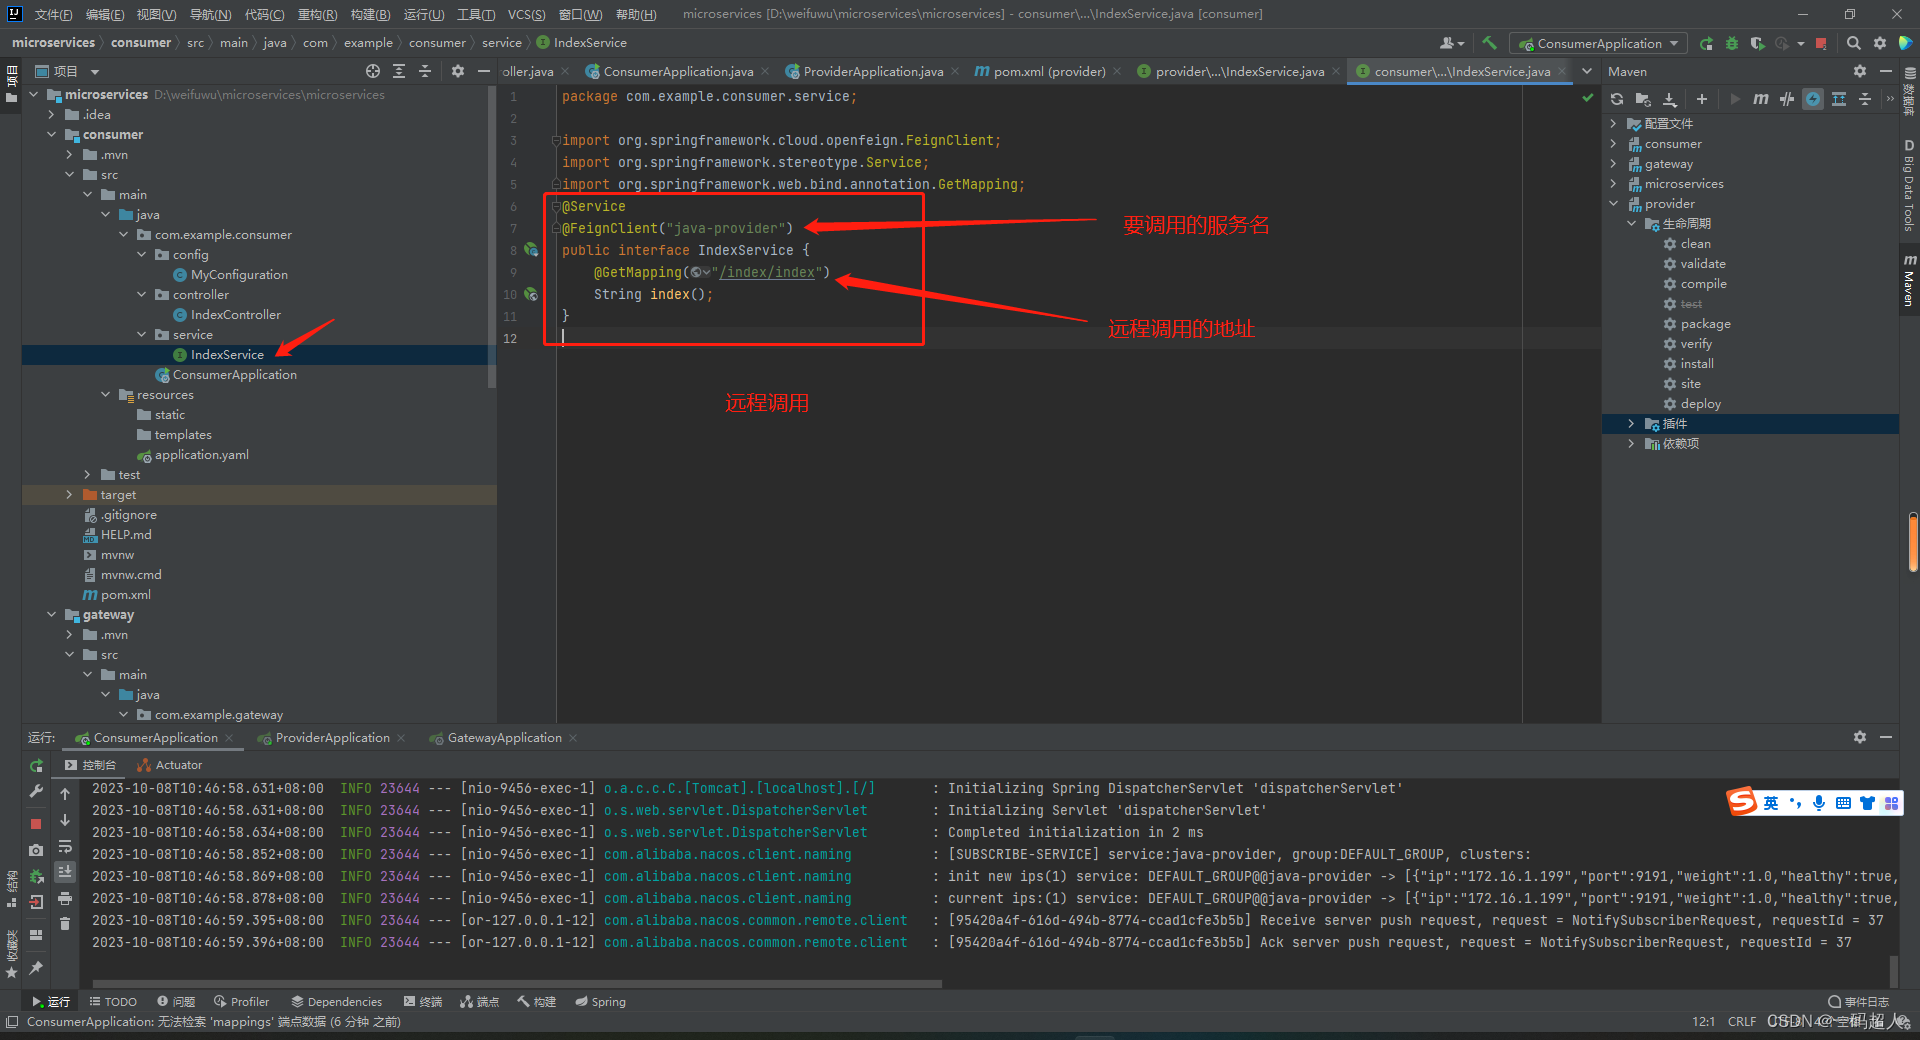
package com.example.consumer.service;

import org.springframework.cloud.openfeign.FeignClient;
import org.springframework.stereotype.Service;
import org.springframework.web.bind.annotation.GetMapping;
@Service
@FeignClient("java-provider")
public interface IndexService {
    @GetMapping("/index/index")
    String index();
}
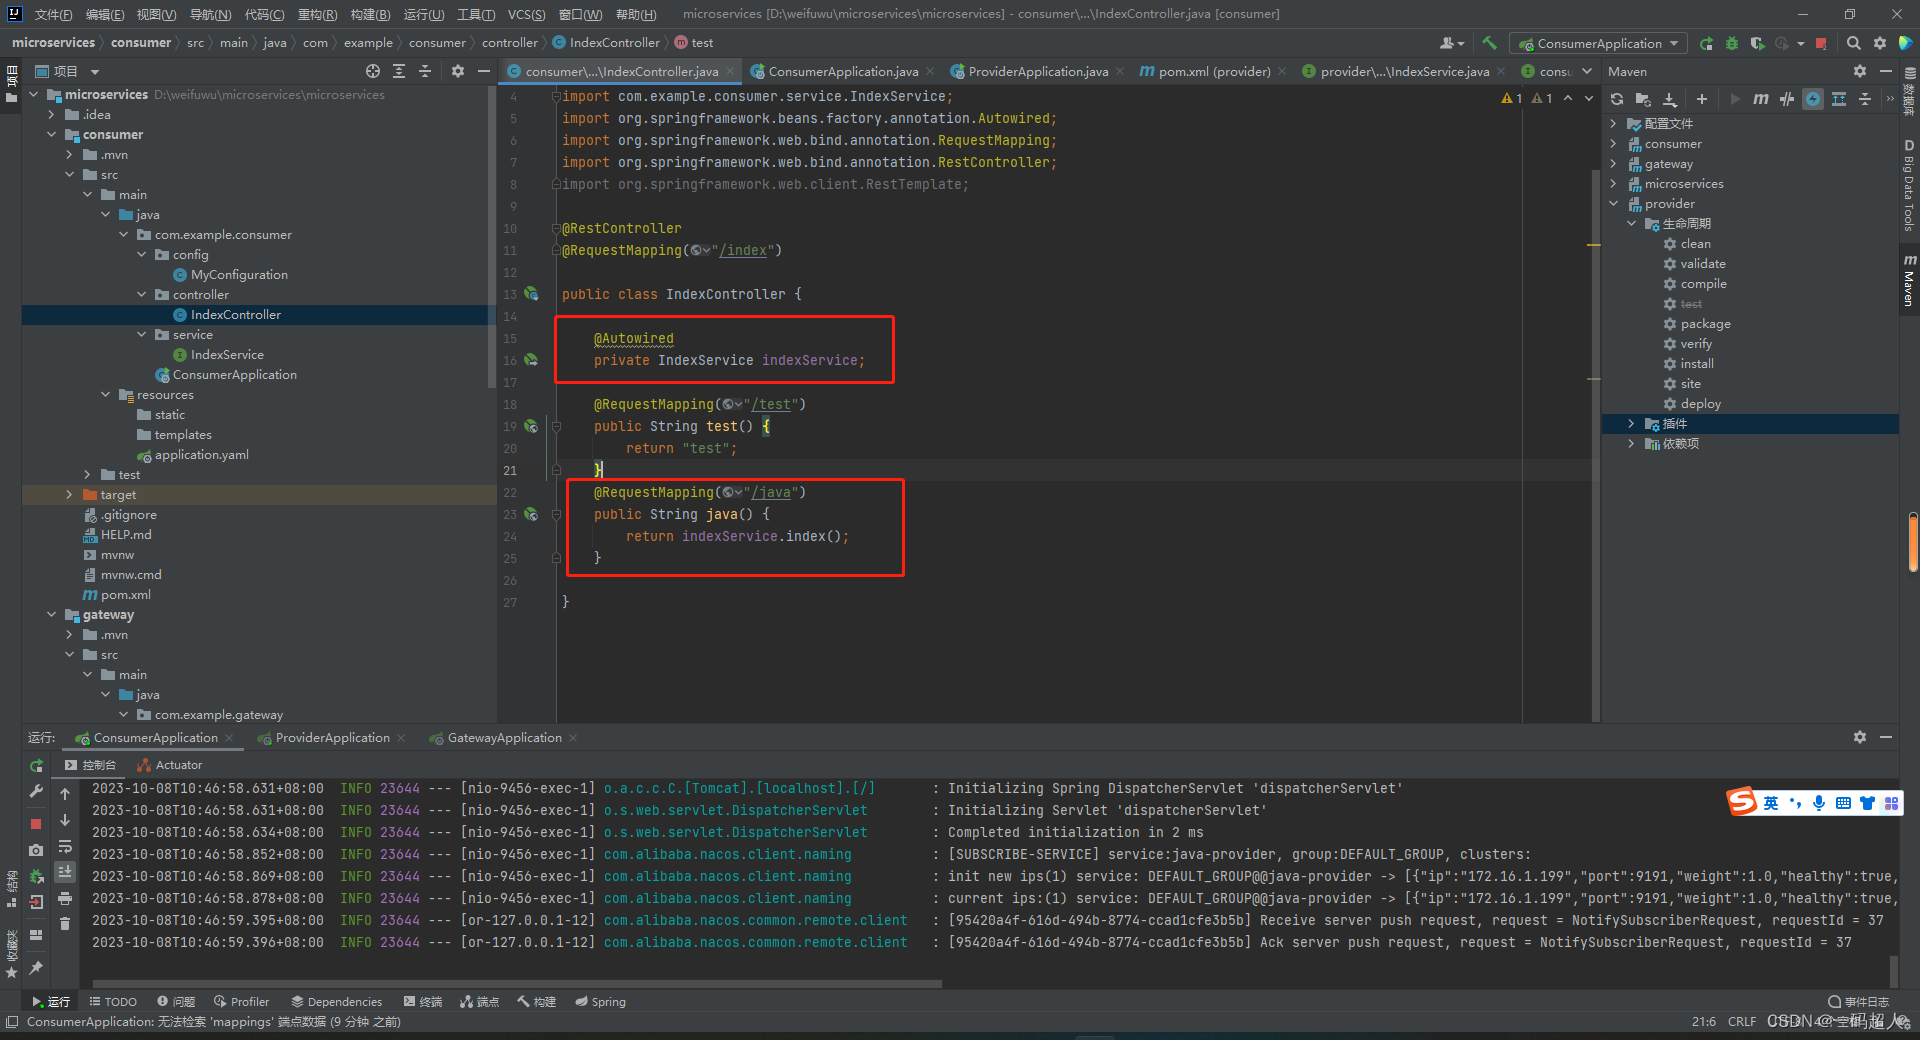
package com.example.consumer.controller;


import com.example.consumer.service.IndexService;
import org.springframework.beans.factory.annotation.Autowired;
import org.springframework.web.bind.annotation.RequestMapping;
import org.springframework.web.bind.annotation.RestController;

@RestController
@RequestMapping("/index")

public class IndexController {

    @Autowired
    private IndexService indexService;

    @RequestMapping("/test")
    public String test() {
        return "test";
    }
    @RequestMapping("/java")
    public String java() {
        return indexService.index();
    }

}

server:
  port: 9457
spring:
  application:
    name: java-consumer
management:
  zipkin:
    tracing:
      endpoint: http://127.0.0.1:9411/api/v2/spans
  tracing:
    sampling:
      probability: 1.0 # 记录速率100%
诶,研究了一天,还是自己能力不行啊!
【2023年10月7日更新】
视频讲解:【IT老齐336】Micrometer Tracing与Zipkin实现链路追踪_哔哩哔哩_bilibili
【注意事项】
springboot3后期会抛弃resttemplate,所以想在zipkin中多服务调用实现链路请使用openfeign来进行远程调用!


 540
540


 被折叠的 条评论
为什么被折叠?
被折叠的 条评论
为什么被折叠?
 到【灌水乐园】发言


