


SpringBoot集成文档工具Knife4j
什么是knife4j,这里不做介绍,自己去搜一下就知道了。这里演示,怎么把这个神器集成的项目中来。
1、安装knife4j的依赖
打开pom文件,把下面的代码贴进去,然后更新安装依赖。
        <dependency>
        <groupId>com.github.xiaoymin</groupId>
        <artifactId>knife4j-spring-boot-starter</artifactId>
        <version>3.0.3</version>
         </dependency>
这个是集成的,不用再多安装其他的。
2、创建配置类文件
在config文件夹下,创建Knife4jConfiguration.java
package com.example.demo.config;
import com.github.xiaoymin.knife4j.spring.annotations.EnableKnife4j;
import org.springframework.context.annotation.Bean;
import org.springframework.context.annotation.Configuration;
import springfox.documentation.builders.ApiInfoBuilder;
import springfox.documentation.builders.PathSelectors;
import springfox.documentation.builders.RequestHandlerSelectors;
import springfox.documentation.service.ApiInfo;
import springfox.documentation.service.Contact;
import springfox.documentation.spi.DocumentationType;
import springfox.documentation.spring.web.plugins.Docket;
import springfox.documentation.swagger2.annotations.EnableSwagger2;


@Configuration
@EnableSwagger2
@EnableKnife4j
public class Knife4jConfiguration {
    @Bean
    public Docket createRestApi() {
        return new Docket(DocumentationType.SWAGGER_2)
                .useDefaultResponseMessages(false)
                .apiInfo(apiInfo())
                .select()
                .apis(RequestHandlerSelectors.basePackage("com.example.demo.controller"))
                .paths(PathSelectors.any())
                .build();

    }
    private ApiInfo apiInfo() { return new ApiInfoBuilder()
            .description("接口测试文档-one demo")
            .contact(new Contact("山楂卷", "https://111.111.111", "shanzhajuan@qq.com"))
            .version("v1.1.0")
            .title("API测试文档")
            .build();
    }

}
由于版本不是那么兼容性好,跟官方文档的配置情况是略有不同的。
这里还要再创建一个配置类文件:WebMvcConfigurer.java
也是在config文件下。
WebMvcConfigurer.java
package com.example.demo.config;


import org.springframework.context.annotation.Configuration;
import org.springframework.web.servlet.config.annotation.ResourceHandlerRegistry;
import org.springframework.web.servlet.config.annotation.WebMvcConfigurationSupport;

@Configuration
public class WebMvcConfigurer extends WebMvcConfigurationSupport {

    @Override
    public void addResourceHandlers(ResourceHandlerRegistry registry) {
        registry.addResourceHandler("/**").addResourceLocations("classpath:/static/");
        registry.addResourceHandler("doc.html").addResourceLocations("classpath:/META-INF/resources/");
        registry.addResourceHandler("/webjars/**").addResourceLocations("classpath:/META-INF/resources/webjars/");
        super.addResourceHandlers(registry);
    }
}
3、在启动类上加上@EnableWebMvc
如图:

4、测试
启动项目成功后,在浏览器中输入地址:http://localhost:8080/doc.html
即可打开页面:
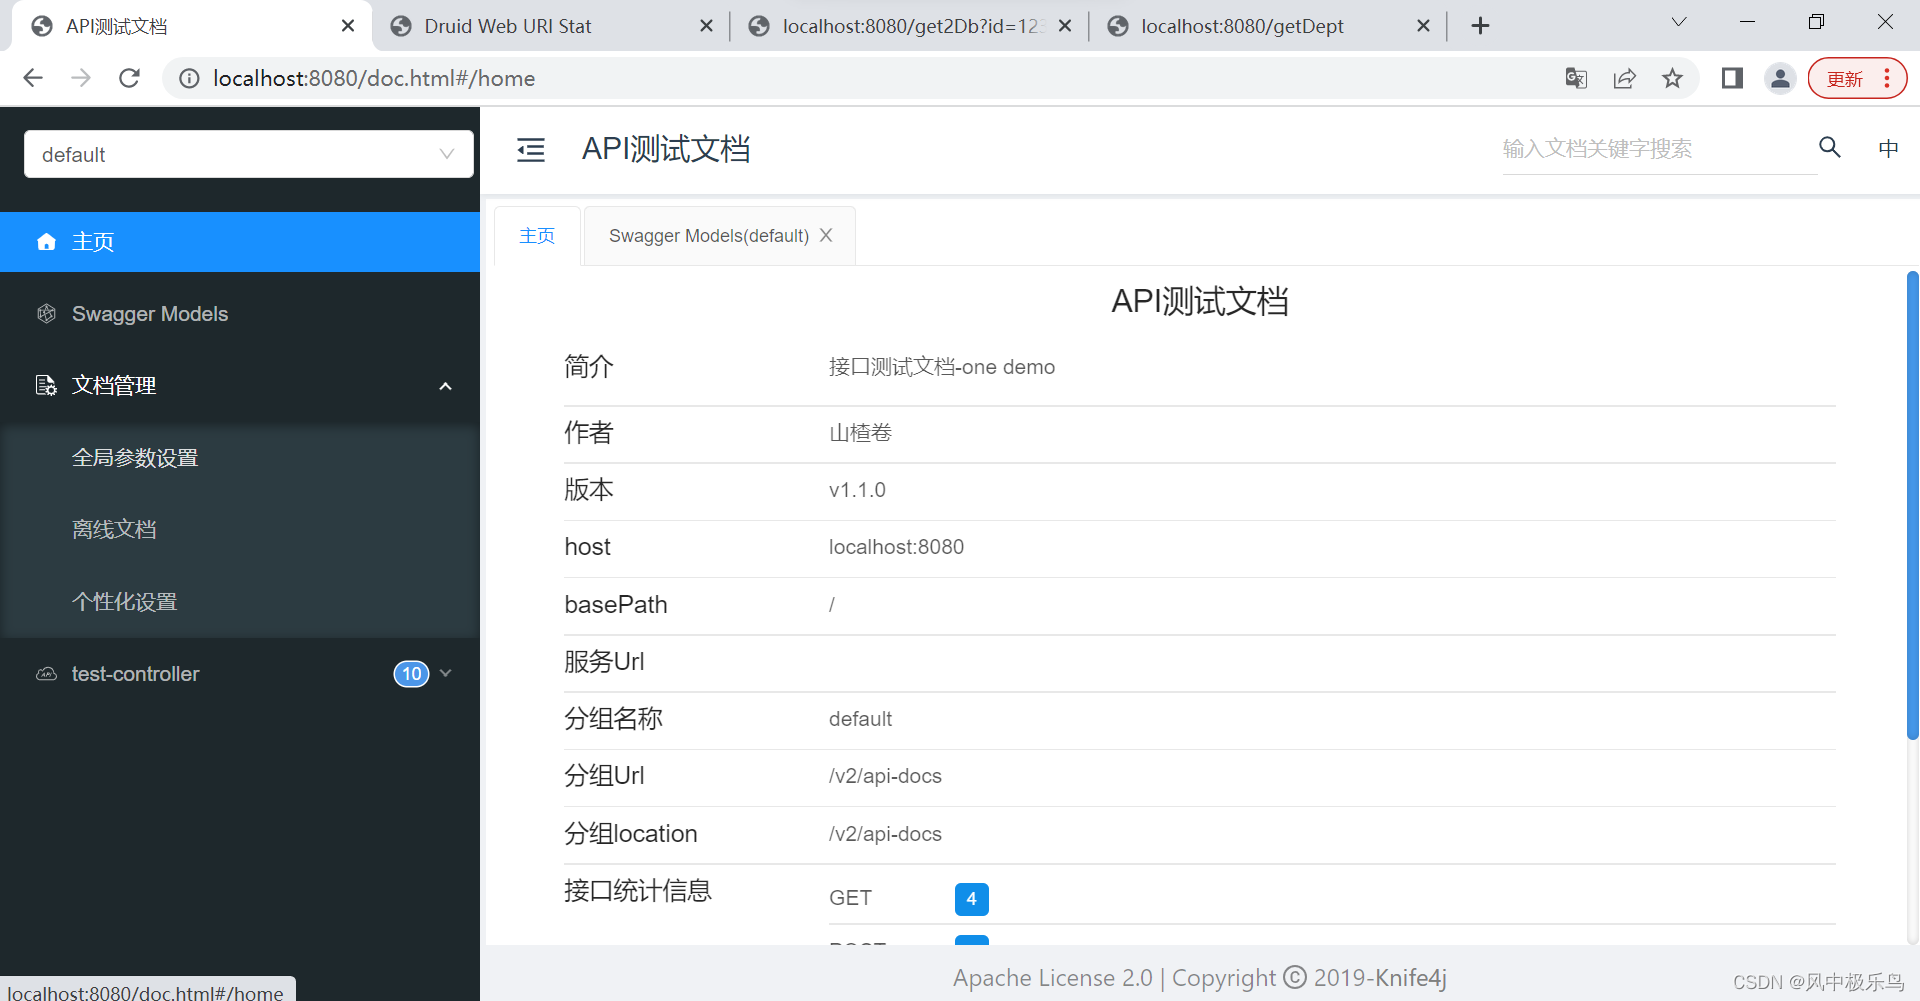 到此,knife4j已经成功集成进来!
tips:
项目启动时,明明相应的依赖包已经正常安装,偶尔还是会出现找不到包的问题,这应该是idea的问题。在maven中输入命令,mvn:idea:idea运行即可解决。
 关于knief4j中的一些api标注用法,自己去查官方文档吧。
这一版中有个问题,就是swangger models 中只看到一个Dept,而Student却出不来,不知道是怎么一回事。
5、 最后,修饰调整一下
对调用的接口做一下api注释,全部调整成GET方式请求。
TestController.java 文件具体调整后如下:
package com.example.demo.controller;

import com.example.demo.bean.Dept;
import com.example.demo.bean.Student;
import com.example.demo.services.DeptService;
import com.example.demo.services.StudentService;
import io.swagger.annotations.Api;
import io.swagger.annotations.ApiImplicitParam;
import io.swagger.annotations.ApiOperation;
import org.springframework.beans.factory.annotation.Autowired;
import org.springframework.web.bind.annotation.*;

import java.util.List;
@Api(tags = "测试接口")
@RestController
public class TestController {
    @ApiOperation(value = "入门程序,Hello World")
    @RequestMapping(value="/Hello",method = RequestMethod.GET)
    public String Hello(String pra){
        return "Hello world !"+pra;
    }

    @Autowired
    DeptService deptService;
    //测试注解方式操作数据库
    @ApiOperation(value = "获取Dept")
    @ResponseBody
    @GetMapping("/getDept")
    public List<Dept> getDept(){
        return deptService.getDept();
    }


    //XML方式
    @ApiImplicitParam(name = "id", value = "id", required = true)
    @ApiOperation(value = "通过id获取对应的Dept")
    @ResponseBody
    @GetMapping("/getDeptById")
    public Dept getTheDept(@RequestParam("id") String id){

        return deptService.getDeptById(id);
    }


    @Autowired
    StudentService studentService;

    @ApiImplicitParam(name = "id", value = "id", required = true)
    @ApiOperation(value = "多数据源测试")
    @GetMapping("/get2Db")
    public String get2DB(String id)
    {
        Student ss=  studentService.getStudentById(id);

        Dept dept=deptService.getDeptById("101");

        return "数据源1中数据:"+dept.toString()+";数据源2中数据:"+ss.toString();
    }
}
然后我们再测试一下:
 集成knife4j就到这里。对于后台接口服务,有时候需要后端主动往前端推送消息,怎么做呢?下一篇要集成的netty-socketio的就可以做这些事情。


 4026
4026


 被折叠的 条评论
为什么被折叠?
被折叠的 条评论
为什么被折叠?
 到【灌水乐园】发言


