


centos安装
1: 修改内核参数,使网卡名统一 开机按tab进入编辑内核,按一个空格加入net.ifnames=0 biosdevname=0

输入后按回车启动
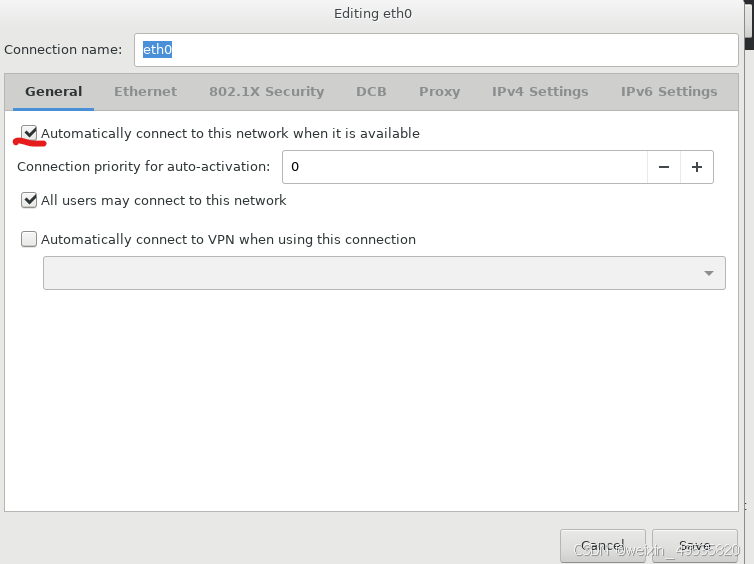
配置网卡时选中该选项为开机自动启动网卡
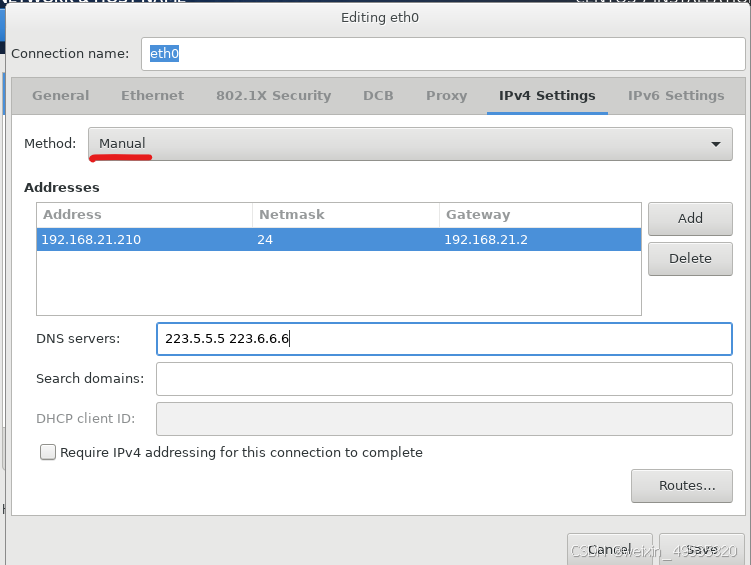
选择Manual为手动配置ip
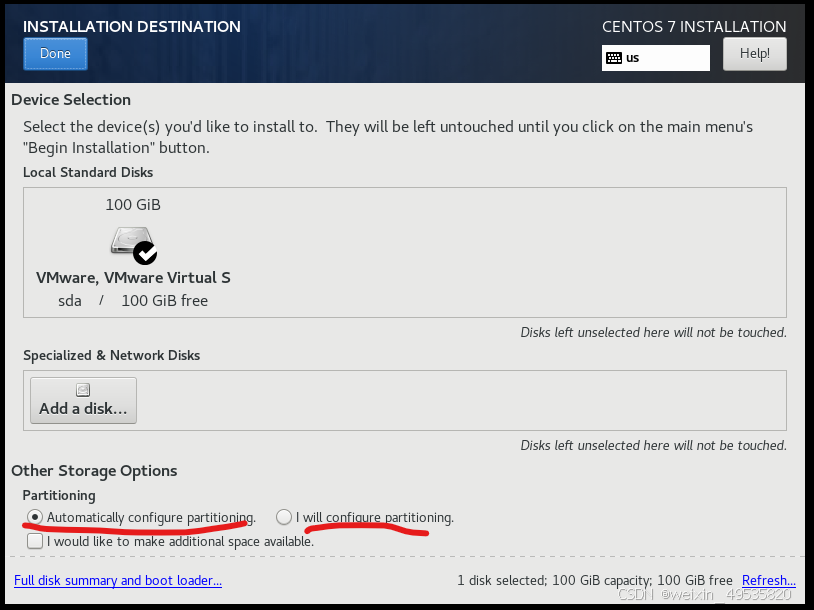
上面两个选项分别为自动与手动配置磁盘
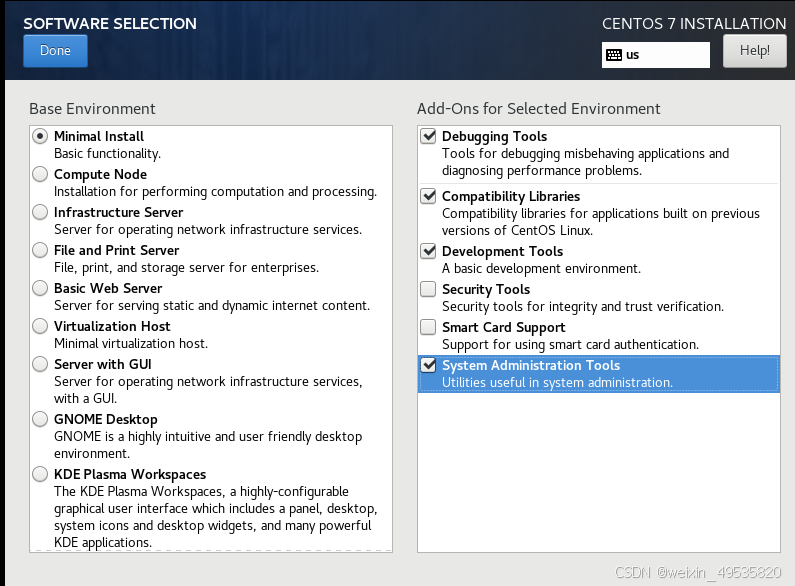
软件安装时使用最小化安装,越小越安全
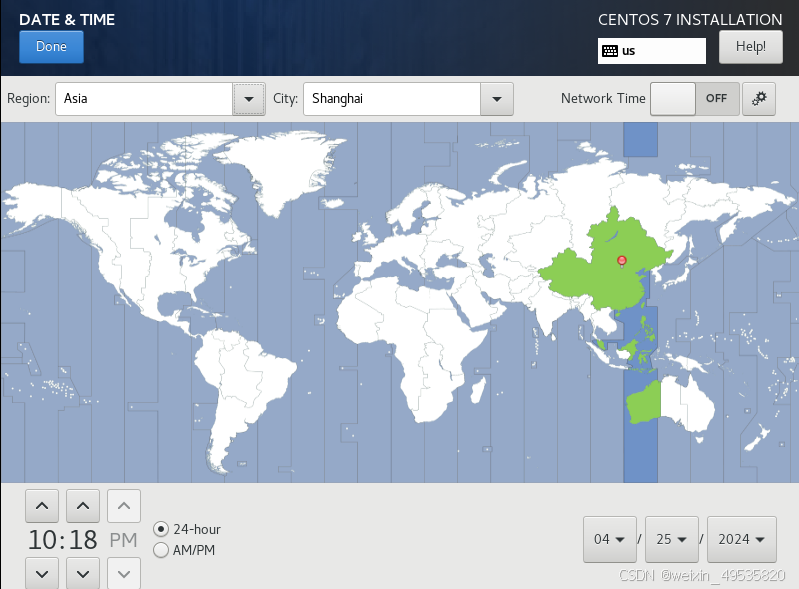
配置时间,选择中国,时间不对可以自行调整
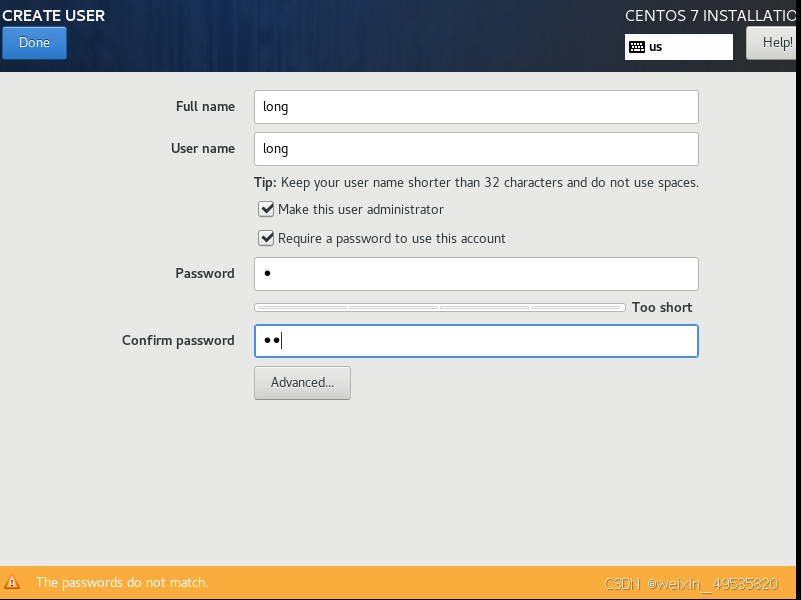
创建用户时选择make给他root权限
Kdump
在系统崩溃的时用来转储内存运行参数的工具
kdump是在系统崩溃、死锁或者死机的时候用来转储内存运行参数的一个工具和服务。
有安全风险因此关闭
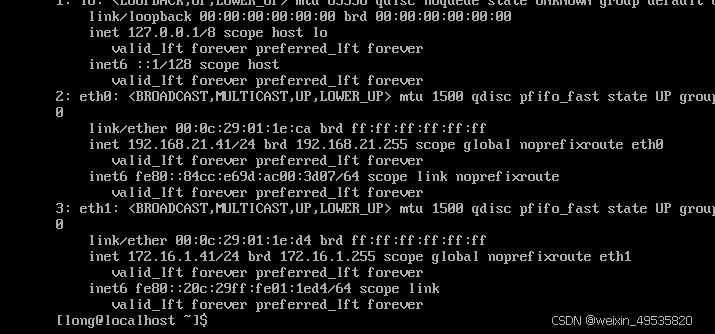
第1块网卡 nat模式:eth0 192.168.21.* 模拟公网
第2块网卡 :eth1 172.16.1.* 局域网
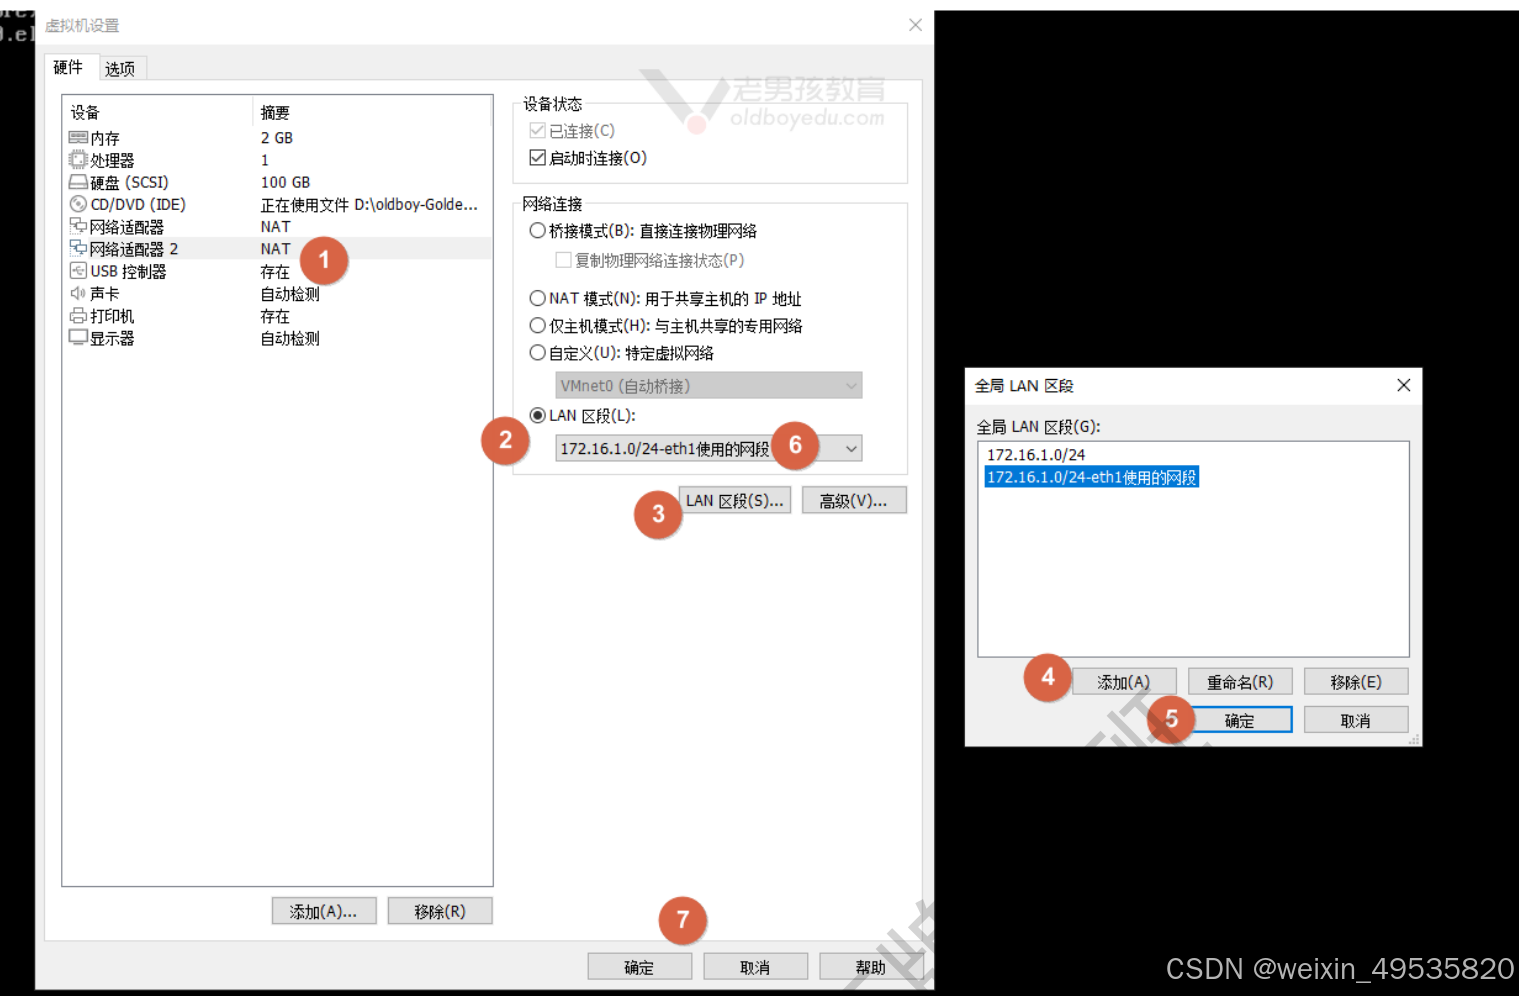
添加网卡,选择LAN区段,添加LAN区段时,可以随意设置,这只是像名字一样
xshell优化
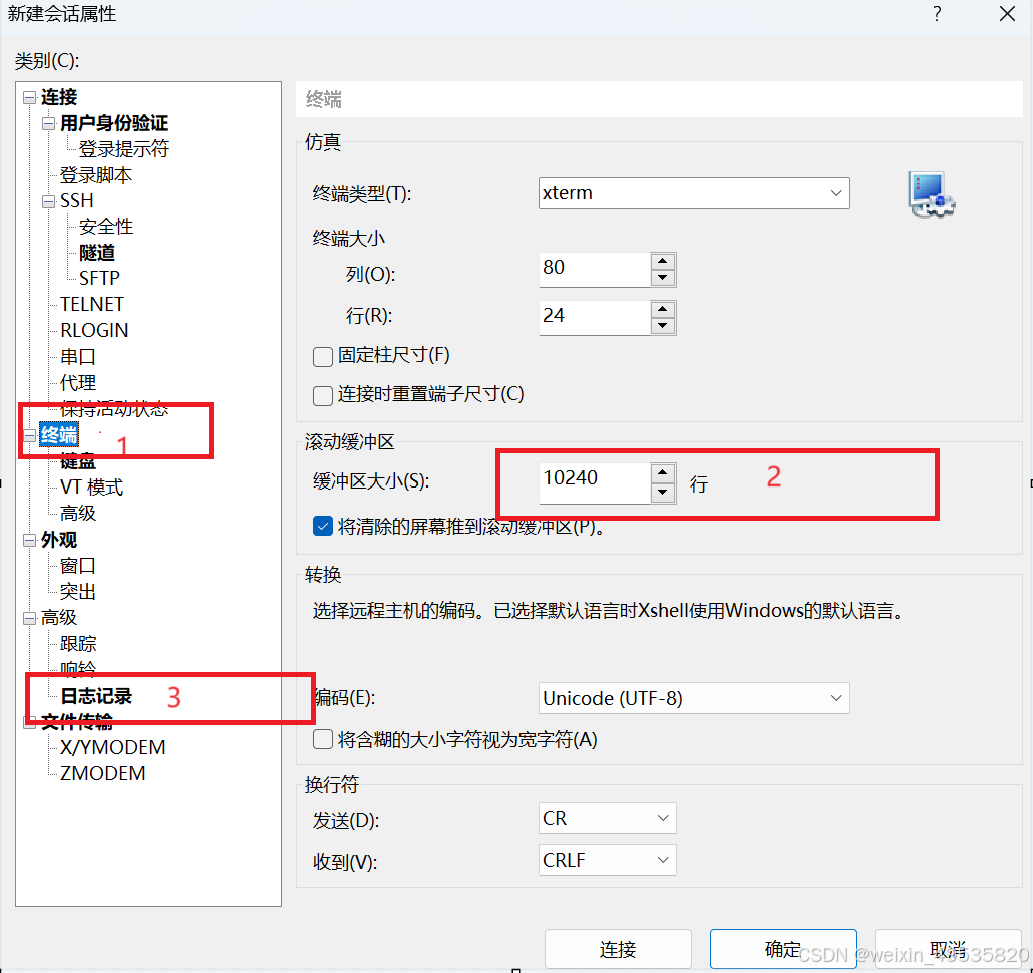
终端输入的缓冲区增大
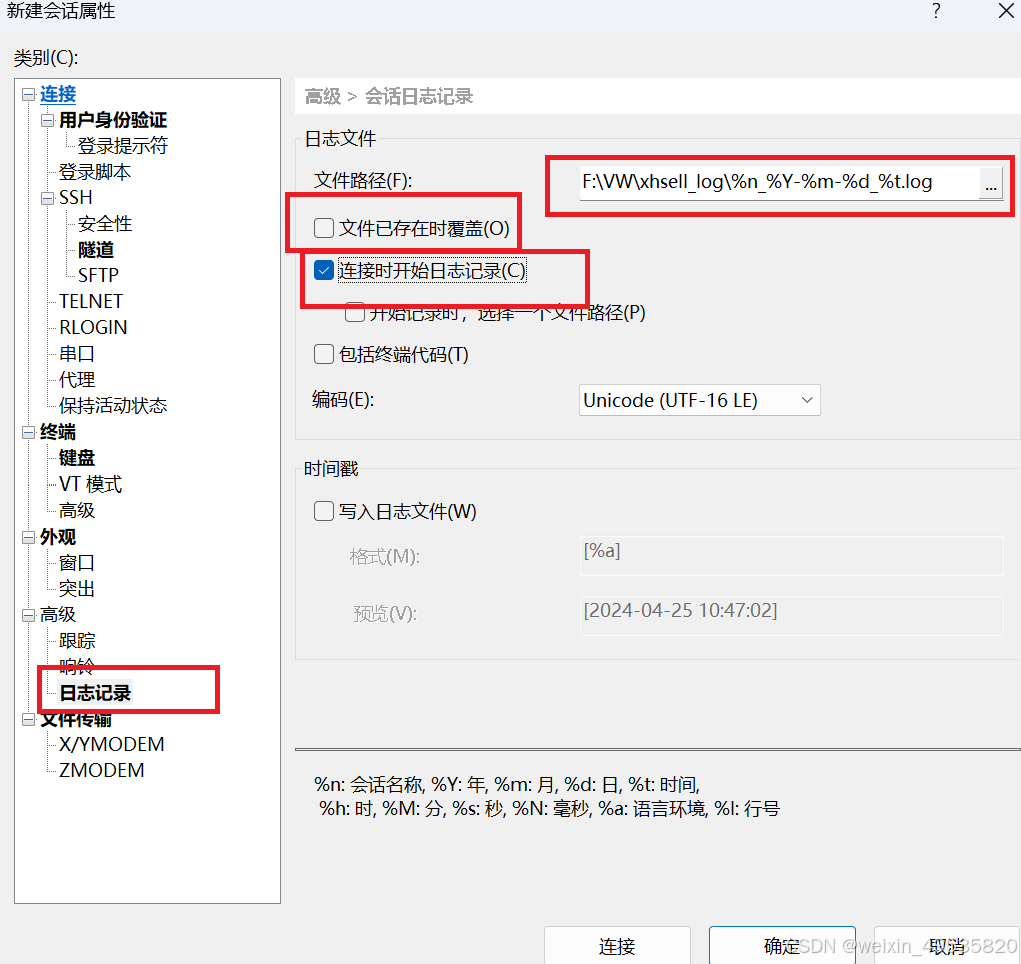
日志记录
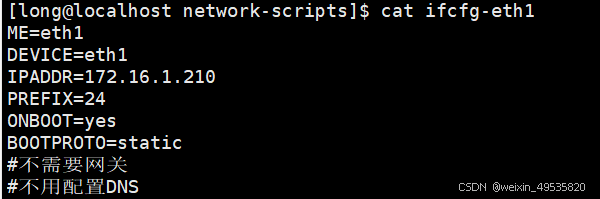
配置eth1网卡
sudo vi /etc/sysconfig/network-scripts/ifcfg-eth1
cat ifcfg-eth1
systemctl restart network
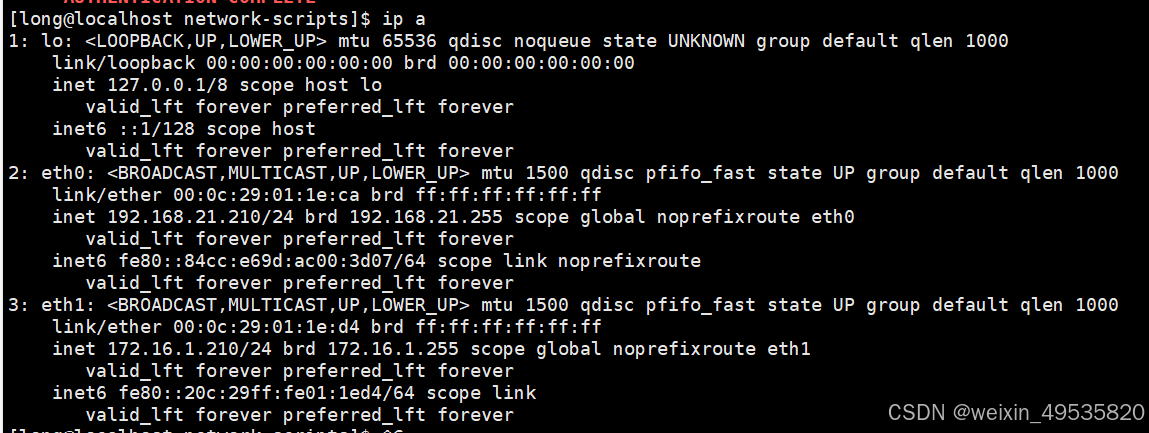
网卡配置成功
关闭防火墙
#firewalld
systemctl stop firewalld
systemctl disable firewalld
#firewalld
永久关闭
sed -i 's#SELINUX=enforcing#SELINUX=disabled#g' /etc/selinux/config
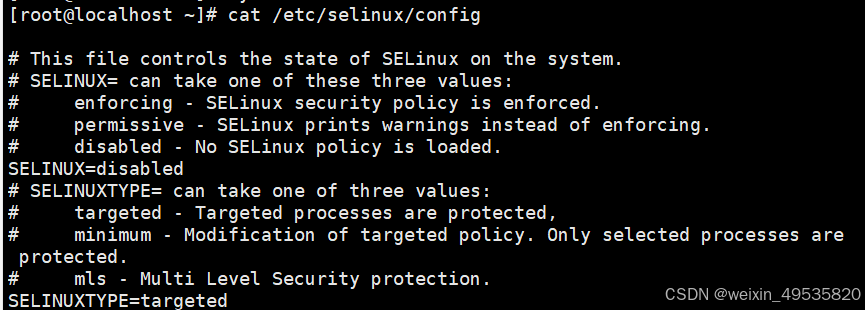
将SELINUX=enforcing提换为SELINUX=disabled则关闭
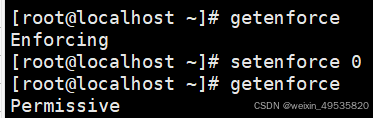
临时关闭
setenforce 0
getenforce #结果只要不是enforcing就表示关闭了.
配置yum源
备份
sudo cp /etc/yum.repos.d/CentOS-Base.repo /etc/yum.repos.d/CentOS-Base.repo.backup

修改base源 为阿里云
sudo curl -o /etc/yum.repos.d/CentOS-Base.repo http://mirrors.aliyun.com/repo/Centos-7.repo

增加epel源
sudo curl -o /etc/yum.repos.d/epel.repo https://mirrors.aliyun.com/repo/epel-7.repo

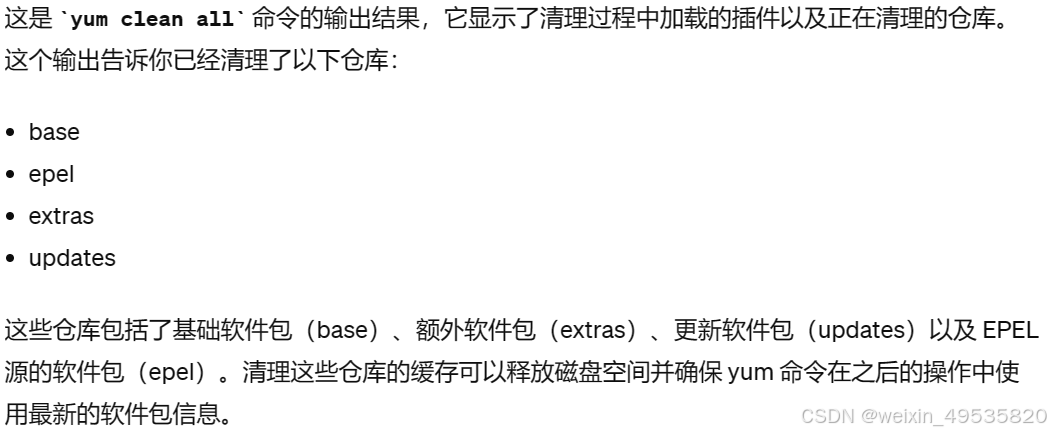
清除缓存
sudo yum clean all

查看yum源
yum repolist

安装常用工具
sudo yum install -y vim tree wget bash-completion bashcompletion-extras lrzsz net-tools sysstat iotop iftop htop unzip nc nmap telnet bc psmisc httpd-tools bindutils nethogs expect
sudo yum install -y cowsay sl
优化ssh连接速度
sed -i '/^GSSAPIAuthentication/s@^@#@g' /etc/ssh/sshd_config
cat >>/etc/ssh/sshd_config<<EOF
> UseDNS no #相当于网络命令的-n选项.
> GSSAPIAuthentication no #关闭GSS认证.
> EOF
systemctl restart sshd
检查
egrep '^(GSSAPIAuthentication|UseDNS)' /etc/ssh/sshd_config

时间同步
#修改时区(如果不对)
timedatectl status #查看时区 time zone部分
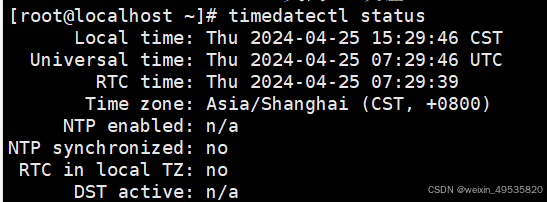
timedatectl set-timezone Asia/Shanghai #如果时区不对再 修改.
#配置定时时间同步. yum install -y ntpdate
crontab -l #查看定时任务
crontab -e
#1. sync time lidao996
*/2 * * * * /sbin/ntpdate ntp1.aliyun.com &>/dev/null
命令行颜色
把下面内容 PS1是系统环境变量之一,用于控制命令行格式样子.
export PS1='[\[\e[34;1m\]\u@\[\e[0m\]\[\e[32;1m\]\H\ [\e[0m\]\[\e[31;1m\] \w\[\e[0m\]]\$ '

写入到/etc/profile中即可. #如果只想对自己生效修改 ~/.bash_profile 或~/.bashrc
source /etc/profile
主机名与hosts文件
主机名
Hostnamectl 修改
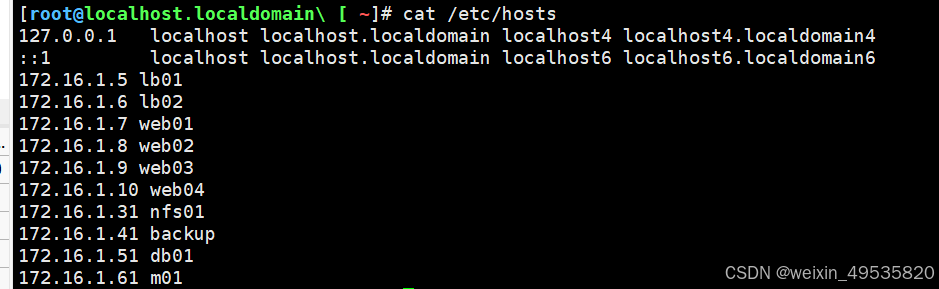
Hosts 解析(方便使用主机名进行互相访问)
cat>>/etc/hosts <<EOF
172.16.1.5 lb01
172.16.1.6 lb02
172.16.1.7 web01
172.16.1.8 web02
172.16.1.9 web03
172.16.1.10 web04
172.16.1.31 nfs01
172.16.1.41 backup
172.16.1.51 db01
172.16.1.61 m01
EOF
一键修改主机名和ip地址的脚本
脚本用法
sh /server/scripts/change.sh 主机名 10.0.0.7
[root@oldboy-muban ~]# cat /server/scripts/change.sh
#!/bin/bash
#author: long
#desc: change ip and hostname
#version: v7.0
#升级一些判断
#判断参数格式是否为2
[ $# -ne 2 ] && {
echo "脚本使用姿势不对"
echo "正确姿势:$0 主机名 ip地址"
exit 1
}
#获取当前主机ip地址
ip=`hostname -I |awk '{print $1}'|sed 's#.*\.##g'`
#新的ip
ip_new=`echo $2 |sed 's#^.*\.##g'`
#新的主机名
hostname=$1
#修改ip
sed -i "s#192.168.21.$ip#192.168.21.$ip_new#g" /etc/sysconfig/network-scripts/ifcfg-eth0
sed -i "s#172.16.1.$ip#172.16.1.$ip_new#g" /etc/sysconfig/network-scripts/ifcfg-eth1
#重启网卡
systemctl restart network
#修改主机名
hostnamectl set-hostname $hostname
修改完成
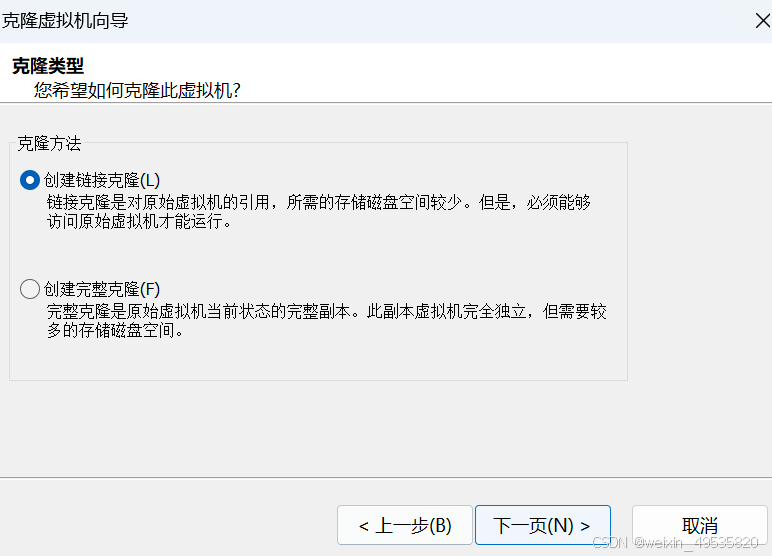
进行克隆,设置好名字与文件路径
修改ip
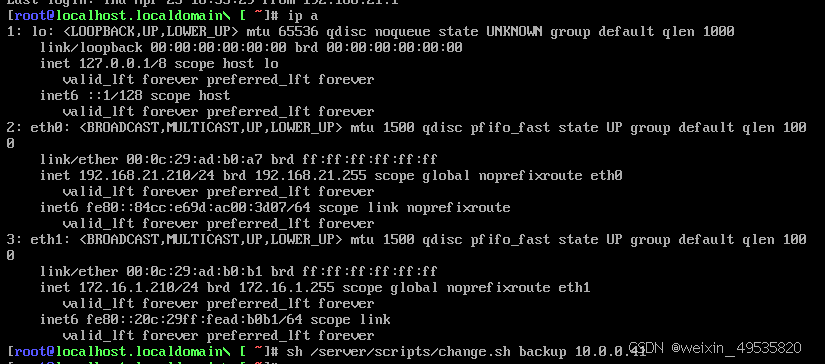
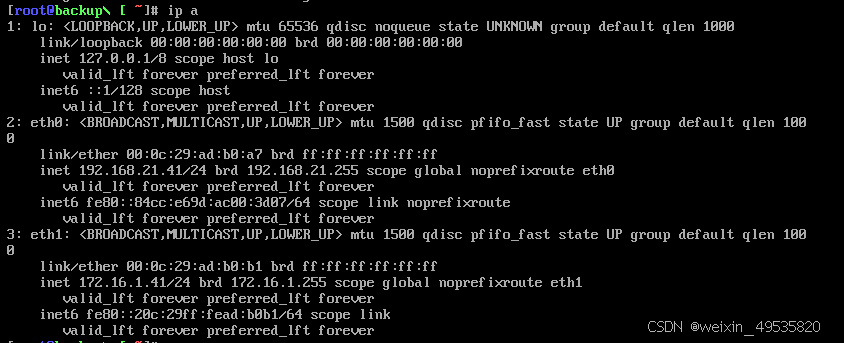
修改完成
Xshell连接成功


 2027
2027

 被折叠的 条评论
为什么被折叠?
被折叠的 条评论
为什么被折叠?
 到【灌水乐园】发言


