


多线程的优势—增加运行速度
多线程和单线程的比较:
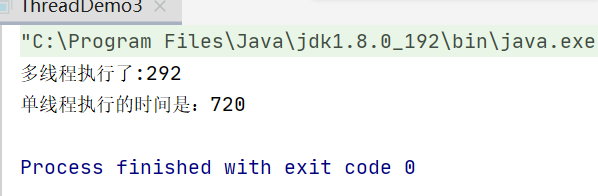
public class ThreadDemo3 {
    //执行循环的次数
    private static final Long count = 5_0000_0000L;
    public static void main(String[] args) throws InterruptedException {

        //调用多线程的方法
        concorrency();

        //调用单线程的方法
        serial();
    }

    //单线程执行方法
    private static void serial() {
        //开始
        Long stime = System.currentTimeMillis();//记录当前时间的毫秒时间戳
        //System.nanoTime();//记录当前时间的纳秒时间数(更精确)
        int a = 0;
        for (int i = 0; i < 3 * count; i++) {
            a++;
        }
        Long etime = System.currentTimeMillis();
        System.out.println("单线程执行的时间是:" + (etime-stime));
    }

    private static void concorrency() throws InterruptedException {
        //开始时间(用时间戳获得开始的毫秒时间)
        Long stime = System.currentTimeMillis();
        // todo: 执行30亿次循环
        //创建了线程任务
        Thread t1 = new Thread(new Runnable() {
            @Override
            public void run() {
                //具体业务
                int a = 0;
                for(int i = 0;i < count;i++){
                    a++;
                }
            }
        });
        //开始执行线程
        t1.start();
        //
        Thread t2 = new Thread(new Runnable() {
            @Override
            public void run() {
                int b = 0;
                for(int i = 0;i < count;i++){
                    b++;
                }
            }
        });
        t2.start();

        //让主线程执行10亿次
        int c = 0;
        for (int i = 0; i < count; i++) {
            c++;
        }

        //等待线程t1和t2执行完成之后才开始计算时间
        t1.join();
        t2.join();

        //结束时间
        Long etime = System.currentTimeMillis();

        System.out.println("多线程执行了:" + (etime-stime));
    }
}
创建线程方式
一、方法1-继承Thread类:
可以通过继承 Thread 来创建一个线程类,该方法的好处是 this 代表的就是当前线程
1、
/*
*
* 创建方法1:继承Thread类
* */
public class ThreadDemo4 {
    static class MyThread extends Thread{
        @Override
        public void run() {
            //线程执行任务
            System.out.println("线程名称:"+
                    Thread.currentThread().getName());
        }
    }

    public static void main(String[] args) {
        //创建了线程
        Thread t1 = new MyThread();
        //运行新线程
        t1.start();

        System.out.println("当前线程的名称(主线程):" +
                Thread.currentThread().getName() );
    }
}
2、
public class ThreadDemo5 {
    public static void main(String[] args) {
        Thread thread = new Thread(){
            @Override
            public void run() {
                System.out.println("线程名:" +
                        Thread.currentThread().getName());
            }
        };
        thread.start();
    }
}
但是因为java不能多继承,所以这种方式了解即可,也因此有了第二类方式
二、方法2-实现Runnable接口
通过实现 Runnable 接口,并且调用 Thread 的构造方法时将 Runnable 对象作为 target 参数传入来创建线程对象。该方法的好处是可以规避类的单继承的限制;但需要通过 Thread.currentThread() 来获取当前线程的引用
1、
public class ThreadDemo6 {
    static class MyRunnable implements Runnable{
        @Override
        public void run() {
            System.out.println("线程名:" +
                    Thread.currentThread().getName());
        }
    }

    public static void main(String[] args) {
        //1.新建Runnable类
        MyRunnable runnable = new MyRunnable();
        //2、新建Thread
        Thread thread = new Thread(runnable);
        //3、启动线程
        thread.start();
    }
}
2、这是最主流的一种方式 创建线程
(匿名内部类的方式实现线程)
public class ThreadDemo7 {
    public static void main(String[] args) {
        //匿名内部类的方式实现线程
        Thread thread = new Thread(new Runnable() {
            @Override
            public void run() {
                System.out.println("线程名:" +
                        Thread.currentThread().getName());
            }
        });
        thread.start();
    }

}
3、在JDK1.8之后有了更简便的方法(lambda + 匿名runnable的方式)
public class ThreadDemo8 {
    public static void main(String[] args) {
        //lambda + 匿名runnable的方式
        Thread thread = new Thread(() -> {
            System.out.println("线程名:" +
                    Thread.currentThread().getName());
        });
        thread.start();
    }
}
三、方法3-实现Callable接口
该种方法可以得到线程执行之后的结果
/*
*
* 创建并得到线程的结果
* 实现 Callable 接口 + Future 的方式
* */
public class ThreadDemo9 {
    //创建了线程的任务和返回方法
    static class MyCallable implements Callable<Integer>{
        @Override
        public Integer call() throws Exception {
            //生成 一个随机数
            int num = new Random().nextInt(10);
            System.out.println("子线程:" +
                    Thread.currentThread().getName() + ",随机数" +num);
            return num;
        }
    }

    public static void main(String[] args) throws ExecutionException, InterruptedException {
        //1、创建一个Callable
        MyCallable myCallable = new MyCallable();
        //2、创建一个FutureTask对象来接收返回值
        FutureTask<Integer> futureTask = new FutureTask<>(myCallable);
        //3、创建Thread
        Thread thread = new Thread(futureTask);
        //启动线程
        thread.start();
        //得到线程执行结果
        int result = futureTask.get();

        System.out.println(String.format("线程名:%s,得到的数字:%d",
                Thread.currentThread().getName(),result));
    }
}


 1986
1986


 被折叠的 条评论
为什么被折叠?
被折叠的 条评论
为什么被折叠?
 到【灌水乐园】发言


