


转一下 自己留着以后看呀 原网址
https://blog.csdn.net/qq_40960731/article/details/112387656
1.arduino使用NTP开发模板
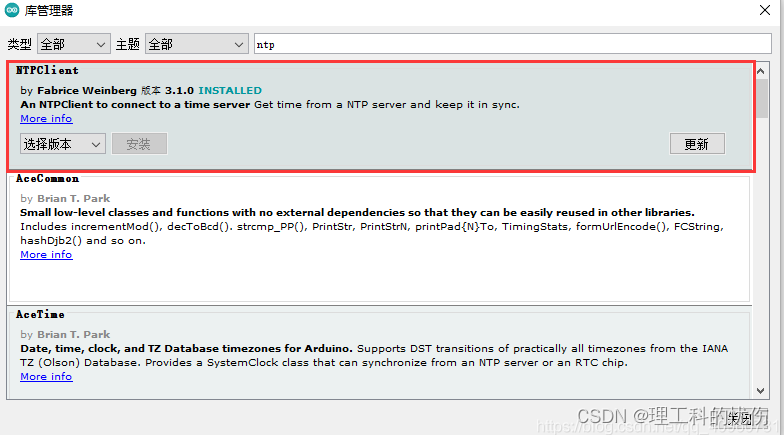
项目->加载库->管理库
搜索ntp,安装NTPClient库
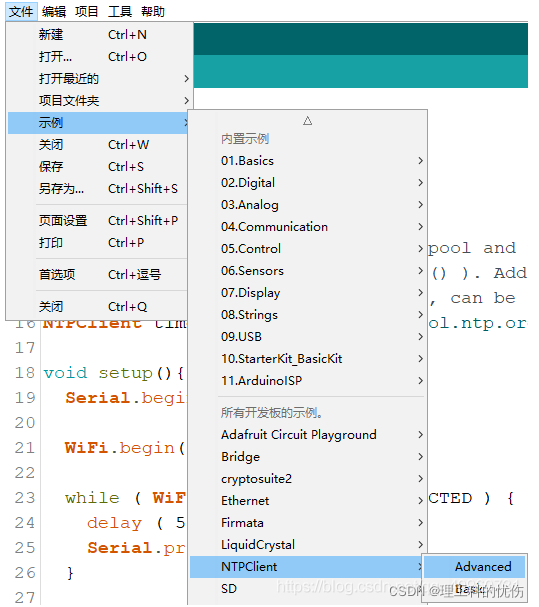
开始项目,启用NTP模板
2代码
#include <NTPClient.h>
// change next line to use with another board/shield
#include <ESP8266WiFi.h>
//#include <WiFi.h> // for WiFi shield
//#include <WiFi101.h> // for WiFi 101 shield or MKR1000
#include <WiFiUdp.h>

const char *ssid     = "<SSID>";
const char *password = "<PASSWORD>";

WiFiUDP ntpUDP;
NTPClient timeClient(ntpUDP, "europe.pool.ntp.org", 8*3600, 60000);

void setup(){
  Serial.begin(115200);

  WiFi.begin(ssid, password);

  while ( WiFi.status() != WL_CONNECTED ) {
    delay ( 500 );
    Serial.print ( "." );
  }

  timeClient.begin();
}

void loop() {
  timeClient.update();

  Serial.println(timeClient.getFormattedTime());

  delay(1000);
}
注意
const char *ssid = “”;
const char *password = “”;
账号和密码要改一下
具体获得单独的日期、周几、等等等等 …见
https://randomnerdtutorials.com/esp8266-nodemcu-date-time-ntp-client-server-arduino/
#include <NTPClient.h>
#include <ESP8266WiFi.h>
#include <WiFiUdp.h>

#include <SPI.h>
#include <Wire.h>
#include <Adafruit_GFX.h>
#include <Adafruit_SSD1306.h>

#define SCREEN_WIDTH 128 // OLED display width, in pixels
#define SCREEN_HEIGHT 32 // OLED display height, in pixels


#define OLED_RESET     -1 // Reset pin # (or -1 if sharing Arduino reset pin)
#define SCREEN_ADDRESS 0x3C ///< See datasheet for Address; 0x3D for 128x64, 0x3C for 128x32
Adafruit_SSD1306 display(SCREEN_WIDTH, SCREEN_HEIGHT, &Wire, OLED_RESET);

const char *ssid     = "FAST_201";
const char *password = "rz666888";

WiFiUDP ntpUDP;
NTPClient timeClient(ntpUDP, "europe.pool.ntp.org", 8*3600, 60000);

void setup(){
  Serial.begin(115200);

  WiFi.begin(ssid, password);

  while ( WiFi.status() != WL_CONNECTED ) {
    delay ( 500 );
    Serial.print ( "." );
  }

  timeClient.begin();

  display.display();
  delay(2000); // Pause for 2 seconds

  // Clear the buffer
  display.clearDisplay();
}

void loop() {
  timeClient.update();

  Serial.println(timeClient.getFormattedTime());
 display.setTextSize(1);
  display.setTextColor(SSD1306_WHITE);
  display.setCursor(0,0);
  display.print("Connecting to SSID\n'adafruit':");
  delay(1000);

}
3.显示年月日
/*
  Rui Santos
  Complete project details at https://RandomNerdTutorials.com/esp8266-nodemcu-date-time-ntp-client-server-arduino/

  Permission is hereby granted, free of charge, to any person obtaining a copy
  of this software and associated documentation files.

  The above copyright notice and this permission notice shall be included in all
  copies or substantial portions of the Software.
*/

#include <ESP8266WiFi.h>
#include <NTPClient.h>
#include <WiFiUdp.h>

// Replace with your network credentials
const char *ssid     = "REPLACE_WITH_YOUR_SSID";
const char *password = "REPLACE_WITH_YOUR_PASSWORD";

// Define NTP Client to get time
WiFiUDP ntpUDP;
NTPClient timeClient(ntpUDP, "pool.ntp.org");

//Week Days
String weekDays[7]={"Sunday", "Monday", "Tuesday", "Wednesday", "Thursday", "Friday", "Saturday"};

//Month names
String months[12]={"January", "February", "March", "April", "May", "June", "July", "August", "September", "October", "November", "December"};

void setup() {
  // Initialize Serial Monitor
  Serial.begin(115200);

  // Connect to Wi-Fi
  Serial.print("Connecting to ");
  Serial.println(ssid);
  WiFi.begin(ssid, password);
  while (WiFi.status() != WL_CONNECTED) {
    delay(500);
    Serial.print(".");
  }

// Initialize a NTPClient to get time
  timeClient.begin();
  // Set offset time in seconds to adjust for your timezone, for example:
  // GMT +1 = 3600
  // GMT +8 = 28800
  // GMT -1 = -3600
  // GMT 0 = 0
  timeClient.setTimeOffset(0);
}

void loop() {
  timeClient.update();

  time_t epochTime = timeClient.getEpochTime();
  Serial.print("Epoch Time: ");
  Serial.println(epochTime);

  String formattedTime = timeClient.getFormattedTime();
  Serial.print("Formatted Time: ");
  Serial.println(formattedTime);

  int currentHour = timeClient.getHours();
  Serial.print("Hour: ");
  Serial.println(currentHour);

  int currentMinute = timeClient.getMinutes();
  Serial.print("Minutes: ");
  Serial.println(currentMinute);

  int currentSecond = timeClient.getSeconds();
  Serial.print("Seconds: ");
  Serial.println(currentSecond);

  String weekDay = weekDays[timeClient.getDay()];
  Serial.print("Week Day: ");
  Serial.println(weekDay);

  //Get a time structure
  struct tm *ptm = gmtime ((time_t *)&epochTime);

  int monthDay = ptm->tm_mday;
  Serial.print("Month day: ");
  Serial.println(monthDay);

  int currentMonth = ptm->tm_mon+1;
  Serial.print("Month: ");
  Serial.println(currentMonth);

  String currentMonthName = months[currentMonth-1];
  Serial.print("Month name: ");
  Serial.println(currentMonthName);

  int currentYear = ptm->tm_year+1900;
  Serial.print("Year: ");
  Serial.println(currentYear);

  //Print complete date:
  String currentDate = String(currentYear) + "-" + String(currentMonth) + "-" + String(monthDay);
  Serial.print("Current date: ");
  Serial.println(currentDate);

  Serial.println("");

  delay(2000);
}


 523
523

 被折叠的 条评论
为什么被折叠?
被折叠的 条评论
为什么被折叠?
 到【灌水乐园】发言


